Introduction
This document describes the features of ISE to manage Administrative Access on the Identity Services Engine (ISE).
Prerequisites
Requirements
Cisco recommends that you have the knowledge of these topics:
- ISE
- Active Directory
- Lightweight Directory Access Protocol (LDAP)
Components Used
The information in this document is based on these software and hardware versions:
- ISE 3.0
- Windows Server 2016
The information in this document was created from the devices in a specific lab environment. All of the devices used in this document started with a cleared (default) configuration. If your network is live, ensure that you understand the potential impact of any command.
Configure
Authentication Settings
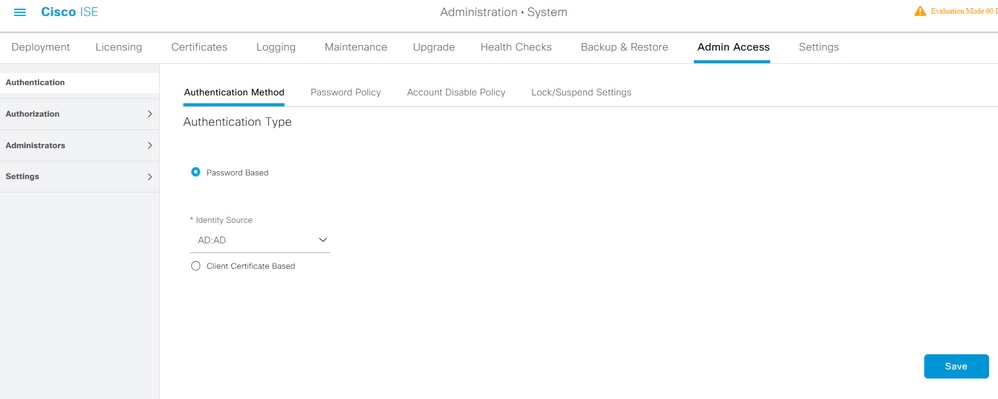
Admin Users must authenticate themselves To access any information on ISE. The identity of admin users can be verified by using the ISE Internal Identity Store or an External Identity Store. The authenticity can be verified by either a password or a certificate. In order to configure these settings, navigate to Administration > System> Admin Access > Authentication. Choose the required authentication type under the Authentication Method tab.
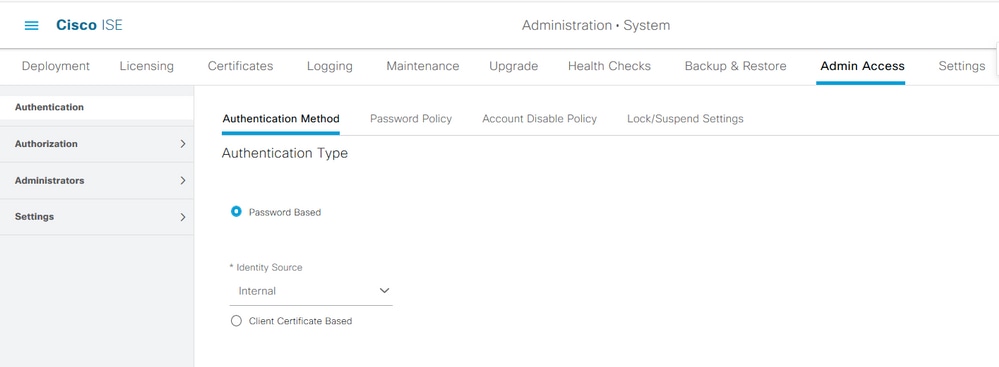
Note: Password-based authentication is enabled by default. If this is changed to client certificate-based authentication, it causes an application server to restart on all deployment nodes.
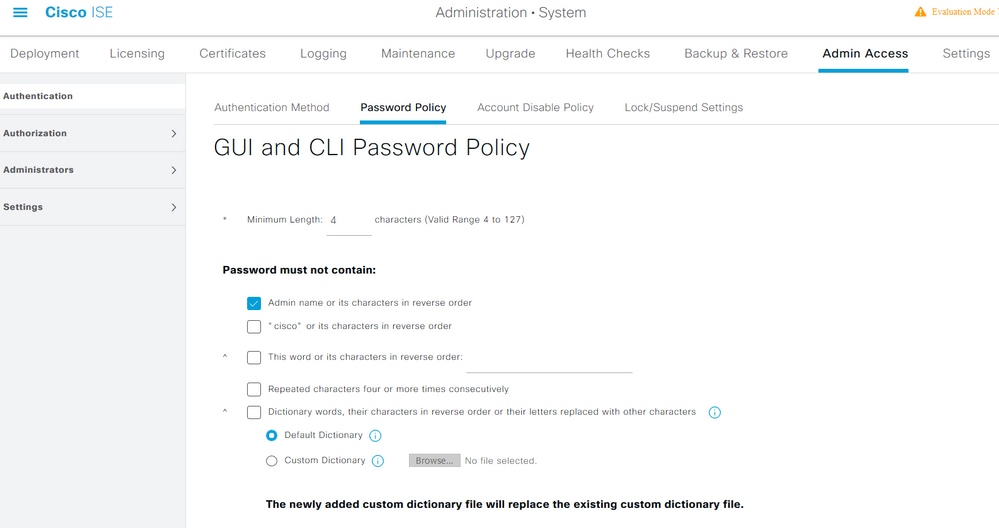
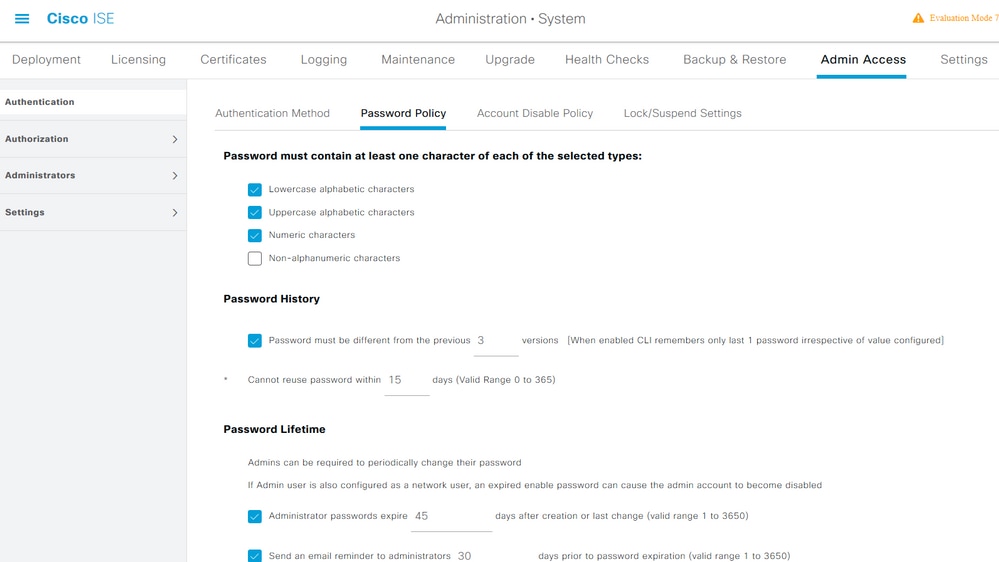
ISE does not allow the configuration of the command line interface (CLI) password policy from the CLI. Password policy for both the Graphical User Interface (GUI) and the CLI can only be configured via the ISE GUI. To configure it, navigate to Administration > System > Admin Access > Authentication and navigate to the Password Policy tab.
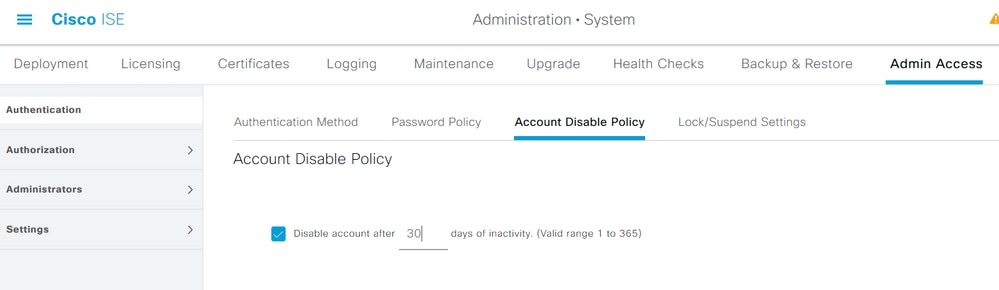
ISE has a provision to disable an inactive admin user. In order to configure this, navigate to Administration > System > Admin Access > Authentication and navigate to the Account Disable Policy tab.
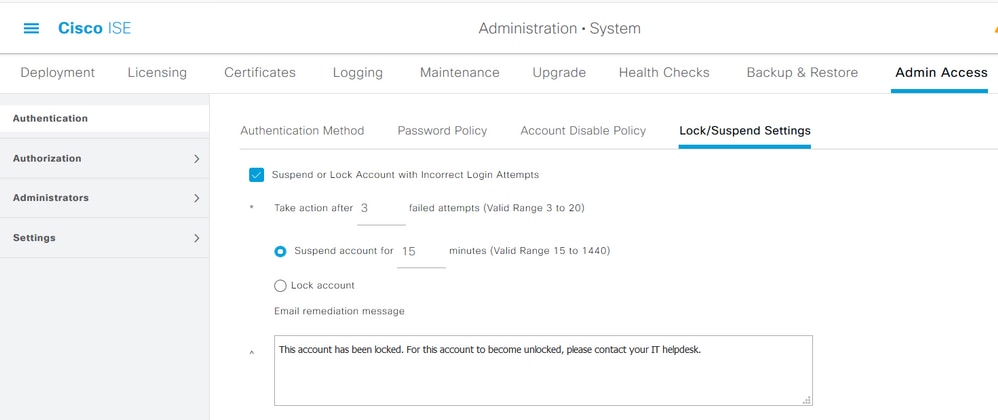
ISE also provides the facility to lock or suspend an admin user account based on the number of failed login attempts. In order to configure this, navigate to Administration > System > Admin Access > Authentication and navigate to the Lock/Suspend Settings tab.
To manage administrative access, there is a need for administrative groups, users, and various policies/rules to control and manage their privileges.
Configure Admin Groups
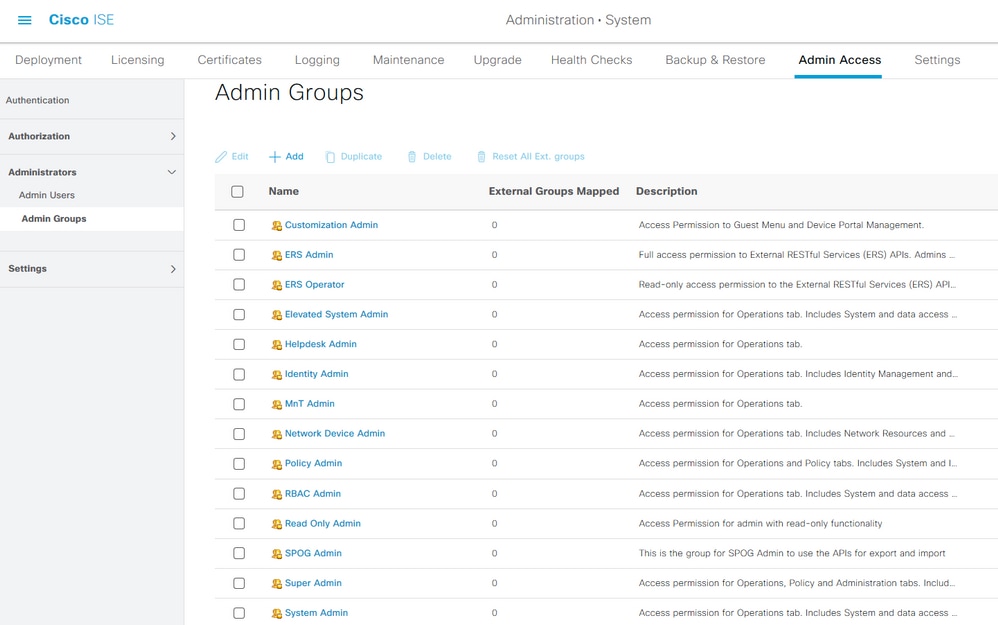
Navigate to Administration > System > Admin Access > Administrators > Admin Groups to configure administrator groups. There are a few groups that are built-in by default and cannot be deleted.
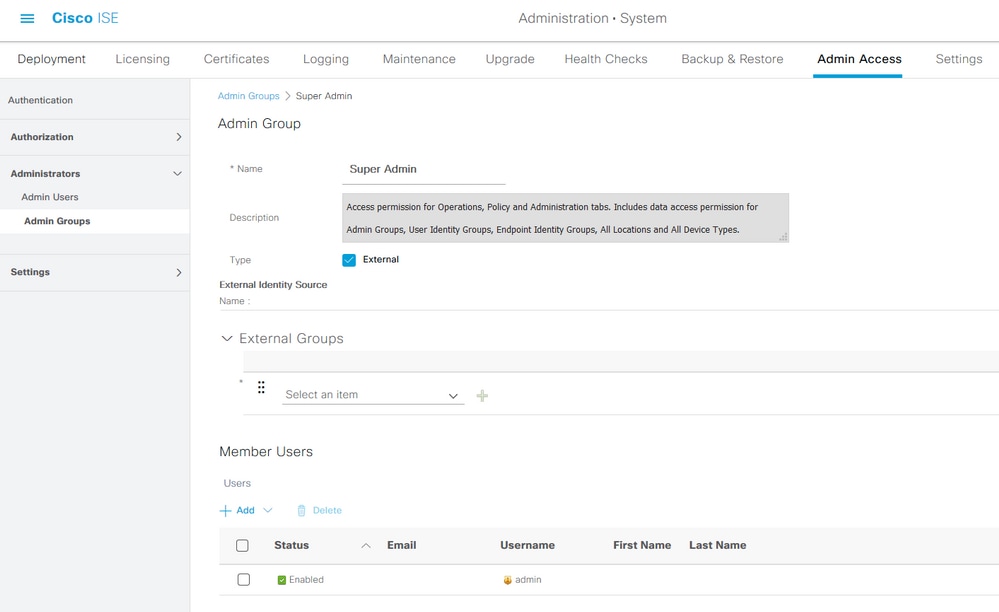
Once a group is created, choose the group and click edit to add administrative users to that group. There is a provision to map External Identity Groups to the Admin Groups on ISE so that an External Admin user gets the required permissions. To configure it, choose the type External while adding the user.
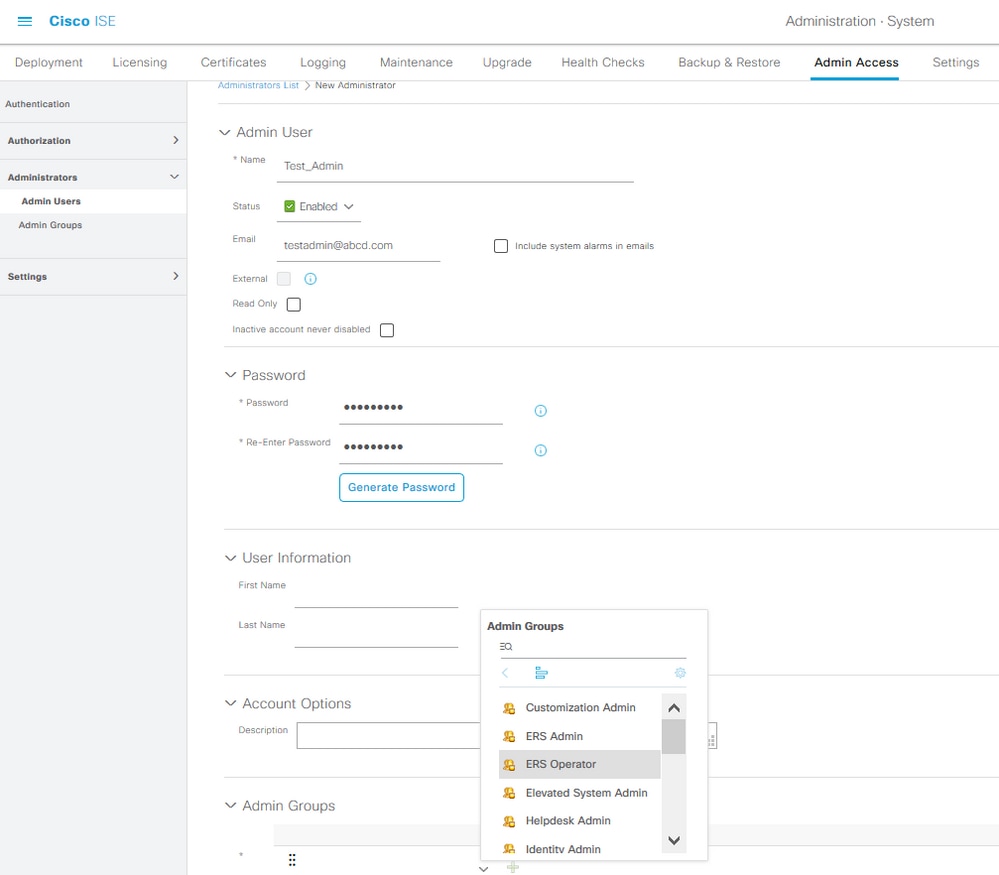
Configure Admin Users
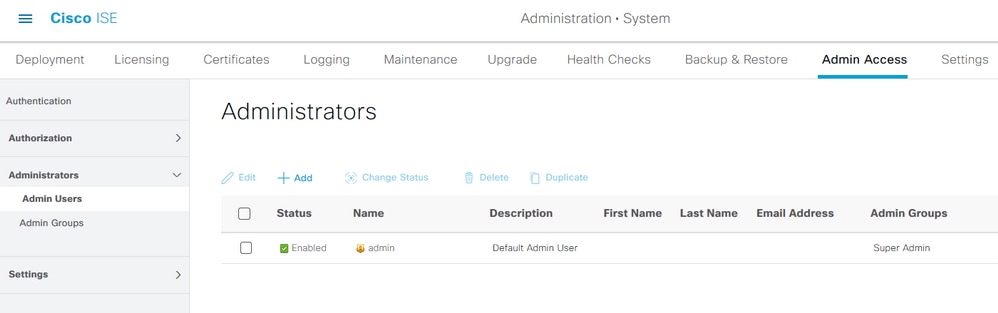
To configure Admin Users, navigate to Administration > System > Admin Access > Administrators > Admin Users.
Click Add. There are two options to choose from. One is to add a new user altogether. The other one is to make a Network Access User (that is, a user configured as an internal user in order to access the network/devices) an ISE admin.

After you choose an option, the required details must be provided and the user group must be chosen based on which permissions and privileges are given to the user.
Configure Permissions
There are two types of permissions that can be configured for a user group:
- Menu Access
- Data Access
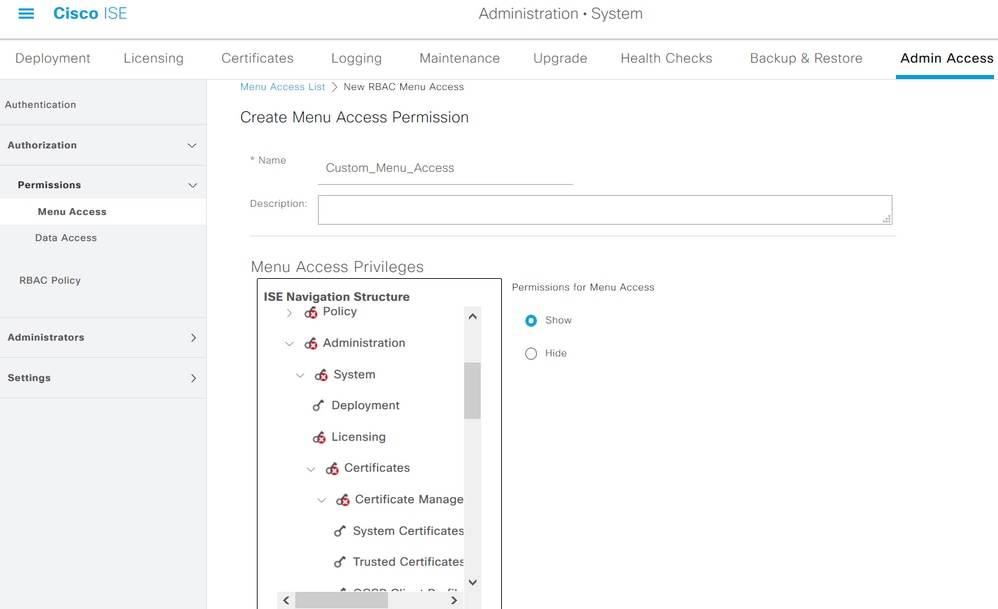
Menu Access controls the navigational visibility on ISE. There are two options for every tab, Show or Hide, that can be configured. A Menu Access rule can be configured to show or hide chosen tabs.
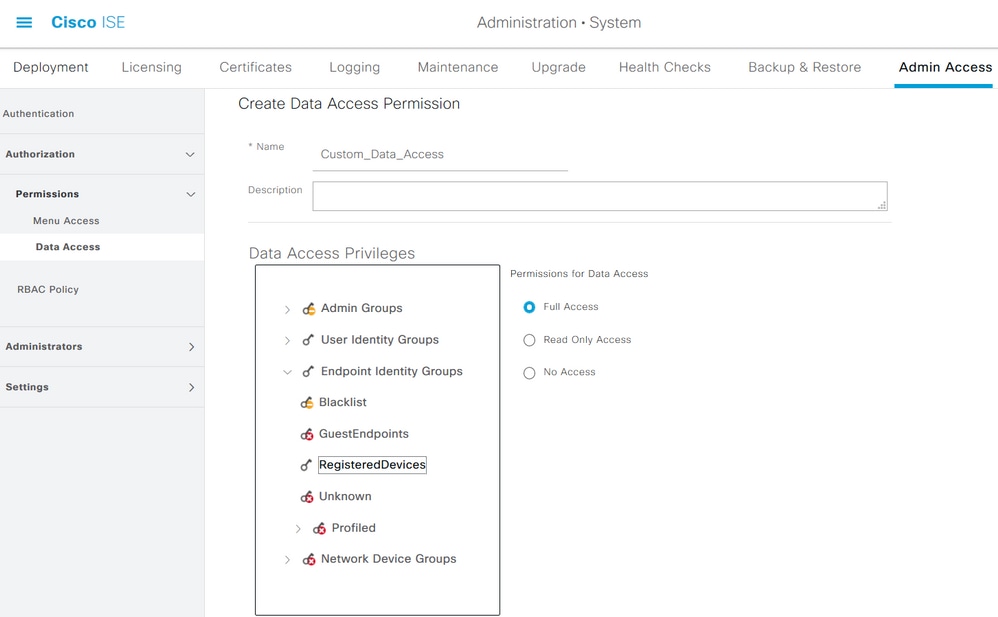
Data Access controls the ability to read/access/modify the Identity Data on ISE. Access permission can be configured only for Admin Groups, User Identity Groups, Endpoint Identity Groups, and Network Device Groups. There are three options for these entities on ISE which can be configured. They are Full Access, Read-Only Access, and No Access. A Data Access rule can be configured in order to choose one of these three options for each tab on ISE.
Menu Access and Data Access policies must be created before they can be applied to any admin group. There are a few policies that are built-in by default but they can always be customized or a new one can be created.
To configure a Menu Access policy, navigate to Administration > System > Admin Access > Authorization > Permissions > Menu Access.
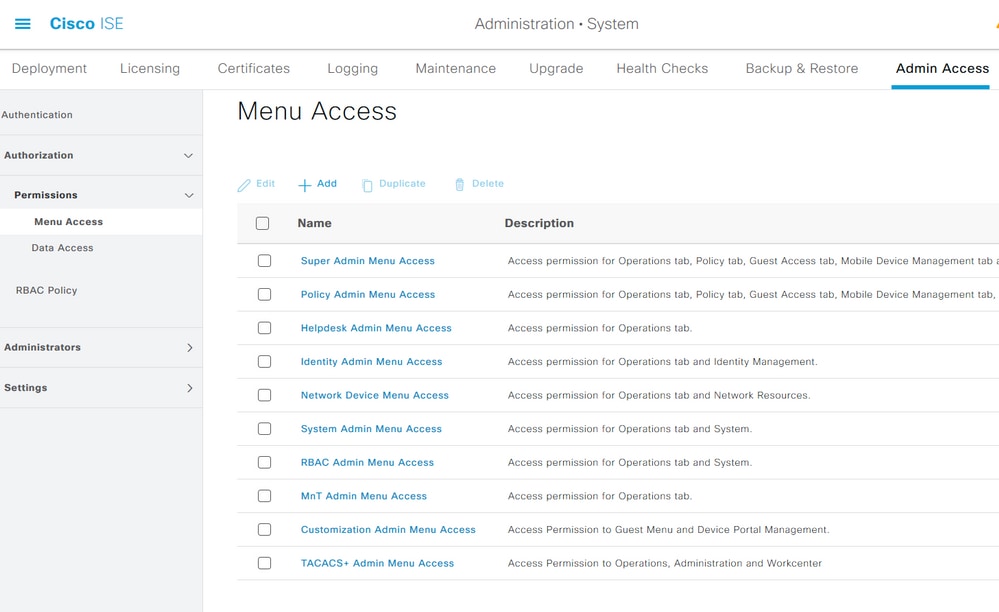
Click Add. Each navigational option in ISE can be configured in order to be shown/hidden in a policy.
To configure the Data Access policy, navigate to Administation > System > Admin Access > Authorization > Permissions > Data Access.
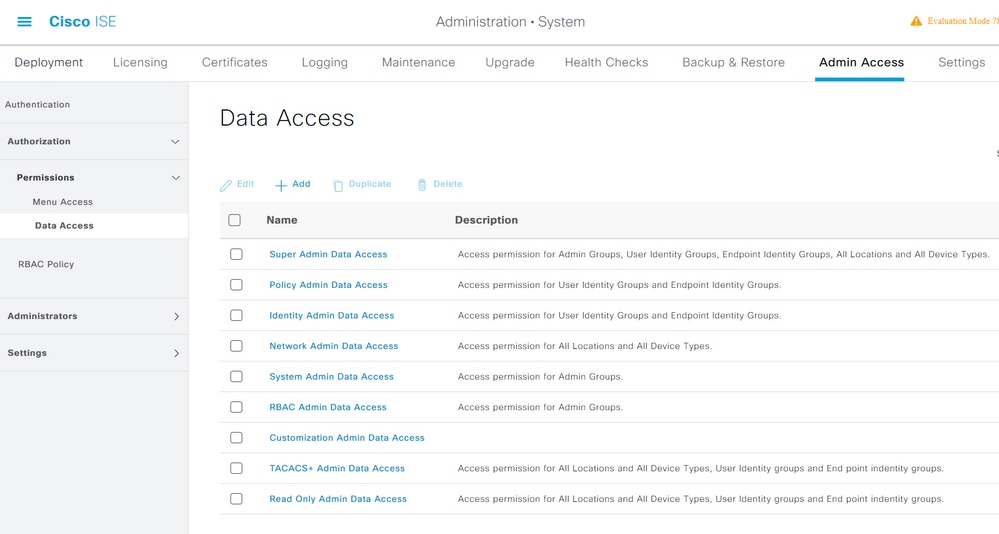
Click Add in order to create a new policy and configure permissions in order to access Admin/User Identity/Endpoint Identity/Network Groups.
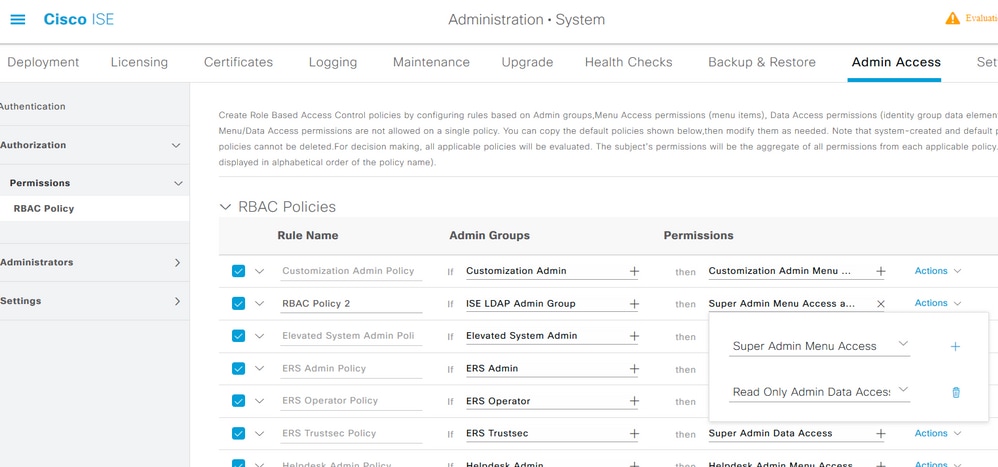
Configure RBAC Policies
RBAC stands for Role-Based Access Control. The role (admin group) to which a user belongs can be configured to use the desired Menu and Data Access policies. There can be multiple RBAC policies configured for a single role or multiple roles can be configured in a single policy in order to access Menu and/or Data. All of those applicable policies are evaluated when an admin user tries to perform an action. The final decision is the aggregate of all policies applicable to that role. If there are contradictory rules which permit and deny at the same time, the permit rule overrides the deny rule. To configure these policies, navigate to Administration > System > Admin Access > Authorization > RBAC Policy.
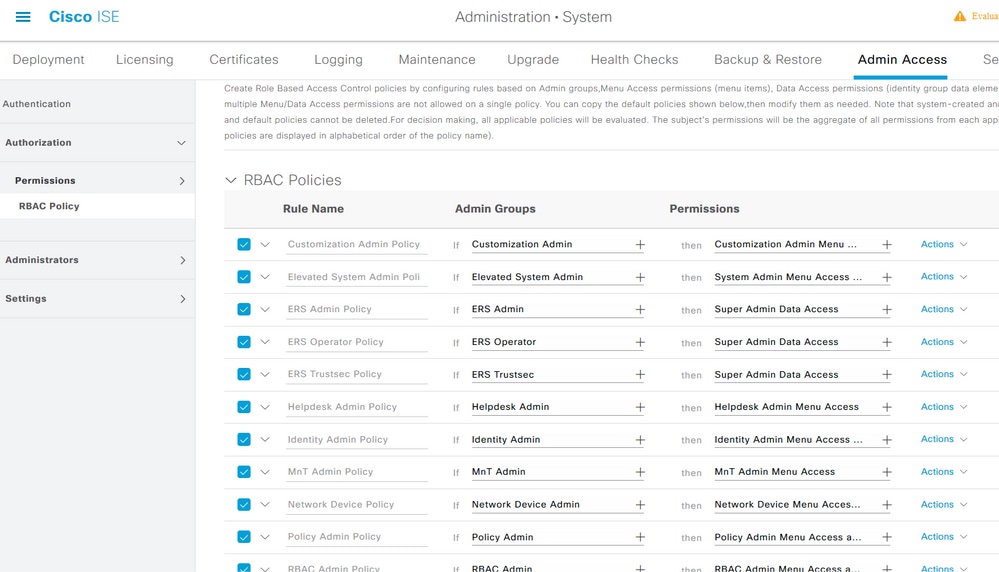
Click Actions to Duplicate/Insert/Delete a policy.
Note: System-created and default policies cannot be updated, and default policies cannot be deleted.
Note: Multiple Menu/Data Access permissions cannot be configured in a single rule.
Configure Settings for Admin Access
In addition to the RBAC policies, there are a few settings that can be configured which are common to all the admin users.
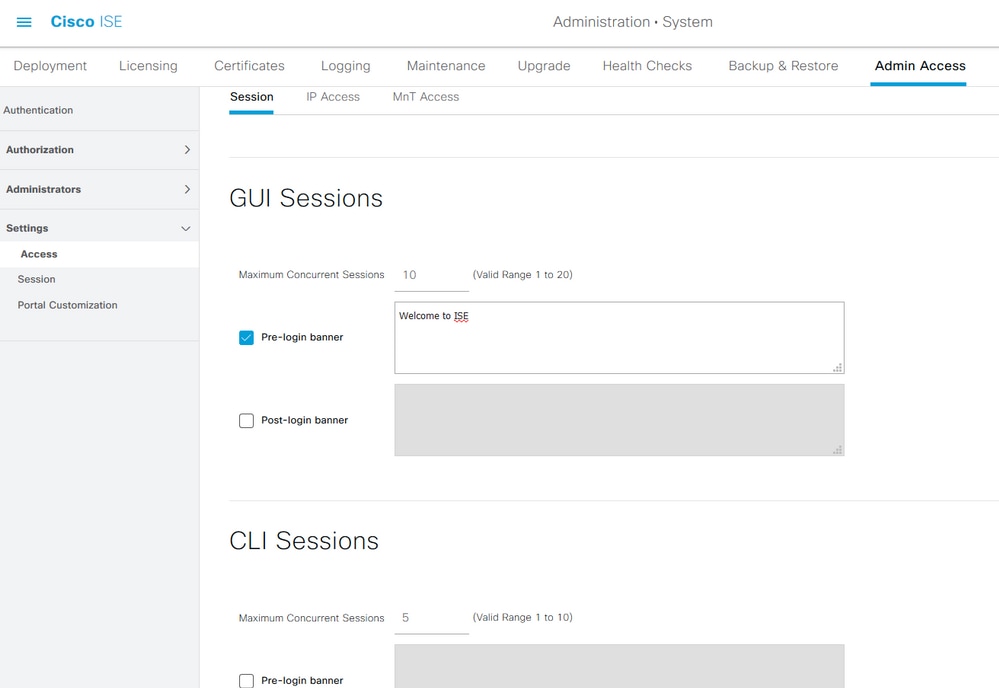
To configure the number of Maximum Sessions Allowed, Pre-login, and Post-login Banners for GUI and CLI, navigate to Administration > System > Admin Access > Settings > Access. Configure these under the Session tab.
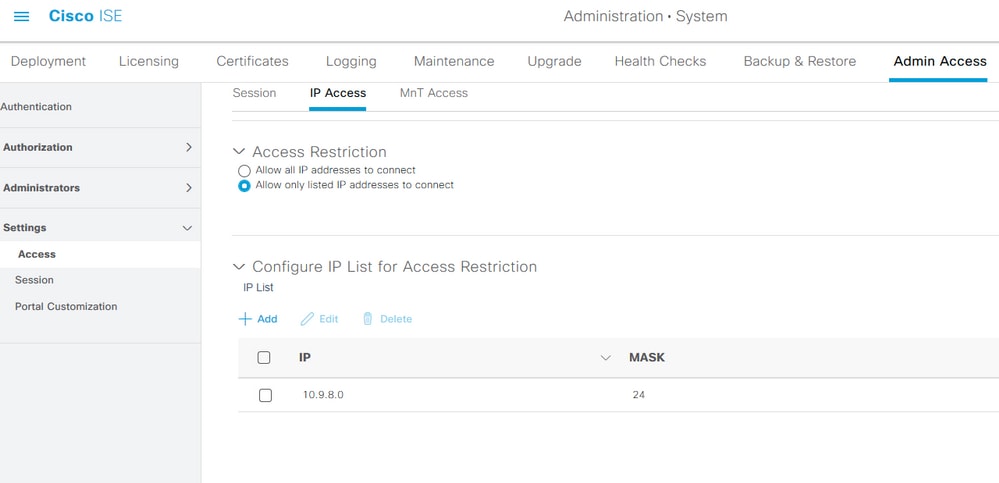
In order to configure the list of IP addresses from which the GUI and the CLI can be accessed, navigate to Administration > System > Admin Access > Settings > Access and navigate to the IP Access tab.
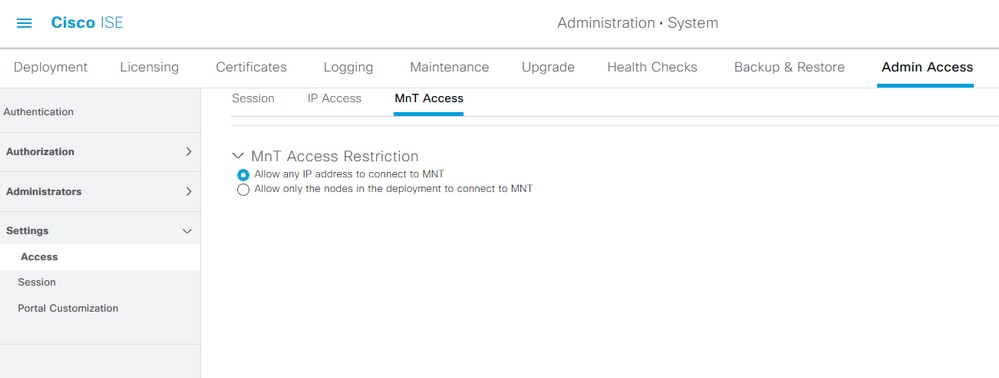
In order to configure a list of nodes from which administrators can access the MnT section in Cisco ISE, navigate to Administration > System > Admin Access > Settings > Access and navigate to the MnT Access tab.
To allow nodes or entities either within the deployment or outside the deployment to send syslogs to MnT, click the Allow any IP address to connect to MNT radio button. To allow only nodes or entities within the deployment to send syslogs to MnT, click Allow only the nodes in the deployment to connect to MNT radio button.
Note: For ISE 2.6 patch 2 and later, the ISE Messaging Service is enabled by default for delivering UDP Syslogs to MnT. This configuration restricts the acceptance of syslogs from external entities beyond the deployment.
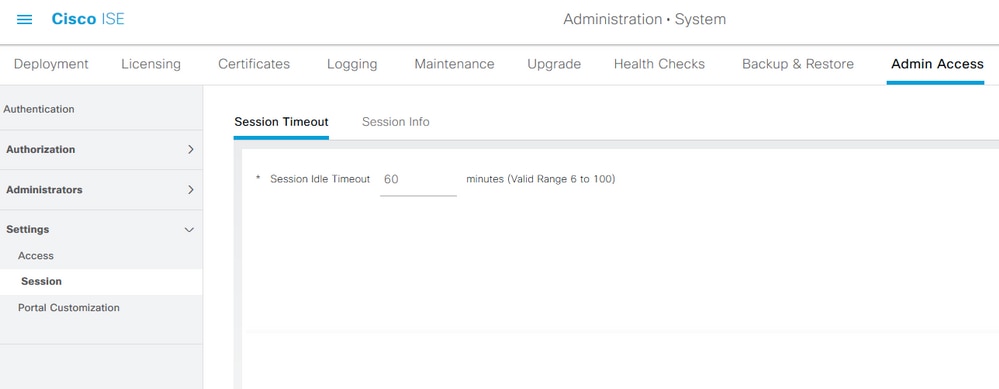
To configure a timeout value due to the inactivity of a session, navigate to Administration > System > Admin Access > Settings > Session. Set this value under the Session Timeout tab.
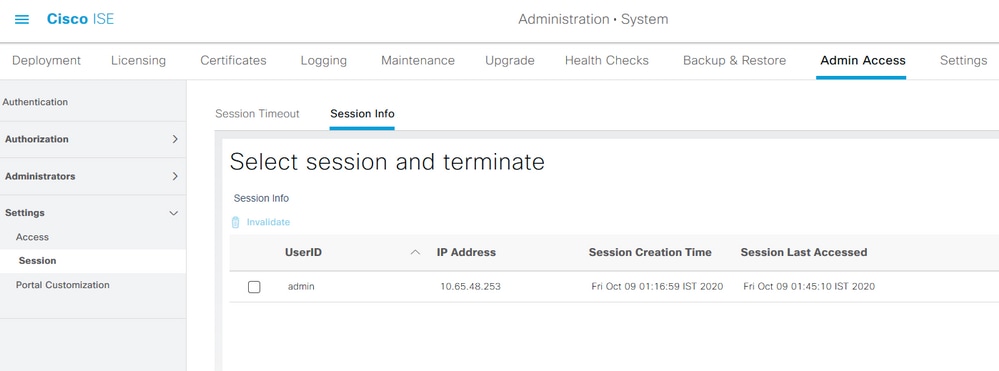
In order to view/invalidate the currently active sessions, navigate to Administration > Admin Access > Settings > Session and click the Session Info tab.
Configure Admin Portal Access with AD Credentials
Join ISE to AD
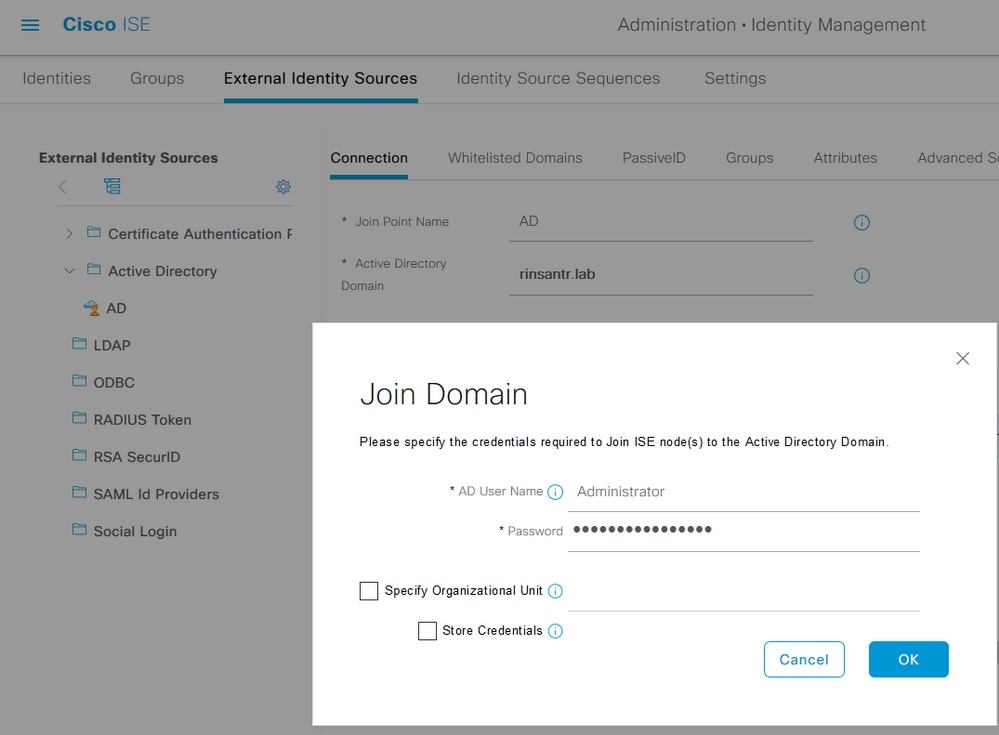
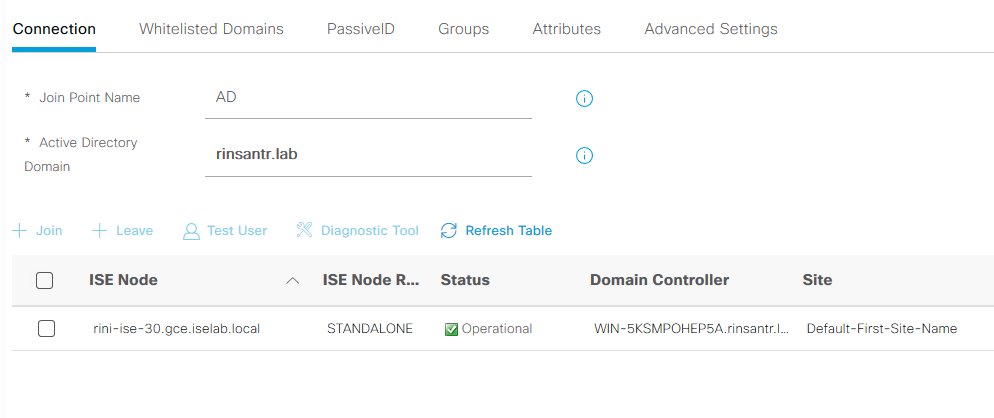
To join ISE to an external domain, navigate to Administration > Identity Management > External Identity Sources > Active Directory. Enter the new join point name and active directory domain. Enter the credentials of the AD account that can add, make changes to computer objects, and click OK.
Choose Directory Groups
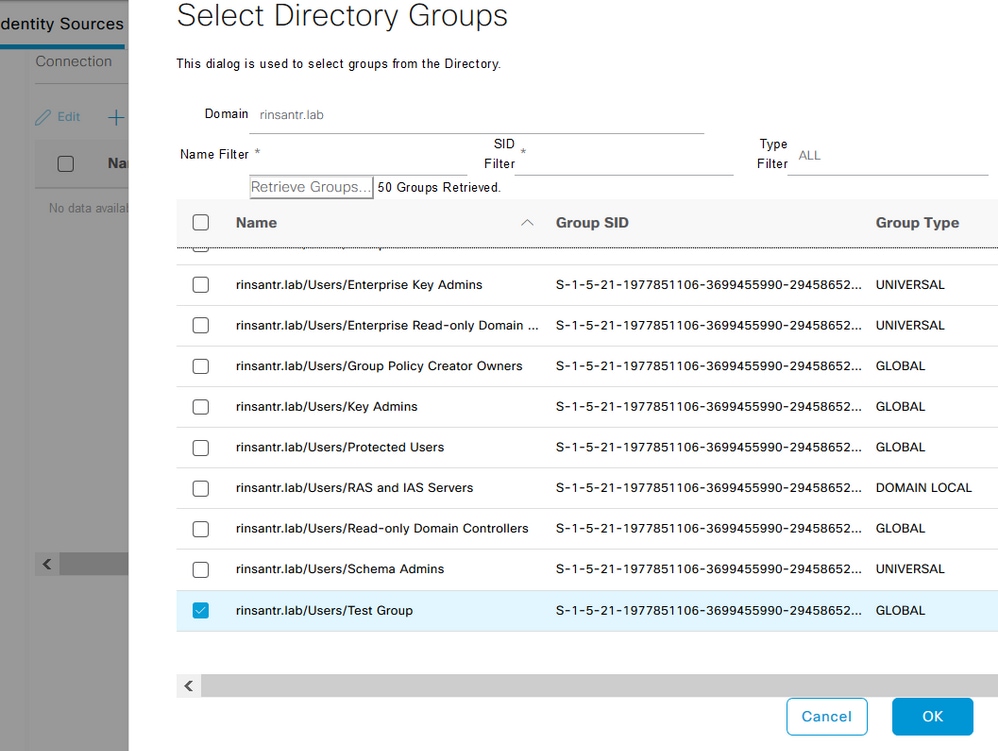
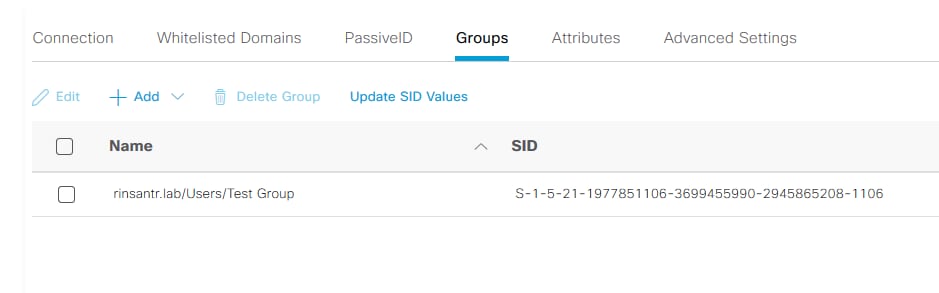
Navigate to Administration > Identity Management > External Identity Sources > Active Directory. Click the desired Join Point Name and navigate to the Groups tab. Click Add > Select Groups from Directory > Retrieve Groups. Import at least one AD Group to which your administrator belongs, click OK, then click Save.
Enable Administrative Access for AD
To enable password-based authentication of ISE using AD, navigate to Administration> System > Admin Access > Authentication. In the Authentication Method tab, choose the Password-Based option. Choose AD from the Identity Source drop-down menu and click Save.
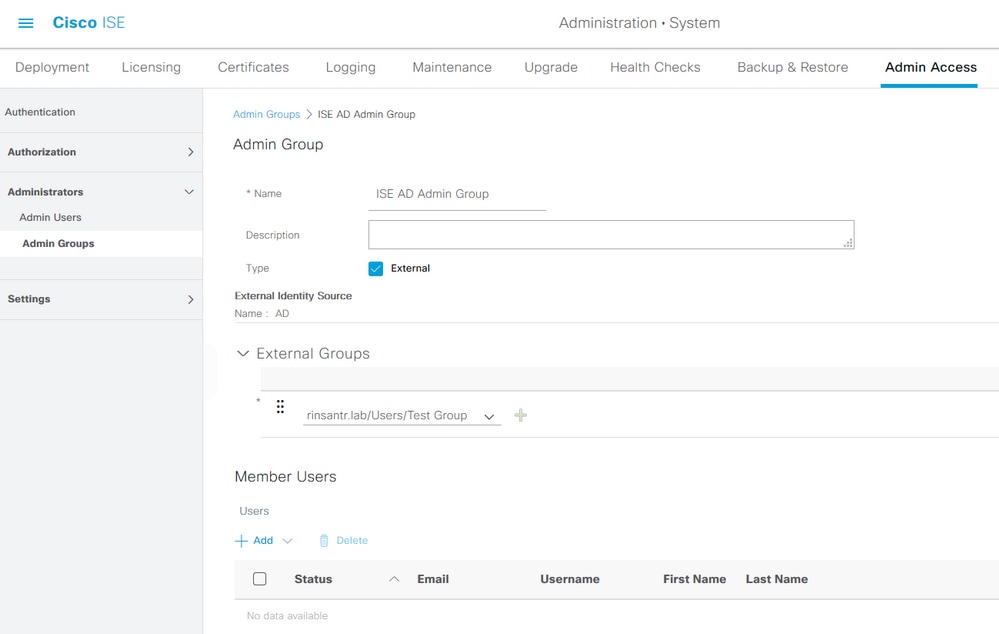
Configure the ISE Admin Group to AD Group Mapping
This allows authorization to determine the RBAC permissions for the administrator based on group membership in AD. To define a Cisco ISE Admin Group and map that to an AD group, navigate to Administration > System > Admin Access > Administrators > Admin Groups. Click Add and enter a name for the new Admin group. In the Type field, check the External check box. From the External Groups drop-down menu, choose the AD group to which this Admin Group is to be mapped (as defined in the Select Directory Groups section). Submit the changes.
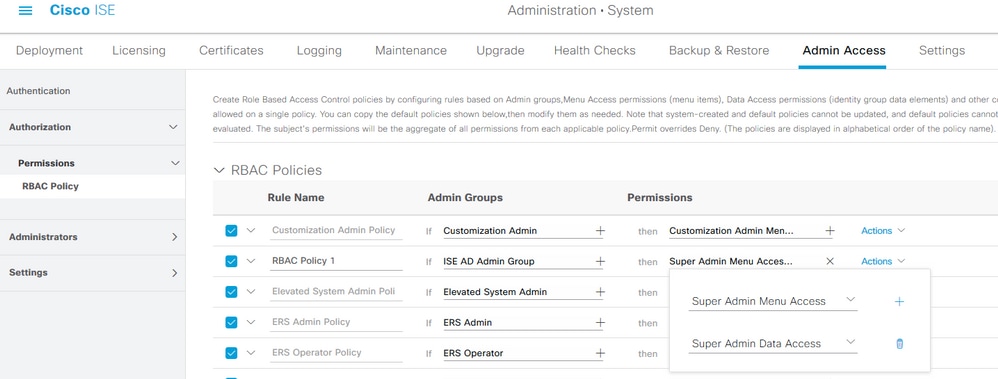
Set RBAC Permissions for the Admin Group
To assign RBAC permissions to the Admin Group created in the previous section, navigate to Administration > System > Admin Access > Authorization > RBAC Policy. From the Actions drop-down menu on the right, choose Insert new policy. Create a new rule, map it with the Admin Group defined in the earlier section, and assign it with desired data and menu access permissions, then click Save.
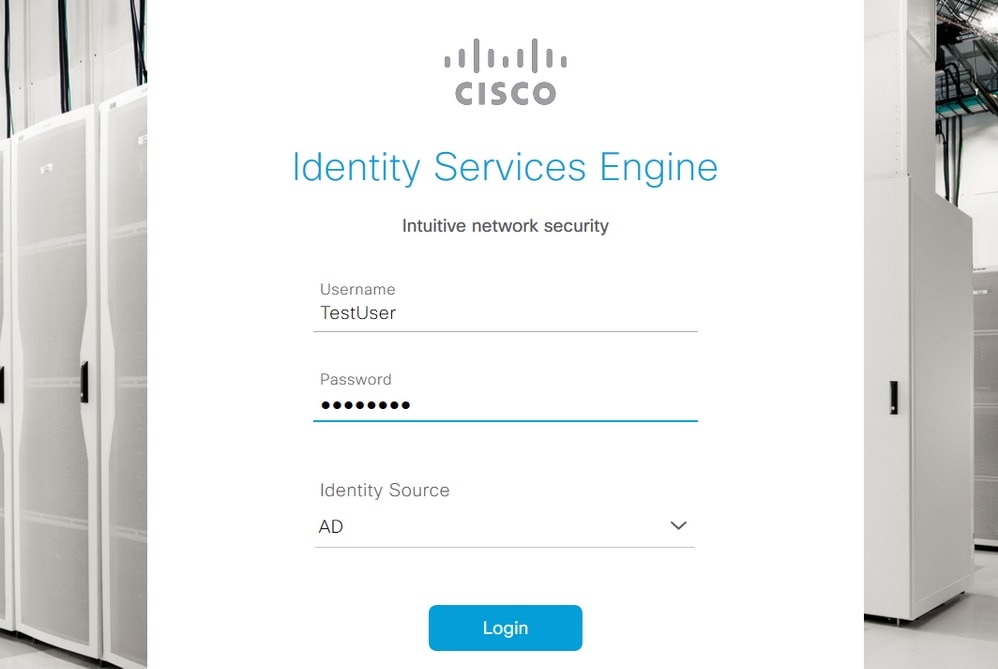
Access ISE with AD Credentials and Verify
Log out of the administrative GUI. Choose the Join Point name from the Identity Source drop-down menu. Enter the username and password from the AD database, and log in.
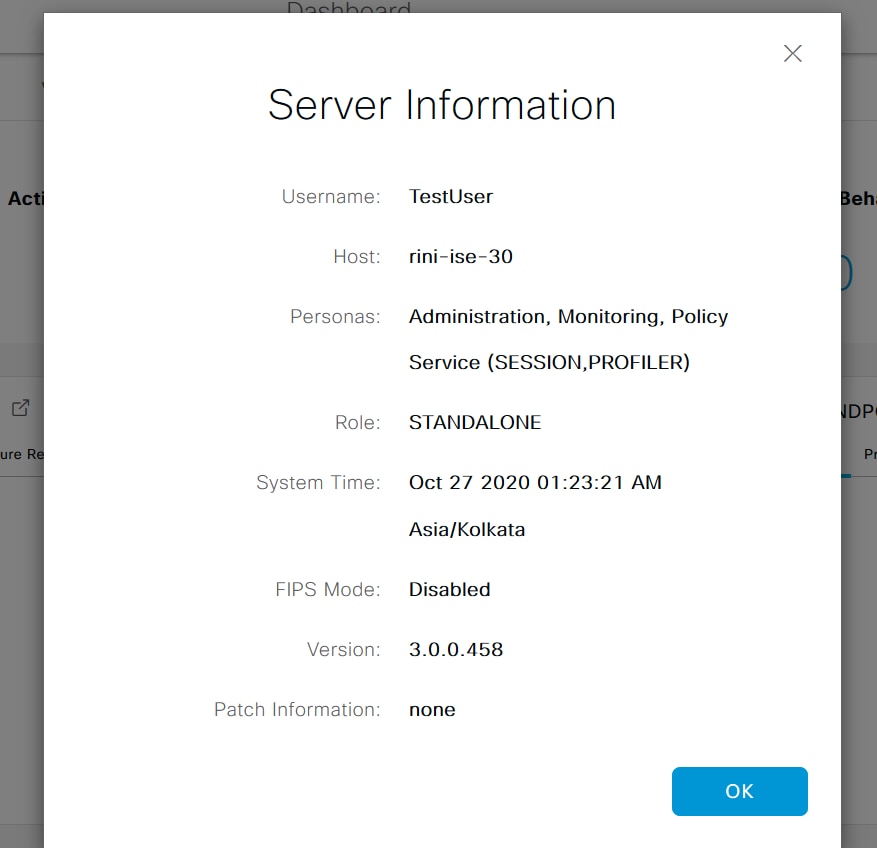
In order to confirm that the configuration works properly, verify the authenticated username from the Settings icon on the top right corner of the ISE GUI. Navigate to Server Information and verify the Username.
Configure Admin Portal Access with LDAP
Join ISE to LDAP
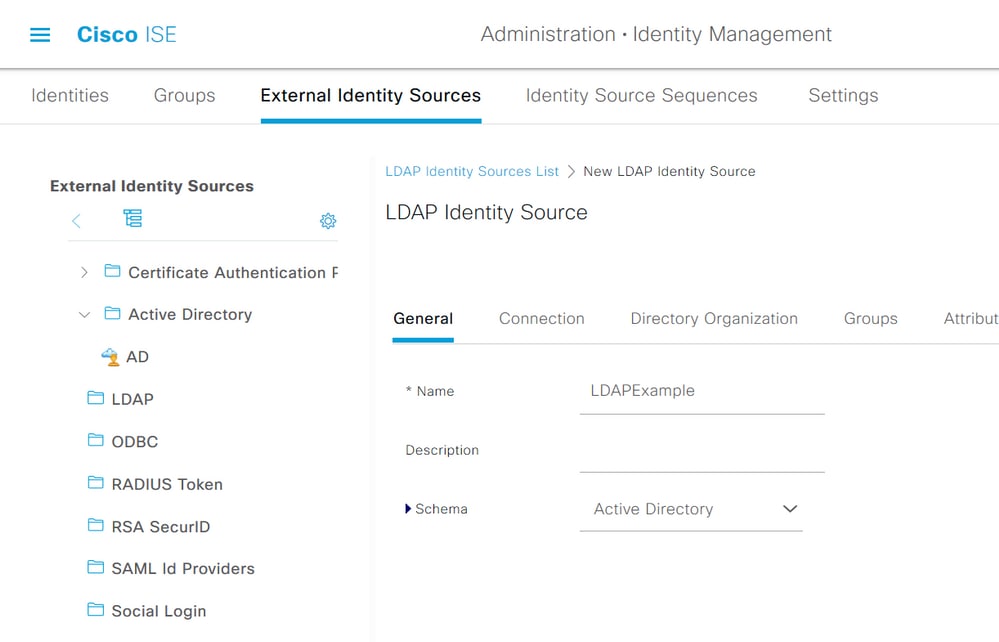
Navigate to Administration > Identity Management > External Identity Sources > Active Directory > LDAP. Under the General tab, enter a name for the LDAP, and choose the schema as Active Directory.
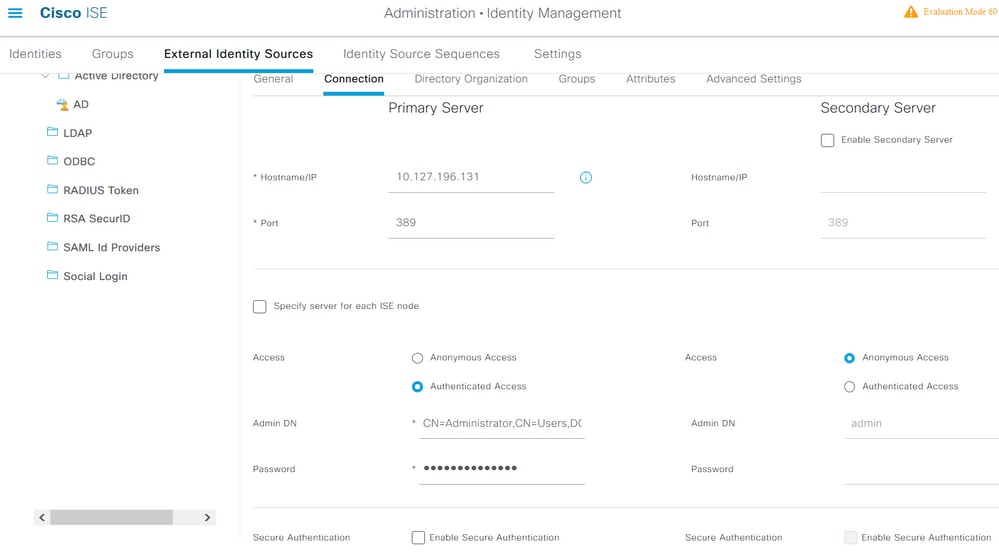
Next, to configure the connection type, navigate to the Connection tab. Here, set the Hostname/IP of the Primary LDAP server along with the port 389 (LDAP)/636 (LDAP-Secure). Enter the path of the Admin distinguished name (DN) with the Admin password of the LDAP server.
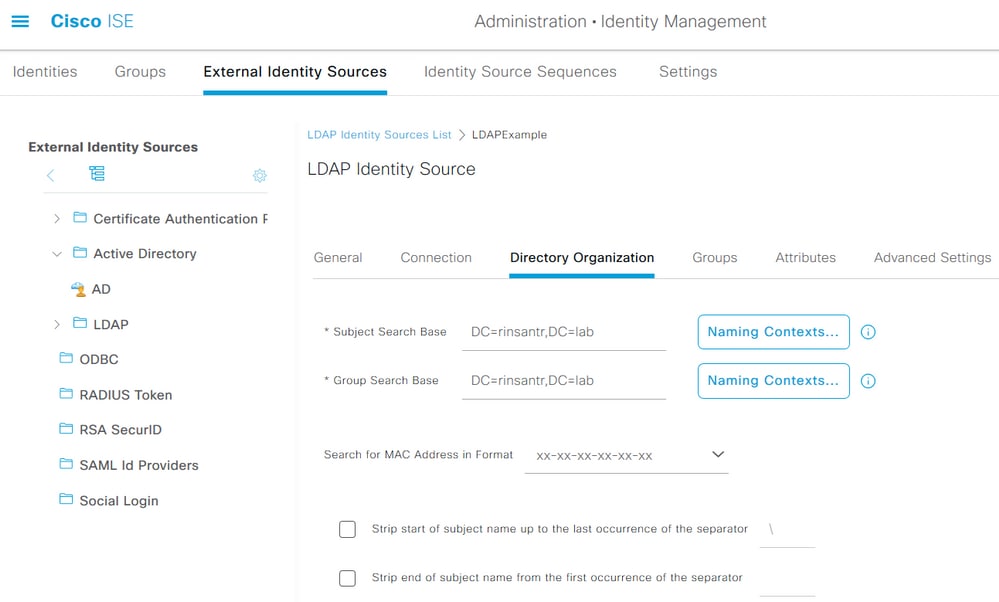
Next, navigate to the Directory Organization tab and click Naming Contexts to choose the correct organization group of the user based on the hierarchy of users stored in the LDAP server.
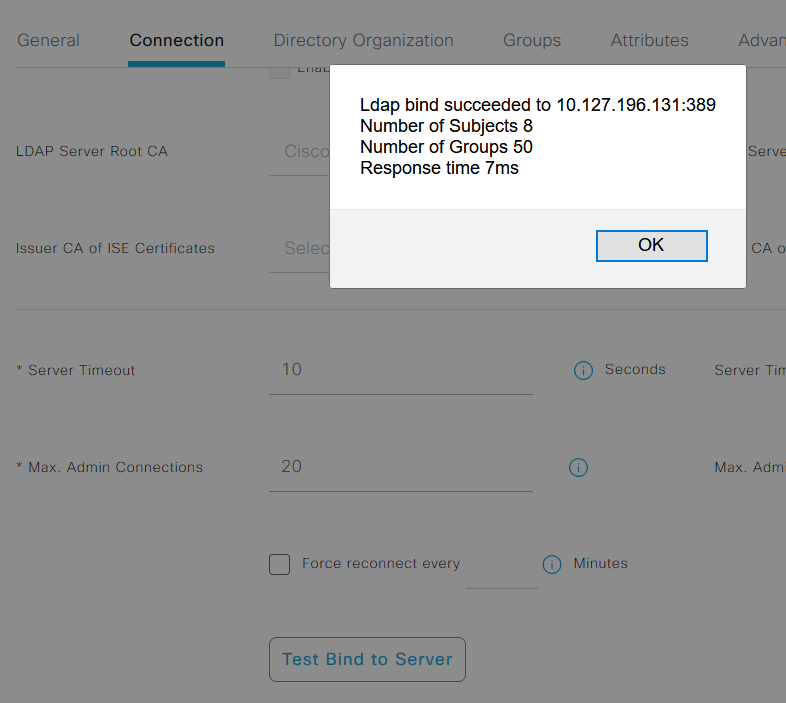
Click Test Bind to Server under the Connection tab to test the reachability of the LDAP server from ISE.
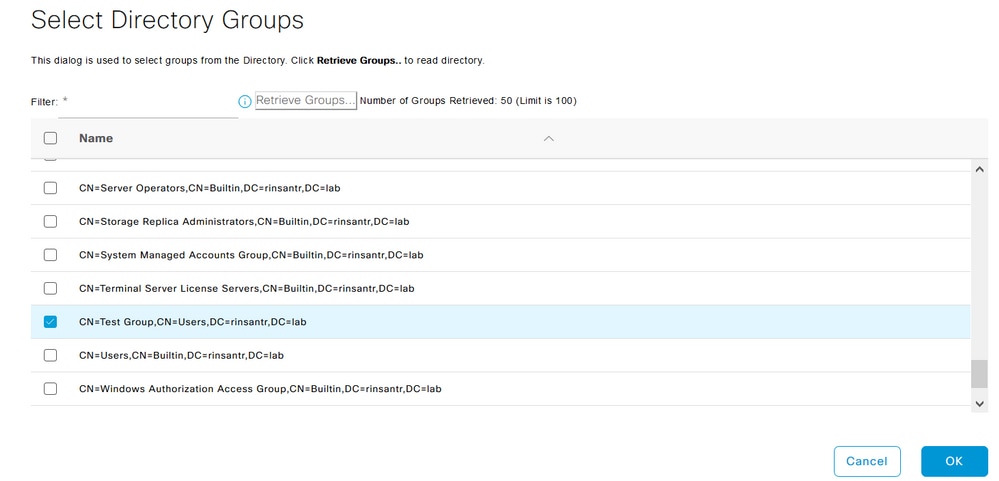
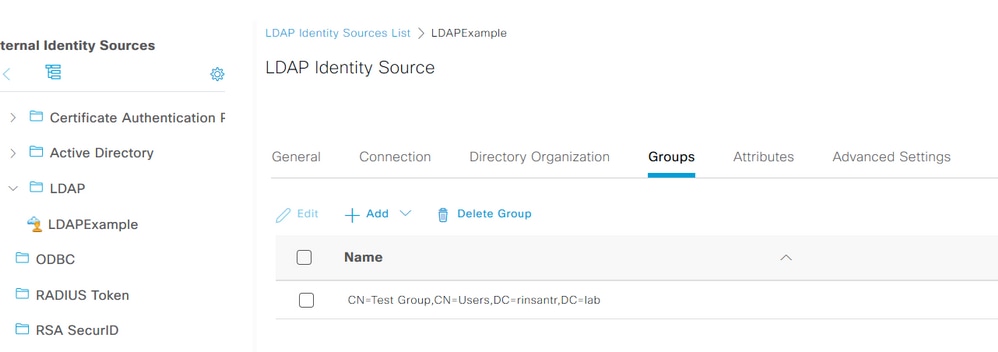
Now navigate to the Groups tab and click Add > Select Groups From Directory > Retrieve Groups. Import at least one group to which your administrator belongs, click OK, then click Save.
Enable Administrative Access for LDAP Users
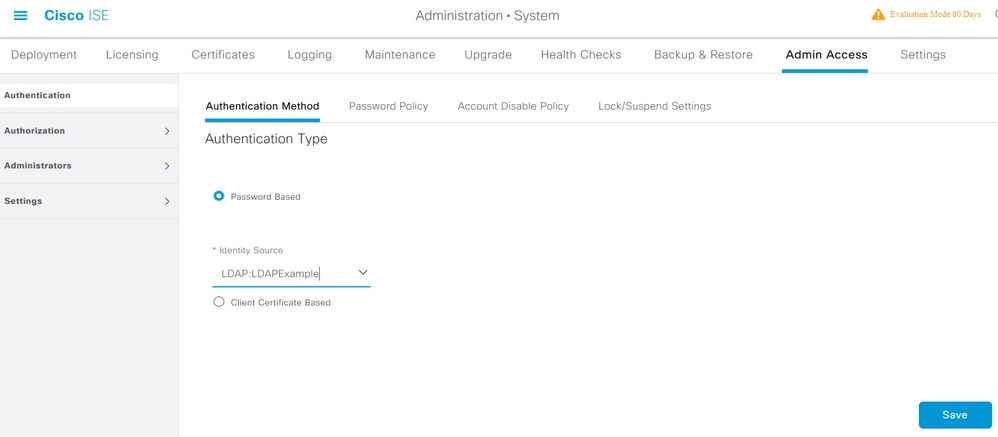
To enable password-based authentication of ISE using LDAP, navigate to Administration> System > Admin Access > Authentication. In the Authentication Method tab, choose the Password-Based option. Choose LDAP from the Identity Source drop-down menu and click Save.
Map the ISE Admin Group to the LDAP Group
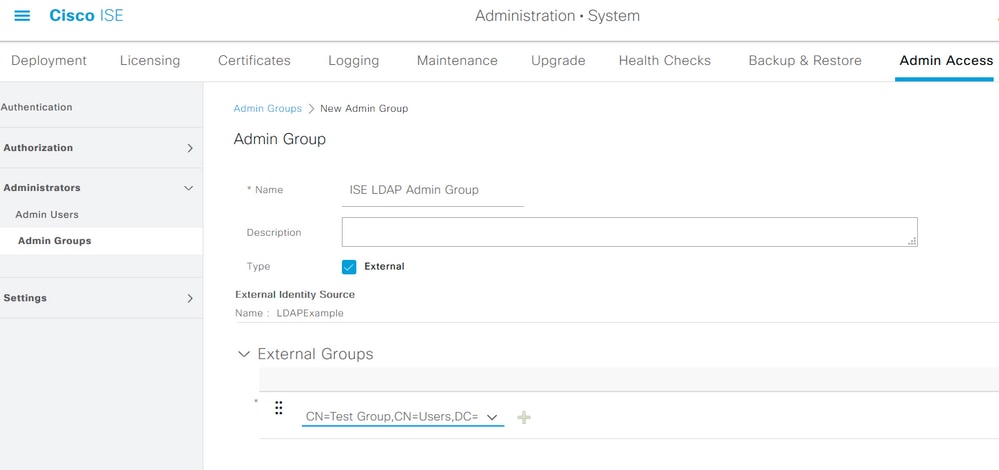
This allows the configured user to get Administrator access based on the authorization of the RBAC policies, which in turn is based on the LDAP group membership of the user. To define a Cisco ISE Admin Group and map it to an LDAP group, navigate to Administration > System > Admin Access > Administrators > Admin Groups. Click Add and enter a name for the new Admin group. In the Type field, check the External check box. From the External Groups drop-down menu, choose the LDAP group to which this Admin Group is to be mapped (as retrieved and defined previously). Submit the changes.
Set RBAC Permissions for the Admin Group
To assign RBAC permissions to the Admin Group created in the previous section, navigate to Administration > System > Admin Access > Authorization > RBAC Policy. From the Actions drop-down menu on the right, choose Insert new policy. Create a new rule, map it with the Admin Group defined in the earlier section, and assign it with desired data and menu access permissions, then click Save.
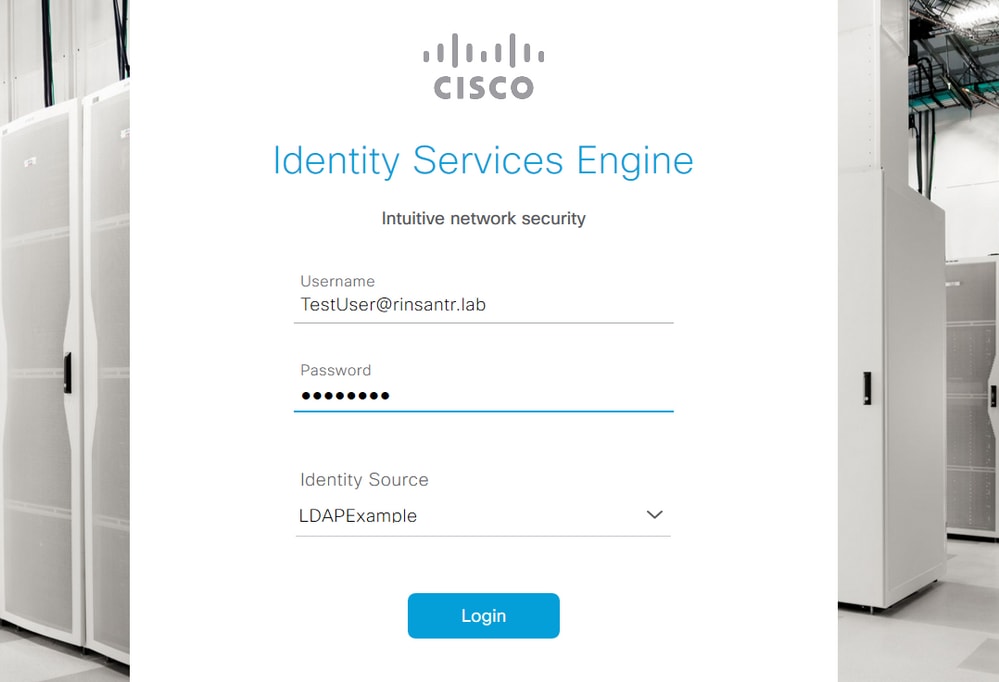
Access ISE with LDAP Credentials and Verify
Log out of the administrative GUI. Choose the LDAP name from the Identity Source drop-down menu. Enter the username and password from the LDAP database, and log in.
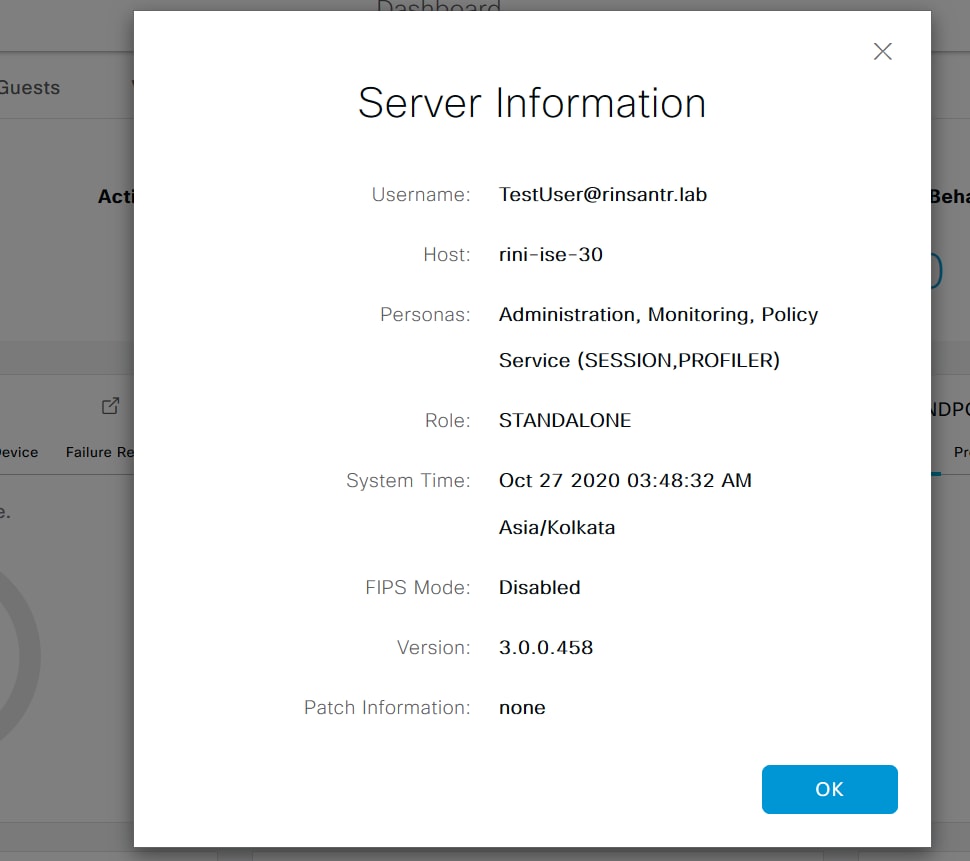
To confirm that the configuration works properly, verify the authenticated username from the Settings icon on the top right corner of the ISE GUI. Navigate to Server Information and verify the Username.
 Feedback