Introduction
This document describes the steps to create a new SecureX business using Cisco Secure Sign-On.
Contributed by Uriel Torres, Brenda Marquez, and Edited by Yeraldin Sanchez, Cisco TAC Engineers.
Prerequisites
Requirements
Cisco recommends that you have knowledge of these topics:
- Basic navigation in Cisco Security Service Exchange (SSE)
- A Cisco Smart/Virtual Account or one of the following devices:
- Security Management Appliance (SMA) Email/Web
- Firepower
- Email Security Appliance (ESA)
- Web Security Appliance (WSA)
- Stealthwatch Enterprise
Components Used
The information in this document is based on these software and hardware versions:
- Cisco SSE
- SecureX version 1.52
- Cisco Duo Mobile Android version 3.34.0
- ESA with Async OS version 13.0.0
- Firefox Mac Version 78.0.1
The information in this document was created from the devices in a specific lab environment. All of the devices used in this document started with a cleared (default) configuration. If your network is live, ensure that you understand the potential impact of any command.
Background Information
The Cisco SecureX platform connects the breadth of Cisco’s integrated security portfolio and the customer’s infrastructure for a consistent experience that unifies visibility, enables automation, and strengthens your security across network, endpoint, cloud, and applications. By connecting technology in an integrated platform, SecureX delivers measurable insights, desirable outcomes, and unparalleled cross-team collaboration.
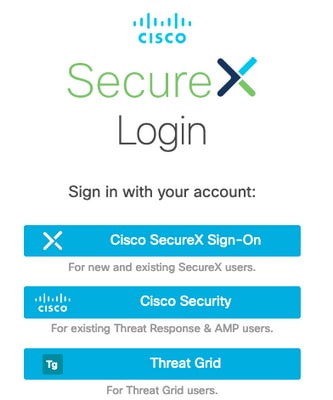
Cisco SecureX has 3 different ways to login:
- Cisco Secure Sign-On
- Cisco Security Account (CSA)
- Threat Grid Account
In this article, a new SecureX business is created with Cisco Secure Sign-On.
Troubleshoot
This section provides the information you can use to troubleshoot your configuration.
Create the Cisco Secure Sign-On account
Tip: Use a private window in order to avoid any possible cache issues from the web browser.
Tip: An email without a relationship with a Cisco Security Account is suggested in order to avoid accounts duplicated.
In order to create the Cisco Secure Sign-On account:

- An email is sent to the email that was used to register, as shown in the image.

- The Activate Account link has the URL format https://sign-on.security.cisco.com/tokens/[RegistryToken]/verify
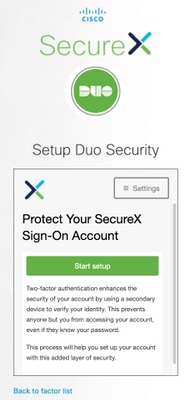
- Complete the registration process with DUO.
- Click on the Configure factor button.

- Click on the Start Setup button, as shown in the image.
- Continue the setup and use your phone number to create the two-factor authentication.

- Click on the Finish button to complete the enrollment process.

- Click on Create My Account, as follows.

Create the Cisco SSE account
- The Secure Sign-on page is displayed.

- Click on SecureX (For this guide North America region is used).
- Log on SecureX with DUO and the Cisco Secure Sign-On.
- Create your New SecureX Organization.

- Once the organization is created, the account requires activation.
Activate the SecureX account via SSE

- For this guide, an ESA device is used in order to activate SecureX.
- Click on the Connect button.
- In the Connect Device window, a device or a Cisco Smart/Virtual account can be used to activate it.
- For this guide click on the Register Device button.
Tip: In order to register other devices than ESA, in the Connect Device window you can find the registration guide and the link guide.

- You are redirected to the Cisco Security Service Exchange (SSE) portal.
- On SSE navigate to Cloud Services and enable Cisco SecureX threat Response and Eventing.

- On SSE navigate to Devices section.
- Click on the Add Devices and Generate Tokens option.

Tip: You can find more information about how to register a device with the token: Here.
- Copy the registration token.
- Access to the ESA user interface.
- On the ESA navigate to Network > Cloud Services Settings.
- On Cloud Services Settings window click on the Edit Settings button.
- Enable Threat Response, the cloud server (AMERICAS in this guide).

- Commit the changes.
- Paste the registration token and click on the Register button, as shown in the image.

- Reload the SSE page, navigate to Devices and the ESA device is displayed.

- Navigate to SecureX and click on the Confirm Device is Connected button.

- After the confirmation, you are redirected to the SecureX portal, as shown in the image.

Manage Users in SecureX (Invite, Enable, Disable)
In case the SecureX account was activated with Advanced Malware Protection (AMP) for endpoints the users are managed directly on the AMP Console.

If the account was activated without AMP, the users are managed directly on the SecureX console, on SecureX you can have 2 types of roles:
In order to allow the User role, on SecureX navigate to Your Account > Users, check Allow Non-Admin Users, as shown in the image.

Invite User
You can add new users to the SecureX organization.
- In order to add a new user role (Admin or User) on SecureX.
- Navigate to Administration > Invite User section.
- Use the email and role of the new user.
- Click on the Add button.
- If you want to add more users, fill the information of the new user and click on the Add button.
- Repeat this process until you have all your users added.
- Click on the Send Invites button.

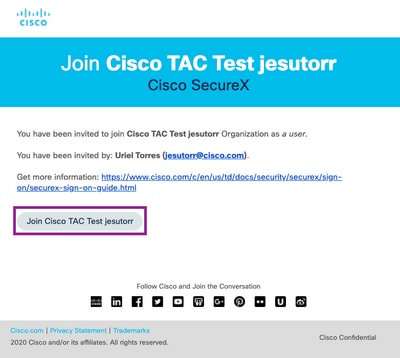
- The new user receives an email with the information to access to the Secure X account.
- Click on the Join...<Business Name> button.
- The email redirects to the Secure X invitation login page.
- Click on Continue the invite process.

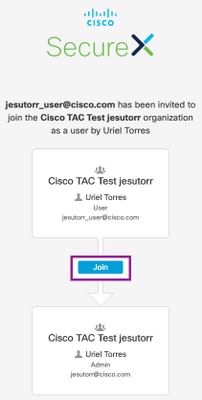
- Complete the registration form.
- Once the registration was completed click on the Join button, as shown in the image.
- Once the user clicks on join, a new user is available in the Administrator window.
- In order to manage the users with an Admin account in SecureX navigate to the Administration section.
- On the Administration window, the users can be enabled/disabled or promoted/demoted, as shown in the image.

Note: At this moment the users can't be deleted from SecureX, if a user isn't necessary can be disabled.
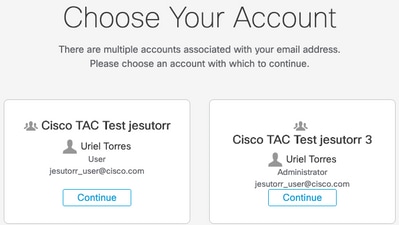
Note: You can have different SecureX business with the same Secure Sign-on account, at the moment you use the Secure Sign-On option, the account can be selected.
 Feedback