The objective of this document is to welcome you to Cisco Business and get you familiar with the basics of networking.
Are you a small business owner that is trying to set up your network? Did you have your network set up but now you are having issues? Have you asked for help and gotten the advice to talk to your IT guy, but you don’t have an IT guy? If you don’t know networking, it is like learning a whole new language. Here is a great place to start. This article aims to familiarize you with some common Cisco Business terms and get you more comfortable navigating through what to do when setting up and maintaining a network.
The following videos and PDFs offer some very high level information on networks and what you might need.
These websites offer even more information. Check them out!
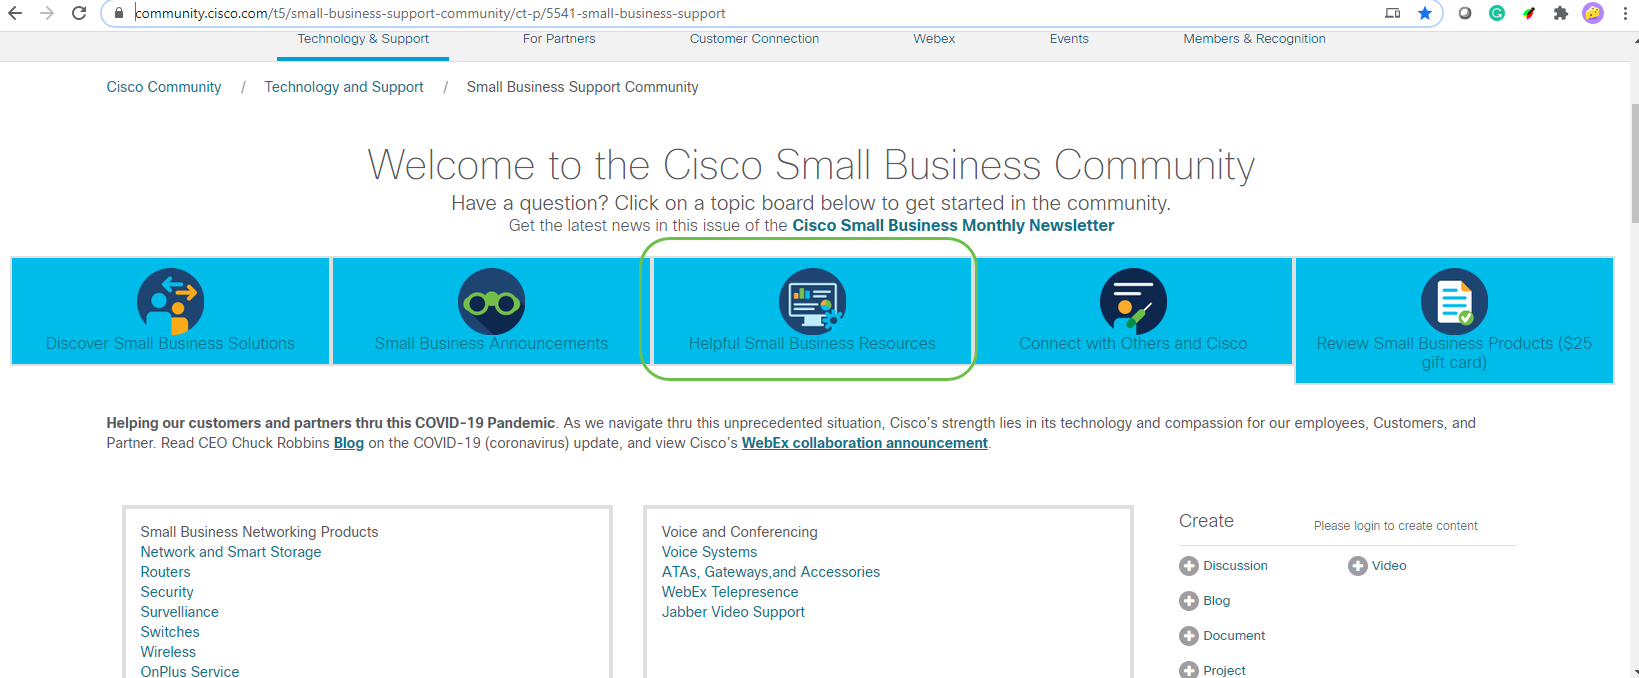
Cisco Business, sometimes referred to as Cisco Small Business or SMB, has its own section on the Cisco website. Click here to go directly to the Cisco Business Community.
This site contains many topics that might be relevant to you.
Note: This website is updated frequently, so what you see may differ slightly from the examples provided.
Note: Enterprise products are tailored toward larger businesses that typically have an IT person on staff. It all depends on the size of your business and networking needs. This article is specifically for Cisco Business.
All Cisco Business (Small Business) Equipment has a special product Support Page. To see an overview, navigate to the Cisco Business Support Page.
Click on the device and family that you would like to explore.

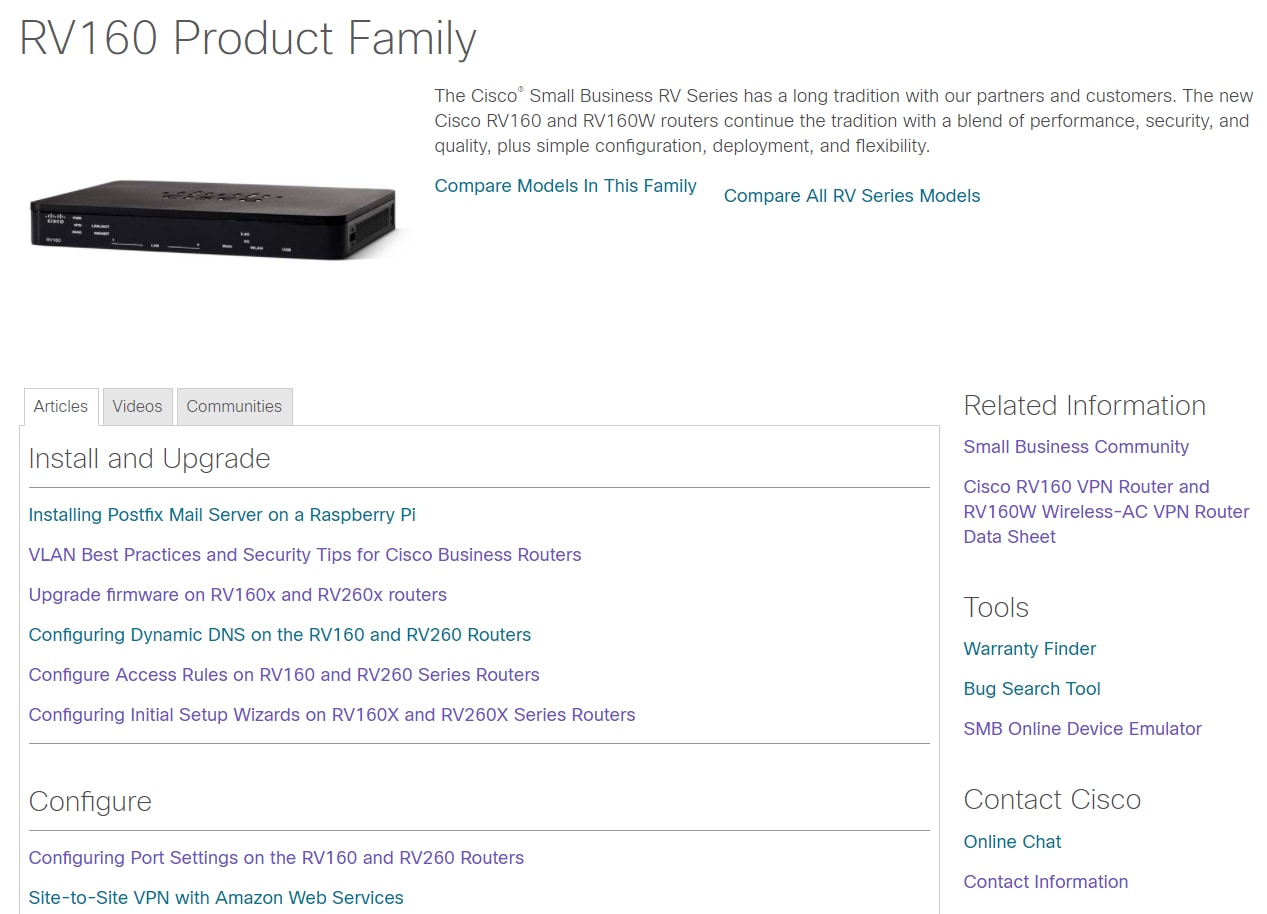
Once you open the support page for your specific product, you will have several links to explore.
Another option is to navigate to the Cisco Website. Select Support and Products and Downloads. In the search bar, enter the model of the device you want to explore.
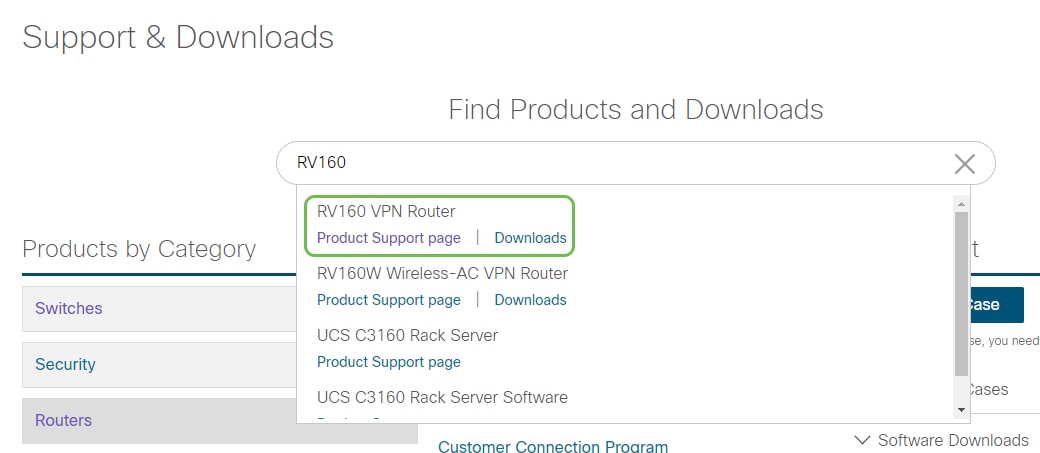
You will be brought to a special page for that product.
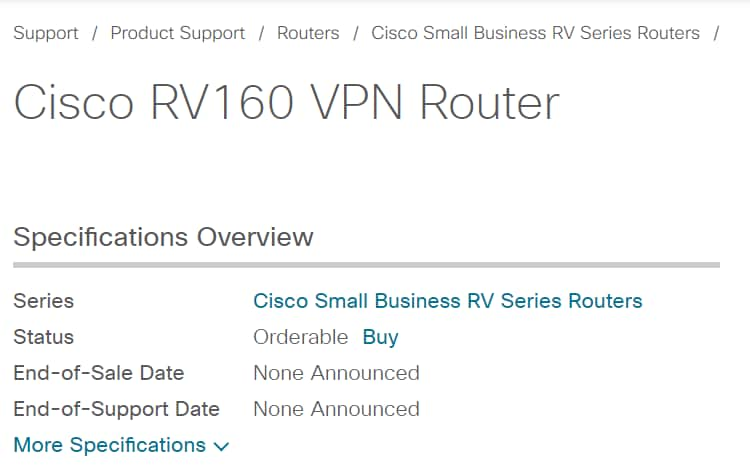
Scroll down and the following categories are listed. You can select the area of interest, or scroll further to see lists of documentation under each category.
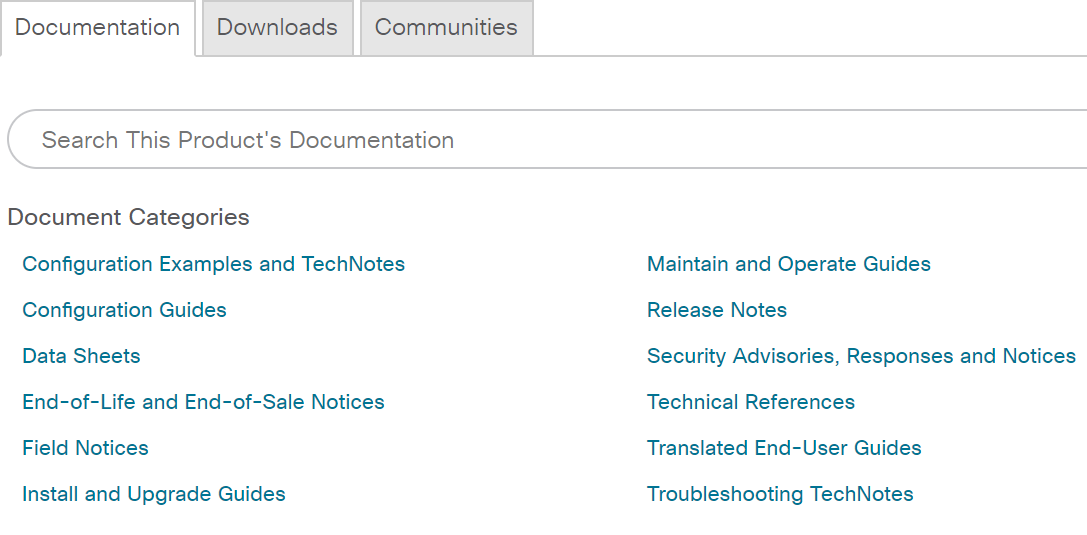
On the right side of the screen you can find other related documentation.

This same site is also used for product support and downloads. If you want to find the latest firmware version for your device, you can find it here.
Administration Guide and Quick Start Guide: These are two different resources to search through to get very detailed information about your product and its features. When you do a site or web search with your model number, you can add one or the other to view these longer guides.
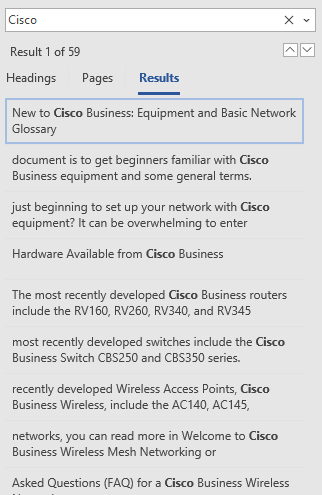
Tip: Some documents are quite large and can be challenging to navigate. If you are searching for something specific in a Cisco article or in the online administration guide, and you are on a computer that uses Windows, you can hold down the Ctrl button on your keyboard and click the f key. This will open up an area on the left side of your screen. From there you can type the key word and click the arrow up and down. It will scroll through the document as you click the arrow, highlighting that word in the document for easy visibility.
This section provides links for you to compare various models and devices in the Cisco Business Portfolio.
In order to log into your device, you have to access it.
Make sure the device is on and has power. Use an Ethernet cable to connect your computer to the device. Depending on the device you are using, you might need an Ethernet adapter if your device doesn’t have one. On the device you can put the Ethernet cable in any LAN port (on a router) or regular port on another device. On a Cisco IP phone you would also plug it into the LAN Port, which is an icon that may show three boxes or computers connected.
Tip: You should not be connected to a VPN. You may have to turn off your WiFi as well.
Double-click on a web browser, in order to open the address (search) bar where you type in website names you want to visit.

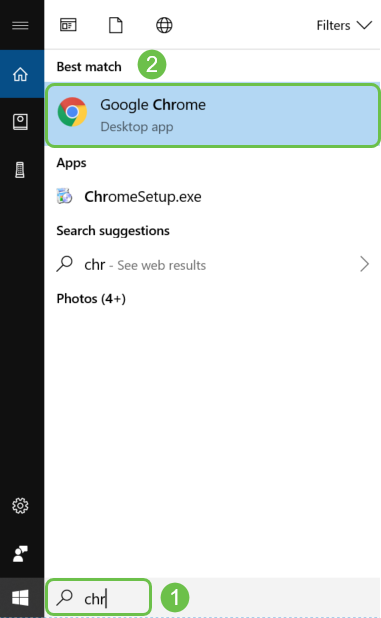
If you do not see the web browser, you can access it at the bottom left search bar on a Windows computer. Start typing in the name of the application and options that match appear, you can select from there and it will open.
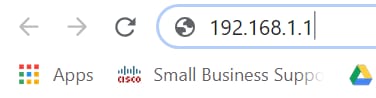
Enter the IP address of the device. If you did a factory reset, or this is the first time you are entering credentials, use the default IP address of 192.168.1.1 for a router, 192.168.1.254 for a switch, and 192.168.1.245 for a Wireless Access Point. The credentials are cisco for both the username and password the first time. Older devices and some phones use admin as the default username and password. If you changed the credentials, enter those instead.
Note: When accessing a switch or WAP, the default IP address applies in situations when the switch or WAP is not connected to a router and your computer is connected directly to the switch or WAP. If the switch or WAP is connected to a router, DHCP will, by default, assign an IP address and it may be different.
If you forgot the IP address of the device and you don't have a specific configuration that you need to keep, you can reset to factory defaults on the physical device. Open a paperclip and insert the end of it into the small recessed reset button. Hold for 10 seconds and you see should see the lights on the device light up. It will take at least a few minutes to boot back up. Your IP address, as well as your configuration file, will revert to default.

At this point you may receive a warning that it is unsafe. This is because you don’t have a certificate registered for the router. You can choose Proceed, Add Exception, or Advanced. This will vary by web browser.
Tip: If you have a popup blocker you will need click to allow the popup before you can proceed.
In this example, Chrome was used for a web browser. This message appears, click Advanced.
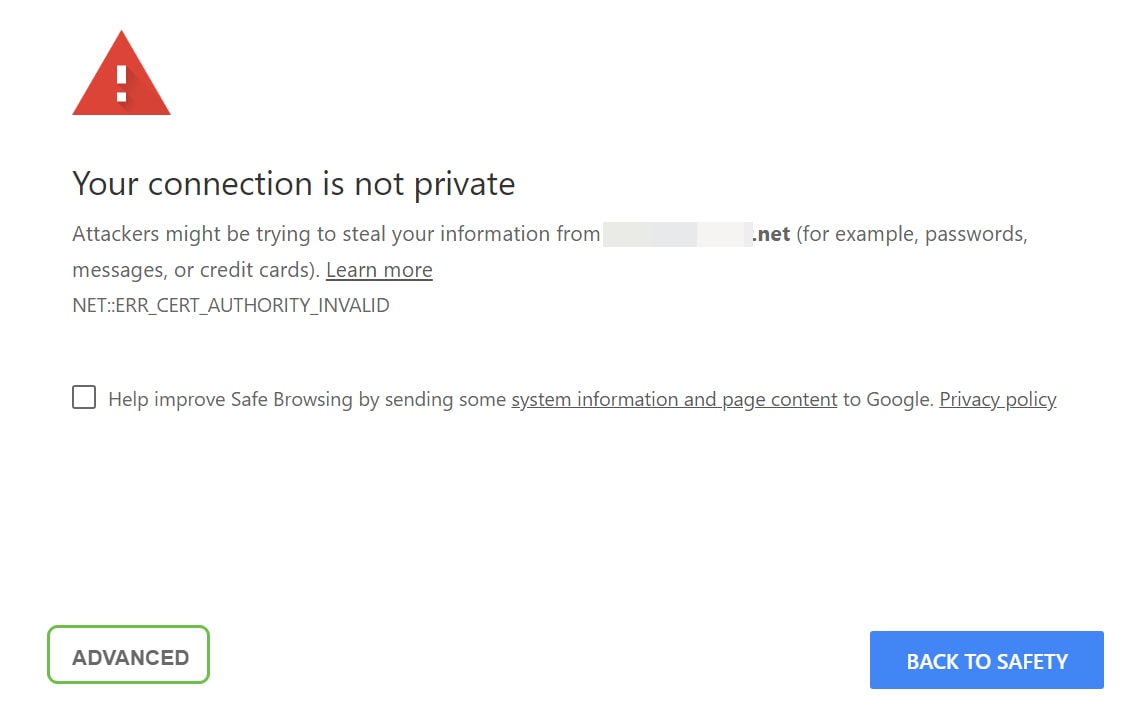
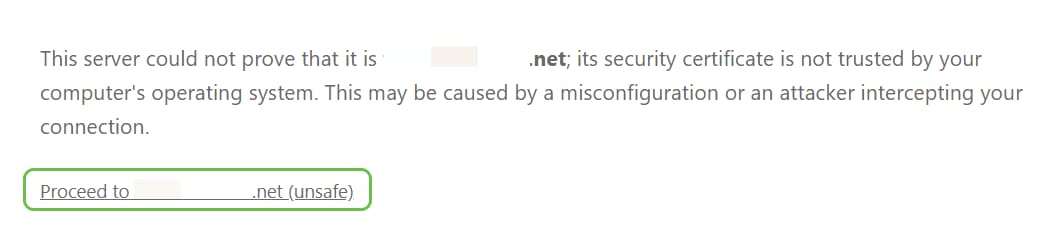
A new screen will open and you need to click on Proceed to (name of website) (unsafe).
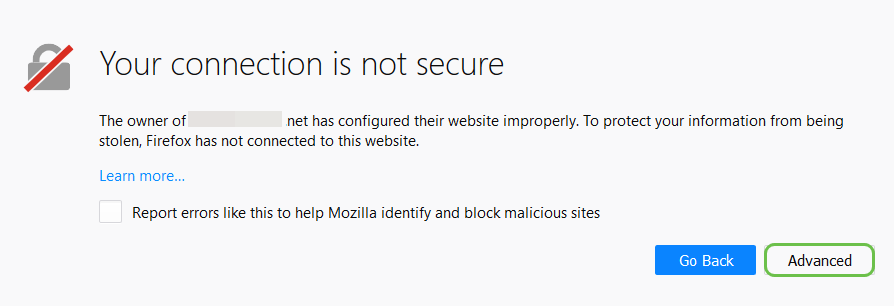
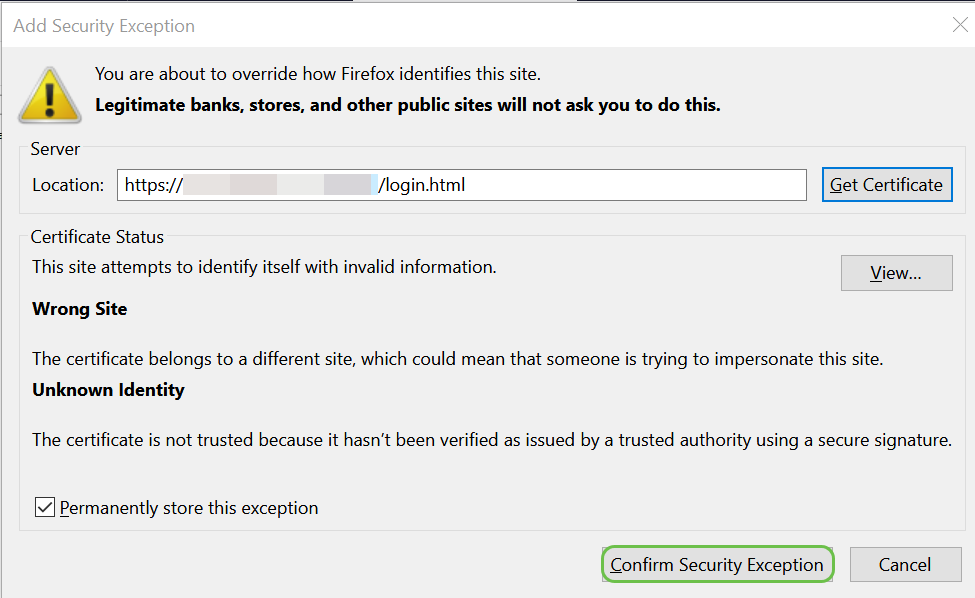
Here is an example of accessing the device warning when using Firefox as a web browser. Click on Advanced.
Click Add Exception
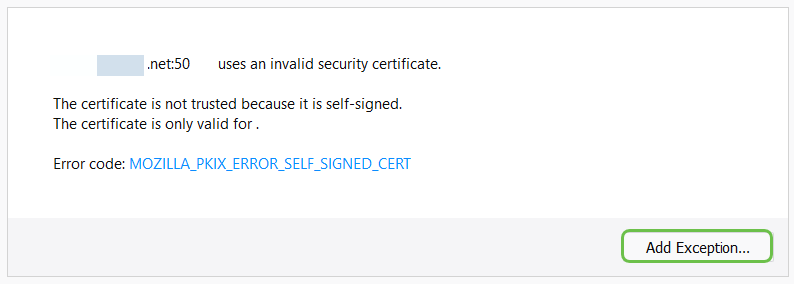
Finally, you will have to click on Confirm Security Exception.
If you don’t have a connection you won’t see the Web UI as described below. You might need to make sure that you are on the same subnet as your device. Since the devices come with 192.168.1.x you will have to go into your computer and set a static IP address that is in that same subnet. Just make sure you don’t have the same exact IP address as anything else in your network. The last octet, represented with an x in 192.168.1.x can be any number 1-254 as long as it doesn’t match any other device in the network. If you see an IP address for your laptop that DHCP assigned a 169.x.x.x address, that is a red flag, your device is not routable and cannot communicate with other devices.
For information on how to access the web-based setup page of Cisco VPN router, click here.
For information on how to access the web-based utility of the Wireless Access Point (WAP), click here.
For information on how to access the web-based utility of a Cisco IP Phone, click here.
Every piece of Cisco Business equipment (except for the 100 series unmanaged switches) comes with a Web User Interface (UI).
This type of interface, what you see on your screen, shows options for selection. You do not need to know any commands to navigate through these screens. The Web UI is also sometimes referred to as a Graphical User Interface (GUI), web-based interface, web-based guidance, web-based utility, or a web configuration utility.
One of the easiest ways to change the configuration of a device is through the Web UI. The Web UI gives the administrator a tool that contains all of the possible features that can be changed to modify the performance of a device.
After you log into a Cisco device, you will see a Web UI screen that includes a navigation pane down the left side. It contains a list of the top-level features of the device. The navigation pane is also referred to as a navigation tree, navigation bar, menu, or a navigation map.
The colors of this page may vary, as well as the top-level features, depending on the equipment and firmware version.
Some Cisco Web UI screens are the light blue, as shown here.
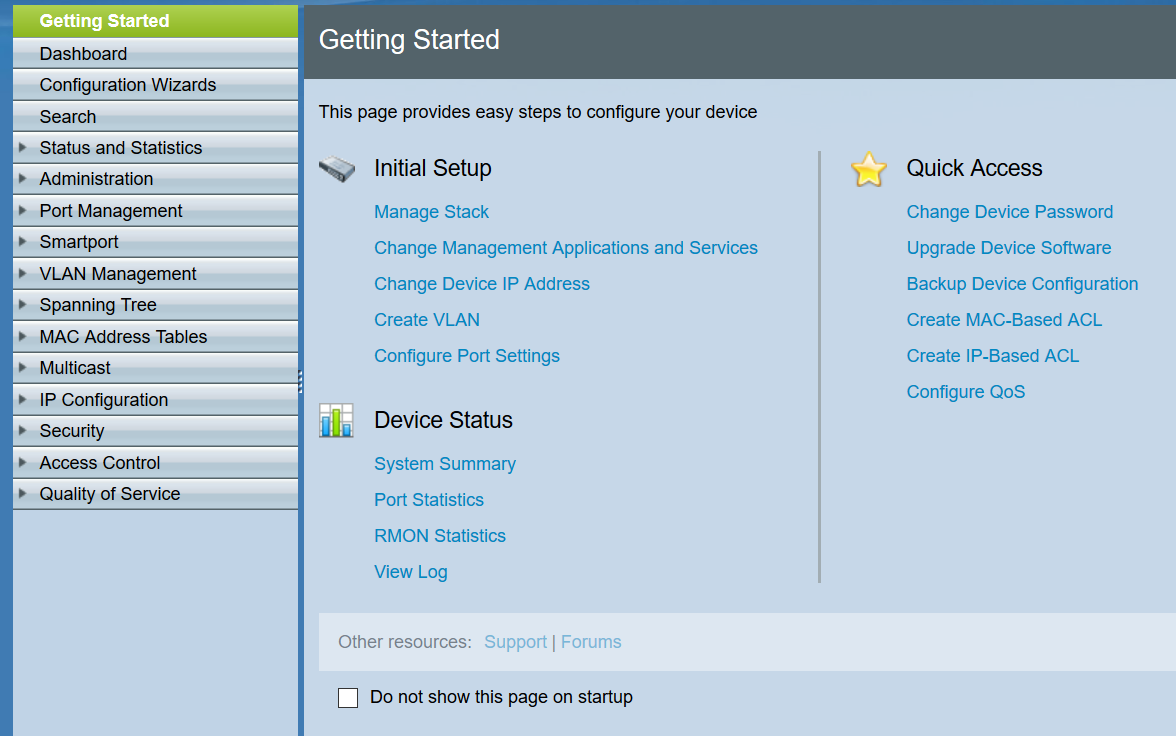
Note: This is a Web UI of an SG350X switch.
Other Cisco devices have a Web UI screen that is black and blue, as shown here.
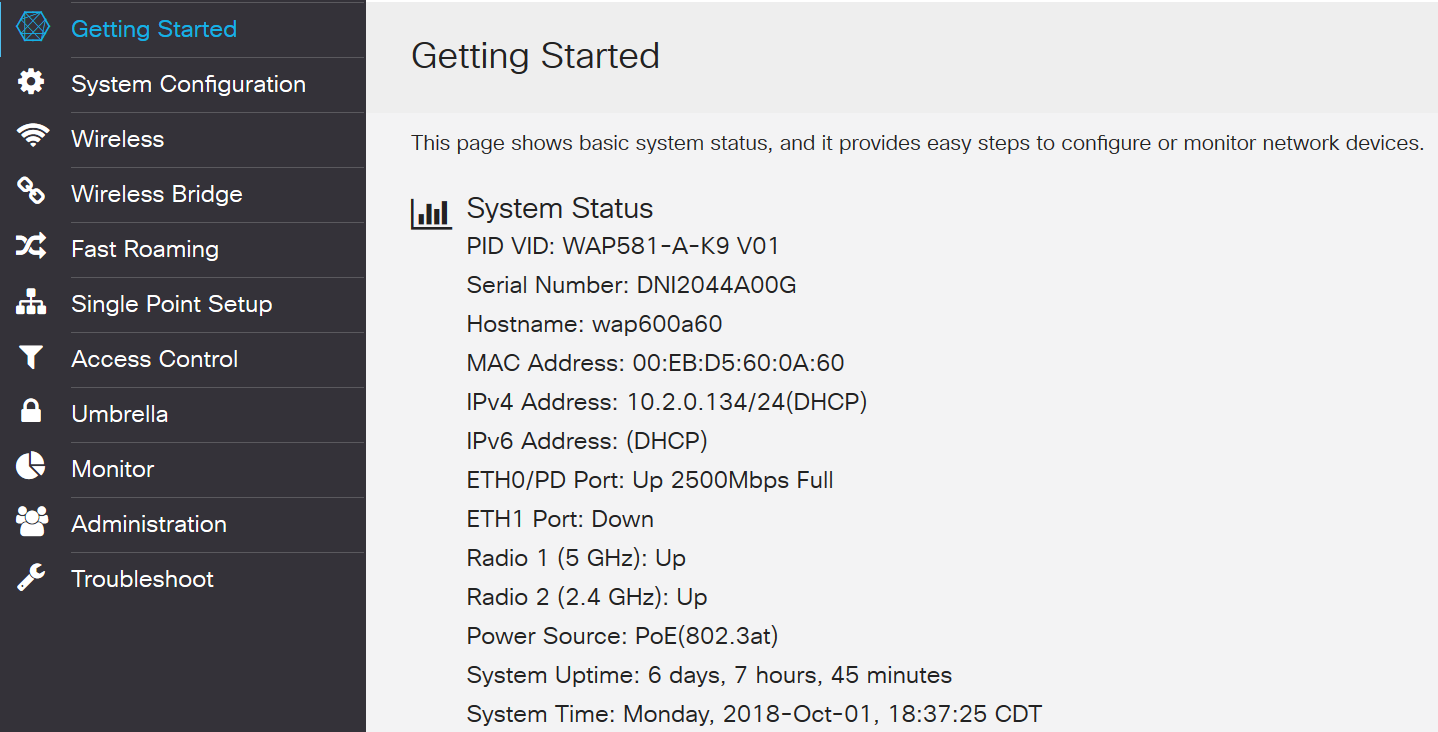
Note: This is a picture from the Web UI of a Wireless Access Point. The navigation pane on the most recent devices typically follow this color scheme.
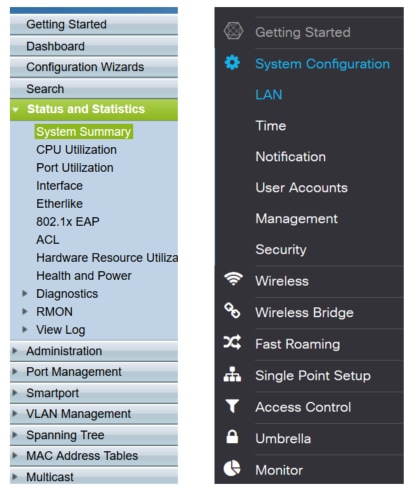
Tip: If a main menu item is preceded by an arrow or icon, select to expand and display the sub-menu of that group. You can then select the desired sub-menu item to open the associated page. When you select one, that area will expand to show the options in that section. Examples of expanded sub-menu options:
Depending on your equipment and if it is updated, your screen may show up a little differently.
At any point, this blue circle with the lines and arrow can be selected to open the navigation pane.

If you would like more details on the navigation pane options, click on the question mark icon on the top right of your Web UI screen.

Once you have selected the question mark icon, a new screen will open and an expandable section will appear that is in the same order as the navigation pane.

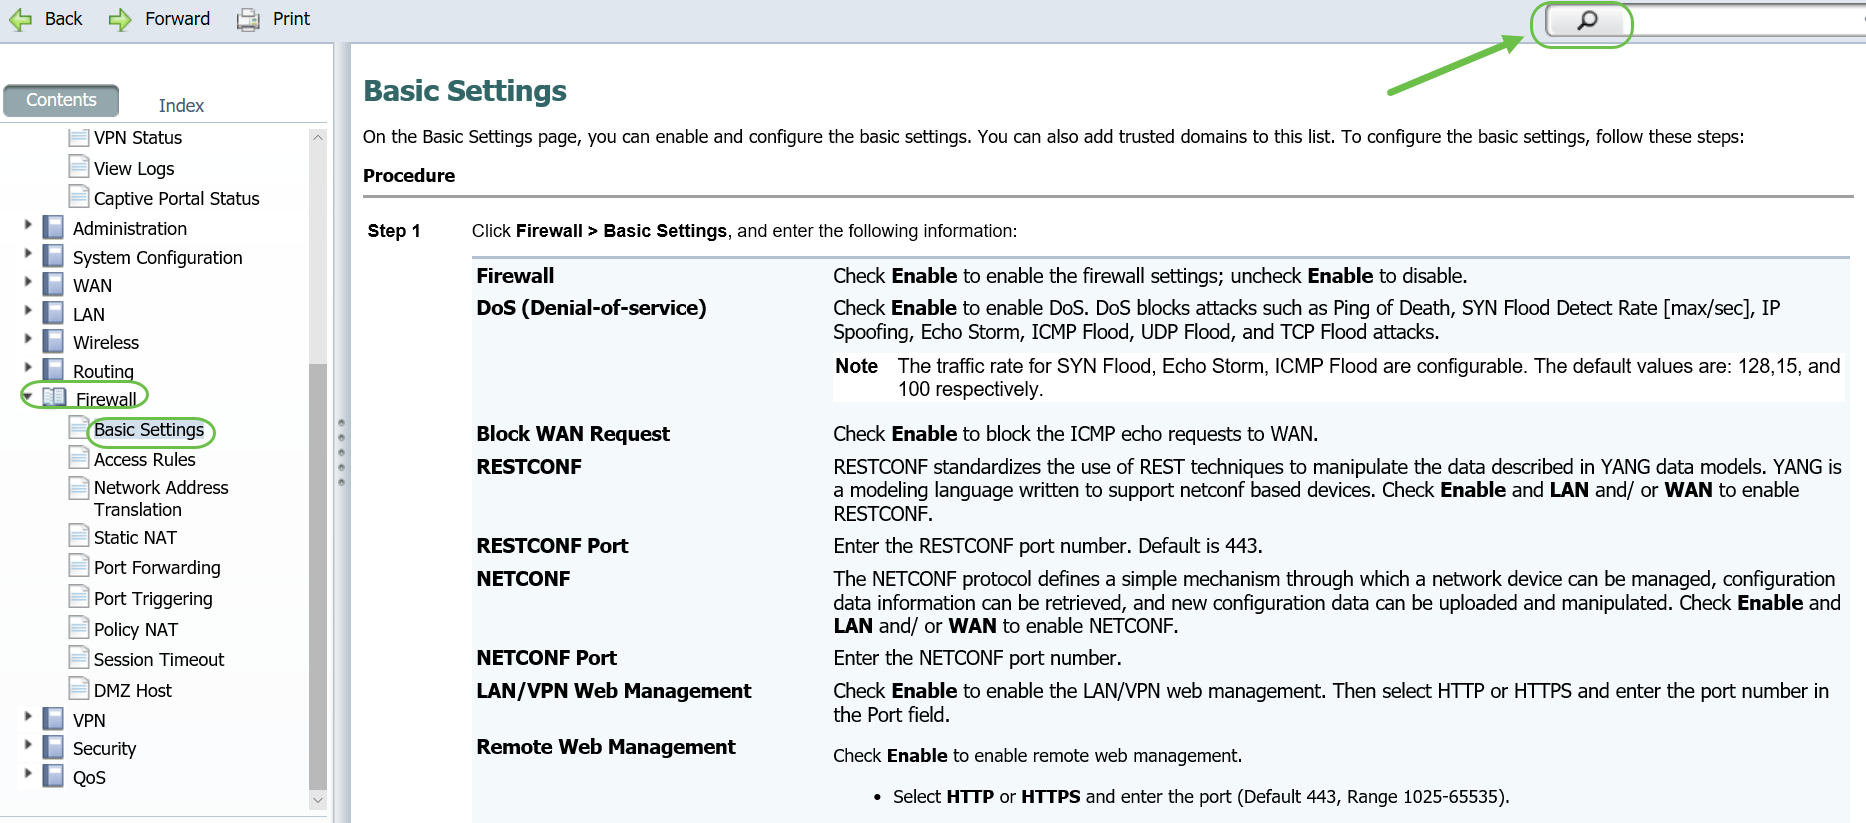
When you select one of the sections, a list of topics will expand beneath it. Select the area you want more information on and it will open up. In this example Firewall > Basic Settings was selected. There is also a search feature on the top right of the screen if you are not sure where to look for a certain question.
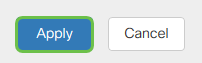
Step 1. Once you complete the configurations for your device, click the Apply button, this saves the configuration for the current session only. This is referred to as a running configuration.
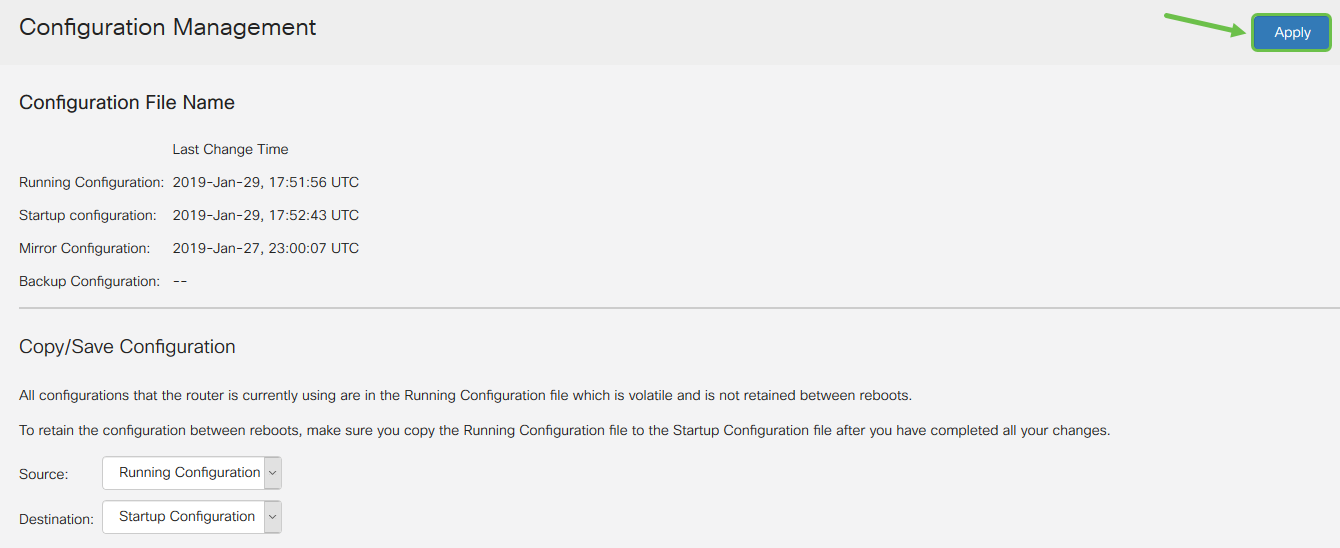
Step 2. Most likely, you will want to save this configuration so that the next time you reboot or boot up the device, it will have the configuration still in place. This is referred to as a startup configuration. To do this, click Save at the top of the page. The Save button blinks after a change has been made to the configuration.

Step 3. Check to make sure that the Running Configuration is selected as source, and Startup Configuration is selected as Destination. Click Apply to save the running configuration to the startup configuration.
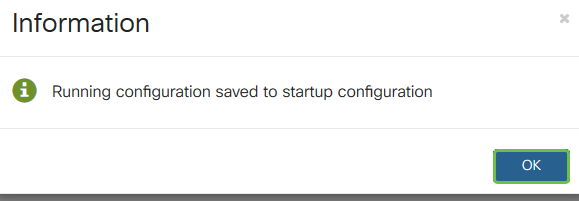
Step 4. When you receive the confirmation, click OK.
Your device should now have the configuration set, even after it has a reboot, restarts, or was unplugged.
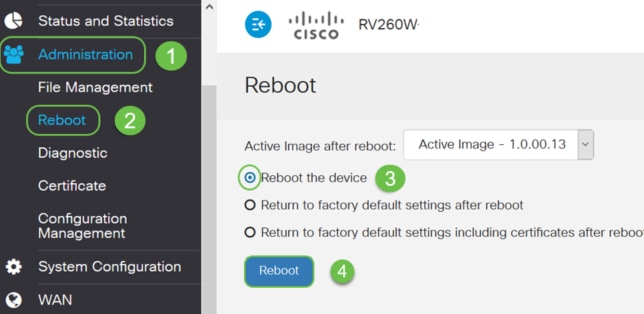
Reboot: A reboot can be a very useful tool and for optimal performance, it should be done on a regular basis. A reboot is necessary to update the active image after you do a firmware or language upgrade. At times a reboot may be necessary to save configurations. It is a simple solution to try if the router is not working correctly or having connection issues.
Navigate to Administration > Reboot. It will take a few minutes for the reboot to be complete. You can check the active image after reboot here to ensure you are running the latest version. If you are not sure if you have the most recent version, you should go to Cisco Support and check under Downloads. The higher the number, the newer the version available.
Reset to Factory Default: At times a reset to factory default settings can be very helpful. There are times when the router may not be running correctly and the solution isn't obvious. Or perhaps you received a router that another person in the company used and you need to clear the configuration and start over.
When Return to Factory Default Settings after Reboot is performed, all configurations are lost and settings go back to default. If you have a complicated configuration you may want to back it up, but keep in mind, a mistake in your configuration may possibly be what is causing the issue in the first place.
Navigate to Administration > Reboot. Select the radio button to Return to factory default settings after reboot. Click Reboot. It will take a few minutes to perform this action.

For more information on troubleshooting techniques, check out this article on troubleshooting. It was written for a router but may help you with other pieces of equipment as well.
Command Line Interface (CLI): Sometimes referred to as terminal. This is utilized as another option for choosing configurations on devices such as routers and switches. If you are experienced, this can be a much simpler way to get things set up since you wouldn’t have to navigate through various Web UI screens. The downfall of this is that you need to know the commands and enter them perfectly. Since you are reading an article for beginners, CLI probably shouldn’t be your first choice. Fortunately, all Cisco Business Devices allow you to navigate with a Web UI screen.
Tip: Many articles that use CLI will provide a link to a similar one that uses the Web UI. You might want to click on that link and configure that way.
Tip: If you find yourself needing to configure using the CLI here are a few things to look for. If you see something in bracket such as this [IP address], that means you don’t enter the words, you enter an actual IP address. If you see [enable | disable] it is showing you what the options are in that place.
For more information on IOS and Configuration Basics, click here.
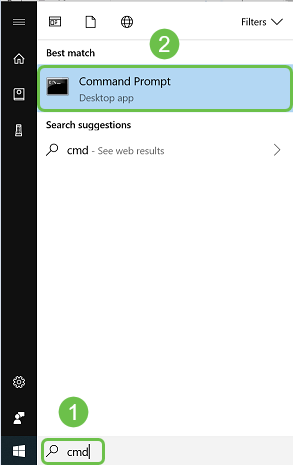
Command Prompt: Command prompt is specific name for the Command Line interface (CLI) that is utilized in Windows on a computer. You can access this to see devices on your network, send a ping, and do a traceroute.
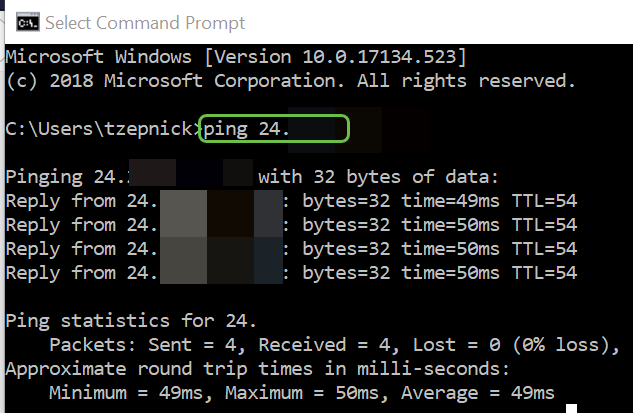
If you want to see if you can connect to a certain IP address you can enter ping and then the IP address. If you receive replies you are connected. This can also be done in the Web UI but many people check connections this way. If you are connected through a VPN, you can ping the local (LAN) IP address of the remote router to see if the VPN connection is working.
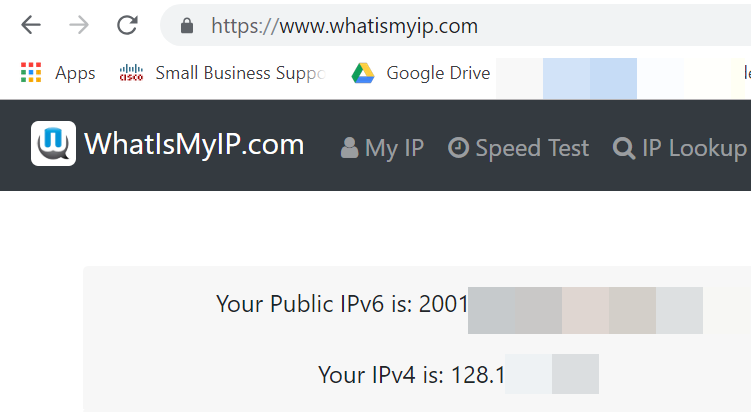
Note: In this example, the public IP address has been blurred for security purposes.
To find the IP address of your device and other information on your network in Windows, right click on the computer icon on the bottom right of your screen.

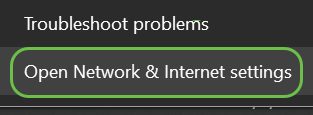
Select Open Network & Internet settings.

Another option would be to click the window icon and then the gear icon on the bottom left of your screen.

Then select Network & Internet.

Either option brings you to this screen. Select View your network properties.
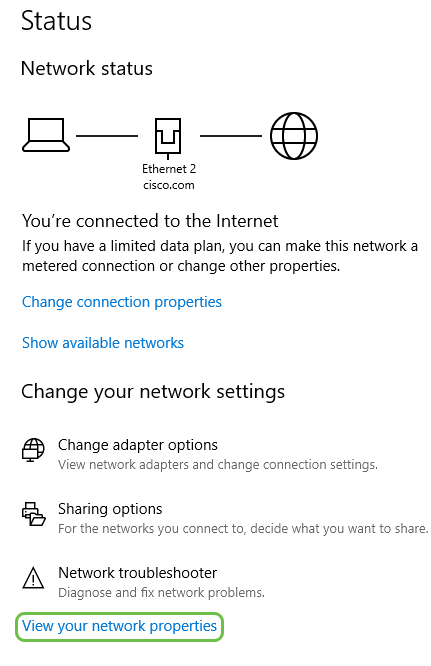
You will then see a list of information. Notice that the Default gateway, the router that lets you access the internet, has the same IP address as the DHCP server and the DNS server. This is often the case. The IPv4 address is the address of the computer you are on.
Note: If you utilize FindIT or Cisco Business Dashboard (CBD), you can look on there to find information about Cisco devices as well.

Dynamic IP Address or DHCP: The simplest of all options, choose this to let your router automatically manage IP address assignment and maintenance. If all are set this way it prevents any two devices from carrying the same internal IP address.
Static IP Address: The most custom solution, static IP addresses are created when precision is required. An administrator is in control and needs to keep them updated. If clients need to find the address this might be a good solution. If you select a static IP address and you have existing routing equipment, you will need to assign an IP address in a different VLAN than the existing equipment.
PPPoE: Point to Point Protocol over Ethernet. Common in Europe. Point to Point Protocol is an older method used for VPN traffic.
L2TP: Common in Europe. Layer 2 Tunneling Protocol is an older method used for VPN traffic.
You can manually assign a local IP address to your computer or to your router so it is in the same network as the rest of the devices and then it does not change. This is only recommended for smaller networks.
If you use Windows as an operating system, right click on the computer icon on the bottom right of your screen.

Select Open Network & Internet settings.
Another option would be to click the window icon and then the gear icon on the bottom left of your screen.

Select Network & Internet.

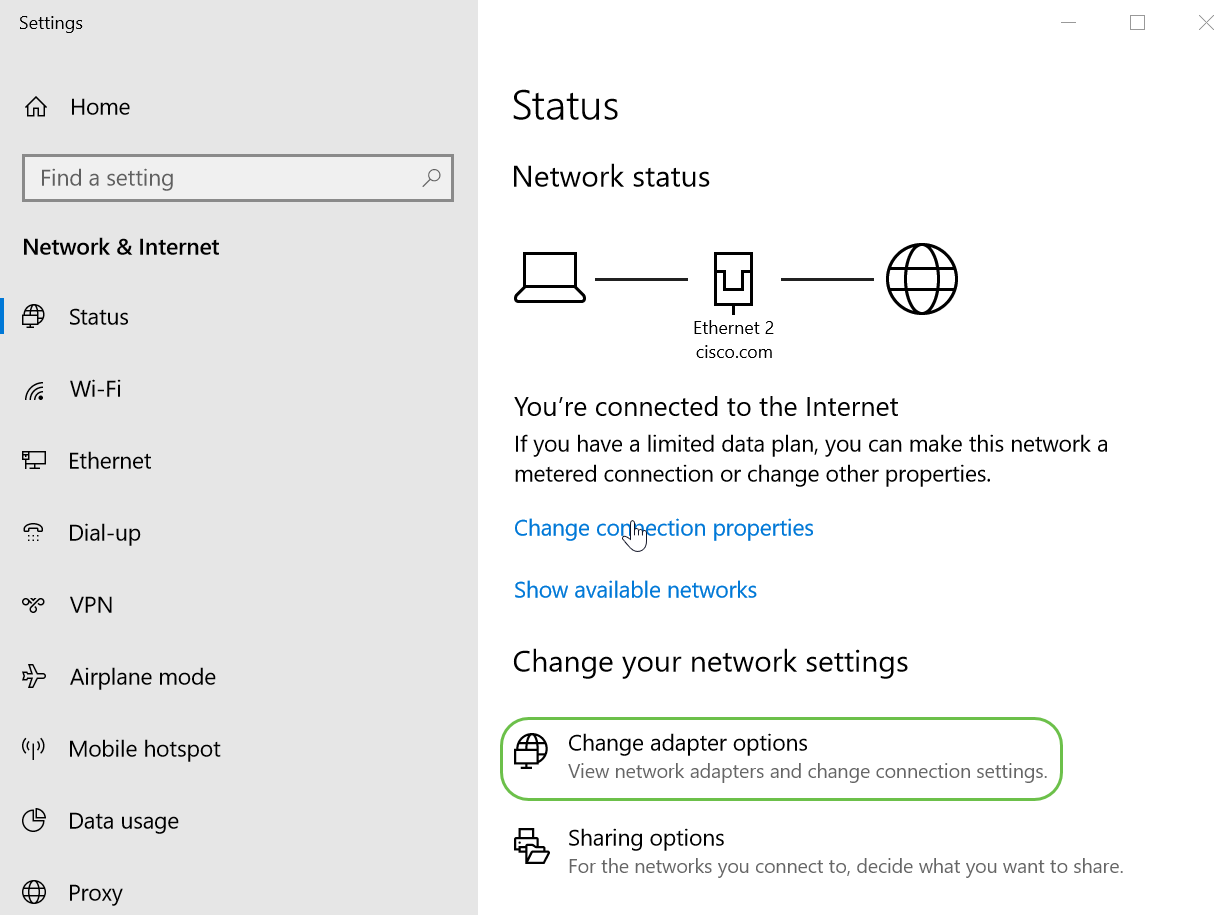
Once you follow one of these options you will see a screen similar to this. Select Change adapter options.
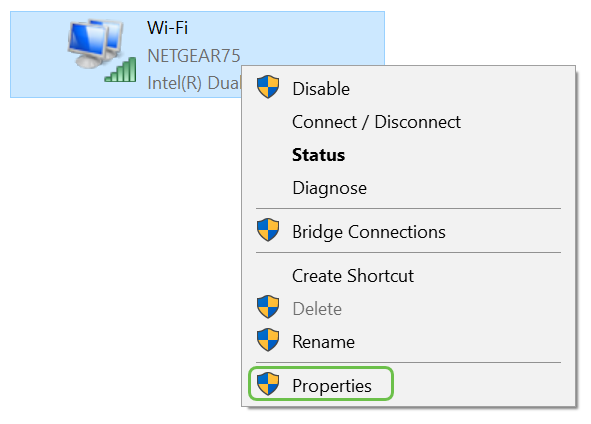
Right click on the network you are using and choose Properties on the dropdown menu. This lets you see what IP is assigned and allows you to change the configuration.
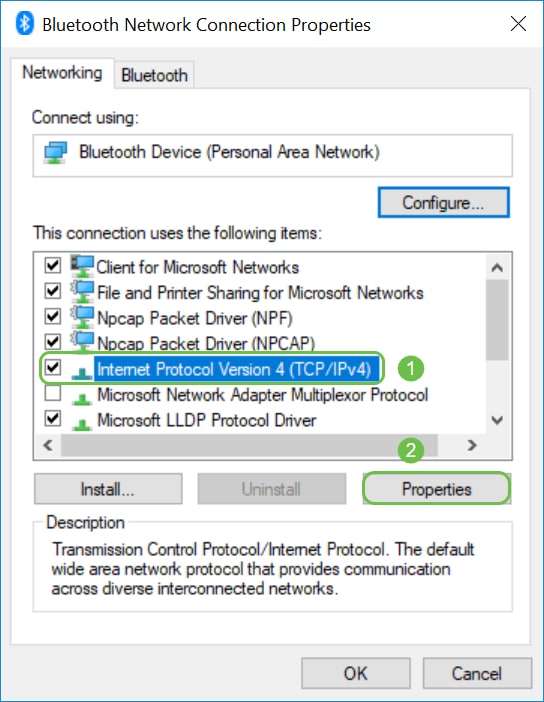
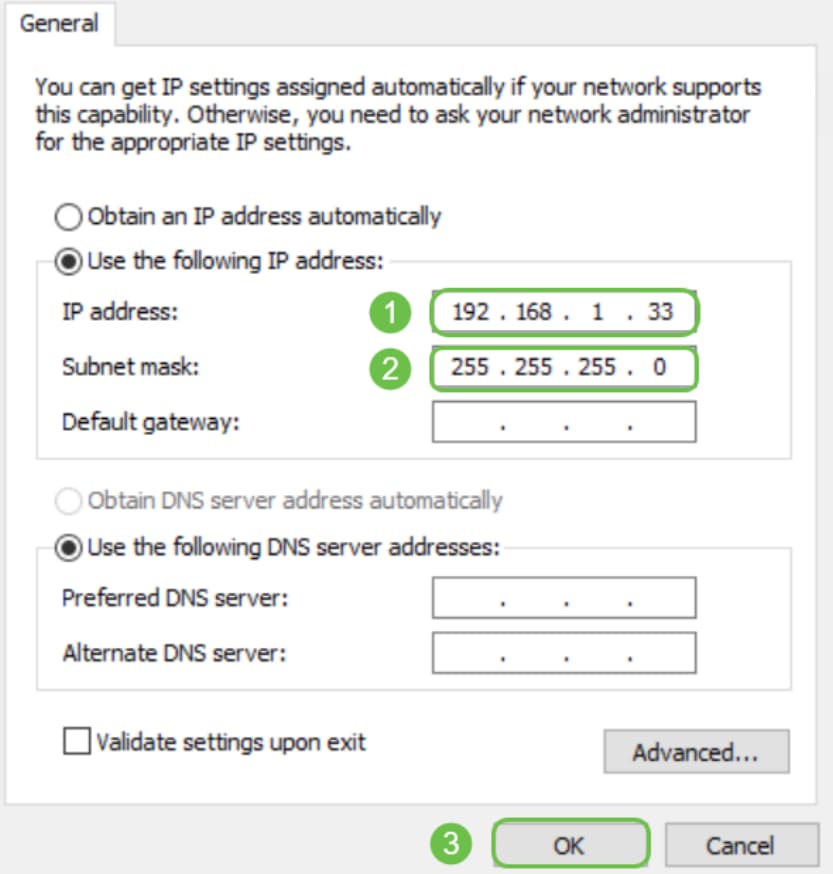
Select Internet Protocol Version 4 (TCP/IPv4). Click Properties.
Enter a local IP address that is in the same network as your other devices. Make sure it isn’t the same as any other devices or that will cause a problem. Click on the spaces in in the Subnet mask box and it will populate automatically. Click OK.
Now your laptop should be able to communicate with your device. Enter the IP address of the device in your web browser, as stated previously.
You can find your current public IP address by doing a search in your web browser. Enter What is my IP address and it should appear as a result. If more than one result is shown, you should check more than one source to make sure it is correct. If only an IPv6 address appears and you need an IPv4 address, simply add that to your search.
We hope this article has given you some top level information to get you started. We encourage you to continue to get to know your network and all of its potential. Cisco Business wants you to have a positive experience configuring and maintaining your network.
For more introductory articles, click on any of the options below.