Konfigurieren des manuellen Keying-Modus für IPsec-Profile auf RV160 und RV260
Ziel
In diesem Dokument wird erläutert, wie Sie das IPsec-Profil für den manuellen Schlüsselmodus auf Routern der Serien RV160 und RV260 konfigurieren.
Einführung
IPsec stellt sicher, dass Sie eine sichere private Kommunikation über das Internet haben. Sie bietet zwei oder mehr Hosts Datenschutz, Integrität und Authentizität für die Übertragung vertraulicher Informationen über das Internet. IPsec wird in der Regel in einem Virtual Private Network (VPN) verwendet, das auf der IP-Ebene implementiert ist, und kann viele Anwendungen unterstützen, denen es an Sicherheit mangelt. Ein VPN wird verwendet, um einen sicheren Kommunikationsmechanismus für vertrauliche Daten und IP-Informationen bereitzustellen, die über ein unsicheres Netzwerk wie das Internet übertragen werden. Es bietet eine flexible Lösung für Remote-Benutzer und das Unternehmen, um vertrauliche Informationen von anderen Parteien im gleichen Netzwerk zu schützen.
Der manuelle Keying-Modus verringert die Flexibilität und die Optionen von IPsec. Der Benutzer muss für jedes konfigurierte Gerät das Schlüsselmaterial und die erforderlichen Informationen zur Sicherheitszuordnung bereitstellen. Die manuelle Keying-Funktion ist nicht gut skalierbar, da sie in der Regel in einer kleinen Umgebung am besten eingesetzt wird.
Diese Methode sollte nur verwendet werden, wenn die Implementierung von Internet Key Exchange (IKE)v1 oder IKEv2 auf diesem Router nicht mit dem des Remote-Routers übereinstimmt oder wenn einer der Router IKE nicht unterstützt. In diesen Fällen können Sie die Schlüssel manuell eingeben. Es wird empfohlen, den automatischen Keying-Modus für IPsec-Profile anstelle des manuellen Keying-Modus zu konfigurieren, wenn Ihr Router sowohl IKEv1 als auch IKEv2 unterstützt und dieselben Standards einhält.
Wenn Sie den manuellen Keying-Modus verwenden, stellen Sie sicher, dass Ihr Key In auf Ihrem lokalen Router der Key Out auf dem Remote-Router ist und der Key In auf Ihrem Remote-Router der Key Out auf Ihrem lokalen Router ist.
Ein Beispiel für die Konfiguration der beiden Router ist:
| Feld | Router A | Router B |
| Eingehender SPI | 100 | 100 |
| Ausgehend SPI | 100 | 100 |
| Verschlüsselung | AES-256 | AES-256 |
| Key-In | ...91bb2b489ba0d28c7741b | ...858b8c5ec355505650b16 |
| Key-Out | ...858b8c5ec355505650b16 | ...91bb2b489ba0d28c7741b |
| Authentifizierung | SHA2-256 | SHA2-256 |
| Key-In | .A00997ec3a195061c81e4 | ...2f2de681af020b9ad5f3e3 |
| Key-Out | ...2f2de681af020b9ad5f3e3 | .A00997ec3a195061c81e4 |
Weitere Informationen zur Cisco IPsec-Technologie finden Sie unter: Einführung in die Cisco IPSec-Technologie.
Um zu erfahren, wie IPsec-Profile mithilfe des automatischen Keying-Modus auf dem RV160 und RV260 konfiguriert werden, klicken Sie hier.
Weitere Informationen zur Konfiguration von Site-to-Site-VPN auf dem RV160 und dem RV260 erhalten Sie hier.
Informationen zum Konfigurieren von Site-to-Site-VPN mithilfe des Setup-Assistenten finden Sie in folgendem Artikel: Konfigurieren des VPN-Setup-Assistenten auf dem RV160 und dem RV260.
Anwendbare Geräte
· RV160
· RV260
Softwareversion
· 1.0.00.15
Konfigurieren des IPsec-Profils mithilfe des manuellen Keying-Modus
Schritt 1: Melden Sie sich beim Webkonfigurationsprogramm an.
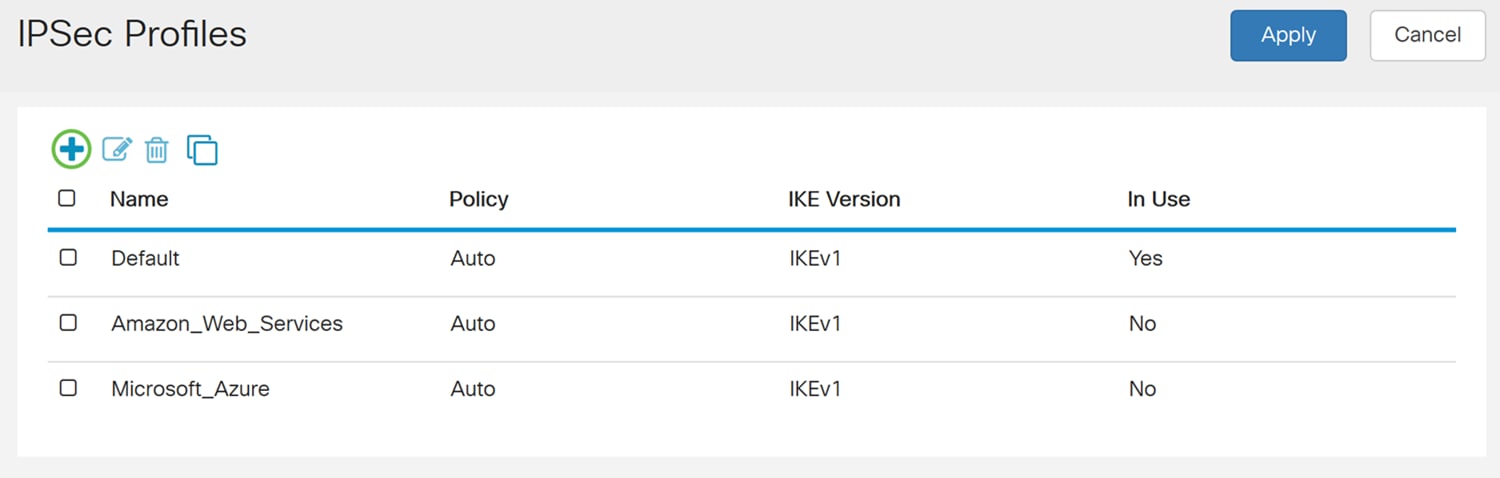
Schritt 2: Navigieren Sie zu VPN > IPSec VPN > IPSec Profiles.

Schritt 3: Drücken Sie das Plus-Symbol, um ein neues IPsec-Profil zu erstellen.
Schritt 4: Geben Sie im Feld Profilname einen Profilnamen ein.

Schritt 5: Wählen Sie Manual (Manuell) als Keying Mode (Keying Mode) aus.

Schritt 6: Geben Sie im Abschnitt "IPSec-Konfiguration" den eingehenden und ausgehenden SPI-Parameter-Index (SPI) ein. Der SPI ist eine Identifizierungs-Tag, die dem Header hinzugefügt wird, während IPsec für das Tunneling des IP-Datenverkehrs verwendet wird. Dieses Tag hilft dem Kernel dabei, zwischen den beiden Datenverkehrsströmen zu erkennen, in denen unterschiedliche Verschlüsselungsregeln und Algorithmen verwendet werden können. Der Hexadezimalbereich liegt zwischen 100 und 100 FFFFFF.
Wir verwenden den Standardwert von 100 für eingehende und ausgehende SPI-Verbindungen.

Schritt 7: Wählen Sie eine Verschlüsselung (3DES, AES-128, AES-192 oder AES-256) aus der Dropdown-Liste aus. Diese Methode bestimmt den Algorithmus, der zum Verschlüsseln oder Entschlüsseln von ESP-/ISAKMP-Paketen verwendet wird. Triple Data Encryption Standard (3DES) verwendet dreimal die DES-Verschlüsselung, ist aber jetzt ein Legacy-Algorithmus. Dies bedeutet, dass sie nur verwendet werden sollte, wenn es keine besseren Alternativen gibt, da sie immer noch ein marginales, aber akzeptables Sicherheitsniveau bietet. Benutzer sollten diese Daten nur dann verwenden, wenn sie für die Abwärtskompatibilität erforderlich sind, da sie für einige "Block-Kollision"-Angriffe anfällig sind. 3DES wird nicht empfohlen, da es nicht als sicher gilt.
Advanced Encryption Standard (AES) ist ein Verschlüsselungsalgorithmus, der sicherer ist als 3DES. AES verwendet eine größere Schlüsselgröße, die sicherstellt, dass der einzige bekannte Ansatz zur Entschlüsselung einer Nachricht darin besteht, dass ein Eindringling jeden möglichen Schlüssel ausprobiert. Es wird empfohlen, AES zu verwenden, wenn Ihr Gerät es unterstützen kann.
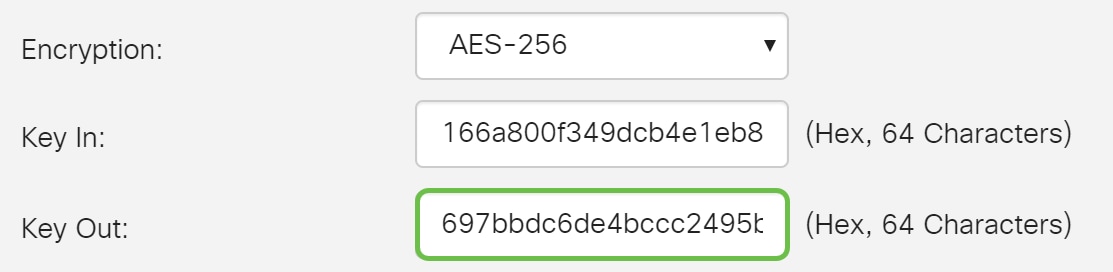
In diesem Beispiel wird AES-256 als Verschlüsselung verwendet.
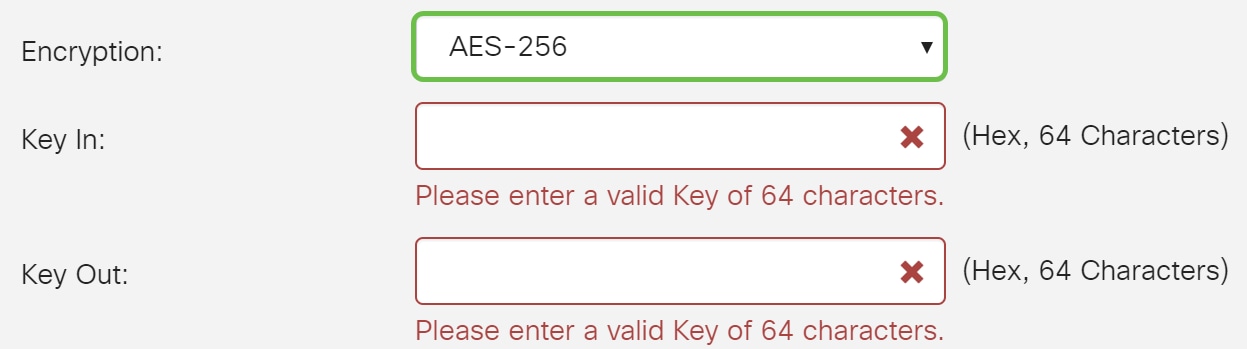
Schritt 8: Geben Sie eine 64-Zeichen-Hexadezimalzahl im Feld Key In ein. Dies ist der Schlüssel zur Entschlüsselung von ESP-Paketen, die im Hexadezimalformat empfangen wurden.
Best Practice: Verwenden Sie einen Zufallshex-Generator, um Ihren Schlüssel ein- und auszuschalten. Stellen Sie sicher, dass der Remote-Router die gleiche Hexadezimalnummer hat.

Schritt 9: Geben Sie eine Hexadezimalnummer mit 64 Zeichen in das Feld "Auslese" ein. Dies ist der Schlüssel zur Verschlüsselung der einfachen Pakete im Hexadezimalformat.
Schritt 10: Die Authentifizierungsmethode legt fest, wie die ESP-Headerpakete validiert werden. Dies ist der Hashing-Algorithmus, der in der Authentifizierung verwendet wird, um zu überprüfen, ob Seite A und Seite B wirklich die sind, die sie angeblich sind.
MD5 ist ein unidirektionaler Hash-Algorithmus, der einen 128-Bit-Digest erzeugt und schneller als SHA1 ist. SHA1 ist ein unidirektionaler Hashing-Algorithmus, der ein 160-Bit-Digest erzeugt, während SHA2-256 ein 256-Bit-Digest erzeugt. SHA2-256 wird empfohlen, da es sicherer ist. Stellen Sie sicher, dass beide Enden des VPN-Tunnels dieselbe Authentifizierungsmethode verwenden. Wählen Sie eine Authentifizierung aus (MD5, SHA1 oder SHA2-256).
In diesem Beispiel wählen wir SHA2-256 aus.

Schritt 11: Geben Sie im Feld Key In eine Hexadezimalzahl mit 64 Zeichen ein. Dies ist der Schlüssel zur Entschlüsselung von ESP-Paketen, die im Hexadezimalformat empfangen wurden.
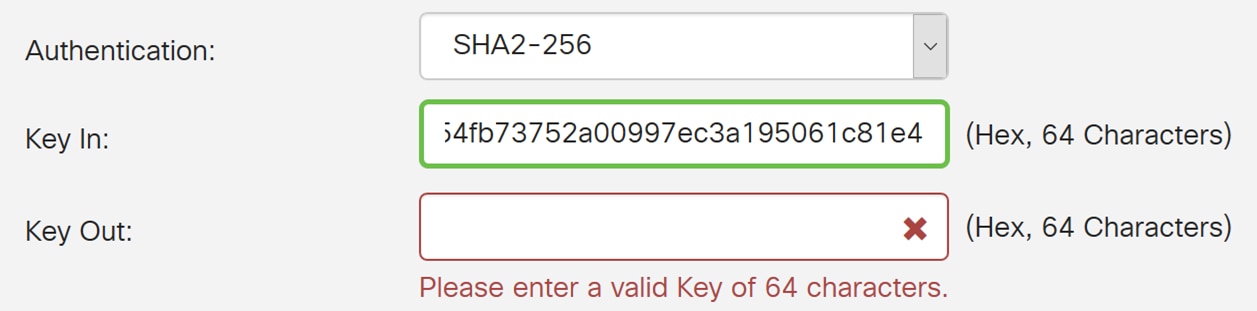
Schritt 12: Geben Sie im Feld Key Out eine Hexadezimalnummer mit 64 Zeichen ein. Dies ist der Schlüssel zur Verschlüsselung der einfachen Pakete im Hexadezimalformat.

Schritt 13: Drücken Sie Apply, um das neue IPsec-Profil zu erstellen.

Schritt 14: Klicken Sie oben auf der Seite auf die Schaltfläche Speichern. Sie werden zur Seite Konfigurationsmanagement weitergeleitet.
Schritt 15: Alle Konfigurationen, die der Router derzeit verwendet, befinden sich in der Konfigurationsdatei Ausführen. Die Konfiguration geht verloren, wenn das Gerät nicht mit Strom versorgt wird oder neu gestartet wird. Durch Kopieren der Running Configuration-Datei in die Startkonfigurationsdatei wird sichergestellt, dass die Konfiguration gespeichert wird. Stellen Sie unter Konfigurationsverwaltung sicher, dass die Quelle Konfiguration ausführt und das Ziel die Startkonfiguration ist. Klicken Sie auf Übernehmen.

Schlussfolgerung
Sie sollten jetzt das IPsec-Profil mithilfe des manuellen Keying-Modus auf Ihrem RV160 oder RV260 erfolgreich konfiguriert haben.
 Feedback