Cisco Secure Access Free Trial Users Guide
Available Languages
Bias-Free Language
The documentation set for this product strives to use bias-free language. For the purposes of this documentation set, bias-free is defined as language that does not imply discrimination based on age, disability, gender, racial identity, ethnic identity, sexual orientation, socioeconomic status, and intersectionality. Exceptions may be present in the documentation due to language that is hardcoded in the user interfaces of the product software, language used based on RFP documentation, or language that is used by a referenced third-party product. Learn more about how Cisco is using Inclusive Language.
Welcome to Cisco Secure Access!
This Free Trial Users Guide provides information on the basic steps we recommend you take during your free trial to experience the advanced capabilities of Secure Access.
There are many security functions and configurations not covered in this guide that can be deployed depending on how deep you want to go during your free trial. You will find detailed information and instructions in the Secure Access Help Center.
If you have not already taken the online tour, we think you will find the self-paced interactive Secure Access Product Tour very informative.
Start with the Pre-Onboarding Checklist
The best place to start is with our Cisco Secure Access Pre-Onboarding Checklist. This checklist details key decisions needed before logging into Secure Access for the first time.
Depending on your organization, you may need to reach out to several different departments for the specifics needed for the trial setup.
Get our Pre-Onboarding Checklist.
Getting the most out of your trial
The following sections detail the basic tasks you should complete to ensure that you get the most out of your trial. We’ve designed this sequence of activities to give you a taste of what Secure Access can do for you.
Use the table of contents at left to quickly jump to specific sections.
Log into your organization’s Secure Access free trial account using the link sent to your email.
Once your account is confirmed, you can log in to Secure Access at https://dashboard.sse.cisco.com/org/<org_number>. We suggest you bookmark your organization’s url.
Secure Access uses single sign-on authentication through Security Cloud Sign On (SCSO).
In the SCSO window, enter the same email address as the one used in the invitation to join the Secure Access trial. Your Secure Access account and the SCSO account must use the same email address.
Note: You will need an SCSO account to sign in. If you already have an SCSO account, that can be used. If you do not, you will be stepped through the Duo enrollment process to create the initial account.
Learn more in the SSO Quick Start Guide.
Share access with other network or IT system administrators in your organization by inviting them to create an account.
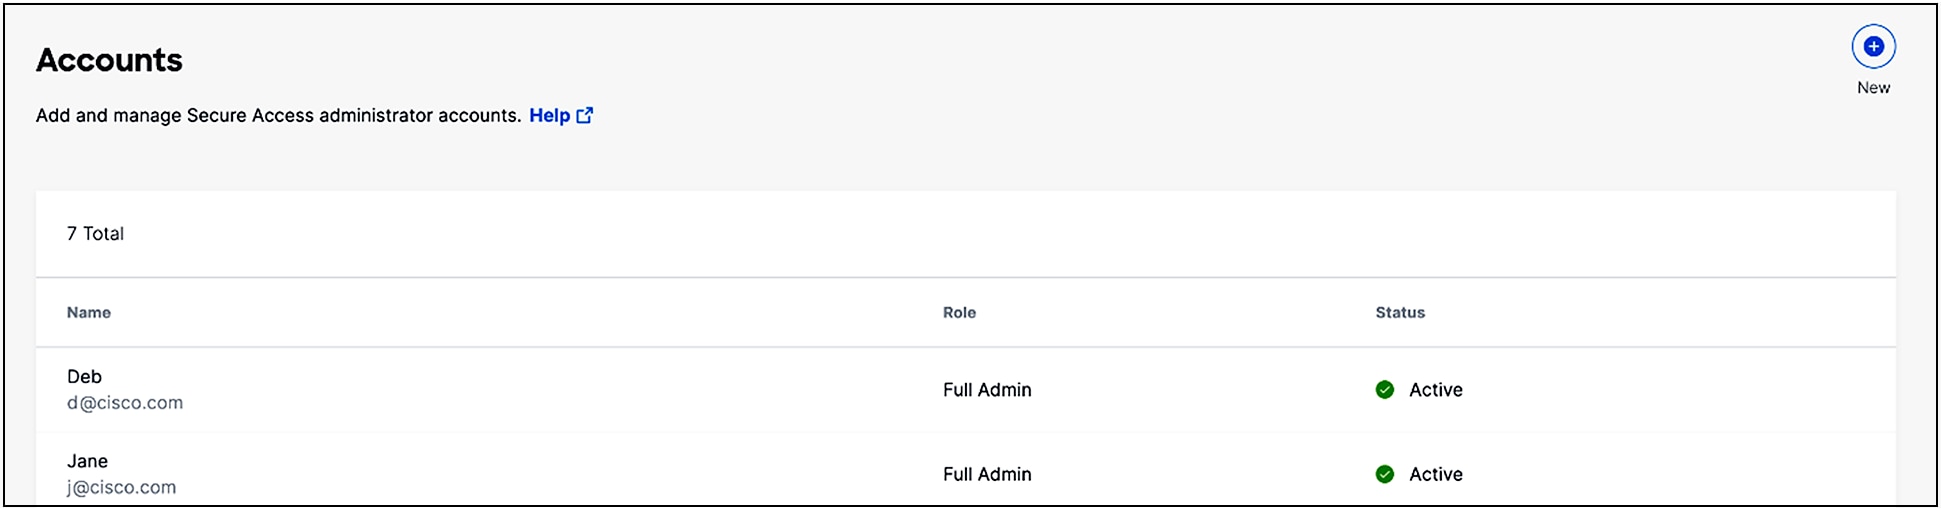
As a “Full Admin”, you can add admins to your free trial instance of Cisco Secure Access by adding a new account and assigning a role that sets that account's permissions to view, write, change, and delete Secure Access configurations.
1. Navigate to Admin > Accounts and click New.
2. Enter the user's email address, choose a User Role, and then click Send Confirmation.
User roles are:
Full Admin—full access to Secure Access, including the ability to add users and assign roles.
Read-Only—access to only view pages and reports.
Security Administrator—the same access as the Full Admin role but does not have access to Data Loss Prevention (DLP) classifications, DLP policies, or the DLP Report.
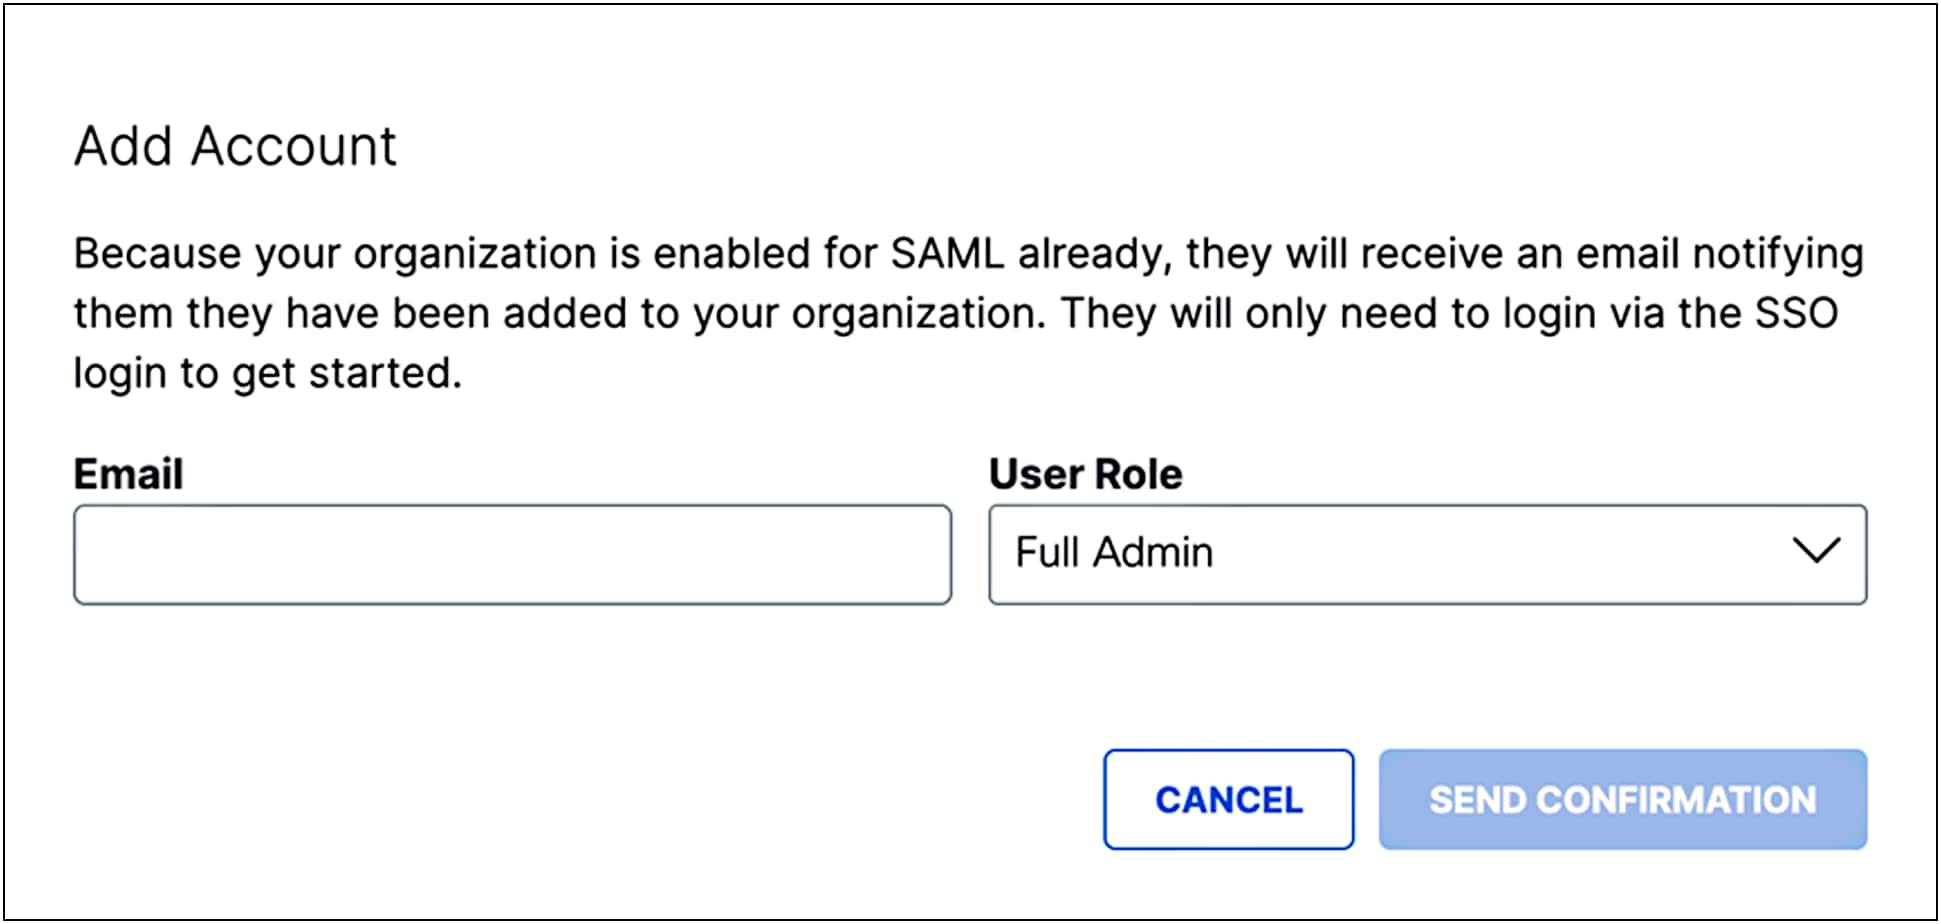
3. A message is sent to the new user's email address either inviting them to log in (if you configured SSO for admin logins) or providing instructions for setting a password (if not configured for admin SSO). When the new user clicks Confirm Invite, Secure Access redirects them to the Secure Access login page.
After a user signs in, the user has access to your instance of Secure Access at the user role you set for them. Once the account is added, its status is Active and you can edit the account.
More information on Managing Accounts.
Secure Access connects and secures traffic from IPsec tunnels established by various network devices.
Note: A network device must have the capability to configure an IPsec (Internet Protocol Security) IKEv2 (Internet Key Exchange, version 2) tunnel and connect to Secure Access.
Click for information on IPsec Tunnel Requirements and Supported Devices for Setting Up IPsec Tunnels.
Add a Network Tunnel Group
Provisioning high-availability network tunnel groups at a hub site allows a group of tunnels to share a primary and secondary hub. Network devices capable of establishing an IPsec tunnel can join a network tunnel group using the credentials created when the tunnel group is deployed.
Each network group has two data center hubs (primary and secondary) that can connect to multiple tunnels.
To enable tunnel redundancy and high availability for IPsec tunnels connected to data center hubs, follow these three steps to add a network tunnel group to Cisco Secure Access.
1. In Secure Access, configure the attributes of the tunnel group and deploy the tunnel group. Once the tunnel group is deployed, the initial state of the tunnel group changes from Unestablished to Inactive.
2. Next, configure a tunnel in the network device that sends traffic to Secure Access. Use the deployed tunnel group's attributes to associate the network tunnel to the tunnel group. The network tunnel group attributes required by network devices to establish the IPsec IKEv2 tunnel are: tunnel ID, tunnel passphrase, and IP Address of the Secure Access data center.
3. Enable user computers to connect securely to the tunnel and begin to send traffic to Secure Access. Once Secure Access receives and logs traffic from a network tunnel, the tunnel state is considered Active. View the events for the tunnel in the Secure Access Overview and Activity Search.
Adding a Network Tunnel, Step-by-Step
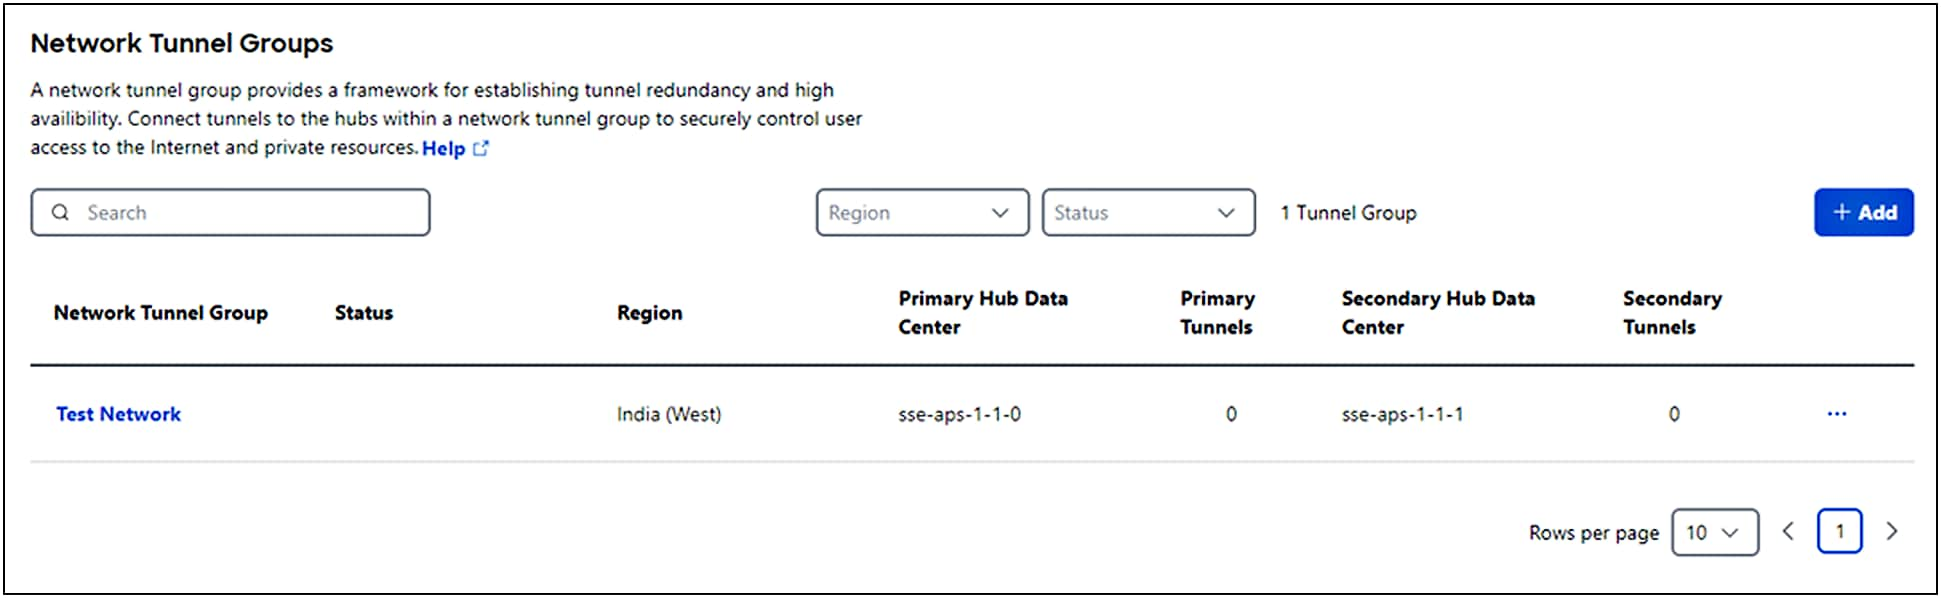
1. Navigate to Connect > Network Connections > Network Tunnel Groups and click on the blue Add button.
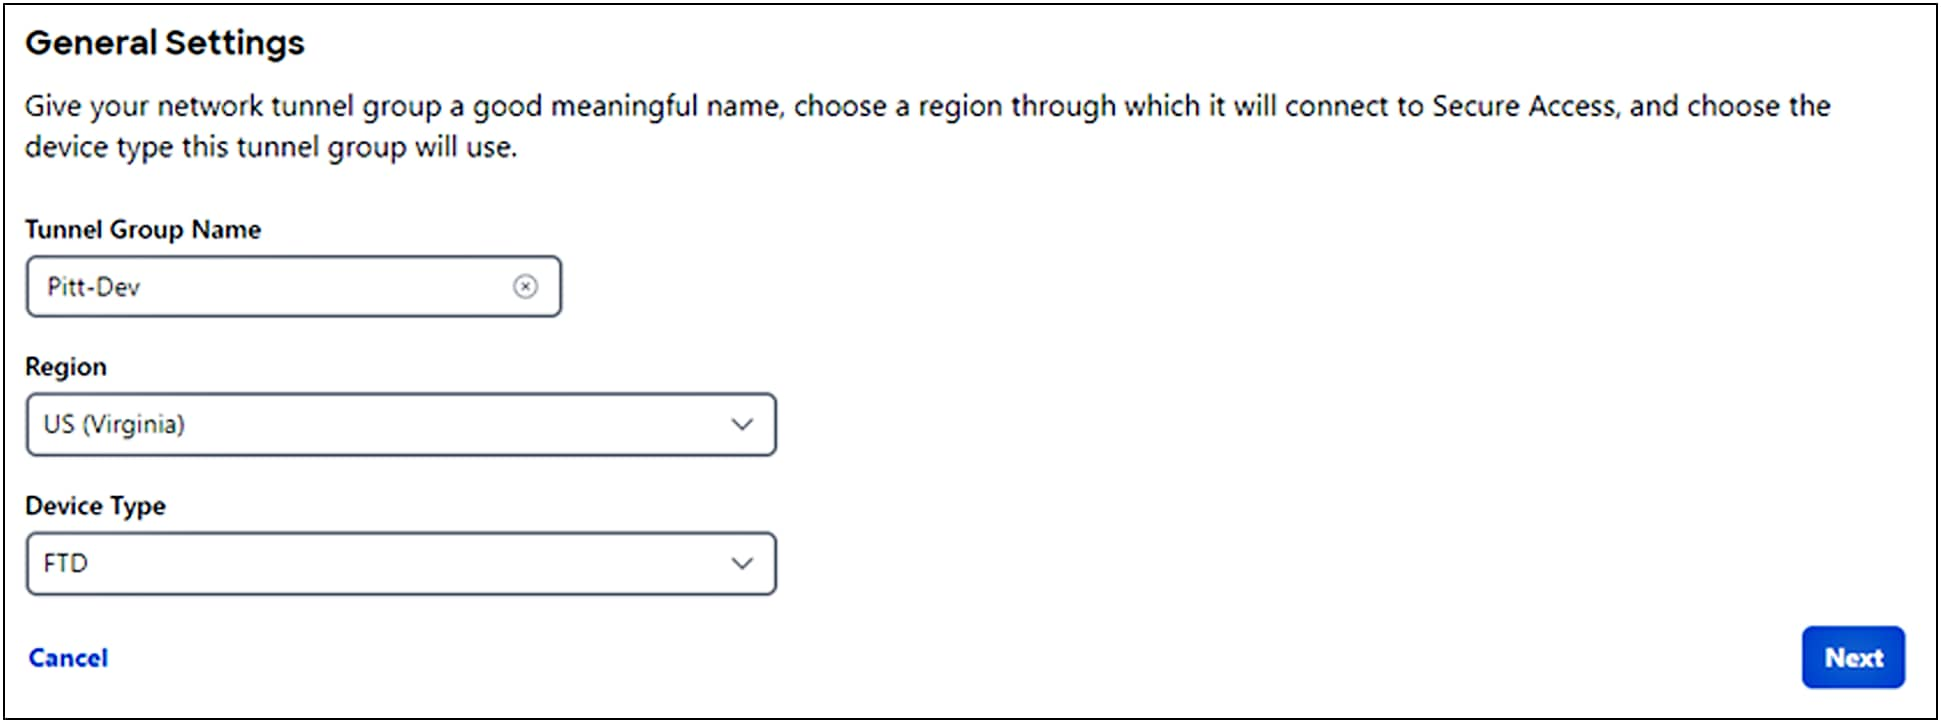
2. Enter the General Settings for your tunnel group. First give your tunnel group a meaningful name, then select a Region and a Device Type. Click Next.
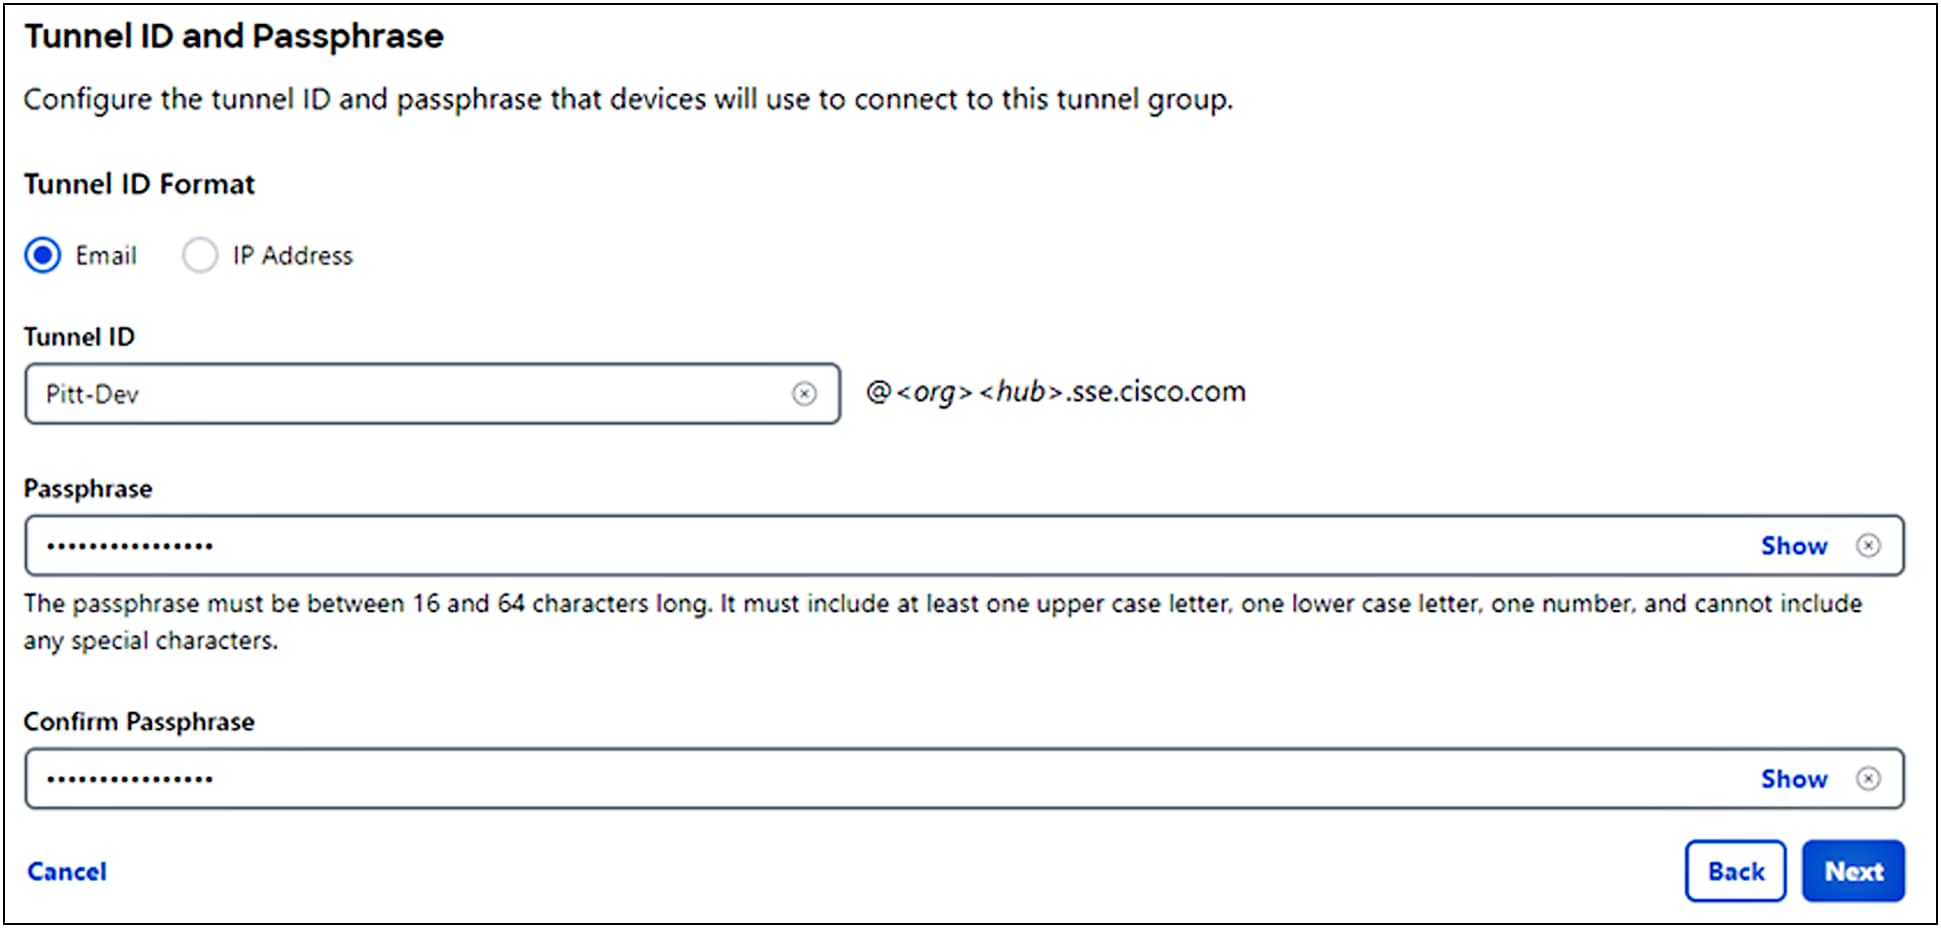
3. Enter the Tunnel ID and Passphrase for your tunnel group.
1. Choose a Tunnel ID Format, either Email or IP Address.
◦ If the choice is email, use the format @.sse.cisco.com. Use the name you gave the tunnel group in General Settings.
◦ If the choice is IP Address, include both a primary and secondary IP address.
2. Enter a Passphrase.
◦ A tunnel passphrase is between 16 and 64 characters in length. The passphrase must contain at least one upper case letter, one lower case letter, and one number.
◦ The passphrase cannot include any special characters.
4. Confirm your passphrase, then click Next.
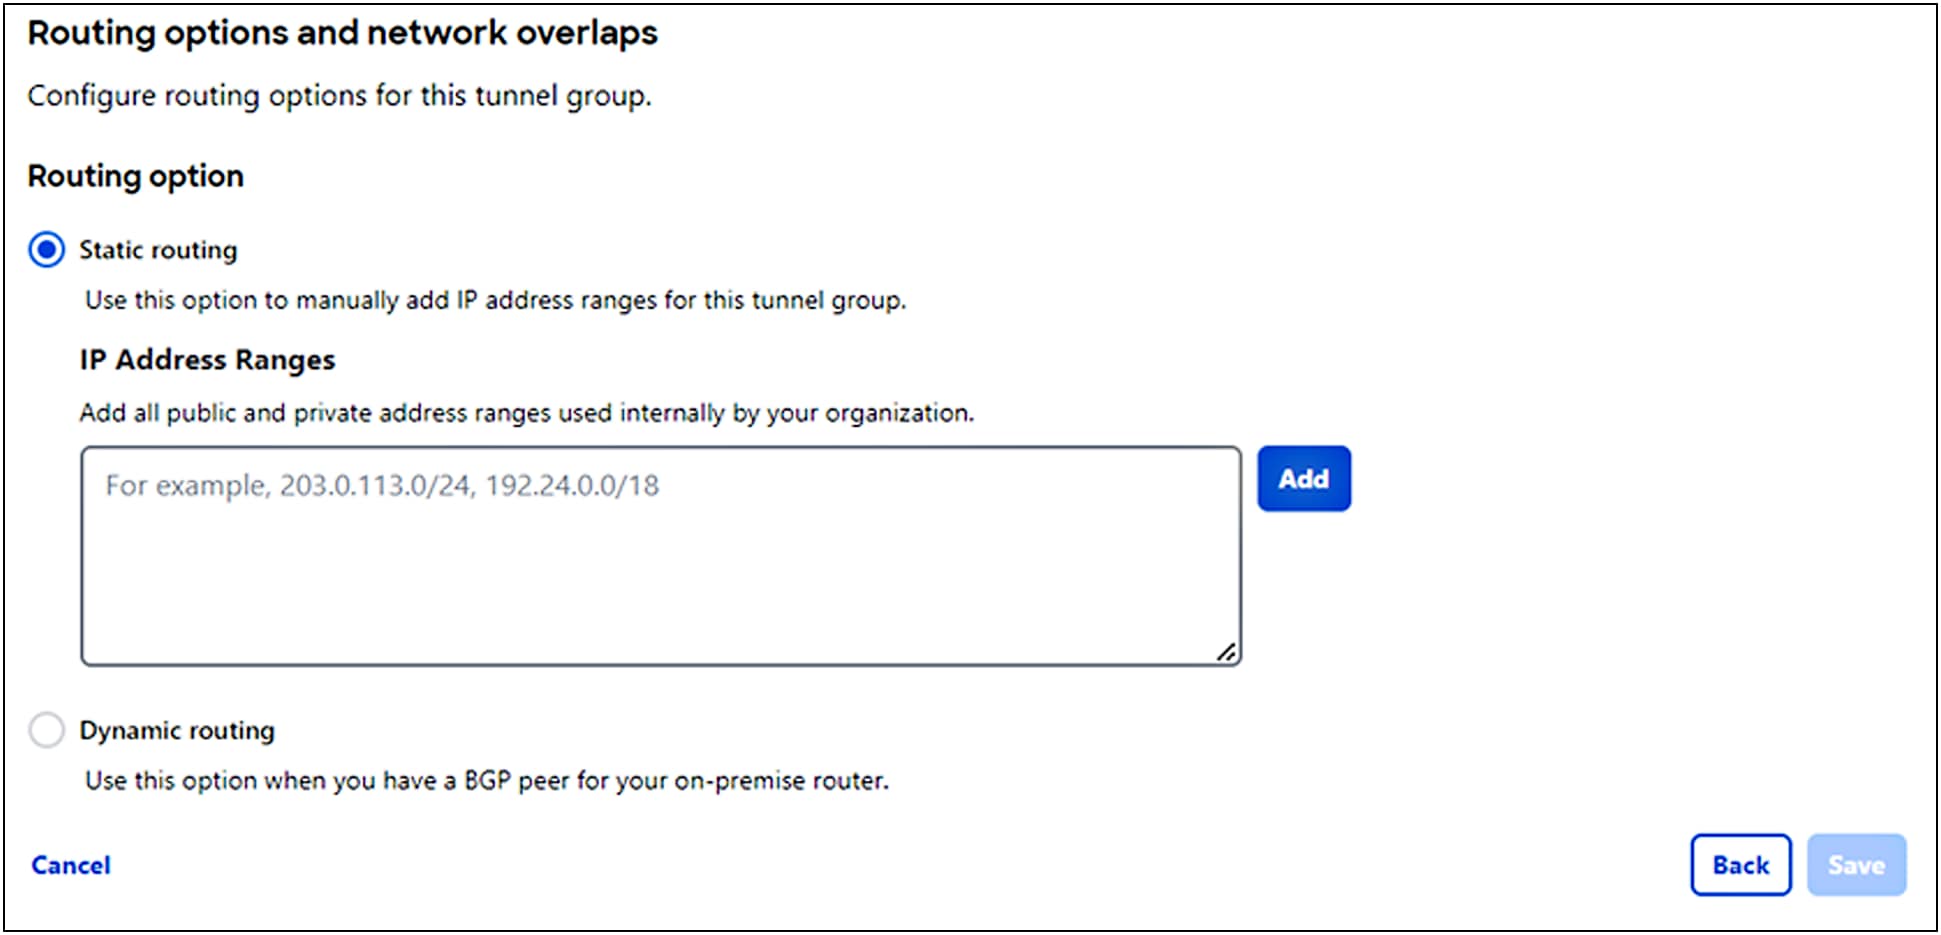
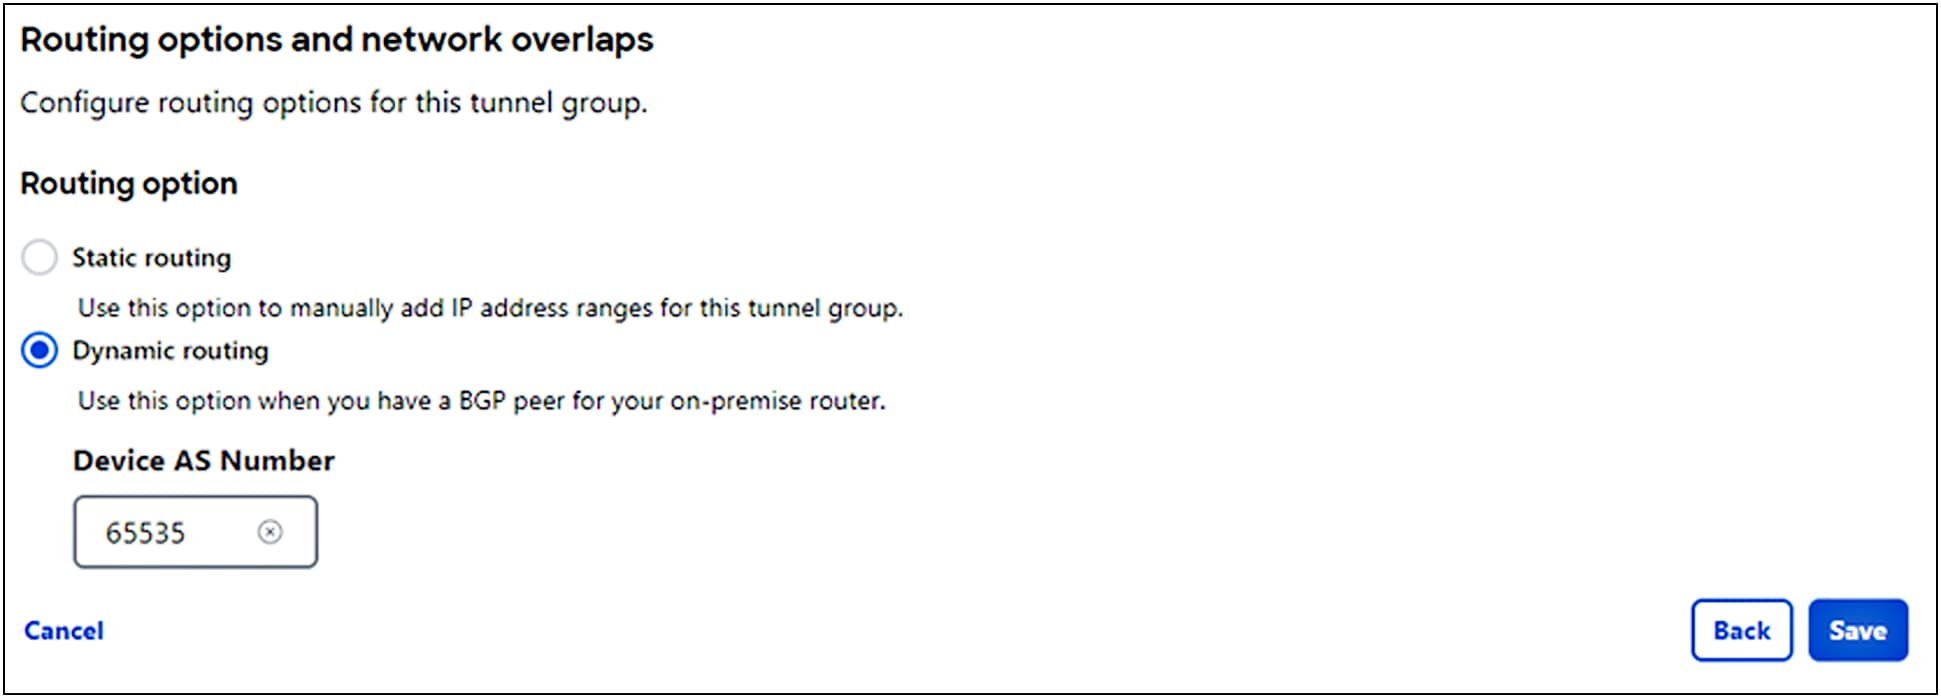
5. Choose the type of Routing for your tunnel group.
● Choose Static routing to manually add IP address ranges for this tunnel group. You should add all public and private address ranges used internally by your organization.
● Choose Dynamic routing when you have a BGP peer for your on-premise router. You'll need the router's autonomous system (AS) number to use dynamic routing.
● Click Next.
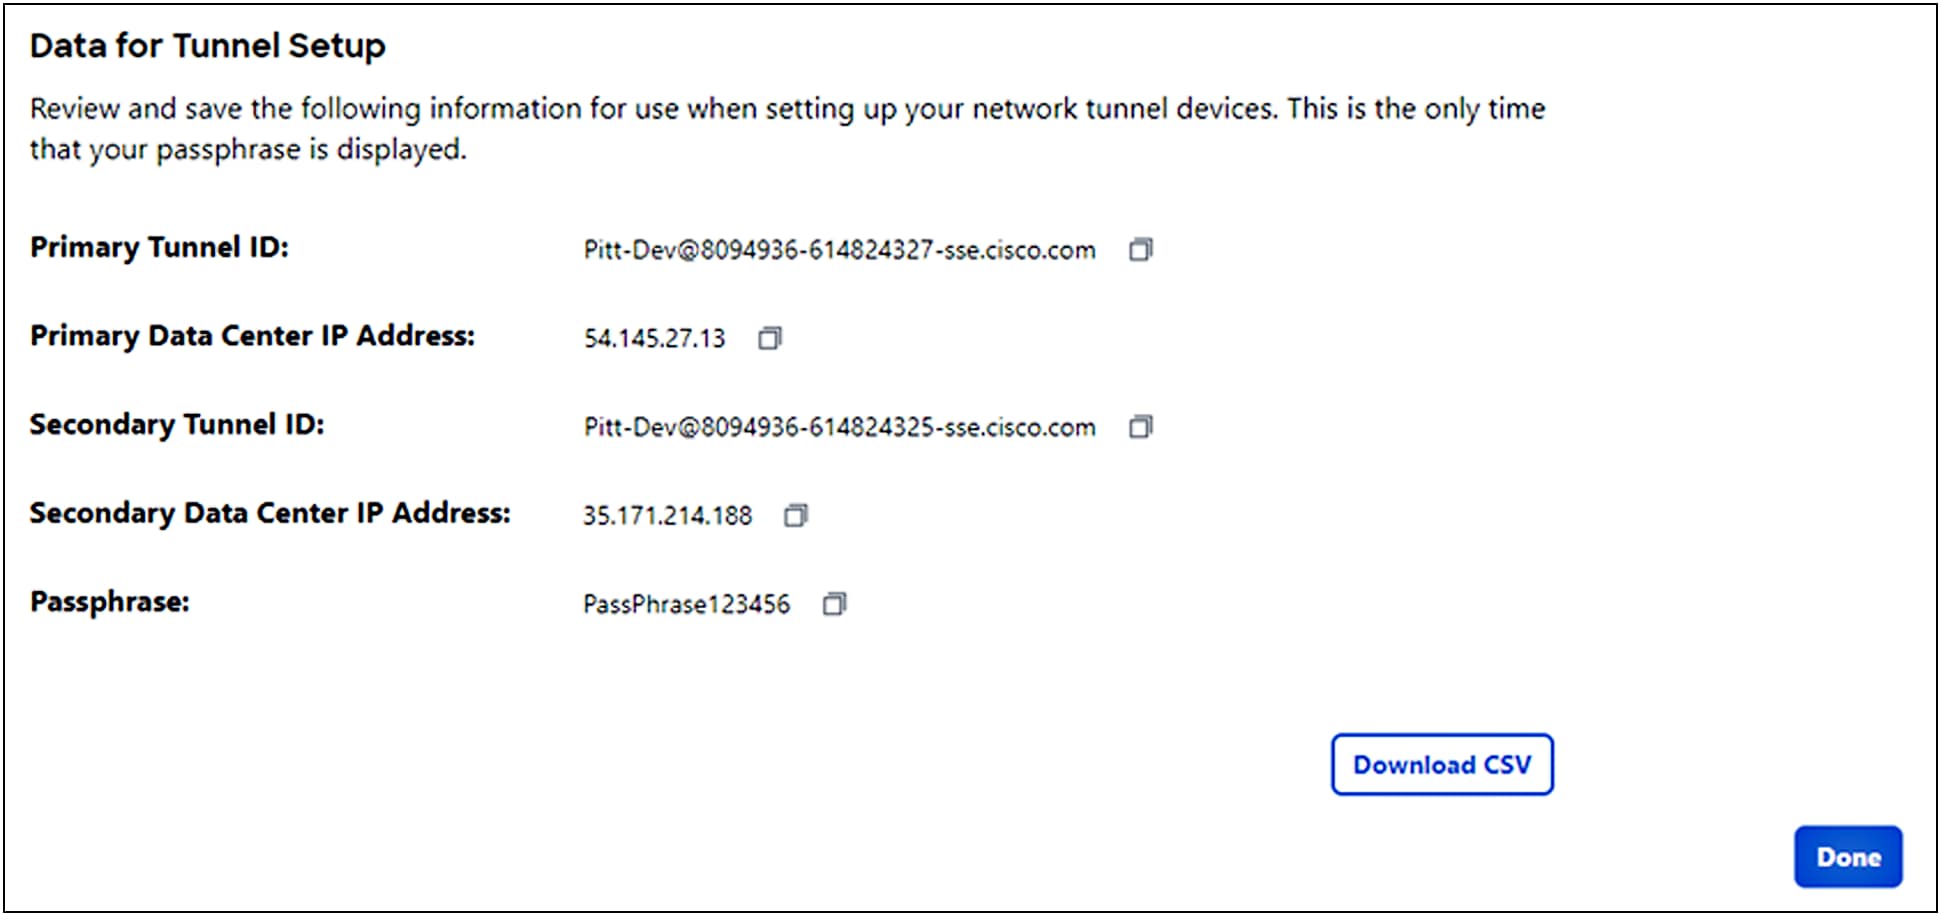
6. On the Data for Tunnel Setup page, review the network tunnel information for completeness. Click the Download CSV button to save the information to configure and deploy a tunnel in a network device.
Note: This is the only time that your passphrase is displayed.
Configure Tunnel on Network Device
Follow the steps in one of the network device guides to deploy an IPsec tunnel with Secure Access. For more information see Network Tunnel Configuration.
Verify Tunnel Traffic in Secure Access
After you add a tunnel to Cisco Secure Access and deploy a network tunnel with a compatible network device, confirm that Secure Access receives and logs traffic from the tunnel.
Navigate to Overview and find your configured tunnel. Verify that the status of the tunnel is Active. For more information, see Secure Access Overview.
Learn more about Network Tunnel Groups and Network Tunnels.
Add an IP address or address range for a DNS server so that your DNS traffic routes through the DNS servers managed by Secure Access.
Navigate to Connect > Remote User Connectivity and click Manage DNS Servers.
1. Click Add.
2. Enter a label for DNS server in Name and for DNS Server 1 provide the IP address of the primary DNS server. If you have a secondary DNS server, add an IP address for DNS Server 2.
3. Click Save and then click Close.
Provision and Enroll Users and Groups
Provision users and groups in Secure Access from your organization's identity provider (IdP) or by importing a comma separated values (CSV) file with the users and groups.
Note: Before enrolling users, the internal DNS server(s) should be defined.
Once you add users and groups to Secure Access, you can protect and monitor the traffic sent from the user devices and manage the resources that are available to the users in your organization.
Secure Access supports various methods to provision users and groups. Follow the instructions for the method you want to use:
● Integrate with SAML IdP for ZTA authentication
● Decide how to add users and groups to Secure Access
● Using SCIM:
◦ Provision Token for Identity Provider
◦ Provision Users and Groups from Okta
◦ Provision Users and Groups from Azure AD
View Users and Groups in Secure Access
After you have added your users, you can view them in Secure Access by navigating to Connect > Users and Groups, then click Users to see users and their details.
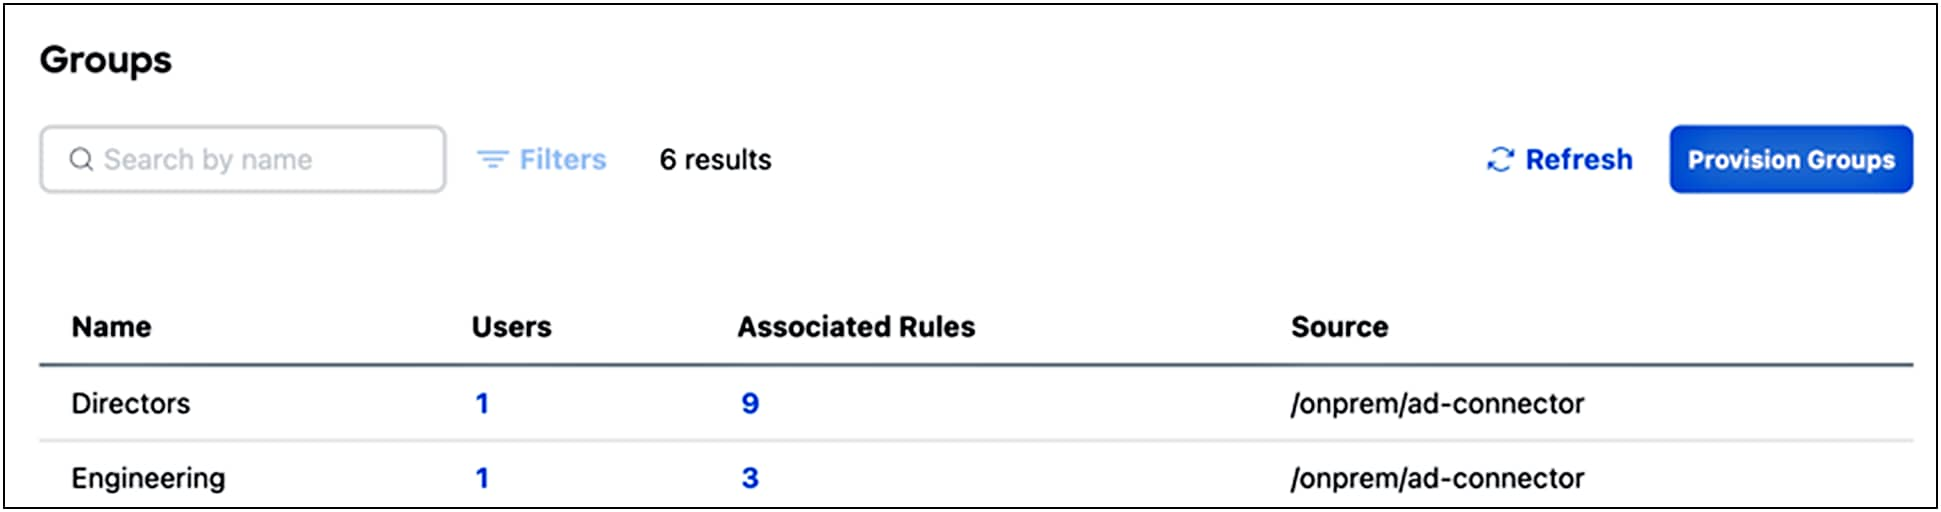
View groups you have provisioned by navigating to Connect > Users and Groups and then click Groups.
You’ll see the table below. Click on the group name to see group details.
Secure Access works to connect and protect your users in two ways: Secure Private Access (securing your apps and resources) and Secure Internet Access (protecting all your inbound and outbound traffic across the web).
Get Started with Private Access Rules
Private access rules control and secure access to internal resources and applications that are private and should not be accessed by the general public.
Traffic to private destinations is blocked by default. You must create rules to allow traffic to private destinations.
Click for detailed information and instructions on setting up Private Access Rules.
Get Started with Internet Access Rules
Internet access rules specify how traffic to internet destinations should be handled.
Traffic to internet destinations is allowed by default. You must create rules to block access to internet destinations, either for acceptable use or security reasons; to warn users before you allow access; or to isolate specified internet traffic.
Click for detailed information and instructions on setting up Internet Access Rules.
A Virtual Private Network (VPN) connection establishes a secure tunnel between endpoints over a public network such as the Internet. This section describes how to create VPN profiles to allow for configuration of remote user connections through a VPN.
Note: Before creating a VPN profile, you need to define the IP Pools.
Step 1. General Settings
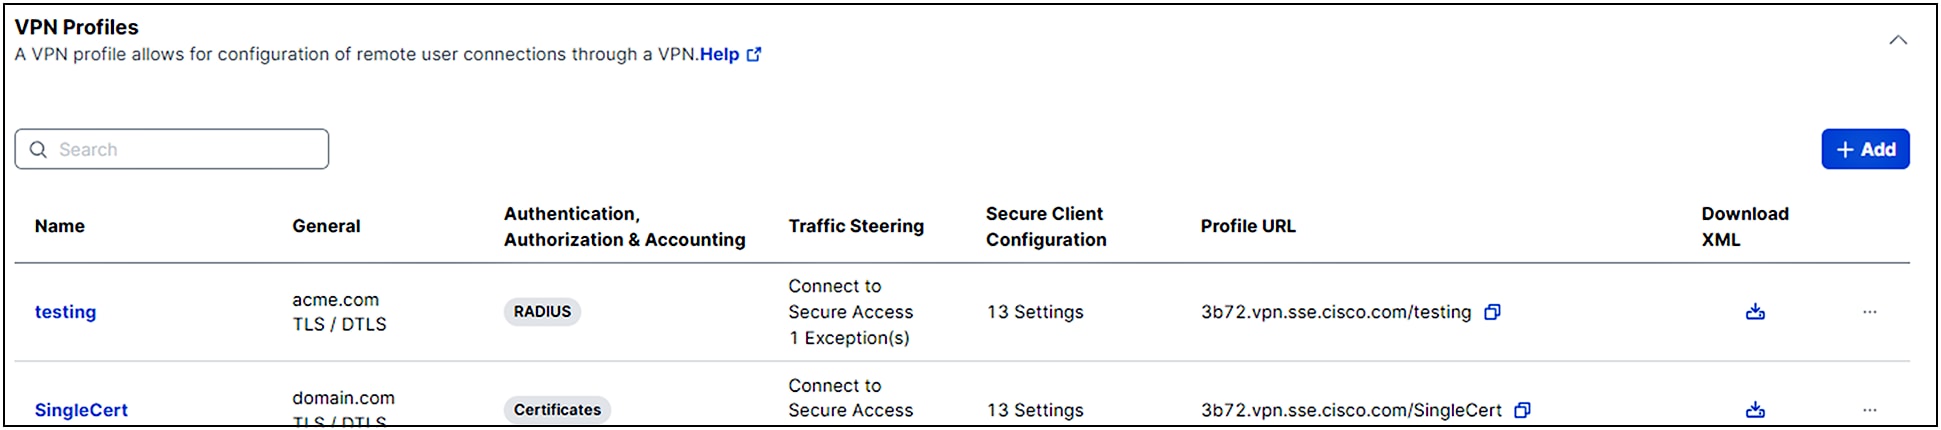
1. Navigate to Connect > End User Connectivity > Virtual Private Network. For VPN Profiles, click Add. Then enter a meaningful VPN Profile name for this profile.
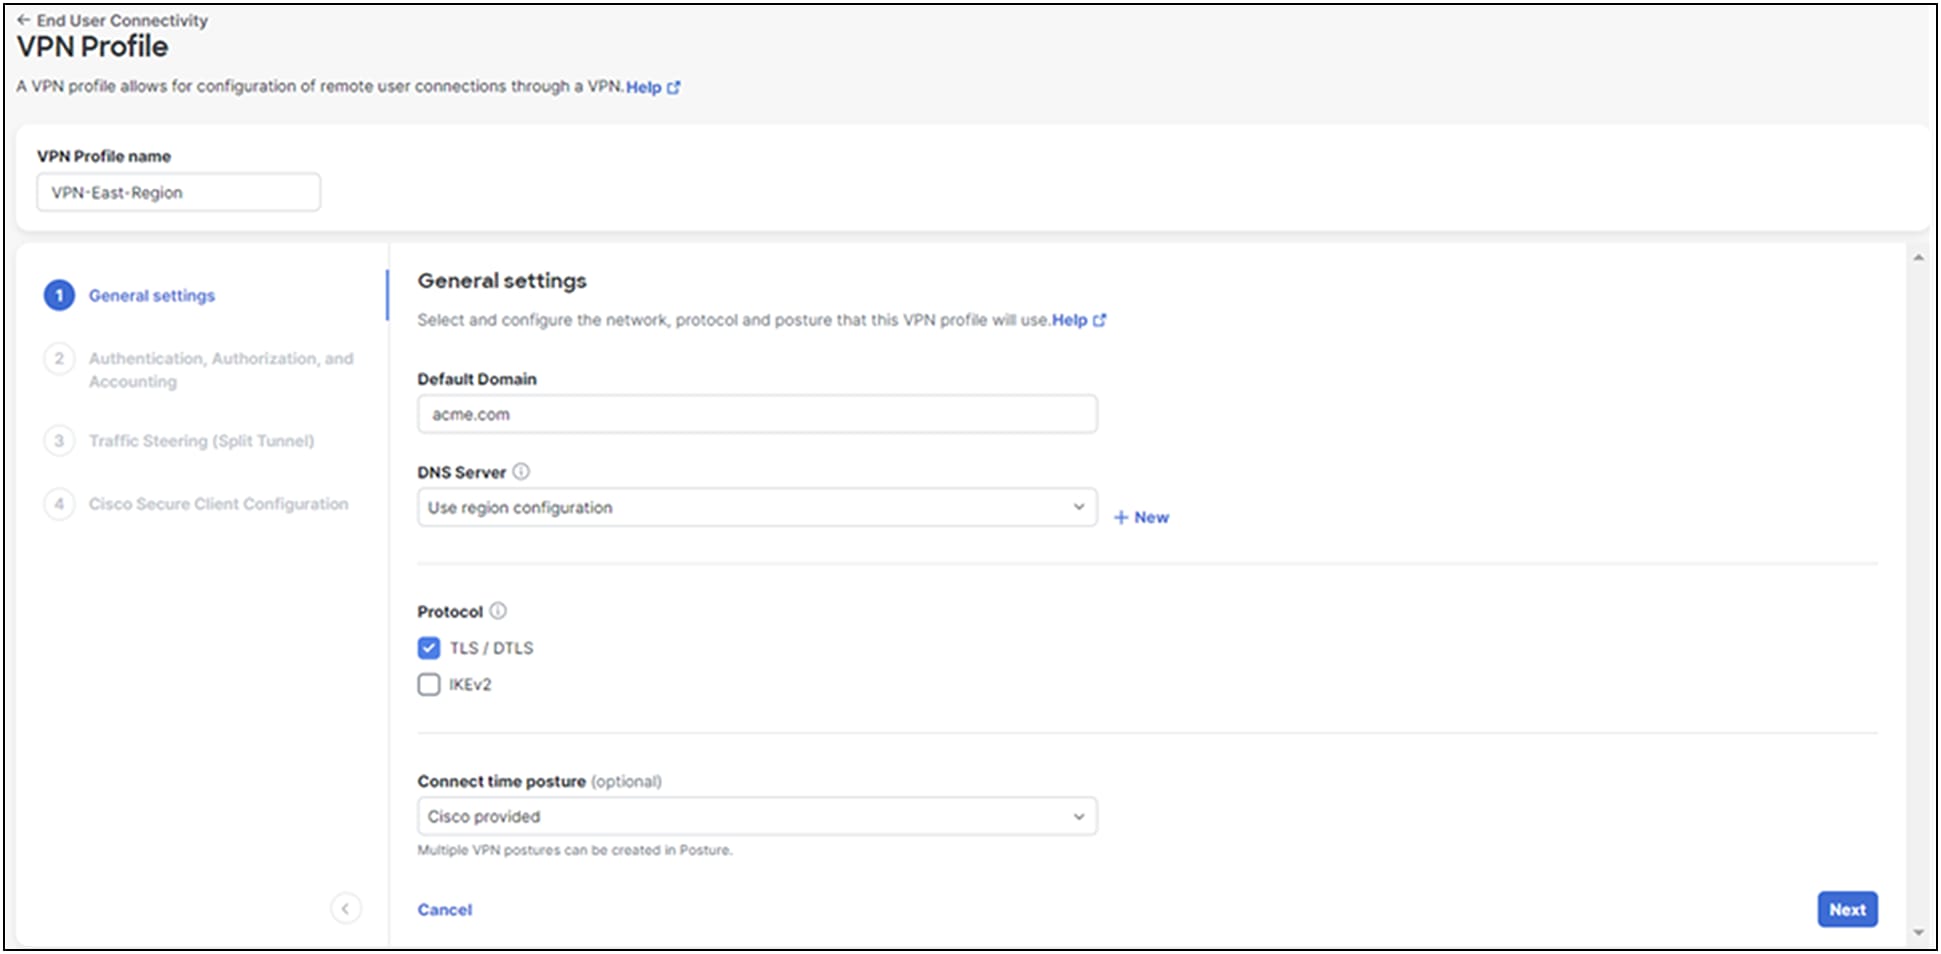
2. Configure the General settings for this VPN profile. Optionally, you can enter a Display name for this profile that is displayed to end-users of the Cisco Secure Client for ease-of-selection when choosing the appropriate profile.
3. Enter the Default Domain.
4. Choose a DNS Server from the drop-down, or click New to add a new DNS server pair. The DNS server mapped through the Manage IP Pool page is set as the default server. Selecting another DNS server overwrites this default server.
5. Check Include regional FQDN to add a region-specific FQDN to the hostname, which provides flexibility to clients when connecting to their VPN headend.
6. Select the protocol that this VPN profile will use. At least one protocol must be selected. If both TLS/DTLS and IKEv2 are selected, choose the primary protocol from the Primary drop-down.
7. Optionally, choose a Connect time posture from the drop-down, then Click Next.
Step 2. Authentication, Authorization, and Accounting
Choose a configuration method from the Protocols drop-down to complete the authentication process for this VPN profile. Authentication is the way a user is identified before being allowed access to the network and network resources. Authentication requires valid user credentials, a certificate, or both. You can use authentication alone, or with authorization and accounting.
Click for detailed instructions on the three user authentication methods: SAML, RADIUS and Certificate.
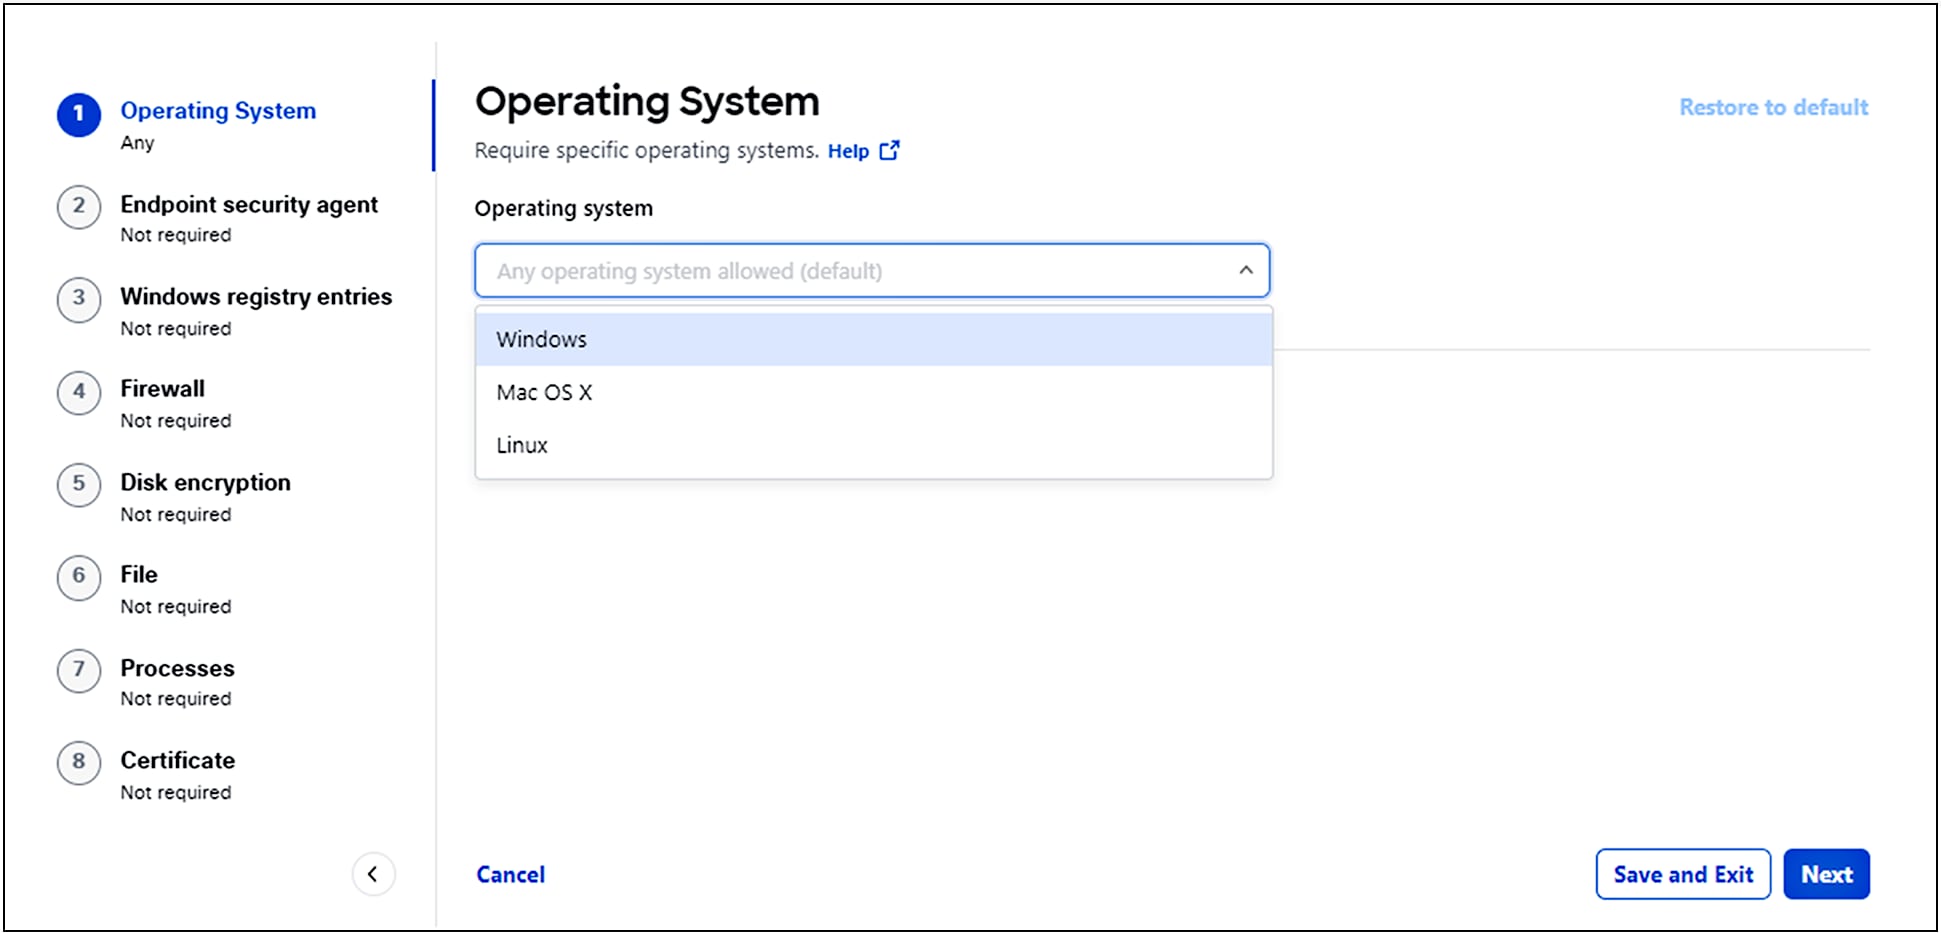
Configure a VPN connection posture profile to define posture requirements for end-user devices connecting to the network using VPN. The VPN client must be installed on the end-user device, and Secure Access checks the requirements when the device connects to the network.
1. Navigate to Secure > Profiles > Endpoint Posture Profiles.
2. For VPN Connection, click Add Posture Profile.
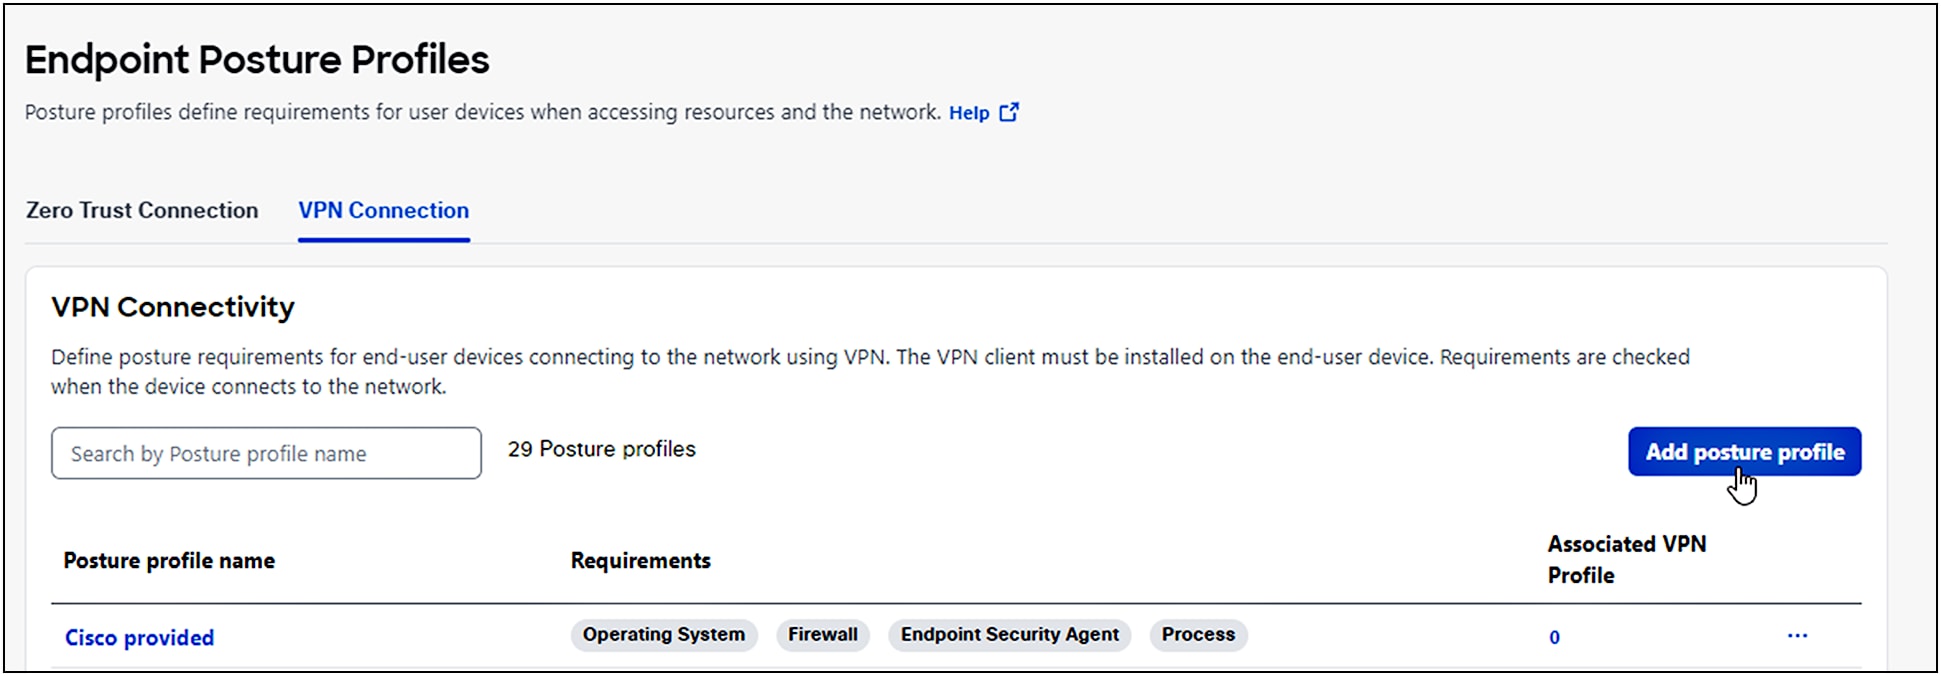
3. Give your posture profile a good descriptive Name.
4. For the Operating System option, choose the operating systems for your profile. Click Save and Exit or Next to select endpoint security agents.
5. The following options are not required and can be configured in any order:
Endpoint Security Agent, Windows Registry Agencies, Firewall, Disk Encryption, File, Processes, and Certificate.
Note: Endpoints must meet all conditions of any configured requirement.
Click for details on adding endpoint requirements.
Build Zero Trust Access Endpoint Posture Profiles
The Cisco Secure Client with Zero Trust Access connects user devices securely to private resources in on-premises data centers managed by your organization and resources in private and public clouds.
Cisco Secure Access Zero Trust supports visibility into user and device identities, network connectivity, and security posture.
The procedure to start onboarding user devices in an organization with the Secure Client and Zero Trust Access should take no more than ten minutes.
Follow the procedure details in Quickstart – Cisco Secure Client with Zero Trust Access.
Secure Access resource connectors connect traffic from user devices to private resources on your network using Zero Trust Access.
A resource connector is a lightweight virtual machine that is installed in your environment. We recommend that you deploy resource connectors in groups, for resilience, load balancing, and scalability. Each connector group is associated with a data center, branch office, or security zone, and serves specified private resources in that location. All connectors in a connector group connect traffic to all resources associated with the group.
For more information, see Manage Resource Connectors and Connector Groups and Requirements and Prerequisites of Connectors and Connector Groups.
Secure Access offers a fully-featured secure client for Windows and macOS devices as well as platform-native Zero Trust Access client apps for devices running Android. For details, see:
● Get Started and Manage Client-based Zero Trust Access from Mobile Devices
● Get Started with Cisco Secure Client on Windows and macOS Devices
◦ Manage Internet Security on the Cisco Secure Client
◦ Manage Zero Trust Access on Cisco Secure Client
◦ Manage Virtual Private Networks on Cisco Secure Client
You can purchase a Secure Access subscription at any time during the free trial. Reach out to your Cisco account team or Cisco partner to learn how to convert the trial to a Secure Access subscription.
Extend your trial: If you haven’t had enough time to see everything Secure Access has to offer, please contact your sales rep and ask to extend your trial.
If you do nothing you will lose the protection of cloud-delivered security. Don’t miss out on modern cybersecurity that seamlessly and securely connects any user to any app over any port or protocol from any device.
● Secure Access Onboarding Workflow
● Data Loss Prevention (DLP) deployment