Introduction
This document describes how to upgrade the Cisco Integrated Management Controller (CIMC) on UCS C Series Servers running the Cisco APIC.
Prerequisites
Requirements
Cisco recommends that you have knowledge of these topics:
- Unified Computing System (UCS) Servers
- Application Policy Infrastructure Controller (APIC)
Components Used
The information in this document is based on APIC servers running on UCS C Series Servers.
The information in this document was created from the devices in a specific lab environment. All of the devices used in this document started with a cleared (default) configuration. If your network is live, ensure that you understand the potential impact of any command.
Before You Upgrade
Upgrading the software version of the ACI Fabric can set new requirements on the CIMC version running on your Fabric, therefore, it is always advised to check the release notes of the APIC software version to know the list of supported CIMC software versions for a specific APIC release.
1. Check APIC Release notes, and confirm to which CIMC software image you need to upgrade to. Link to APIC Release notes.
2. Obtain Software image from Cisco.com site.
3. Confirm that the MD5 Checksum of the image matches the one published on Cisco.com site.
4. The time needed for the process of upgrading a CIMC version varies based on the speed of the link between the Local Machine and the UCS-C chassis, and source/target software image and other internal component versions.
5. CIMC upgrade does not impact the production network as APICs are not in the Data Path of the traffic.
6. When you upgrade the CIMC version it can also require changes to the Internet Browser, and Java Software version to run the Kernal-based Virtual Machine (vKVM).
To upgrade the APIC CIMC you can also use the Cisco Host Upgrade Utility Based on Guide.
APIC servers running on UCS C Series Servers. Cisco UCS 220 M5, Cisco UCS 220 M4 (second generation appliances APIC-SERVER-M2 and APIC-SERVER-L2) or Cisco UCS 220 M3 (first generation appliance APIC-SERVER-M1 and APIC-SERVER-L1), with a minor difference that servers manufactured with an image secured with Trusted Platform Module (TPM), certificates and an APIC product ID (PID).
|
APIC Platform
|
Corresponding UCS Platform
|
Description
|
|
APIC-SERVER-M1
|
UCS-C220-M3
|
Cluster of three Cisco APIC first generation controllers with medium size CPU, hard drive, and memory configurations for up to 1000 edge ports.
|
|
APIC-SERVER-M2
|
UCS-C220-M4
|
Cluster of three Cisco APIC second generation controllers with medium size CPU, hard drive, and memory configurations for up to 1000 edge ports.
|
|
APIC-SERVER-M3
|
UCS C220 M5
|
Cluster of three Cisco APIC second generation controllers with medium size CPU, hard drive, and memory configurations for up to 1000 edge ports.
|
|
APIC-SERVER-L1
|
UCS-C220-M3
|
Cluster of three Cisco APIC first generation controllers with large size CPU, hard drive, and memory configurations for more than 1000 edge ports.
|
|
APIC-SERVER-L2
|
UCS-C220-M4
|
Cluster of three Cisco APIC second generation controllers with large size CPU, hard drive, and memory configurations for more than 1000 edge ports.
|
|
APIC-SERVER-L3
|
UCS C220 M5
|
Cisco APIC with large CPU, hard drive, and memory configurations (more than 1200 edge ports).
|
Procedure
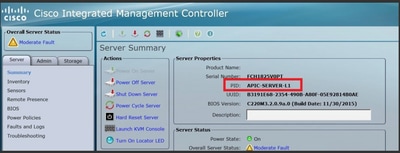
Step 1. First Determine the APIC model.
You can check this in the CIMC GUI to verify the PID displayed under Server> Summary.
Step 2. Download Software.
From Cisco Download Software page, Navigate to Select a Product > Downloads > Home Servers - Unified Computing > UCS C-Series Rack-Mount Standalone Server Software > Choose UCS 220 M3/M4/M5 based on the generation of APIC > Unified Computing System (UCS) Server Firmware.
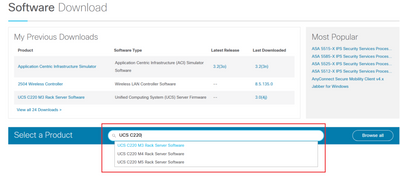
Note: Ensure you check the recommended CIMC Version and Software Release Guide to download the recommended CIMC firmware version for your current ACI software release.
Use CIMC APIC recommended firmware only instead of the latest or recommended one for that UCS model.
Step 3. Launch the KVM console from CIMC GUI.
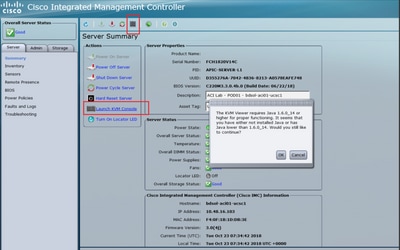
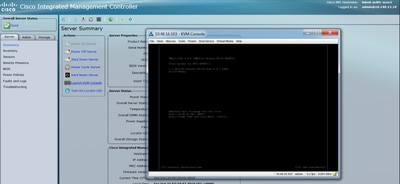

Note: If you are having problems opening the KVM console, this is generally an issue with your JAVA version. Do read the Release Notes for your CIMC version to learn the different workarounds available.
Step 4. In order to activate the virtual device, navigate to Virtual Media > Activate Virtual Devices as shown in the image.

Step 5. In order to map the downloaded ISO image as a CD/DVD, navigate to Virtual Media > Map CD/DVD as shown in the image.

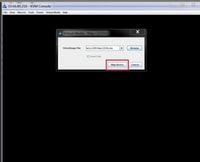
Step 6. Browse the ISO Image from the local machine and then click Map Device as shown in the image.
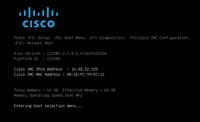
Step 7. In order to Reboot, navigate to Power > Reset System (warm boot) as shown in the image.

Step 8. In order to get into the Boot menu, press F6 after the system reboots as shows in the image.
Step 9. Insert password set by user or use the default password which is password.
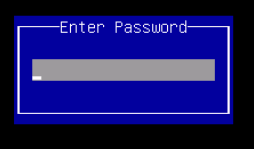
Note: You must set a BIOS Administrator password before performing this procedure. To set this password, press the F2 key when prompted during system boot to enter the BIOS Setup utility. Then navigate to Security > Set Administrator Password and enter the new password twice as prompted.
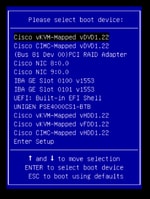
Step 10. Choose the boot device vKVM mapped vDVD1.22 as shown in the image.
Step 11. Now, Cisco UCS Host Upgrade Utility starts as shown in the image.


Step 12. Read the License agreement and click I Agree as shown in the image.

Step 13. In order to upgrade all components, click Update All which upgrades Current Version to Updated Version.

Note: During the upgrade, APIC can show disconnections.
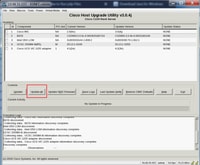
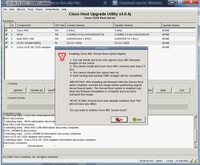
Step 14. Do not enable Cisco IMC secure boot.
A pop up appears to enable Cisco IMC Secure Boot. Select NO, otherwise refer to the Introduction to Cisco IMC Secure Boot section in the Cisco UCS C-Series Servers Integrated Management Controller GUI Configuration Guide, Release 4.0.
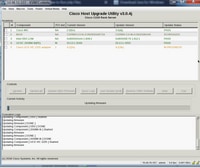
Step 15. HUU upgrades each component individually. Once it is done it reboots the unit, and then you can access the chassis using GUI and CLI.
When the server reboots, you are pushed out of the CIMC GUI. You need to log back into the CIMC and verify the upgrade has completed successfully. In order to do this, you can verify via the GUI, or boot up the CIMC host Upgrade Utility and select Last Update Verify to ensure all components passed the upgrade successfully.
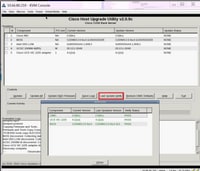
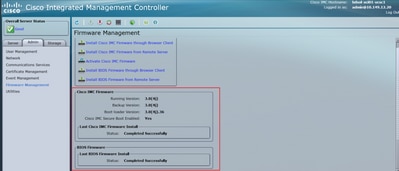
Step 16. In order to verify the successful upgrade of this version, log on to the CIMC GUI and navigate to Admin > Firmware Management and check the Cisco IMC Firmware as shown in the image.


 Feedback