Introduction
This document describes how to configure External Authentication in Cisco DNA Center using Network Policy Server (NPS) in Windows Server as RADIUS.
Prerequisites
Requirements
Basic Knowledge on:
- Cisco DNA Center Users & Roles
- Windows Server Network Policy Server, RADIUS and Active Directory
Components Used
- Cisco DNA Center 2.3.5.x
- Microsoft Windows Server Version 2019 acting as Domain Controller, DNS Server, NPS and Active Directory
The information in this document was created from the devices in a specific lab environment. All of the devices used in this document started with a cleared (default) configuration. If your network is live, ensure that you understand the potential impact of any command.

Note: The Cisco Technical Assistance Center (TAC) does not provide technical support to the Microsoft Windows Server. If you experience issues with the Microsoft Windows Server configuration, please contact Microsoft Support for technical assistance.
Configure
Admin Role Policy
- Click in the Windows Start menu and search for NPS. Then select Network Policy Server:
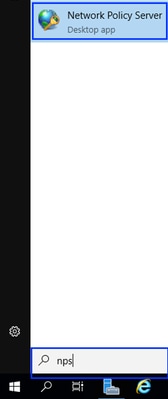 Windows Start Menu
- From the navigation panel in the left side, perform a Right-click in the NPS (Local) option and select Register server in Active Directory:
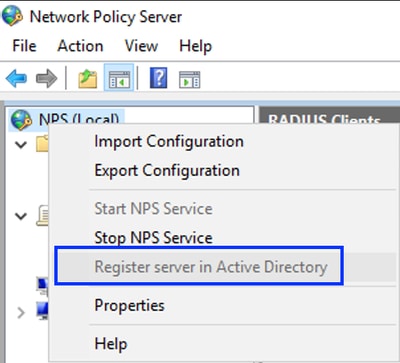 Windows Network Policy Service
- Click on OK twice.
- Expand RADIUS Clients and Servers, right-click RADIUS Clients, and select New:
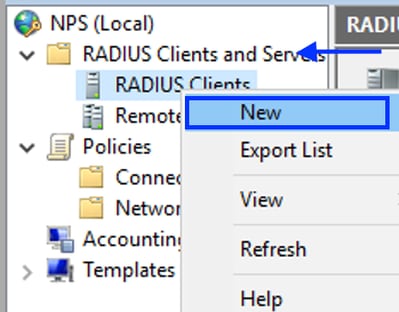 Add RADIUS Client
- Enter the Friendly name, the Cisco DNA Center management IP address, and a shared secret (This can be used later):
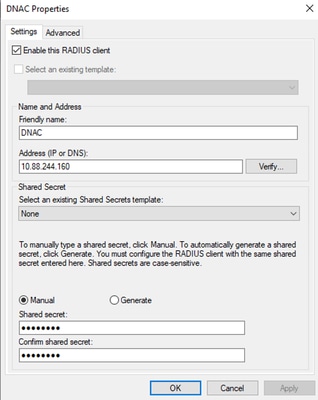 Radius Client Configuration
- Click OK to save it.
- Expand Policies, right-click Network Policies and select New:
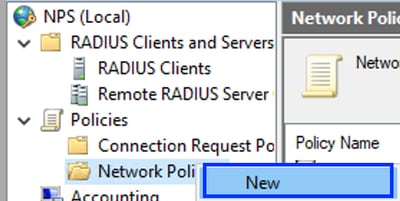 Add New Network Policy
- Enter a policy name for the rule and click Next:
 Policy Name
- To allow a specific domain group, add these two conditions and click Next:
- User Group – Add your domain group that can have an Admin Role on Cisco DNA Center (For this example Sup_Ad_NPS group is used).
- ClientIPv4Address – Add your Cisco DNA Center management IP address.
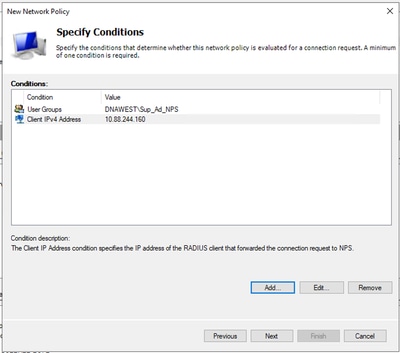 Policy Conditions
- Select Access Granted and click Next:
 Use Access Granted
- Only select Unencrypted authentication (PAP, SPAP):
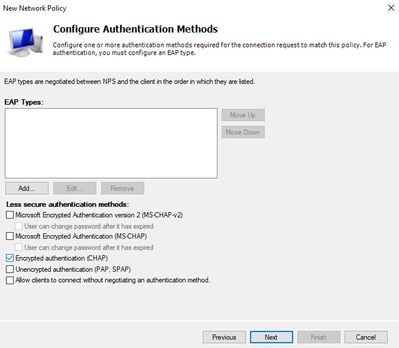 Select Unencrypted authentication
- Select Next since default values are used:
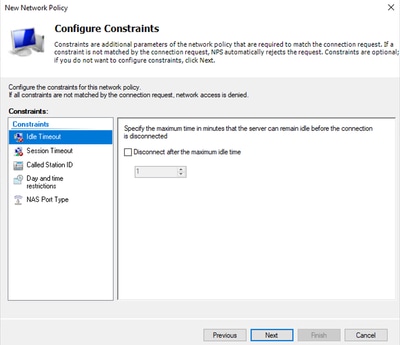 Configure Constraint Window
- Remove Standard attributes:
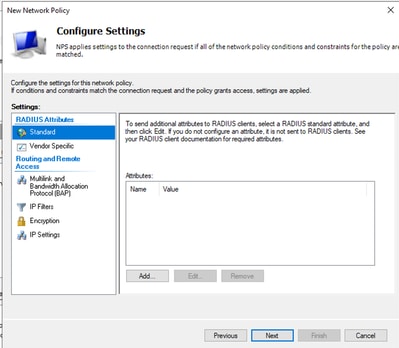 Define Attributes to use
- On RADIUS Attributes select Vendor Specific, then Click Add, select Cisco as a Vendor, and click Add:
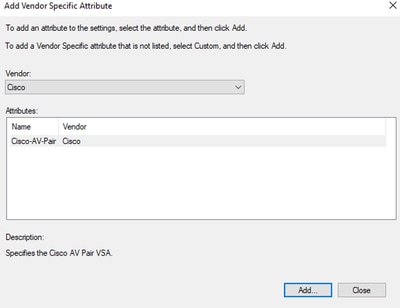 Add Cisco AV-Pair
- Click Add, write Role=SUPER-ADMIN-ROLE and click OK twice:
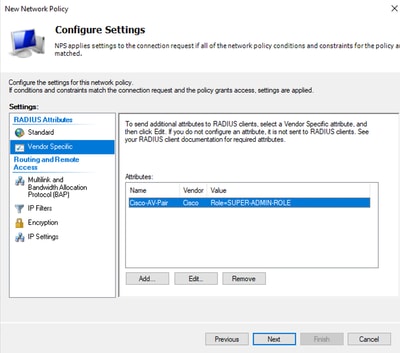 Cisco AV-Pair Attribute added
- Select Close, then select Next.
- Review your policy settings and Select Finish to save it.
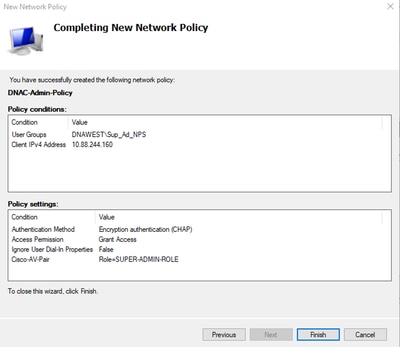 Policy Summary
Observer Role Policy.
- Click in the Windows Start menu and search for NPS. Then select Network Policy Server.
- From the navigation panel in the left side, perform a Right-click in the NPS (Local) option and select Register server in Active Directory.
- Click on OK twice.
- Expand RADIUS Clients and Servers, right-click RADIUS Clients, and select New.
- Enter a Friendly name, the Cisco DNA Center management IP address, and a shared secret (This can be used later).
- Click OK to save it.
- Expand Policies, right-click Network Policies, and select New.
- Enter a policy name for the rule and click Next.
- To allow a specific domain group, you need to add these two conditions and select Next.
- User Group – Add your domain group in order to assign an Observer Role on Cisco DNA Center (For this example Observer_NPS group is used).
- ClientIPv4Address – Add your Cisco DNA Center management IP.
- Select Access Granted and then select Next.
- Only select Unencrypted authentication (PAP, SPAP).
- Select Next since default values are used.
- Remove Standard attributes.
- On RADIUS Attributes select Vendor Specific, then Click Add, select Cisco as a Vendor, and click Add.
- Select Add, write ROLE=OBSERVER-ROLE, and OK twice.
- Select Close, then Next.
- Review your policy settings and select Finish to save it.
Enable External Authentication
- Open the Cisco DNA Center Graphical User Interface (GUI) in a web browser and Log in using an admin privileged account:
 Cisco DNA Center Login Page
- Navigate to Menu > System > Setting > Authentication and Policy Servers and select Add > AAA:
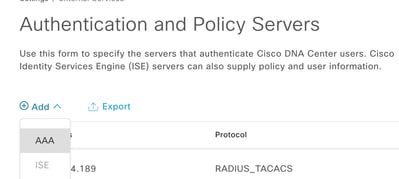 Add Windows Server
- Type your Windows Server IP address and the Shared Secret used in the previous steps and Click Save:
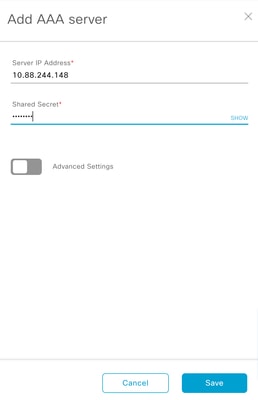 Windows Server Values
- Validate that your Windows Server status is Active:
 Windows Server Summary
- Navigate to Menu > System > Users & Roles > External Authentication and select your AAA server:
 Windows Server as AAA Server
- Type Cisco-AVPair as the AAA attribute and click Update:
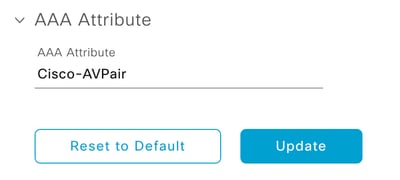 AV-Pair on External User
- Click in the check-box Enable External User to enable External Authentication:

Verify
You can open the Cisco DNA Center Graphical User Interface (GUI) in a web browser and Log in with an external user configured in the Windows Server to validate that you can Log in successfully using External Authentication.
 Cisco DNA Center Login Page


 Feedback