Creation of Self-Signed Certificates with Multiple URL's
Available Languages
Download Options
Bias-Free Language
The documentation set for this product strives to use bias-free language. For the purposes of this documentation set, bias-free is defined as language that does not imply discrimination based on age, disability, gender, racial identity, ethnic identity, sexual orientation, socioeconomic status, and intersectionality. Exceptions may be present in the documentation due to language that is hardcoded in the user interfaces of the product software, language used based on RFP documentation, or language that is used by a referenced third-party product. Learn more about how Cisco is using Inclusive Language.
Introduction
This document describes how to create a self-signed certificate that can be used by CloudCenter with multiple URL's.
Prerequisites
Requirements
Cisco recommends that you have knowledge of these topics:
- Certificates
- Linux
Components Used
The information in this document is based on CentOS7.
The information in this document was created from the devices in a specific lab environment. All of the devices used in this document started with a cleared (default) configuration. If your network is live, make sure that you understand the potential impact of any command.
Problem
The certificates that come standard with CloudCenter, or which can be created with the use of the Cisco Call Manager (CCM) configuration wizard, do not have a Subject Alternative Name (SAN) which certain browsers, such as Google Chrome, treats as an error and warns you. This can be overridden, but without SAN's, a certificate can only be valid from one specific URL.
For example, if you have a certificate that is valid for the IP address of 10.11.12.13, if you have a Domain Name System (DNS) name of www.opencart.com, you receive a certificate error because that URL is not what the certificate is for (this is true even if www.opencart.com is listed in your hosts file as the one that belongs to 10.11.12.13). This can crop up if subtenants of CloudCenter are in the use of Single Sign On (SSO), as each SSO server has its own URL.
Solution
The easiest way to fix this issue is to create a new self-signed certificate that has SAN's which lists any URL that directs you to the same IP address. The guide is an attempt to apply best practices to this process.
Step 1. Navigate to the root directory and make a new folder to house the certificates:
sudo -s
cd /root
mkdir ca
Step 2. Navigate into the new folder and make subfolders to organize the certificates, private keys, and logs.
cd ca
mkdir certs crl newcerts private
chmod 700 private
touch index.txt
echo 1000 > serial
Step 3. Copy the contents of CAopenssl.conf to /root/ca/openssl.cnf
Note: This file contains the configuration options for a Certificate Authority (CA) and default options that might be appropriate for CloudCenter.
Step 4. Generate a private key and certificate for the CA.
openssl genrsa -aes256 -out private/ca.key.pem 4096
chmod 400 private/ca.key.pem
openssl req -config openssl.cnf -key private/ca.key.pem -new -x509 -days 7300 -sha256 -extensions v3_ca -out certs/ca.cert.pem
chmod 444 certs/ca.cert.pem
Step 5. Your CA is the ultimate way to verify that any certificate is valid, this certificate must never be accessed by unauthorized individuals and must never be exposed to the internet. Due to this restriction, you have to create an intermediate CA that signs the end certificate, this creates a break where if the intermediate authority certificate is compromised it can be revoked and a new one issued.
Step 6. Make a new subdirectory for the intermediate CA.
mkdir /root/ca/intermediate
cd /root/ca/intermediate/
mkdir certs crl csr newcerts private
chmod 700 private
touch index.txt
echo 1000 > serial
echo 1000 > /root/ca/intermediate/crlnumber
Step 7. Copy the contents of Intermediateopenssl.conf to /root/ca/intermediate/openssl.cnf .
Note: This file contains nearly identical configuration options for the CA other than a few small tweaks to make it specific to an intermediate.
Step 8. Generate the intermediate key and certificate.
cd /root/ca
openssl genrsa -aes256 -out intermediate/private/intermediate.key.pem 4096
chmod 400 intermediate/private/intermediate.key.pem
openssl req -config intermediate/openssl.cnf -new -sha256 -key intermediate/private/intermediate.key.pem -out intermediate/csr/intermediate.csr.pem
Step 9. Sign the intermediate certificate with the CA certificate, this builds a chain of trust that browser uses to verify a certificate's authenticity.
openssl ca -config openssl.cnf -extensions v3_intermediate_ca -days 3650 -notext -md sha256 -in intermediate/csr/intermediate.csr.pem -out intermediate/certs/intermediate.cert.pem
chmod 444 intermediate/certs/intermediate.cert.pem
Step 10. Create a CA chain, since you do not want the CA on the internet, you can make a CA chain that browsers use to verify authenticity all the way up to the CA.
cat intermediate/certs/intermediate.cert.pem certs/ca.cert.pem > intermediate/certs/ca-chain.cert.pem
chmod 444 intermediate/certs/ca-chain.cert.pem
Step 11. Create a new key and certificate for the CCM.
openssl genrsa -out intermediate/private/ccm.com.key.pem 2048
openssl req -new -sha256 -key intermediate/private/ccm.com.key.pem -subj "/C=US/ST=NC/O=Cisco/CN=ccm.com" -reqexts SAN -config <(cat intermediate/openssl.cnf <(printf "[SAN]\nsubjectAltName=DNS:ccm.com,DNS:www.ccm.com,IP:10.11.12.13")) -out intermediate/csr/ccm.com.csr
Step 12. This has all the required fields in the command and has to be edited manually.
- /C=US refers to the country (2 char limit)
- /ST=NC refers to the State and might include spaces
- /O=Cisco refers to the Organization
- /CN=ccm.com refers to the Common Name, this should be the main URL used to access the CCM.
- SAN\nsubjectAltName= are the alternative names, the common name should be on this list and there is no limit to how many SAN's you have.
Step 13. Sign the final certificate with the use of the intermediate certificate.
openssl ca -config intermediate/openssl.cnf -extensions server_cert -days 375 -notext -md sha256 -in intermediate/csr/ccm.com.csr -out intermediate/certs/ccm.com.cert.pem
Step 14. Verify that the certificate was signed correctly.
openssl verify -CAfile intermediate/certs/ca-chain.cert.pem intermediate/certs/ccm.com.cert.pem
Step 15. It can return either an OK or a Fail.
Step 16. Copy the new certificate, it's key, and the CA-chain to the Catalina folder.
cd /root/ca/intermediate/certs
cp ccm.com.cert.pem /usr/local/tomcat/conf/ssl/ccm.com.crt
cp ca-chain.cert.pem /usr/local/tomcat/conf/ssl/ca-chain.crt
cd ../private
cp ccm.com.key.pem /usr/local/tomcat/conf/ssl/ccm.com.key
Step 17. Grant cliqruser ownership and set permissions correctly.
chown cliqruser:cliqruser ccm.com.crt
chown cliqruser:cliqruser ccm.com.key
chown cliqruser:cliqruser ca-chain.crt
chmod 644 ccm.com.crt
chmod 644 ccm.com.key
chmod 644 ca-chain.crt
Step 18. Backup the server.xml file before you make any changes.
cd ..
cp server.xml server.xml.bak
Step 19. Edit server.xml:
- Locate the section which starts with <Connector port="10443" maxHttpHeaderSize="8192"
- Change SSLCertificateFile to point to ccm.com.crt
- Change SSLCertificateKeyFile to point to ccm.com.key
- Change SSLCACertificateFile to point to ca-chain.crt
Step 20. Restart Tomcat.
service tomcat stop
service tomcat start
Step 21. The CCM now uses the new certificate which is valid for all DNS names and IP addresses specified in Step 13.
Step 22. As the CA was created at the time of the guide, your browsers won't recognize it as valid by default, you have to manually import the certificate.
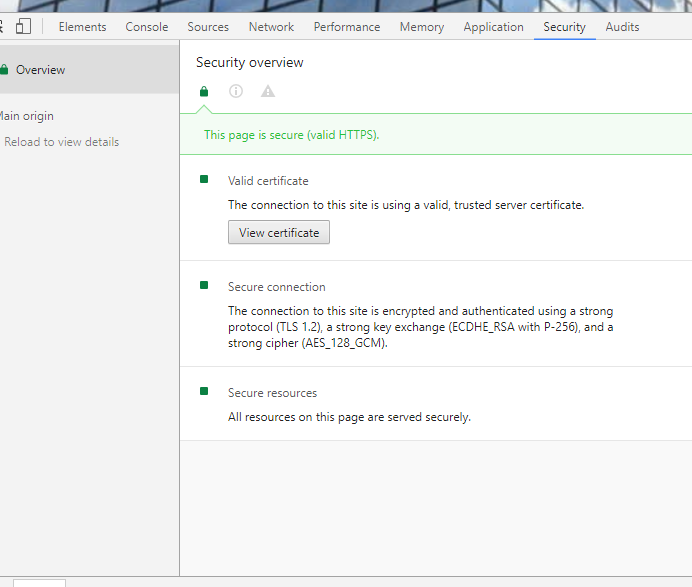
Step 23. Navigate to the CCM with the use of any valid URL and press Ctrl+Shift+i, this opens the developer tools.
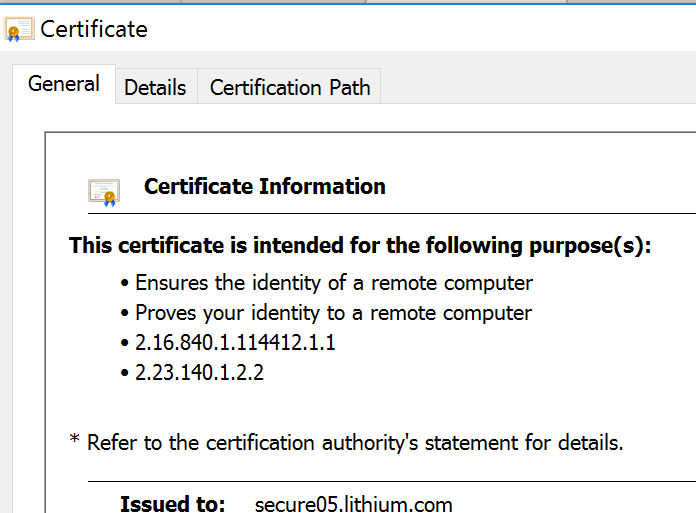
Step 24. Select View Certificate as shown in the image.

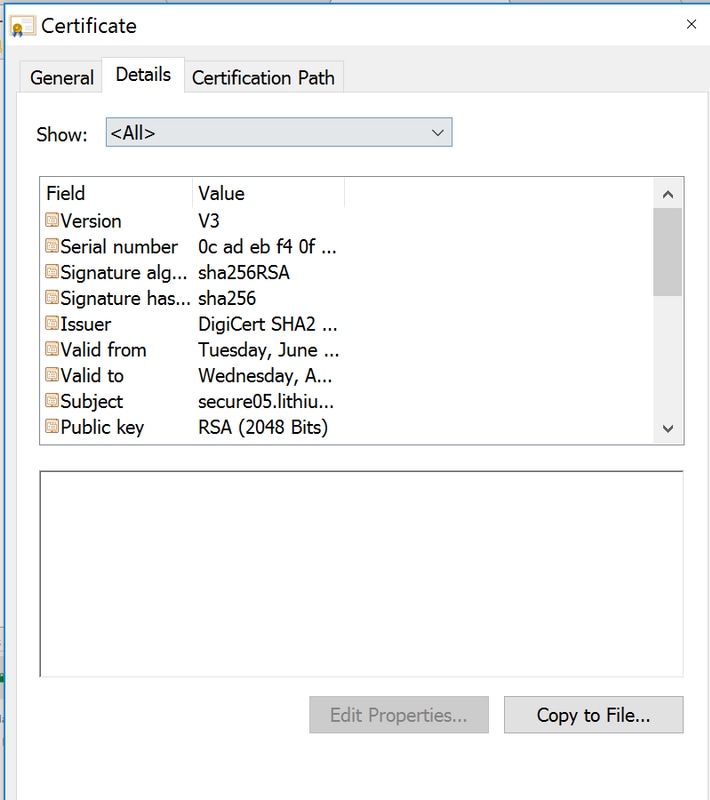
Step 25. Select Details as shown in the image.

Step 26. Select Copy To File as shown in the image.

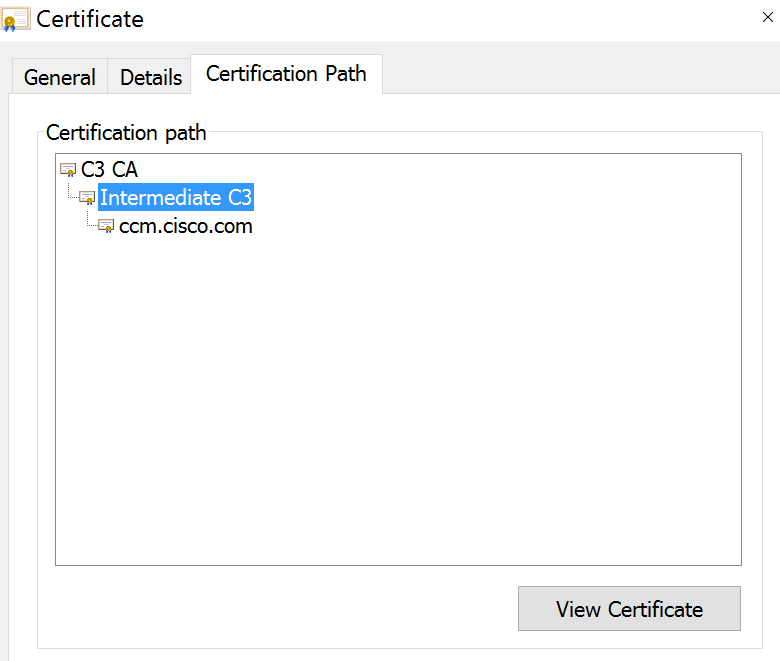
Step 27. If you get errors about an untrusted CA, then navigate to Certification Path to view the Intermediate and Root certificate. You can click on them and view their certificate and also copy those to files as shown in the image.

Step 28. Once you have the certificates downloaded, follow your Operating System's (OS) or Browser's instructions to install these certificates as trusted authority and intermediate authorities.
Contributed by Cisco Engineers
- Jesse LafuentiCisco TAC Engineer
Contact Cisco
- Open a Support Case

- (Requires a Cisco Service Contract)
 Feedback