Introduction
This document describes the process of update and return of a license once Intersight Private Virtual Appliance (PVA) is installed. It does not cover the initial reservation process required during installation.
Prerequisites
Requirements
Cisco recommends that you have basic understanding of Intersight PVA.
Components Used
The information in this document is based on these software versions:
- Intersight PVA version 1.0.9-442
- Smart Software Licensing access
The information in this document was created from the devices in a specific lab environment. All of the devices used in this document started with a cleared (default) configuration. If your network is live, ensure that you understand the potential impact of any command.
Background Information
Intersight PVA is intended for environments where you operate data centers in a disconnected (air gap) mode. Hence, to install licenses you must use Specific License Reservation (SLR) which is a feature for highly secure networks. It provides a method for customers to deploy a Software License on a Device (Product Instance) without the need to communicate the usage information to Cisco.
Configure
Update License Reservation
Log in to your Cisco Smart Software Manager, navigate to the proper virtual account, select the Product Instances tab and identify your Account ID.
Tip: In order to identify your Account ID on Intersight, navigate to Settings > General > Account Details

From the Actions drop-down menu, select Update Reserved Licenses.
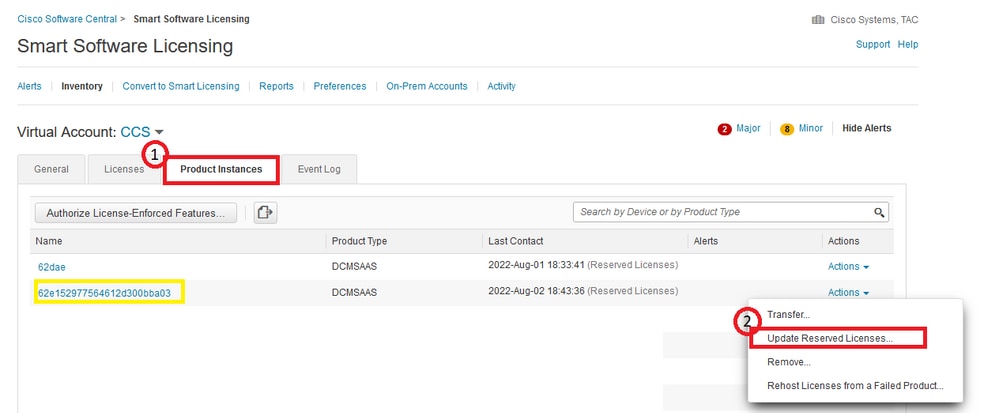
The Update License Reservation wizard appears.
Step 1. Select Licenses
Shows the reservation made in the past. On this page, you can update the reservation quantity. In this example, we update the license to a quantity of 3.
Note: After you update the license reserve count, the Next button is grayed out until you click anywhere on the screen.

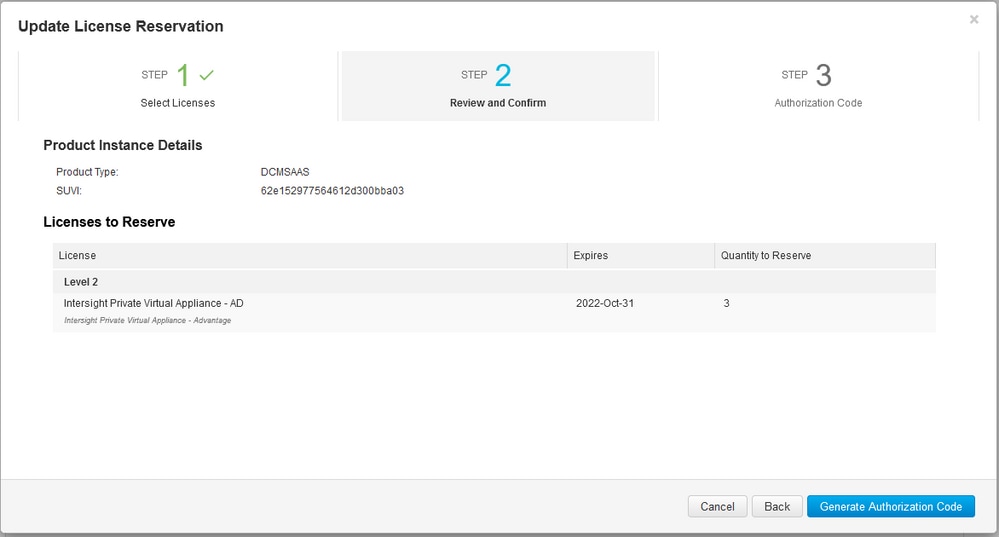
Step 2. Review and Confirm
Verify the license tier and quantity is correct, then select Generate Authorization Code.
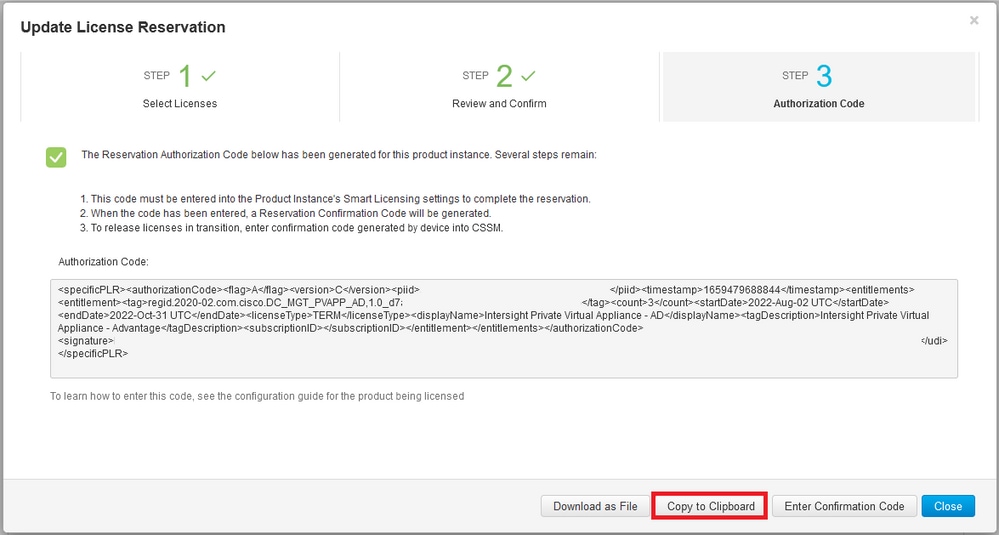
Step 3. Authorization Code
From this page, you must copy the Authorization Code in order to generate the Confirmation Code to complete the update. It can take a few minutes for the confirmation code to be generated. So, once you have the Authorization Code, you can then close the wizard as shown in this.
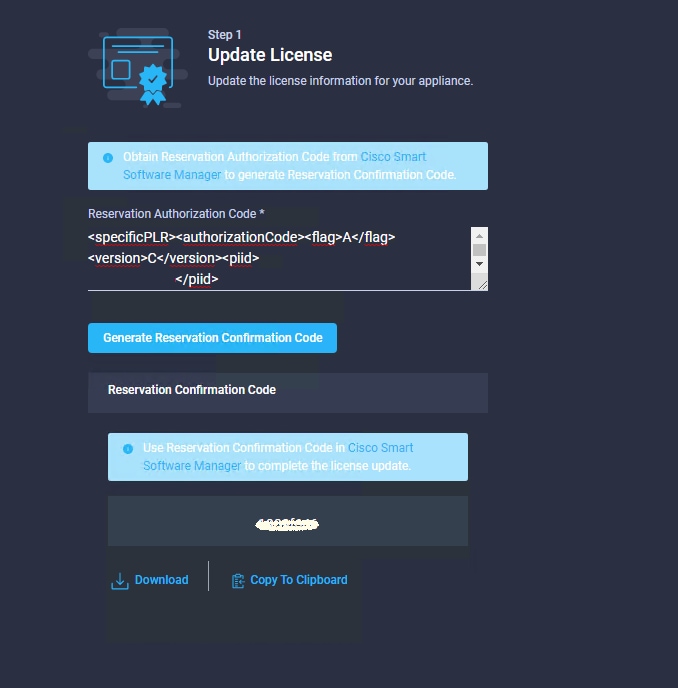
Log in to your Intersight PVA and navigate to Settings > Licensing. From the Actions drop-down menu, select Update License.

Paste the Reservation Code that you obtain from the Smart Licensing portal and then select Generate Reservation Confirmation Code. Once Intersight provides the code, copy it to the clipboard.
Go back to the Smart Licensing portal on the Product Instances tab, identify again your Account ID, and from the Actions drop-down menu, select Enter Confirmation Code as shown in this image.

Copy or upload the code here for the update to be effective and select the OK button to complete the update process as shown in this image.

Return License Reservation
On Intersight, navigate to Settings > Licensing. From the Actions drop-down, select Return License as shown in this image.

From the new windows that show up, select Generate Return Code.
Caution: The generation of a return code deregisters immediately license from Intersight PVA.

Select Generate to acknowledge the alert on the pop-up window.
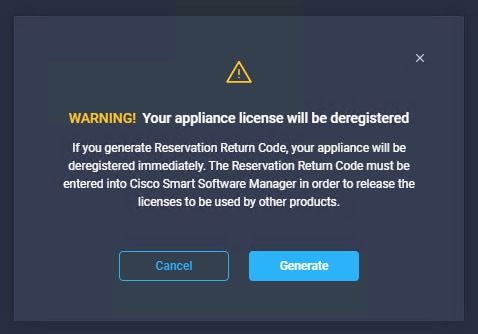
It can take a few minutes for the Return Code to be generated.. Once it shows up, copy it or download it.

Log in to your Cisco Smart Software Manager, navigate to the proper virtual account and select the Product Instances tab and identify your Account ID. From the Actions drop-down, select Remove...

Enter the Reservation Return Code and select Remove Reservation as shown in this image.

This step deletes the Intersight Account ID from your Product Instances and makes the licenses available again to other instances.
Troubleshoot
This section provides information you can use in order to troubleshoot your configuration.
Intersight Fails to generate a Reservation Confirmation Code
When Intersight fails to generate a Reservation Code, verify all services are running.
SSH to the Intersight PVA and log in with your admin account. From the default menu, select option 4.

If after the first time it fails, the next tries automatically fail, use the Restart system services (option 5). This process can take several minutes and you must monitor with option 4 until all services came up.
Intersight Fails to Generate a Return Code
When Intersight fails to generate Return Code, navigate tohttps://[FQDN]/apidocs/introduction/overview/ and select API Reference tab.
Search for license/LicenseReservationOps resource and use API call GET /api/v1/license/LicenseReservationOps.
From the output verify {"GenerateReturnCode": status}, if it is false, try again to generate Return code.

If GenerateReturnCode is set to True and Intersight fails to generate it, copy the MOID and use API Call POST /api/v1/license/LicenseReservationOps/{Moid}.
Paste the MOID on the required field and set {"GenerateReturnCode":false}. Wait until it completes with 200 Success.
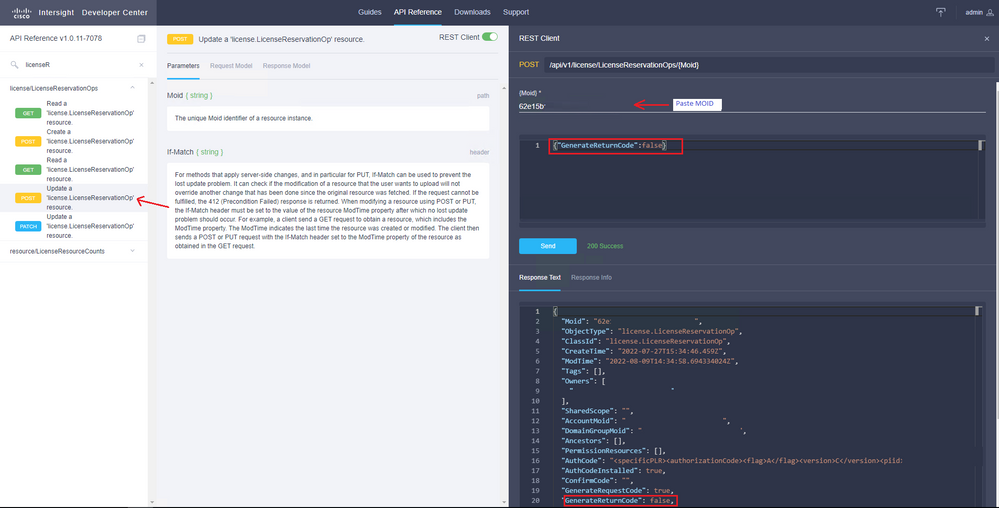
Refresh Intersight PVA and try again to generate the Return Code.
Verify
Use this section in order to confirm that your configuration works properly.
In order to verify if your Intersight has a reservation assigned, your licensing tab on Intersight must show Last Updated date.
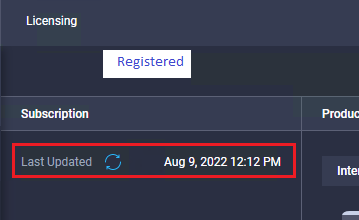
To verify more details of your reservation such as tiers or quantity, you can check it directly on your Smart Portal or with API Call :
GET /api/v1/license/LicenseInfos.
In this scenario, our reservation has only one Advantage license.

Related Information


 Feedback