Introduction
This document describes the upgrade process for a UCS domain and server on a Private Virtual Appliance (PVA).
Prerequisites
Requirements
Cisco recommends that you have knowledge of these topics:
- General knowledge and understanding of Intersight Managed Mode (IMM).
- Understanding of Intersight Private Virtual Appliance (PVA).
Components used
The information in this document is based on these software and hardware versions:
- Cisco UCS 6454 54-Port Fabric Interconnect, Firmware 4.2.3(d)
- Cisco UCS B200 M5 Blade Server, Firmware 4.2.1(a)
The information in this document was created from the devices in a specific lab environment. All the devices used in this document started with a cleared (default) configuration. If your network is live, ensure that you understand the potential impact of any command.
Background Information
A Private Virtual Appliance (PVA) is an on-premises version of the Cisco Intersight platform encapsulated in a virtual machine. It provides the same features and benefits as the cloud-based Intersight service, including infrastructure management and automation, but within a private network. This meets the needs of organizations that require a high level of data security, such as those with strict compliance and regulatory requirements.
Software bundle packages for PVA environments are stored in Intersight and are available for download through the Intersight Appliance account.
Configure
Before you begin
Navigate to this link to set up your account: Creating an Appliance Account.
Follow the steps, accept the license agreement, and create an account name for it.
Fabric Interconnect Upgrade
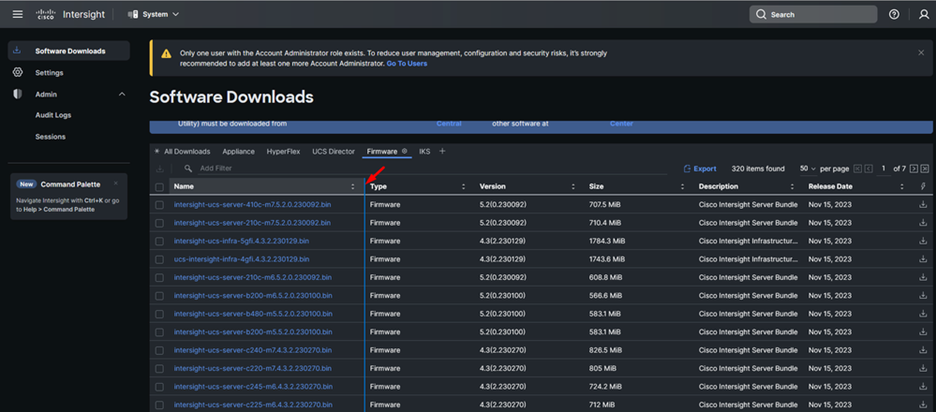
Step 1. Once the Appliance Account it is created, navigate to Software Downloads > Software Catalog > Firmware.
Look for the firmware version to want to go to. Click its name.
Tip: Expand the name column to see the model of the device and the version.
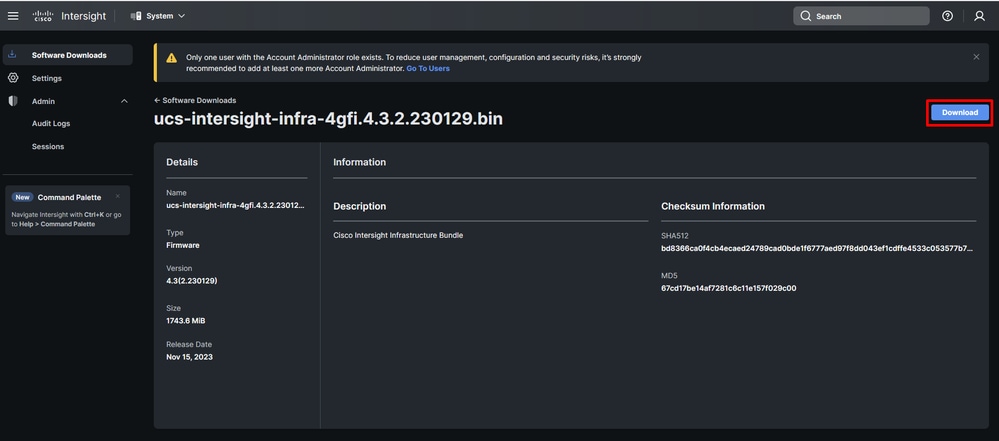
Step 2. In the new window, you can see some more detailed information about the package. Ensure this is the one you need. Click the Download button. For this example, the Fabric upgrade is for 4.3.2.
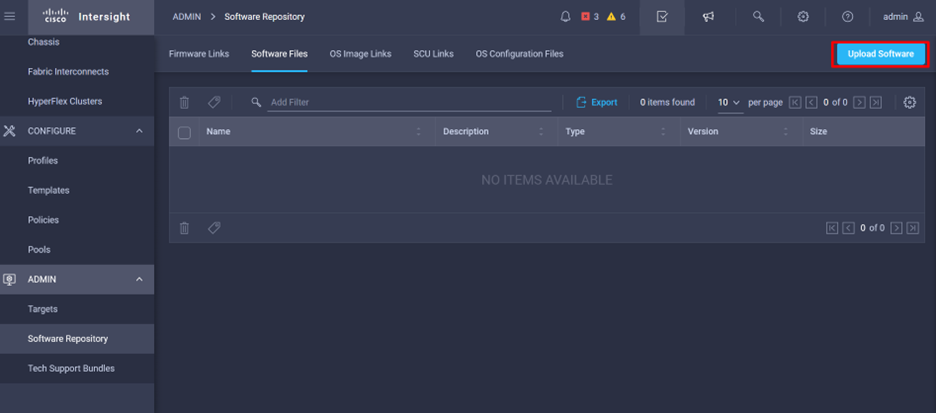
Step 3. When the download is complete, open a tab in your browser and Log In to your Private Virtual Appliance.
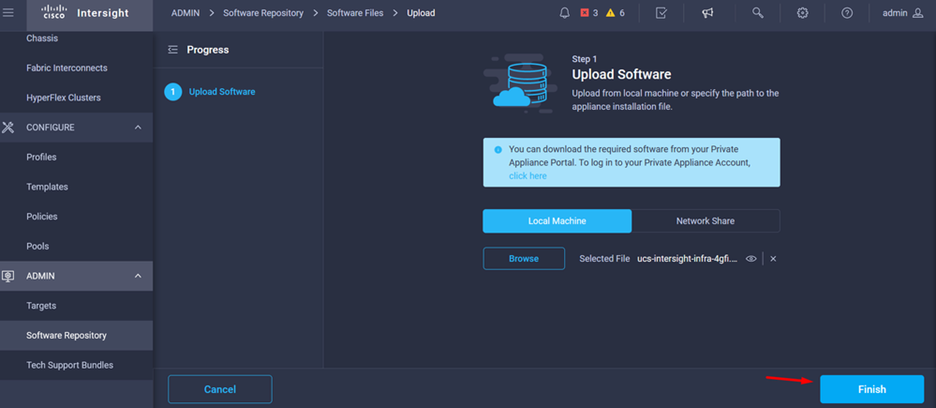
Navigate to Admin > Software Repository > Software Files. In this tab, you can see the list of packages available for upgrade and click Upload Software.
Step 4. Browse for the package for your Fabric Interconnect and upload it.
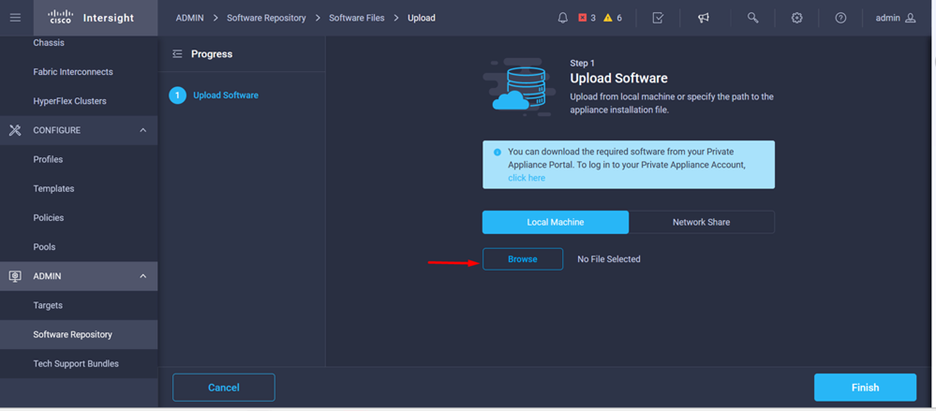
Step 5. Once it has been mapped, click the Finish button.
Step 6. You can see the progress in the icon to the left of the Alert button.
On the Software Files tab, confirm that your downloads are ready to use. Refresh the page if necessary.

Step 7. Navigate to Operate > Fabric Interconnects. Select the device you need to upgrade. Click on any Fabric Interconnect (FI) that belongs to the cluster you need to upgrade.
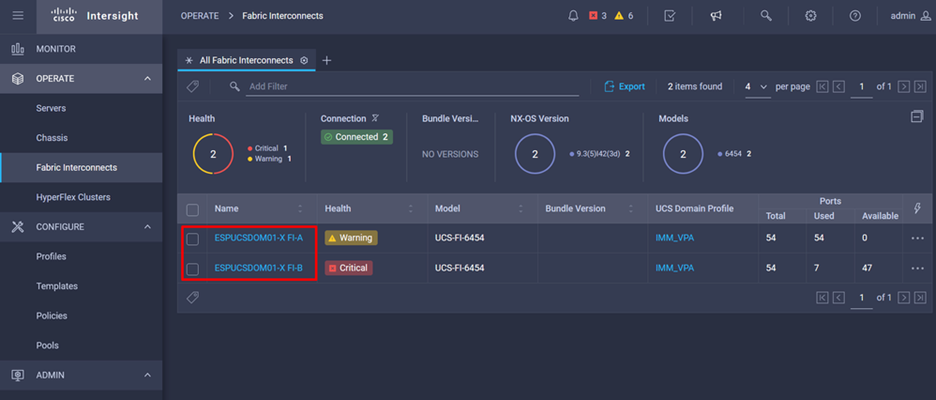
Step 8. Ensure you have selected the correct Fabric Interconnect.
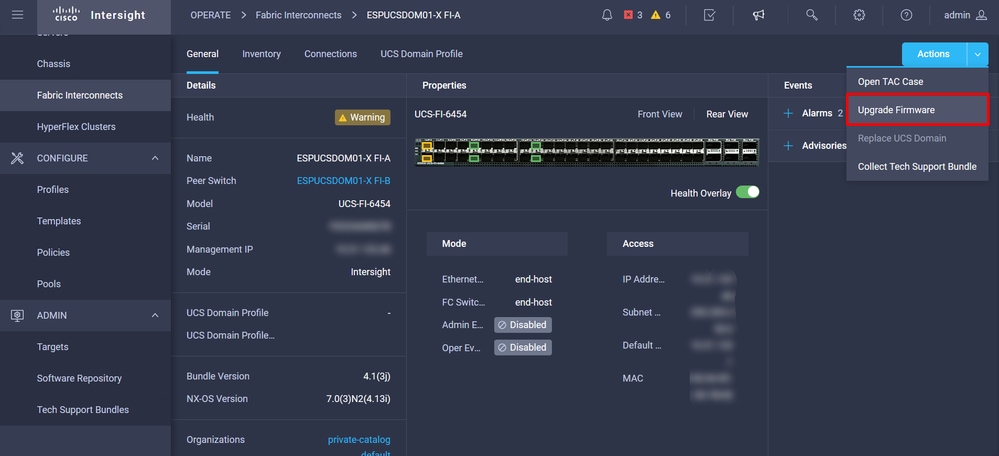
On the Details tab, you can review general information such as the peer switch, management IP and current version.
Step 9. Navigate to Action button. Click on it, it displays a few options, choose Upgrade firmware.
Step 10. A window appears with basic instructions on how to perform the upgrade. Click Start.
Step 11. You can see the list of Fabrics Interconnect that are claimed by Intersight. The domain you clicked on earlier is automatically selected.
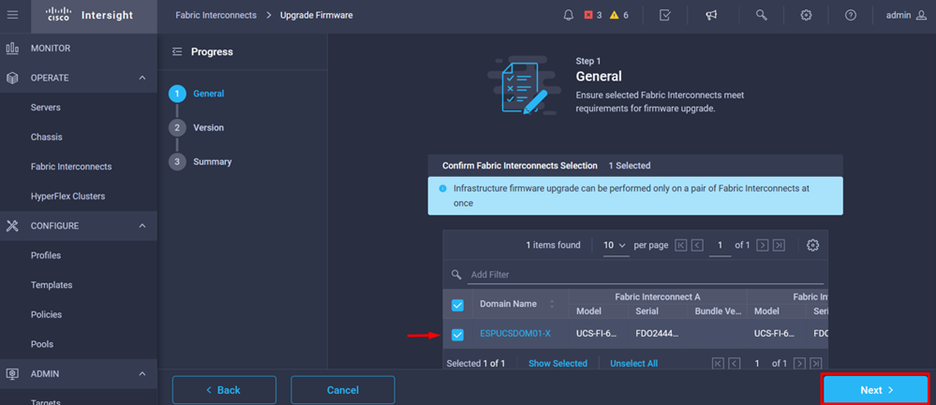
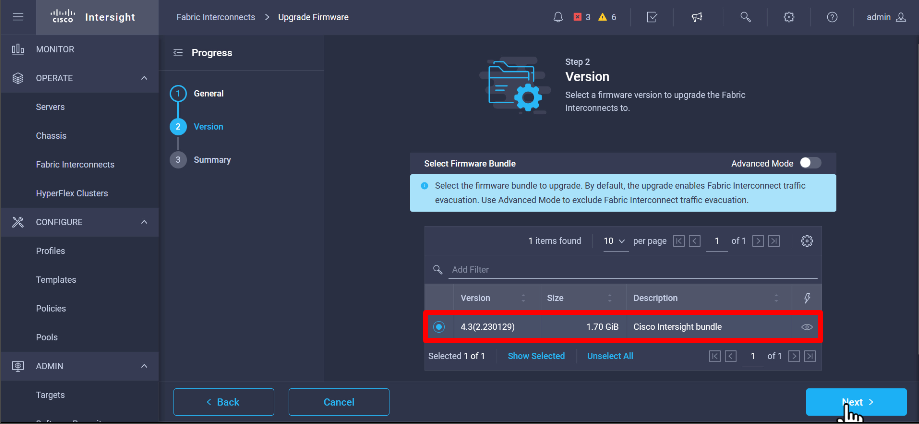
Step 12. For this example, package version 4.3.2 is available. Select your version and click the Next to continue.
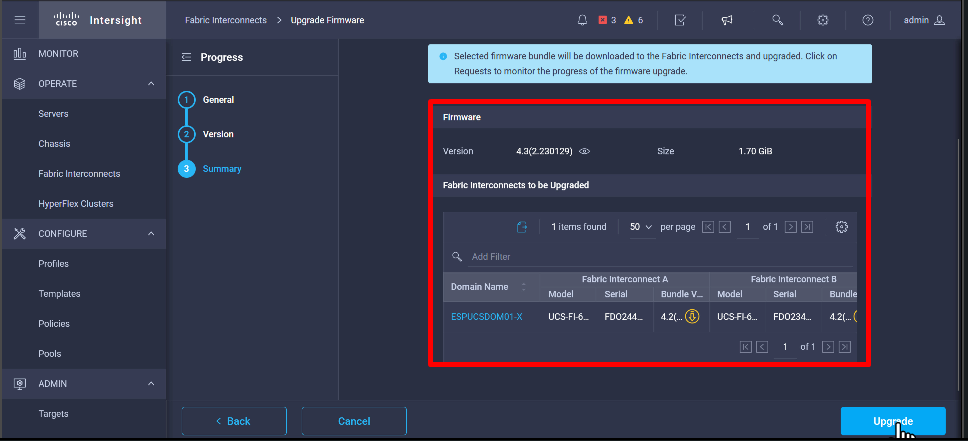
Step 13. It shows a summary of your upgrade: the domain name, serial number, model, and firmware version.
Confirm that this is the correct domain and click Upgrade.
Step 14. A green box appears in the upper right corner if the upgrade action was successful.

Step 15. Press the icon next to the alarm button to check the progress of the upgrade.

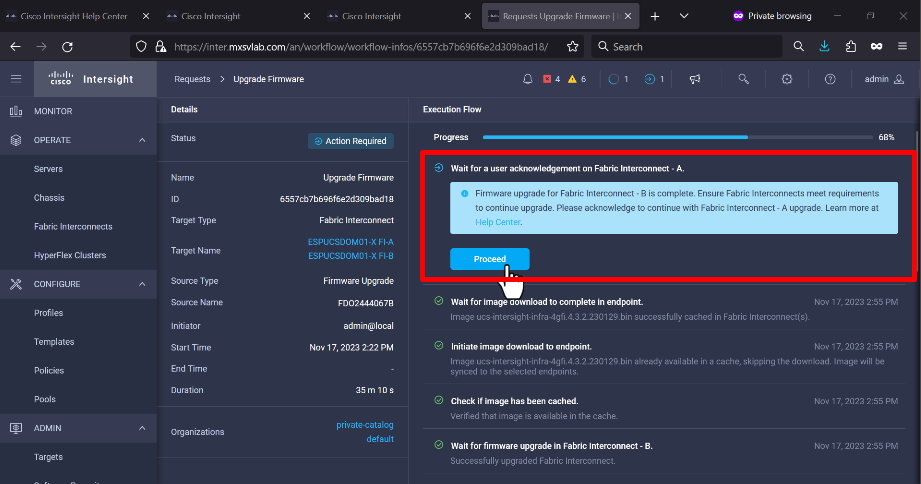
Step 16. It requires an acknowledge for the reboot of the Fabric. Click Proceed to continue with the upgrade.
Step 17. Verify that the upgrade completed successfully in the Bundle Version column of the Fabric Interconnects tab.
Both FIs are now at version 4.3.2.

Server Upgrade
Step 1. Upload the firmware package for the server on Admin > Software Repository > Software Files > Upload Software.
Verify that it is listed when the upload is complete.

Step 2. Navigate to Operate > Server. Select the server you want to upgrade. For this example, server 1/3.
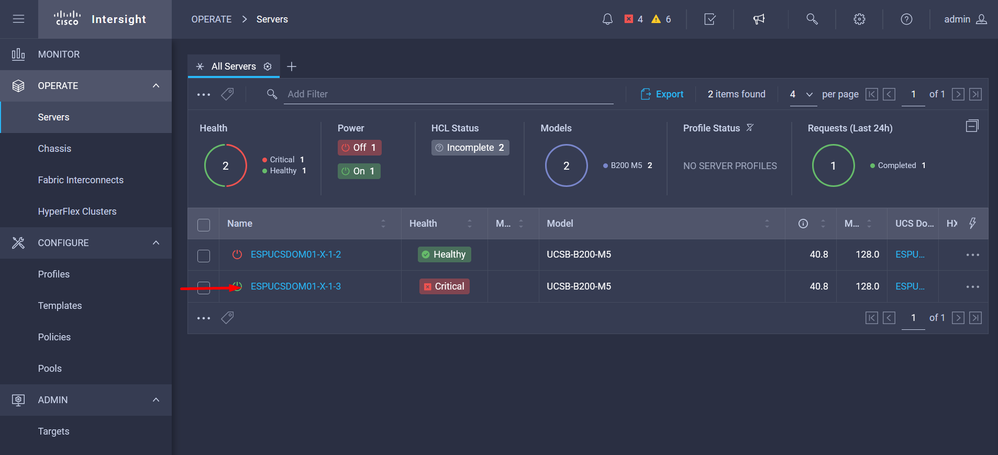
Step 3. Navigate to the Action button and click it, it shows some options, select Upgrade firmware.
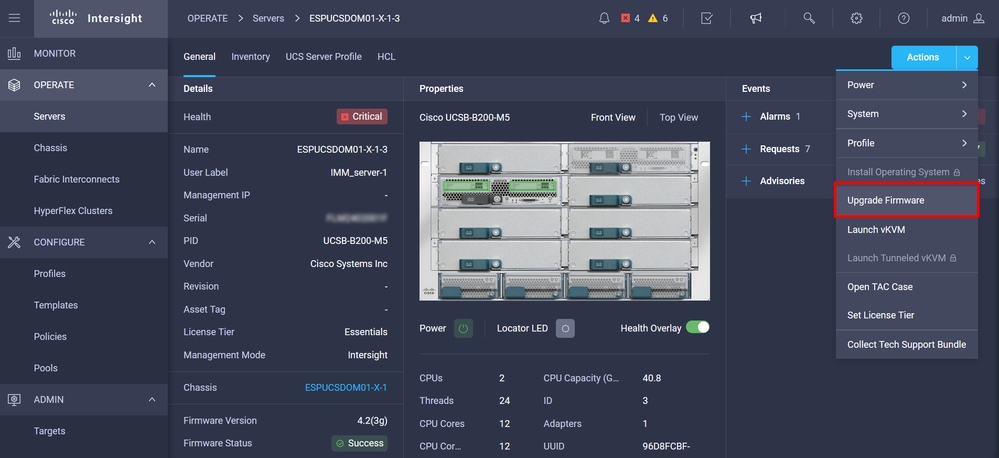
Step 4. Verify that you have selected the correct server and click Next. Select the firmware version to upgrade.
A summary of the upgrade is displayed. Make sure the server and firmware version are correct.

Step 5. It displays a new window. Enable Reboot Immediately to Begin Upgrade and click on Upgrade.
Note: If you do not enable, the server does not get upgraded immediately. Server is upgraded until next reboot.
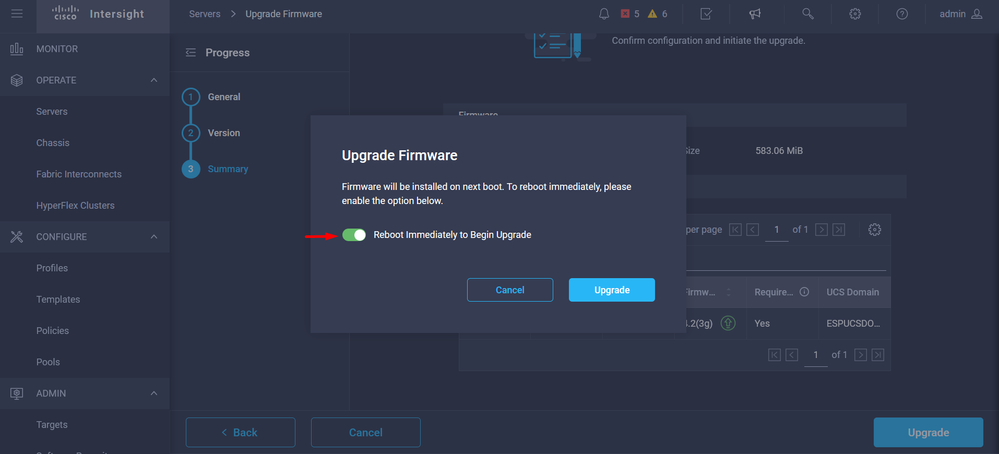
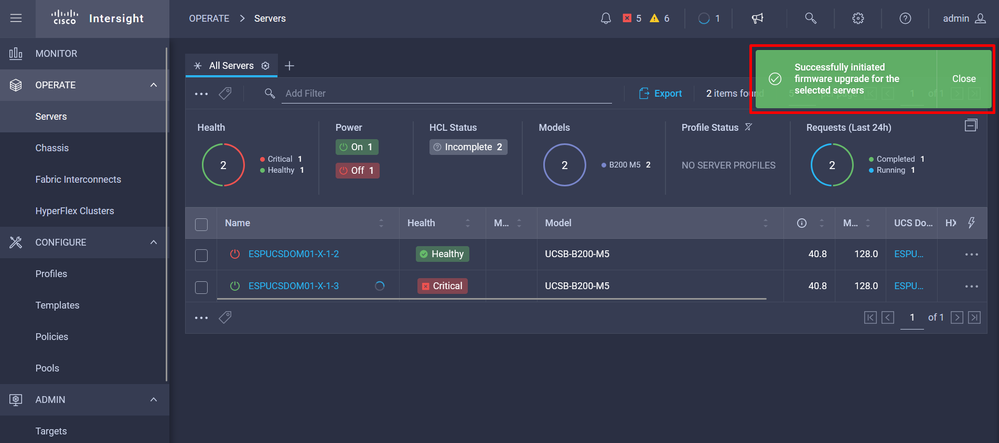
Step 6. A green box appears in the upper right corner if the upgrade action was successful.
Step 7. Press the icon next to the alarm button to check the progress of the upgrade.

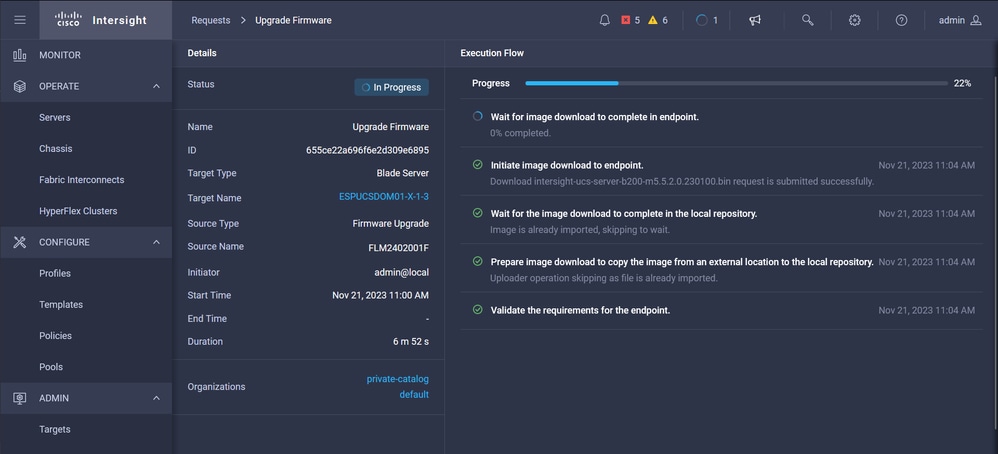
Step 8. Once complete, verify the new firmware version for the server on the General tab. This server now has firmware version 5.2(0.23).

Verify
FOR FABRIC INTERCONNECT

ESPUCSDOM01-X-A# connect nxos
ESPUCSDOM01-X-A(nx-os)#show version | egrep NXOS
 NXOS: version 9.3(5)I43(2b) <<<<
 NXOS image file is: bootflash:///ucs-6400-k9-system.9.3.5.I43.2b.bin
 NXOS compile time:  10/23/2023 15:00:00 [10/23/2023 18:26:58]

FOR SERVER

ESPUCSDOM01-X-A# connect cimc 1/3
[ help ]#version
ver: 5.2(0.230100) <<<<
Build Time: Wed Nov  1 17:14:35 2023
Build Sha: 7e4aab46a4c04c403b3a2ae380572c38c3c4ef18
Build Tools: armv7-cortex_a9_v011-linux-gnueabi
Related Information
Cisco Intersight Virtual Appliance and Intersight Assist Getting Started Guide


 Feedback