Introduction
This document describes the configuration steps required to integrate the Unified Contact Center Express (UCCX) with Cisco Unified Intelligent Center (CUIC).
Prerequisites
Requirement
Cisco recommends that you have knowledge of these topics:
- Cisco Unified Contact Center Express Release 12.5
- Cisco Unified Intelligence Center Release 12.5
Components Used
The information in this document is based on these software and hardware versions:
- Cisco Unified Contact Center Express Release 12.5
- Cisco Unified Intelligence Center Release 12.5
Background Information
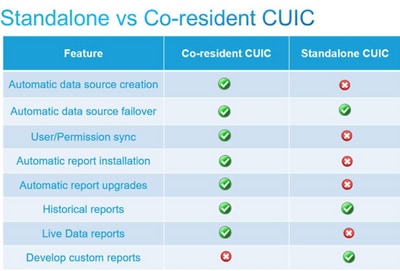
Standalone CUIC Vs Coresident CUIC
The standalone CUIC compared to co-resident CUIC on UCCX doesn't provide the feature of live data. Customization of user permission is not supported on coresident CUIC when compared with standalone CUIC. The UCCX resources don't get automatically synced with standalone CUIC needed to be added manually to CUIC or import from an LDAP server.
Configure
Importing CUIC tomcat certificate on UCCX
After a successful installation of CUIC server, perform one of the following:
If the Cisco Unified Intelligence Center (CUIC) is using the self-signed certificate, then upload Tomcat certificates from the Cisco Unified Intelligence Center nodes into the Unified CCX Tomcat trust store.
Use the Cisco Unified OS Administration interface of CUIC (https://<cuic-hostname/IP address>/cmplatform) to download CUIC self-signed tomcat certificate (tomcat.pem) file or copy the certificate information from the show cert own tomcat CLI command output.
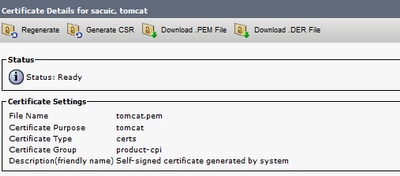
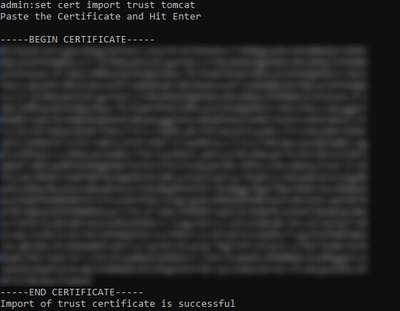
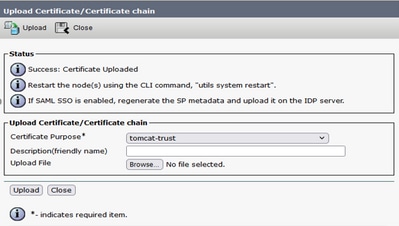
Use the Cisco Unified OS Administration interface of UCCX (for example, https://<uccx-hostname>/cmplatform) to upload the CUIC self-signed tomcat certificate file as tomcat trust certificate or paste certificate output collected from CUIC CLI by using the command set cert import trust tomcat from CLI
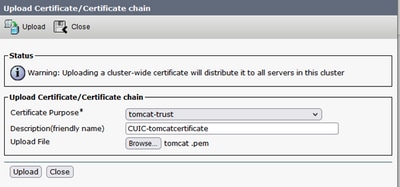
If the Cisco Unified Intelligence Center (CUIC) cluster is using the CA signed certificate, then upload the root CA certificate into the Unified CCX Tomcat trust store.
Once the certificates are successfully uploaded in the UCCX trust store restart the UCCX servers using the utils system restart from CLI starting with publisher node followed by the subscriber.
UCCX data source configuration on CUIC
For pulling the historical data from the UCCX database from standalone CUIC add the UCCX data source in CUIC
- From the configure option in CUIC, navigate to Data source.
- Select the new option
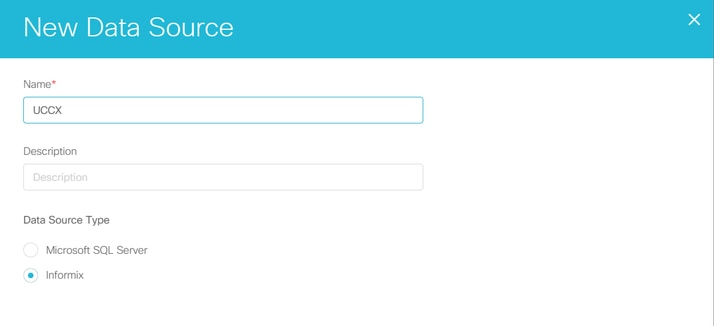
- Enter the name and description
- Select the data source type as INFORMIX
- Hit Next to enter the other details of UCCX
In the host, setting enter the details as mention below
- Data source Host: IP address of UCCX publisher node
- Port: 1504
- Database Name: db_cra
- Instance: Enter the hostname of the UCCX server underscore uccx (example uccxpub_uccx)
- Time zone: Select the time zone from the drop-down setting which is configured on the UCCX server.

In the Authentication Settings enter details as below
- Database User ID: uccxhruser
- Password: Enter the required password
Note: Password for uccxhruser is maintained via Password management: CCX Administration >Tools > Password Management > Historical Reporting User. If you are changing the password do make sure to update the password on other applications as well which are using application user uccxhruser.
- Charset: UTF-8
- Max Pool Size: 100

Note: Use the Test Connection options after the CUIC server configuration is completed on UCCX to verify the database is accessible and the credentials provided are correct.
- Select the Secondary tab to configure failover for the data source
- Check the Failover enabled check box
- Enter the details of the UCCX subscriber node

Note: If it’s a single node server this configuration is not required
Standalone CUIC server configuration on UCCX
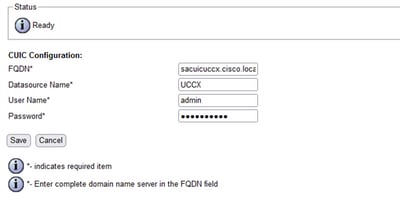
Navigate to System in the UCCX admin page and select the Standalone CUIC configuration to add the CUIC server details on UCCX
- FQDN: Enter the FQDN of the CUIC server
- Data source Name: Enter the data source name configured on CUIC.
- Username: Enter the administrator username of standalone CUIC
- Password: Enter the administrator password of standalone CUIC
Note: Make sure to add the host entry of the CUIC server to the DNS server used for UCCX.
Importing reports from the Co-resident CUIC to standalone CUIC
The standalone CUIC server does not import the UCCX historical reports by default.
- First, download the UCCX reports from the coresident CUIC of UCCX using the export option in the Actions tab
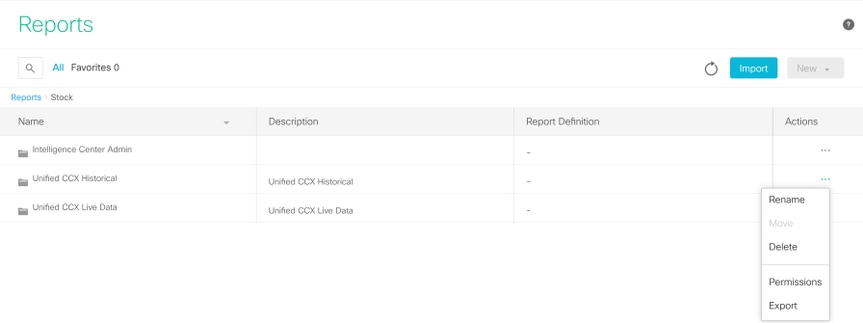
- From the drop-down select the stock as a folder to import the UCCX report.

- Check the select option to overwrite the permission for the reports and then select the import option.
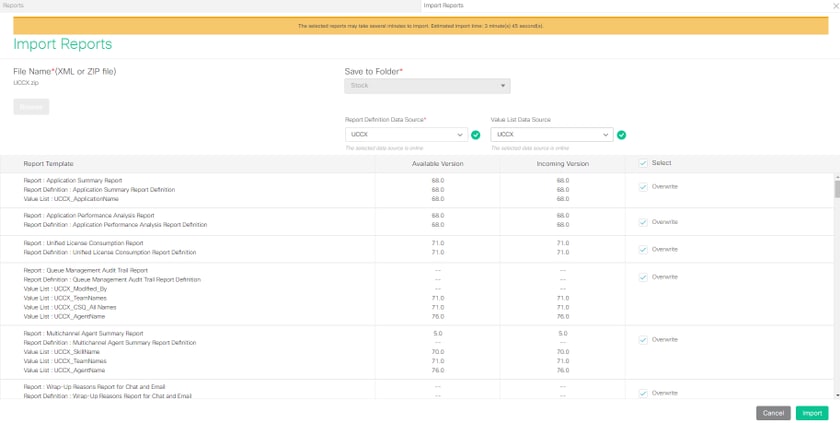
- Assign the permission of reports to required users or groups by going into the permissions tab available in configure option on CUIC.

Verify
Run one of the CUIC stock reports to display the data from UCCX on standalone CUIC.
Troubleshoot
- Verify FQDN is correct.
- Make sure the self-signed tomcat certificate or the root certificate from CUIC are added to the UCCX tomcat trust store.
- Make sure the test connection option in the data source on CUIC shows a green checkmark after configuration is completed.
- Check network connectivity is UP and if the CUIC server is reachable from the UCCX server
- The username or the password entered for the Standalone CUIC server is incorrect.
- The instance name is given for data source with standalone match with that in UCCX.
- Cisco Unified CCX Database service under Serviceability page must be INSERVICE.


 Feedback