Introduction
This document describes how to configure Customer VIrtual Assistant (CVA) feature for Webex Contact Center (WxCC).
Prerequisites
Requirements
Cisco recommends that you have knowledge of these topics:
- Google Contact Center Artificial Intelligence
- Google Dialogflow
- WxCC 2.0
Components Used
The information in this document is based on these software versions:
- WxCC 2.0
- Google Dialogflow ES
The information in this document was created from the devices in a specific lab environment. All of the devices used in this document started with a cleared (default) configuration. If your network is live, make sure that you understand the potential impact of any command.
Configure
Dialogflow Project / Virtual Agent
Google Dialogflow needs to be configured and connected to Cisco Speech Server before you start CVA configuration. You require a Google service account, a Google project and a Dialogflow virtual agent. Then, you can teach this Dialogflow virtual agent the natural language so the agent can respond to the customer interaction with the use of Natural Language processing.
What is a Dialogflow?
Google Dialogflow, is a conversational User Experince (UX) platform which enables brand-unique, natural language interactions for devices, applications, and services. In other words, Dialogflow is a framework which provides NLP / NLU (Natural Language Understanding) services.Cisco integrates with Google Dialogflow for CVA.
What does this mean for you? Well, it means you can basically create a virtual agent on Dialogflow and then integrate it with Cisco Contact Center Enterprise.
Here are the steps to create a virtual agent or Dialogflow project:
Step 1. Create a Google Account/ Project or Have a Google Project assigned to you from your Cisco Partner.
Step 2. Log in to Dialogflow. Navigate to https://dialogflow.com/
Step 3. Create a new agent. Choose a name for your new agent and the default time zone. Keep the language set to English. select on CREATE AGENT.
In this example the virtual agent handles bank transactions, so the name of the agent for this lab is BankingRoot. The language is English and the Timezone is the default system time.
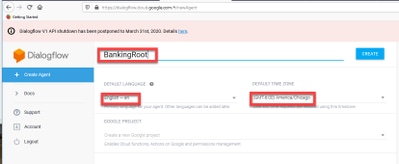
Step 4. select on the CREATE tab.
Step 5. After the virtual agent is created, you can import pre-build Google virtual agents as shown in the image or you can teach the agent how to communicate with the caller.
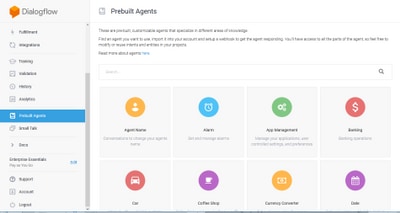
Note: You can also import a Cisco sample Virtual agent from devnet: DialogflowAgent.zip
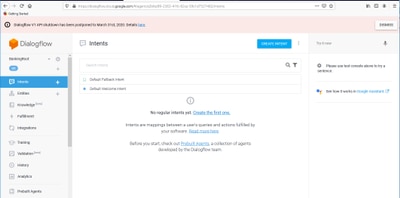
Step 6. At this point, the agent still doesn't know how to respond to any user input. The next step is to teach it how to behave. First, you model agent's personality and make it respond to a hello default welcome intent and present itself. After the agent is created you see this image.
Note: hello is used by WxCC Flow Control to start the conversation with the virtual agent
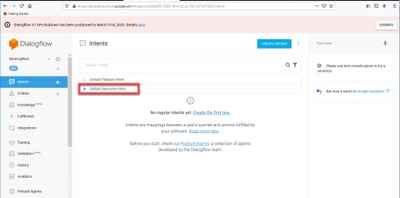
Step 7. select on Default Welcome Intent.
Step 8. Now scroll down to Responses, and select on ADD RESPONSES.
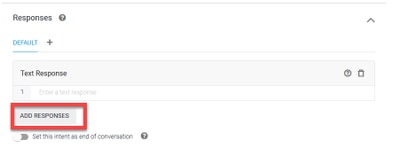
Step 9. Select Text Response.

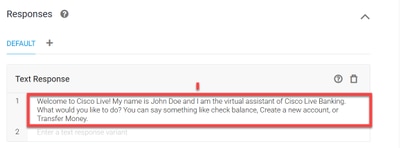
Just as you did with the training phrases, add a proper response. This is the first message the user receives from agent. In order to make your agent sound more natural and conversational, think of a normal conversation and imagine what an agent would say. Still, it's a good practice to let the user know that theinteraction is with an Artificially Intelligent (AI) agent. In this scenario a Cisco Live Banking application is used as an example, so you can add something like:Welcome to Cisco Live! My name is John Doe and I am the virtual assistant of Cisco Live Banking. What would you like to do? You can say something like Check Balance, Create a new account, or Transfer Money.
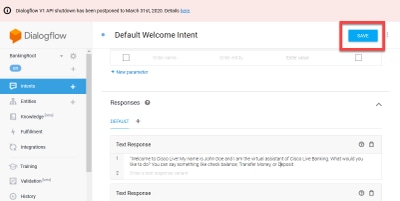
Step 10. select SAVE.
Before you create more intents, create the entities. An Entity is a property or a parameter which can be used by Dialogflow to answer the request from the user — the entity is usually a keyword within the intent such as an account type, date, location, etc. So before you add more intents, add the entities: Account Type, Deposit Type, and Transfer Type.
Step 11. On the Dialogflow Menu, select on Entities.

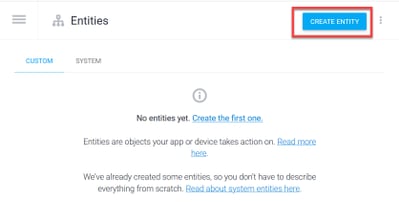
Step 12. On the Entities window, select on CREATE ENTITY.
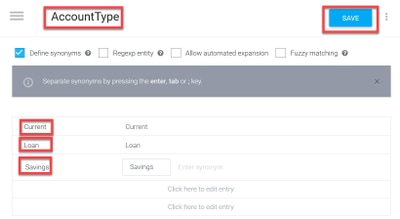
Step 13. On the Entity name type AccountType. In the Define Synonyms field, type: Current, Loan and Savings and select SAVE.
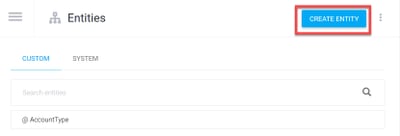
Step 14. Navigate back to the Dialogflow menu and select on Entities once again.Then, in the Entities window, select CREATE ENTITY.
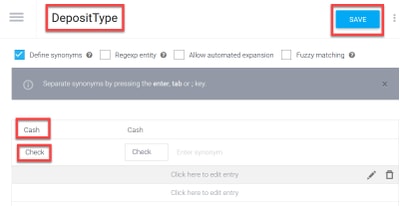
Step 15. On the Entity name type: DepositType. On the Define synonyms field, type: Cash, and Check, and select on SAVE.
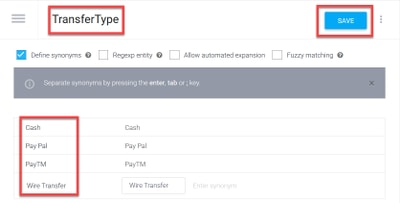
Step 16. You can create more entities such as: TransferType and on the Define synonyms field type: Cash, Pay Pal, PayTM and Wire Transfer, etc.
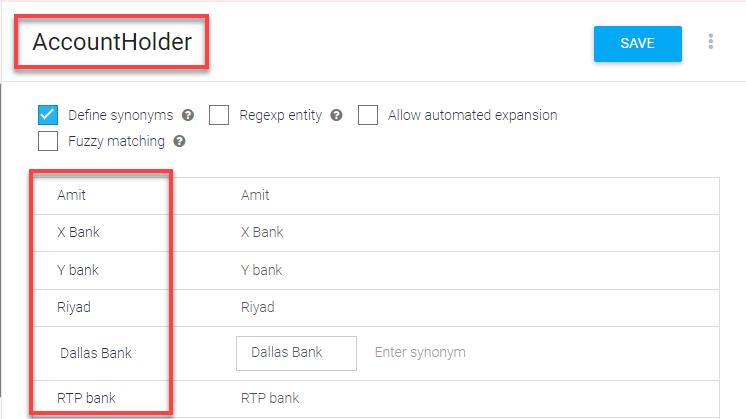
Step 17. Create the Account Holder entity. In the Entity name field type AccountHolder; in the Define Synonyms field.
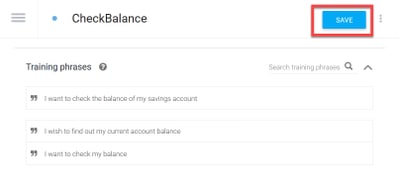
Step 18. Now, continue the agent education with all the possible questions received in the banking system and the typical responses. Create the next intents: CheckBalance, TransferMoney. For CheckBalance intent you can add the training phrases shown in the image:
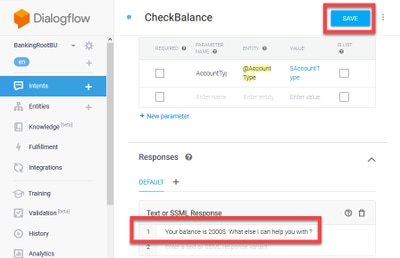
You can also add this response:
Step 19. You can add the rest of the Intents(TransferMoney, CreateAccount and Exit), Training Phrases, parameters and responses.
Note: For more information about Google Dialogflow configuration navigate to: DialogFlow Virtual Ageent
Control Hub Configuration
Control Hub - Connector Setup
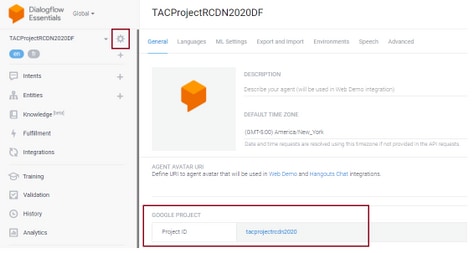
Step 1. Download the Json key for the Virtual Agent bot created in the above steps. Select the settings and service account of the specific bot in the google project which shall interact with WxCC call flow, As shown in the image.
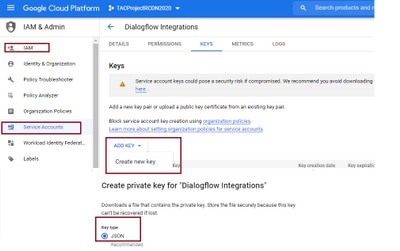
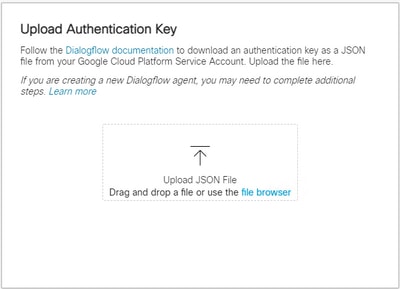
Step 2. In control Hub configure the connector and upload the Json key for authorization with google services.
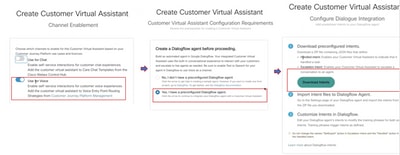
While the connector is being configured control hub provides the option to download the handled and escalation intents so that it can be added into the google bot.
Step 3. These intents are the Zip files which are uploaded to the bot as intents.
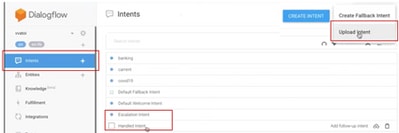
- Handled Intents: When customer and bot is talking and conversations ends, To make the bot understand the conversation has ended certain tones are required. Those are called as handled intents. In short customer query is resolved you can end the conversation.
- Escalation Intent: In the bot intents can be added by the customer while designing the bot which shall trigger the call to be transferred to the agent. One Example is the “I need help” – If you see the intent is help and when this is seen the call with disconnected from bot and transferred to agent.
Step 4. After the intent upload is complete add the bot Json key into the control hub and validate.
Step 5. For validation to be successfull Dialogflow API admin role is required for the service account which interacts beween the bot and VVA service. To add in google cloud platform (gcp) under IAM & Admin prmissions ensure the service account is added to Dialog Flow Admin role as seen in this screen shot.

Step 6. As the Json key is authorized and Google dialogflow completes the integration process we see the card in services section of control hub.
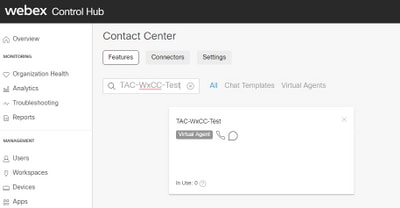
Note: In GCP you can have lot of projects. The JSON key which has a project ID helps the system to know what agent and intent to use.

Webex CC Administrator Portal - Routing Strategy
1. To map the bot to the call flow first create an entry point and then map the flow in the routing strategy to this entry point

Webex CC Administrator Portal - Flow Control
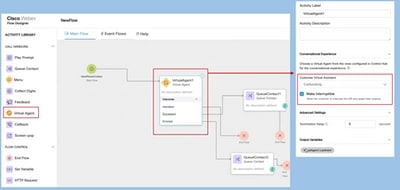
1. Google dialog flow bot can be invoked from flow control script via Virtual Agent activity node.
2. In the node one can select the bot what has been created for this call flow and the make interruptible flag can be checked to ensure the customer can execute the intent such as escalate to reach the desire queue for live agent interaction.
Related Information
Cisco Documentation
Google Documentation


 Feedback