Introduction
This document describes how to configure the Microsoft Office 365 (O365) email account for Webex Contact Center (WxCC).
Prerequisites
Requirements
Cisco recommends that you have knowledge of these topics:
- Microsoft Office 365
- WxCC 2.0
Components Used
The information in this document is based on these software and hardware versions:
- Microsoft Office 365 email account
- WxCC 2.0
The information in this document was created from the devices in a specific lab environment. All of the devices used in this document started with a cleared (default) configuration. If your network is live, ensure that you understand the potential impact of any command.
Configure
Here are the steps to complete email configuration in WxCC and integrate with Microsoft O365. Ensure there is an active O365 email account and all necesary configurations are completed on the email account.
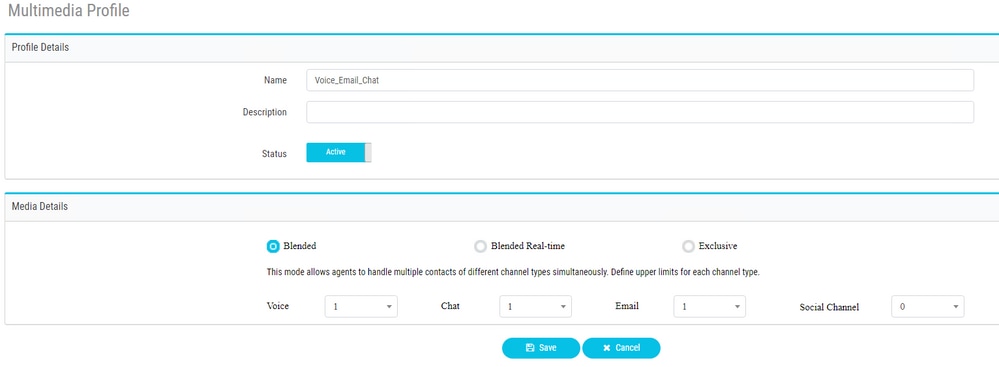
- Create a multimedia profile with the required email channels.
- Associate the multimedia profile either with the user directly or the team.
Note: If the multimedia profile is configured in both the user and the team sections, the user configuration overrides the multimedia profile of the team that the agent uses to log in to Agent Desktop.
User:
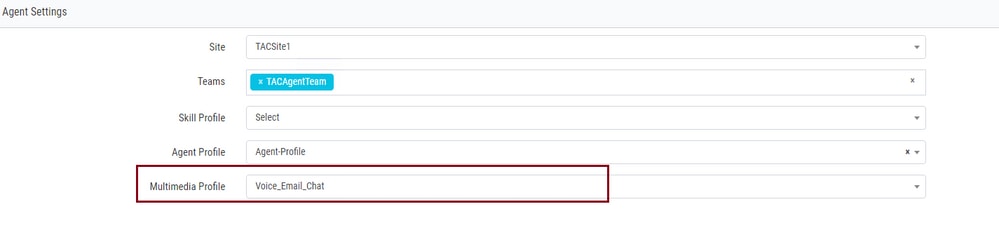
Team:

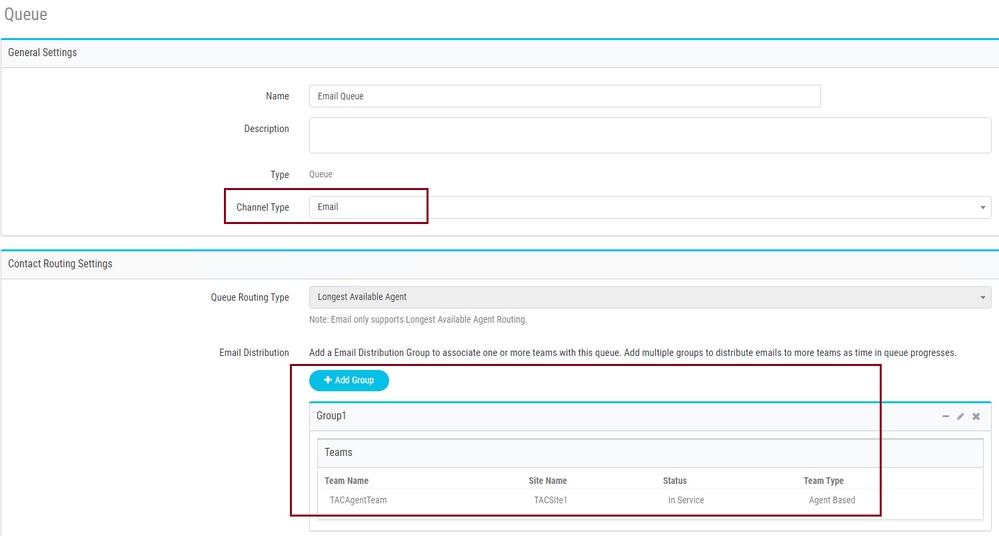
- Create an email queue and associate the team.
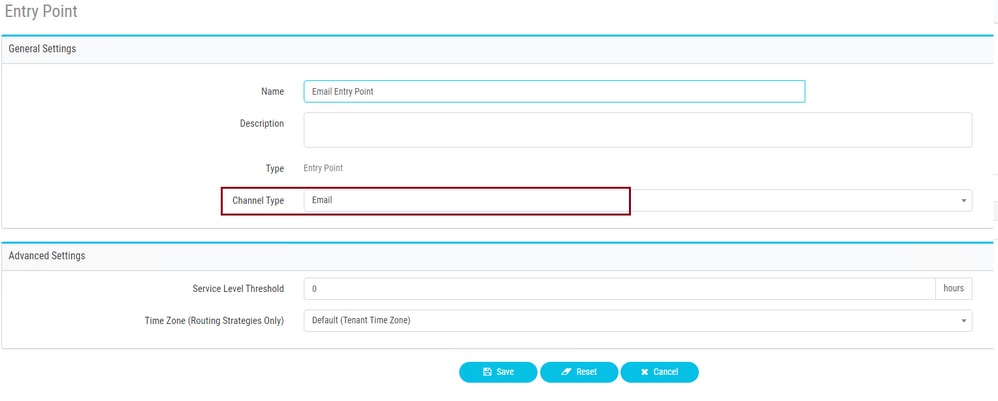
- Create an email entry point.
- Create a Routing Strategy for the email entry point configured in the previous step. Choose
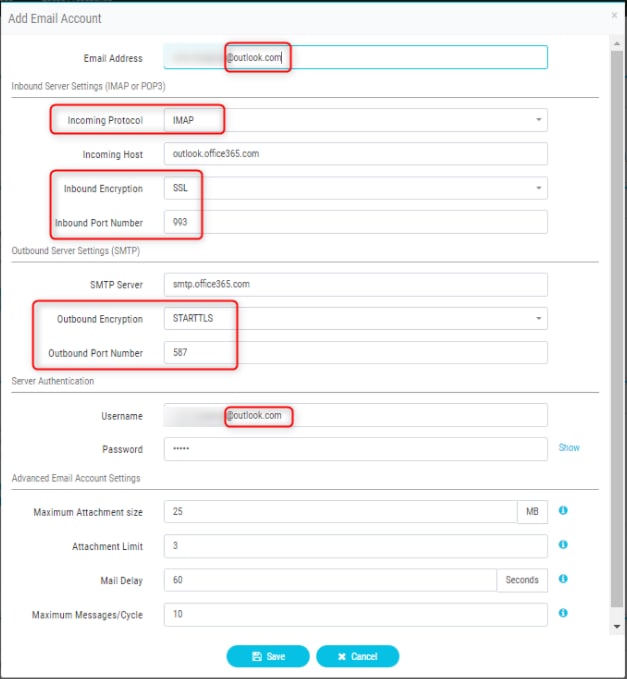
Add Email Account and provide the email account details as provided by your administrator. See Microsoft POP, IMAP and SMTP settings for more information.
Example configuration:
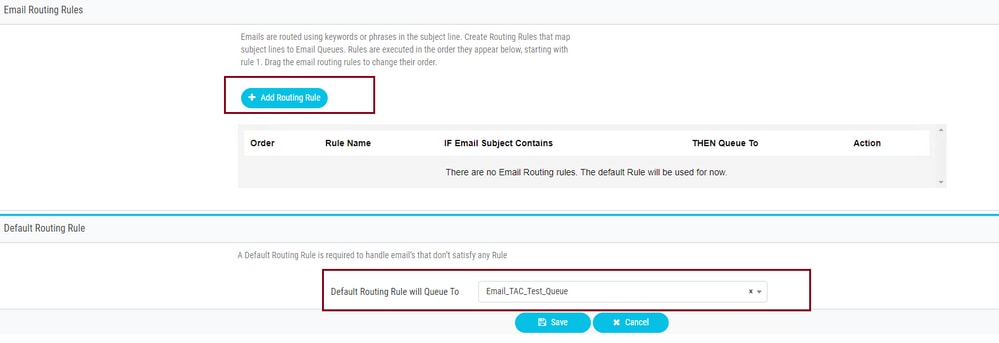
- Add the routing rule or associate the email queue with default routing rule and save the routing strategy.
Verify
Use this section in order to confirm that your configuration works properly.
Log in as an agent with the team configured and associated with email queue, make agent go into available state, send a test email to the account, and verify the email activity is received on agent desktop.
Troubleshoot
This section provides information you can use in order to troubleshoot your configuration.
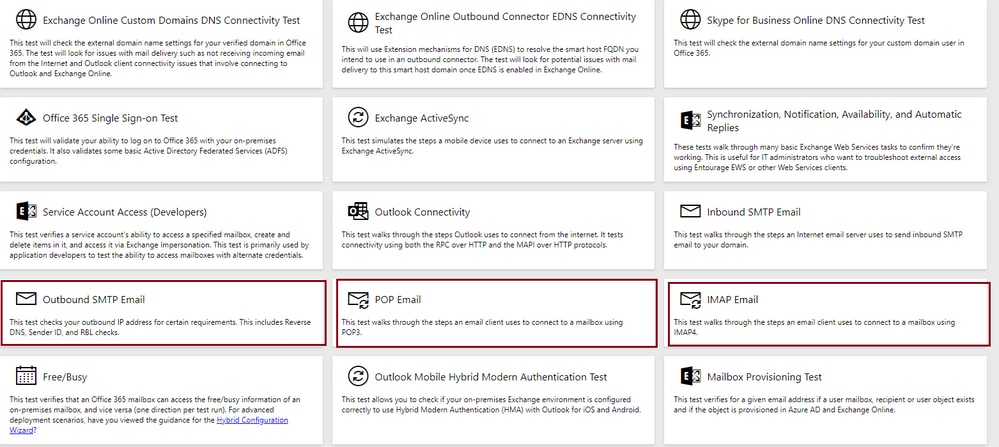
In order to troubleshoot that the email account settings are correct, use the Microsoft test tool.
In order to test inbound email connectivity, choose IMAP Email or POP Email based on the configuration. In order to test outbound email connectivity, choose Outbound SMTP Email.
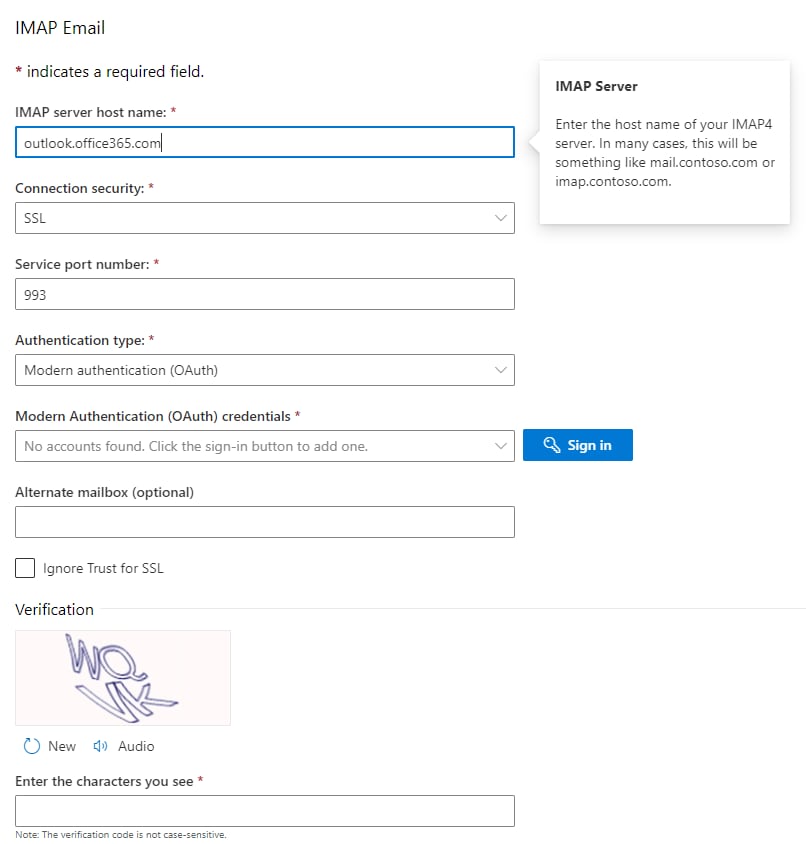
Enter and verify the details in order to test and ensure the protocol, port, and account details provided accept the connection.
 Feedback