Introduction
This document describes how to configure Self-Signed or Certificate Authority (CA) Certificate on Unified Contact Center Enterprise (UCCE) Windows 2008 R2 servers.
Prerequisites
Requirements
Cisco recommends that you have knowledge of the Signed and Self-Signed certificate process.
Components Used
The information in this document is based on these software versions:
- Windows 2008 R2
- UCCE 10.5(1)
Configure
Setting up certificate for HTTPS communication on windows server is a three step process
- Generate Certificate Signing Request (CSR) from Internet Information Services (IIS) Manager
- Upload the CA Signed Certificate to Internet Information Services (IIS) Manager
- Bind the Signed CA Certificate to the Default Web Site
Step 1. Generate CSR from Internet Information Services (IIS) Manager
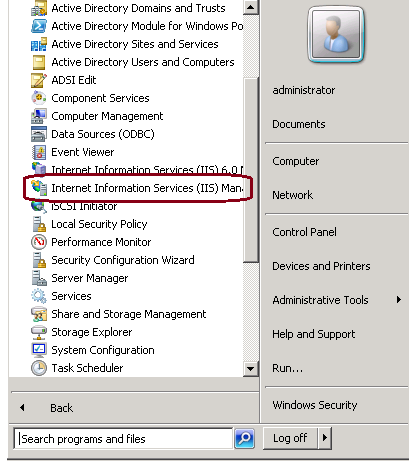
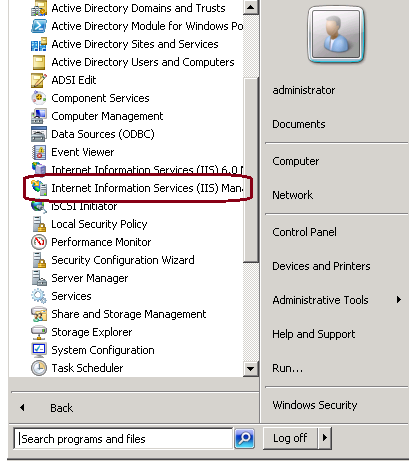
1. Log on to Windows, click Start > Run > All Programs > Administrative Tools > Internet Information Services (IIS) Manager, as shown in this image. Do not select IIS version 6 if it exists.
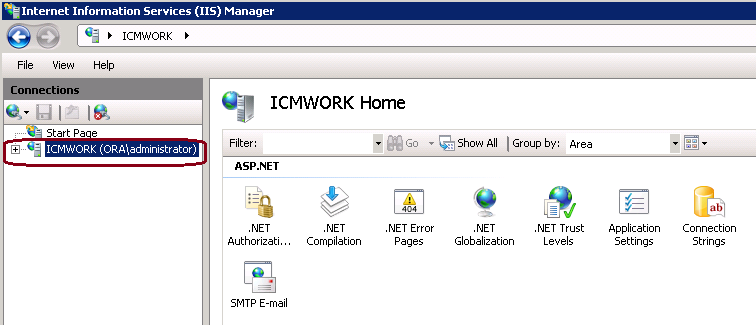
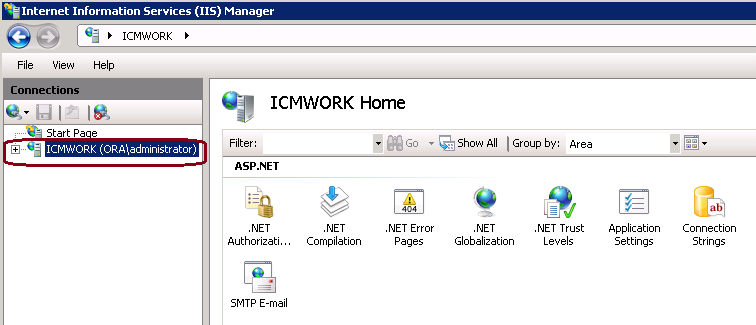
2. In the Connections window pane to the left, select the server name, as shown in this image.
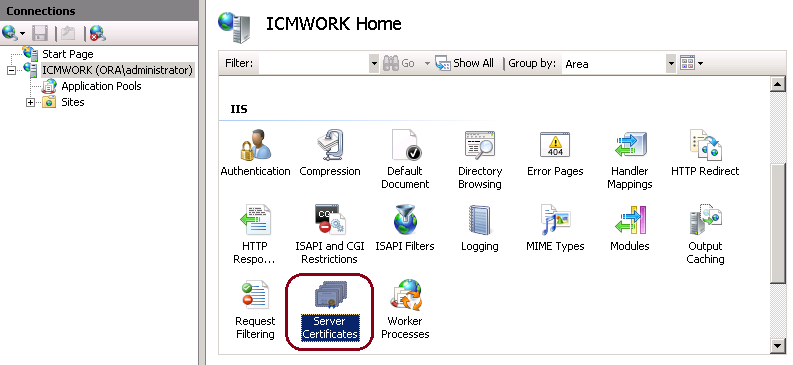
3. In the middle window pane, select IIS > Server Certificates. Double click on Server Certificates to generate the certificate window, as shown in this image.
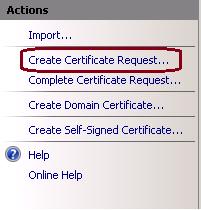
4. On the right pane, click on Actions > Create Certificate Request, as shown in this image.
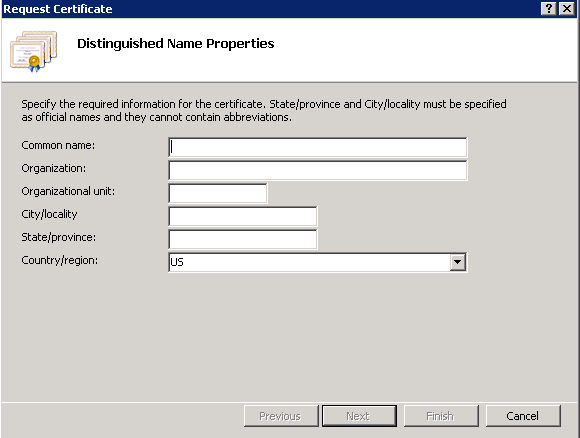
5. To complete the certificate request, enter in the Common name, Organization, Organization unit, City/locality, State/province and Country/region, as shown in this image.
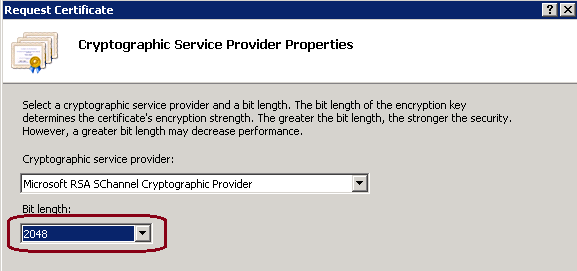
6. Click Next to modify the cryptographic and security bit length, it is recommended to use at least 2048 for better security, as shown in this image.
7. Save the certificate request in desired location which will be saved as a .TXT format, as shown in this image.
8. Provide this file to be signed by the team who manages the internal CA or external CA service request, as shown in this image.
Step 2. Upload the CA Signed Certificate to Internet Information Services (IIS) Manager
1. Log on to Windows, click Start > Run > All Programs > Administrative Tools > Internet Information Services (IIS) Manager, as shown in this image. Do not select IIS version 6 if it exists.
2. In the Connections window pane to the left, select the server name, as shown in this image.
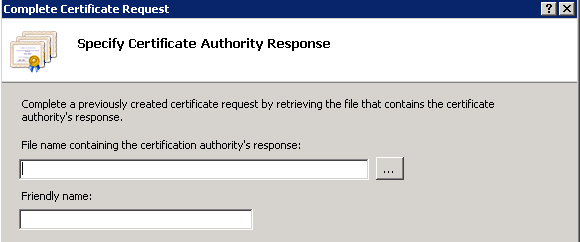
3. In the middle window pane, select IIS > Server Certificates. Double click on Server Certificates to generate the certificate window, as shown in this image.
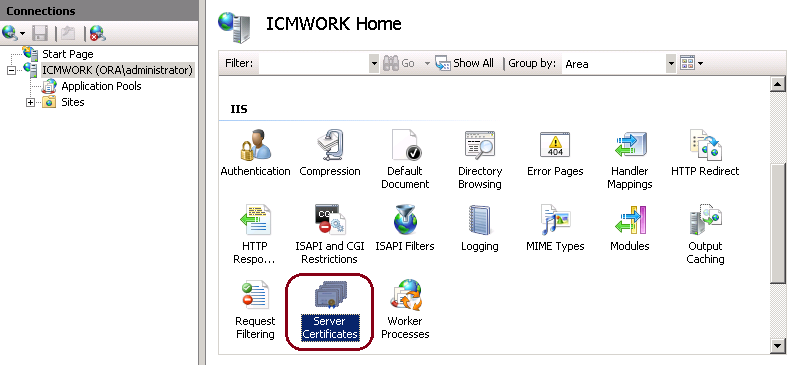
4. On the right pane, click on Actions > Complete Certificate Request, as shown in this image.
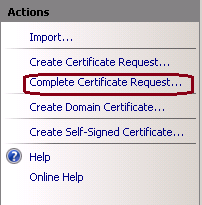
5. Prior to this step, ensure that the signed certificate is in .CER format and has been uploaded to the local server. Click the … button to browse the .CER file. Inside the Friendly name, use the FQDN of the server, as shown in this image.
6. Click OK to upload the certificate. When complete, confirm the certificate now appears in Server Certificates window, as shown in this image.

Step 3. Bind the Signed CA Certificate to the Default Web Site
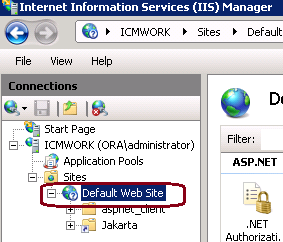
1. In IIS Manager Under the Connections window plane, left hand, click on the <server_name> > Sites > Default Web Site, as shown in this image.
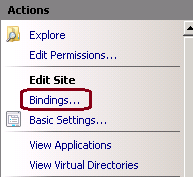
2. Under Actions window pane on right hand side, click on Bindings, as shown in this image.
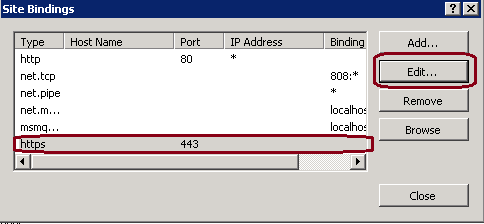
3. At the site bindings window, click on https to highlight more options. Click on Edit to continue, as shown in this image.
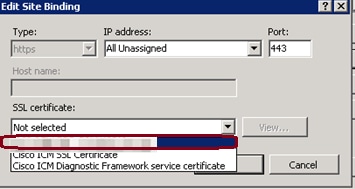
4. Under the SSL certificate parameter, click on the down arrow to select the Signed Certificate uploaded previously. View the Signed Certificate to verify the Certification Path and values matches the local server. When completed press OK, then Close to exit out of the Site Bindings window, as shown in this image.
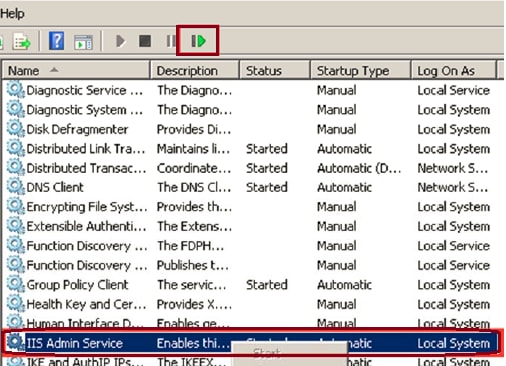
5. Restart the IIS Admin Service under the Services MMC snap-in by clicking on Start > Run > services.msc., as shown in this image.
6. If successful, the client web browser should not prompt any certificate error warning when entering in the FQDN URL for the web site.
Note: If IIS Admin Service is missing restart the World Wide Web Publishing service.
Verify
There is currently no verification procedure available for this configuration.
Troubleshoot
There is currently no specific troubleshooting information available for this configuration.


 Feedback