Introduction
This document describes certificate configurations that are required for UCCE SSO. Configuration of this feature involves several certificates for HTTPS, Digital Signature and Encryption.
Requirements
Cisco recommends that you have knowledge of these topics:
- UCCE Release 11.5
- Microsoft Active Directory (AD) - AD installed on Windows Server
- Active Directory Federation Service (ADFS) Version 2.0/3.0
Components Used
UCCE 11.5
Windows 2012 R2
Part A. SSO Message Flow
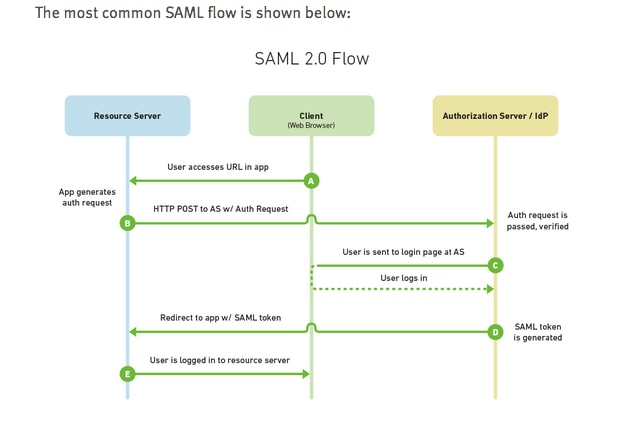
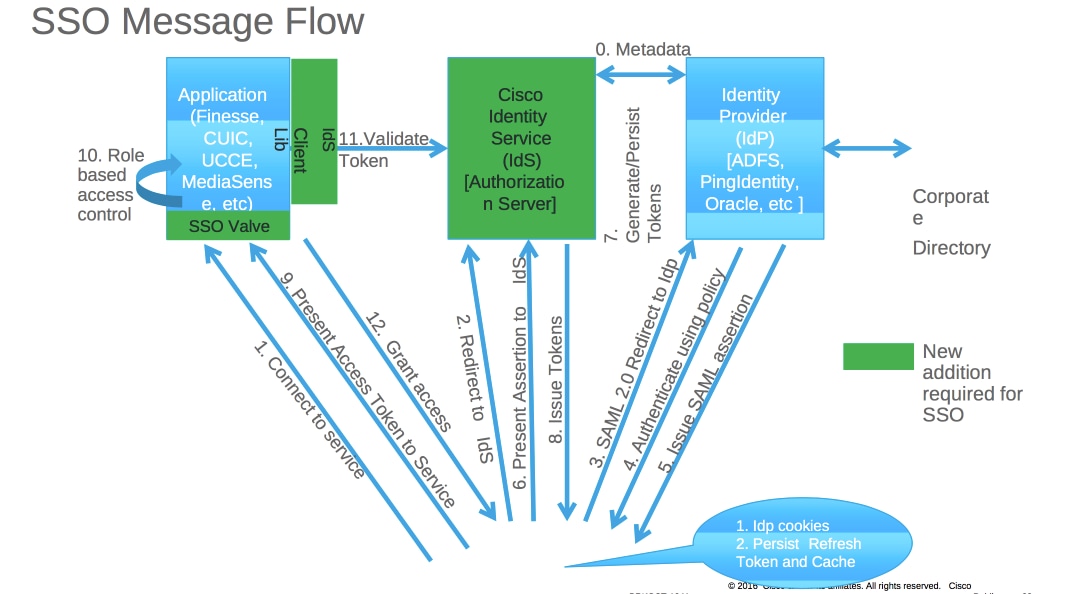
When SSO is enabled, when agent logs in to Finesse desktop:
- Finesse server redirects agent browser to communicate with Identity Service (IDS)
- IDS redirects agent browser to Identity Provider (IDP) with SAML request
- IDP generates SAML token and passes to IDS server
- When token was generated, every time agent browses to ppplication, it uses this valid token for log in
Part B. Certificates Used in IDP and IDS

IDP Certificates
- SSL Certificate (SSO)
- Token Signing Certificate
- Token – decrypting

IDS Certificates
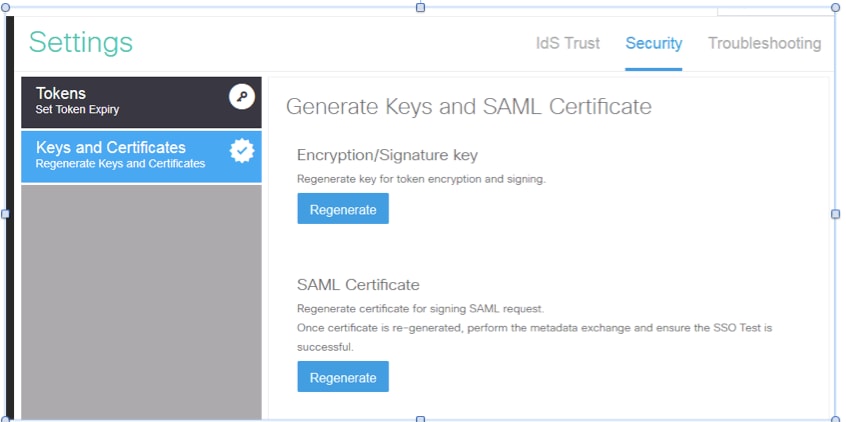
- SAML Certificate
- Signature Key
- Encryption Key
Part C. IDP Certification in detail and Configuration
SSL Certificate (SSO)
- This certificate is used between IDP and client. Client must trust SSO certificate
- SSL certificate is placed to encrypt the session between client and IDP server. This certificate is not specific to ADFS, but specific to IIS
- The subject of the SSL certificate must match with the name used in ADFS configuration

Steps to configure SSL certificate for SSO (local lab with internal CA signed)
Step 1. Create SSL certificate with Certificate Signing Request (CSR) and sign by internal CA for ADFS.
- Open Server Manager.
- Click Tools.
- Click Internet Information Services (IIS) Manager.
- Select the local server.
- Select Server Certificates.
- Click Open Feature (action panel).
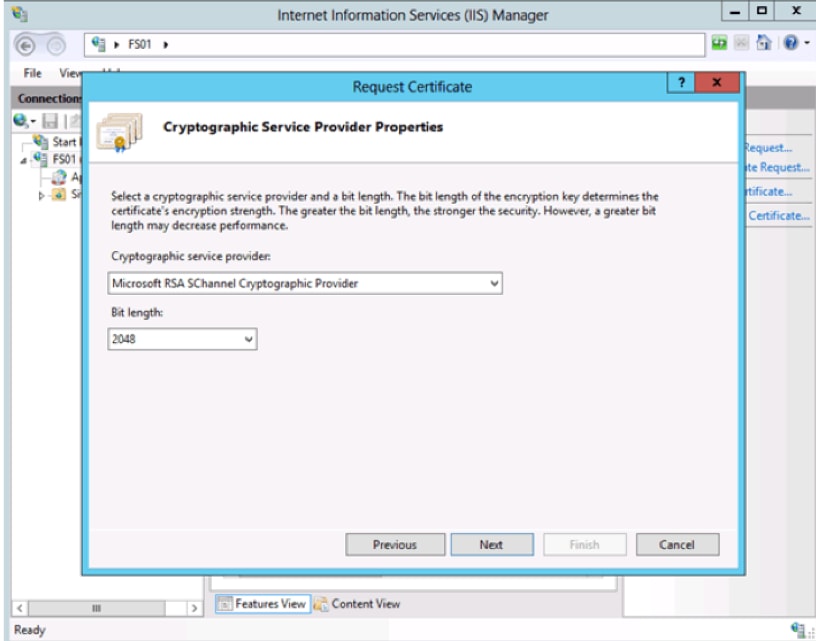
- Click create certificate request.
- Leave the Cryptographic service provider at the default.
- Change the Bit Length to 2048.
- Click Next.
- Select a location to save the requested file.
- Click Finish.

Step 2. CA signs the CSR that was generated from step 1.
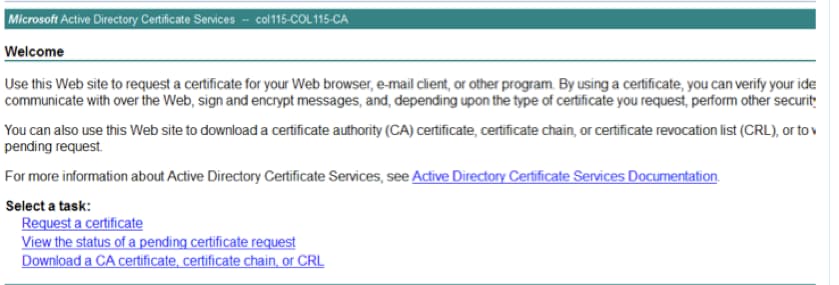
- Open CA server to sing this CSR http:<CA Server ip address>/certsrv/.
-
Click Request a certificate.
-
Click Advanced certificate request.
-
Copy the CSR into Based-64 encoded certificate request.
-
Submit.
-
Download the signed certificate.

Step 3. Install the signed certificate back to ADFS server and assign to ADFS feature.
1. Install the signed certificate back to ADFS server. In order to do this, open Server manager>Tools>Click Internet Information Services(IIS) Manager>.
Local Server>Server Certificate>Open Feature (Action Panel).
2. Click Complete Certificate Request.
3. Select the path to the complete CSR file that you completed and downloaded from the third party certificate provider.
4. Enter the friendly name for the certificate.
5. Select Personal as the certificate store.
6. Click OK.

7. At this stage, all certificate were added. Now, SSL certificate assignment is required.
8. Expand the local server>Expand Sites>Select Default Web Site >Click Bindings (actions pane).
9.Click Add.
10. Change the type to HTTPS.
11. Select your certificate from the drop down menu.
12. Click OK.
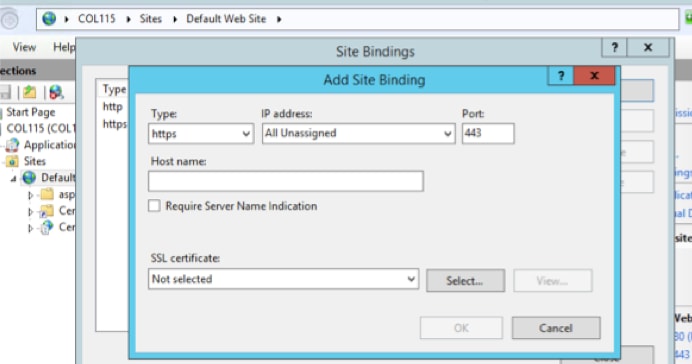
Now, SSL certificate for ADFS server was assigned.
Note: During installation of ADFS feature, previous SSL certificate must be used.
Token Signing Certificate
ADFS generates self-signed certificate for token signing certificate. By default it is valid for a year.
SAML token generated by IDP is singed by ADFS private key (Token Signing Certificate Private Part). Then, IDS uses ADFS public key to verify. This guarantees signed token isn't get modified.
The Token Signing Certificate is used every time that a user needs to gain access to a relying party application (Cisco IDS).
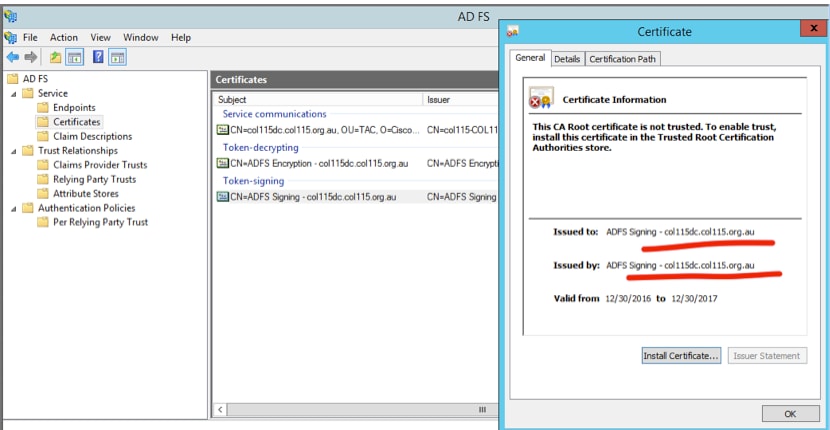
How does Cisco IDS server get the public key of Token Singing Certificate?
This is done by uploading ADFS metadata to IDS server, and then passing ADFS’ public key to IDS server. In this way, IDS gains the public key of ADFS server.
You need to download IDP metadata from ADFS. In order to download IDP metadata, refer to the link https:// <FQDN of ADFS>/federationmetadata/2007-06/federationmetadata.xml.
 From ADFS Metadata
 upload ADFS Metadata to IDS
Token Decryption
This certificate generates automatically by ADFS server (self-signed). If the token needs encryption, ADFS uses IDS public key to decrypt it. But, when you see ADFS token-dcrypting, it does NOT mean the token is encrypted.

If you want to see whether the token encryption was enabled for a specific relying party application, you need to check the encryption tab on a specific relying party application.
This image shows, token encryption was NOT enabled.
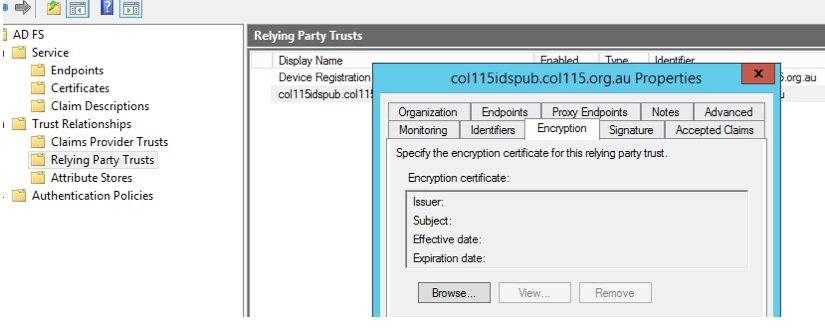 Encryption is NOT enabled
Part D. Cisco IDS side Certificate
- SAML certificate
- Encryption key
- Signature Key
SAML Certificate
This certificate is generated by IDS server (self-signed). By default it is valid for 3 years.

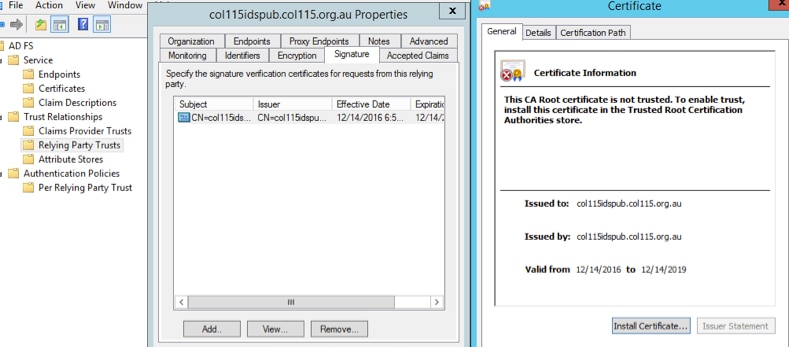
This certificate is used to sign SAML request, and send to IDP (ADFS). This public key is in the IDS metadata, and must be imported to ADFS server.
1.Download SAML SP metadata from IDS server.
2. Broswer to https://<ids server FQDN>:8553/idsadmin/.
3. Select settings and download SAML SP metadata and save it.
 Metadata from IDS Server
 import to ADFS Server
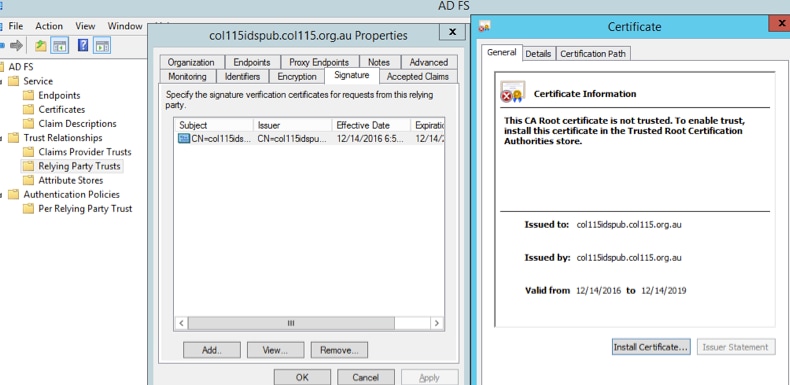 Verify from ADFS side
When IDS re-generates the SAML certificate-the one is used to sign the SAML request- it performs Metadata exchange.
Encryption/Signature Key
Encryption is not enabled by default. If encryption is enabled, it needs to be uploaded to ADFS.

Referecne :
http://www.cisco.com/c/en/us/td/docs/voice_ip_comm/cust_contact/contact_center/icm_enterprise/icm_enterprise_11_5_1/Configuration/Guide/UCCE_BK_U882D859_00_ucce-features-guide/UCCE_BK_U882D859_00_ucce-features-guide_chapter_0110.pdf