Introduction
Cisco Intersight, simplifies data center operations by delivering systems management as-a-service, alleviating the need to maintain islands of on-premise management infrastructure.
Cisco Intersight provides an installation wizard to install, configure, and deploy Cisco HyperFlex clusters — HX Edge and FI-attached. The wizard constructs a pre-configuration definition of your cluster called an HX Cluster Profile. This definition is a logical representation of the HX nodes in your HX cluster and includes-
- Security— credentials for HyperFlex cluster such as controller VM password, hypervisor username, and password.
- Configuration — server requirements, firmware, etc.
- Connectivity— upstream network, virtual network, etc.
This document provides the steps and screen shot of how to deploy FI-attached Hyperflex clusters using intersight.
Prerequisites
Requirements
Supported versions for HX FI-attached Cluster Deployments
| Component |
Version/Release |
| M4, M5 Servers |
HX220C-M4S
HXAF220C-M4S
HX240C-M4SX
HXAF240C-M4S
HX220C-M5SX
HXAF220C-M5SX
HX240C-M5SX
HXAF240C-M5SX
|
| Device Connector |
Auto-upgraded by Cisco Intersight |
Intersight Connectivity
Consider the following prerequisites pertaining to Intersight connectivity-
-
Make sure that the device connector on the corresponding UCS Manager instance is properly configured to connect to Cisco Intersight and claimed.
-
All device connectors must properly resolve svc.ucs-connect.com and allow outbound initiated HTTPS connections on port 443.
-
Hyperflex Installer version till 3.5(2a) supports the use of an HTTP proxy, except when the cluster is redeployed and is not new from the factory.
-
All controller VM management interfaces must properly resolve download.intersight.com and allow outbound initiated HTTPS connections on port 443. The current version of HX Installer supports the use of an HTTP proxy if direct Internet connectivity is unavailable, except when the cluster is redeployed and is not new from the factory.
-
The intended ESX server, HX Controller network, and vCenter host must be accessible through UCS Fabric Interconnect management interfaces.
-
Starting with HXDP release 3.5(2a), the Intersight installer does not require a factory installed controller VM to be present on the HyperFlex servers. However, this requirement will still be applicable if connectivity to Intersight is through a HTTP proxy. All NEW HX servers may be deployed as-is with an HTTP proxy.
Other requirements
Software Requirements
Physical Requirements
Network Requirements
Port Requirements
Deployment Information
Components Used
- Cisco Intersight
- Cisco UCSM
- Cisco HX Servers
- Cisco Hyperflex
- VMWare ESXi
- VMware vCenter
Configure
Network Diagram
- Cisco Intersight provides an easy way to deploy HyperFlex Clusters by including the HyperFlex Installer in all Editions of Cisco Intersight.
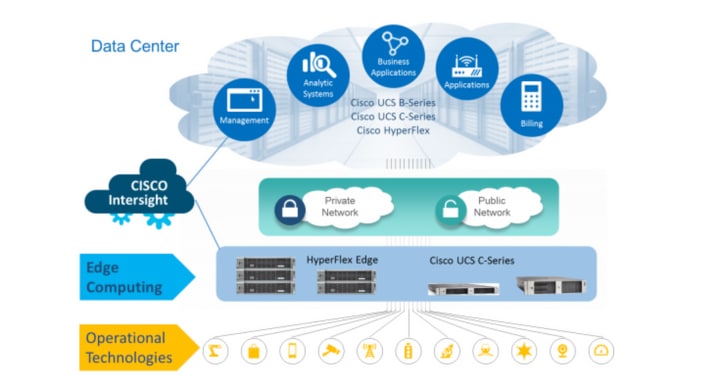
Configuration Steps
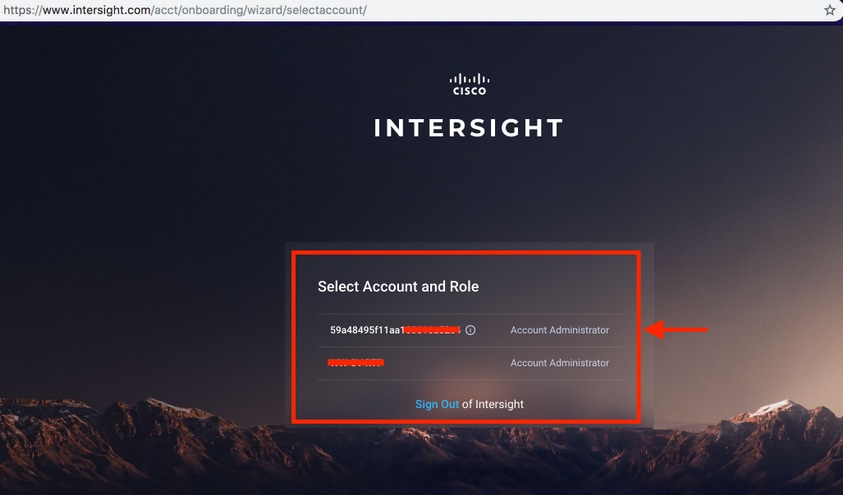
Step 1. Login to Cisco Intersight and select the user account as shown below-
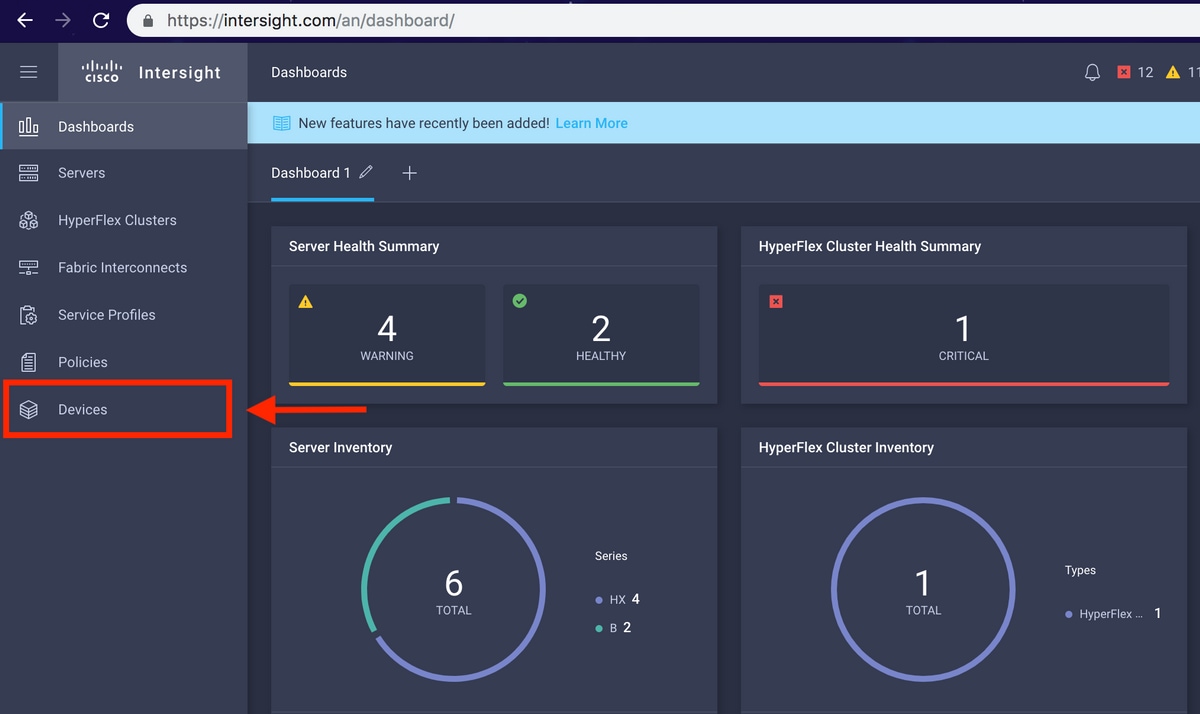
Step 2. On the dashboard click on the Devices tab on the right pane.
Step 3. Under Devices, Click on Claim a New Device

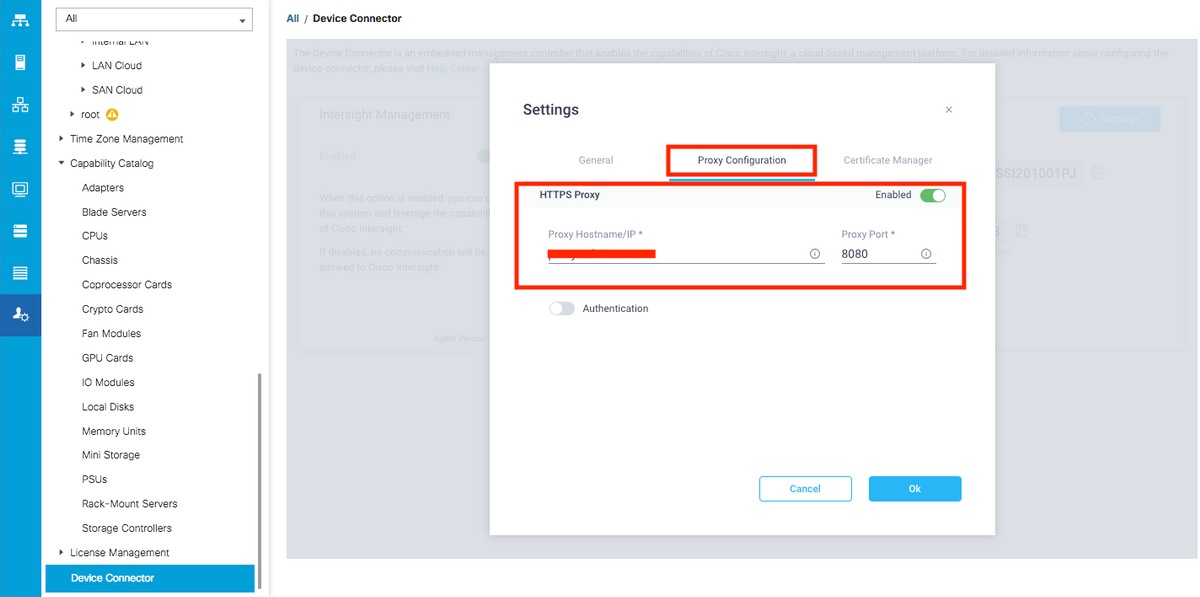
Step 4. Login to UCS Manager, browse to Admin -> Device Connector. Click on Settings to configure Access Mode and Proxy Configuration
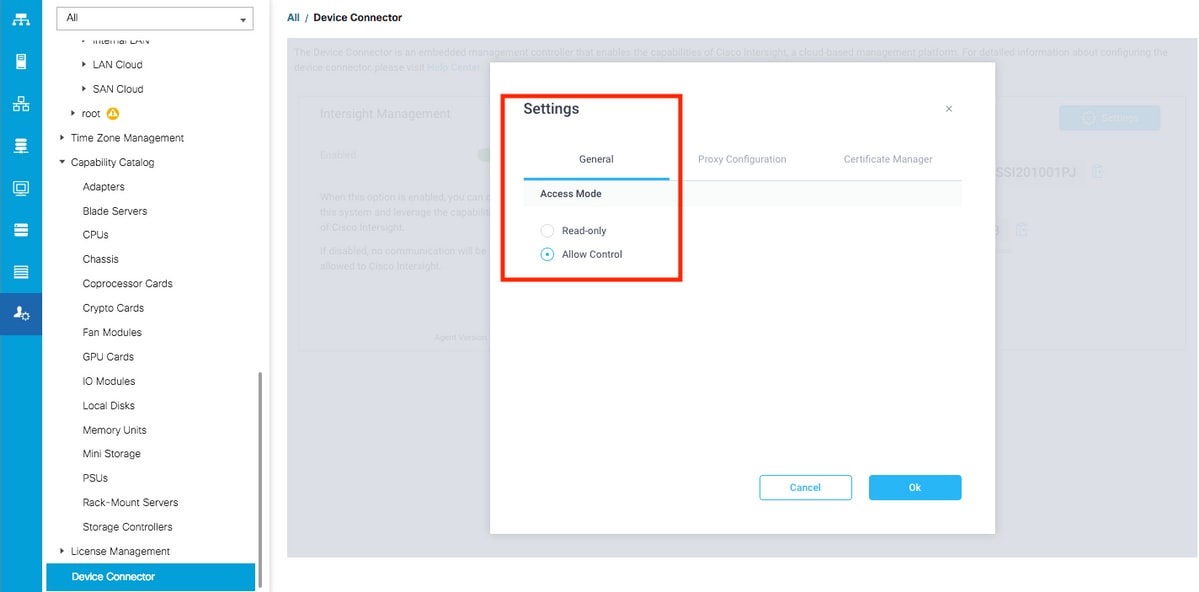
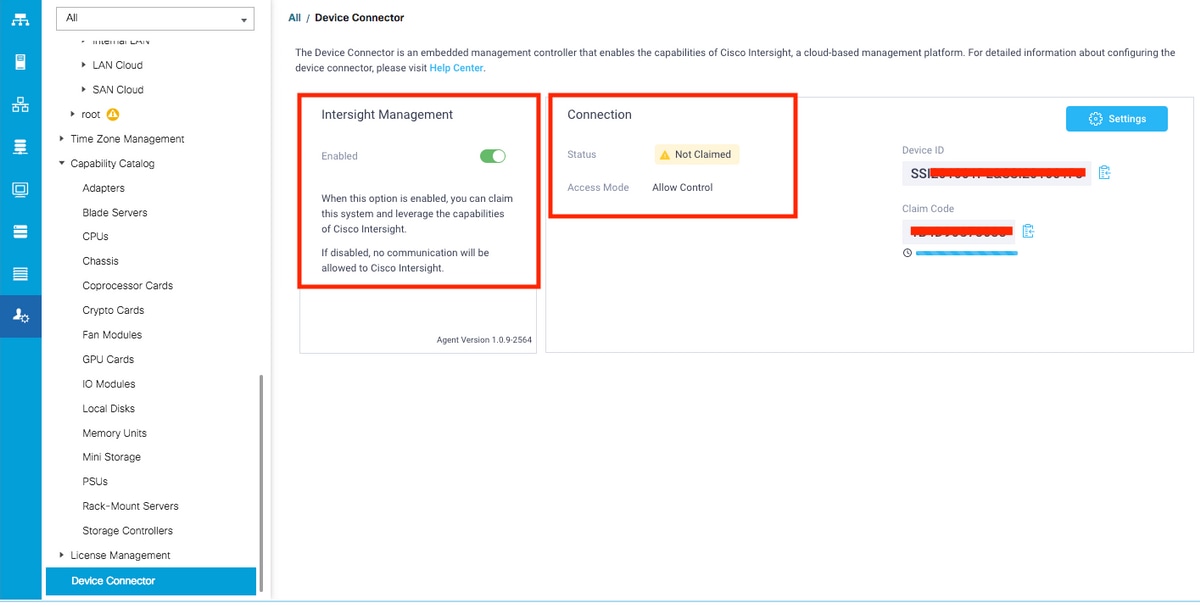
Step 5. In UCS Manager, browse to Admin -> Device Connector. Enable Intersight Management toggle button and get the Device ID and the Claim Code.
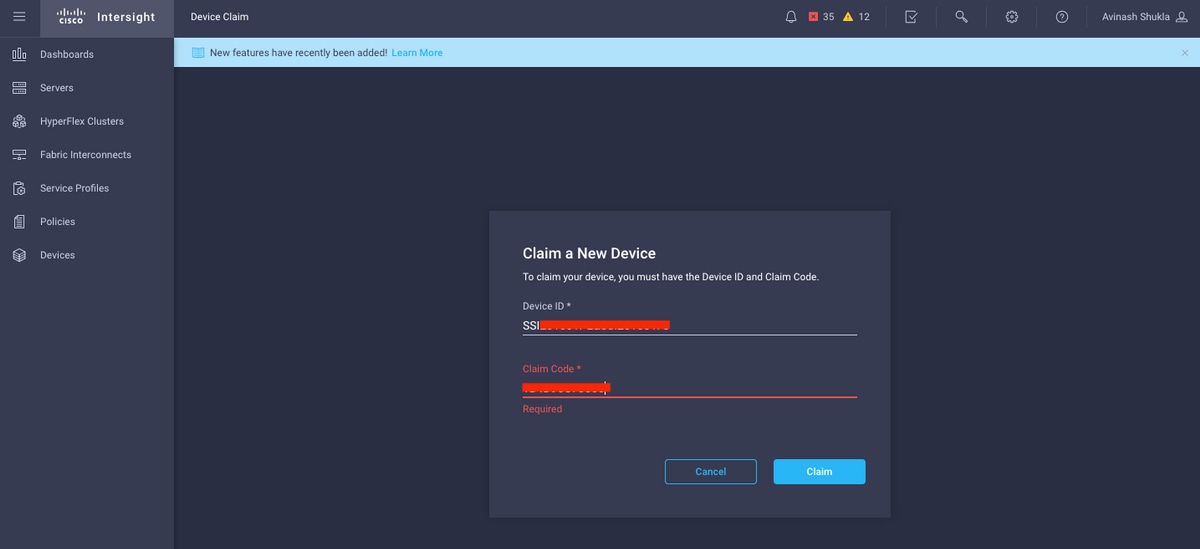
Step 6. On Intersight account, use the Claim Code and Device ID (captured in step 5) to Claim the device. Now the UCSM domain is claimed.
Step 7. Check under Devices to confirm the new domain shows "Connected" and "Claimed". Also, check that you now have the option to cross launch UCSM UI and UCSM CLI from Intersight.

Step 8. Under Service Profiles, click Create Hyperflex Cluster Profile

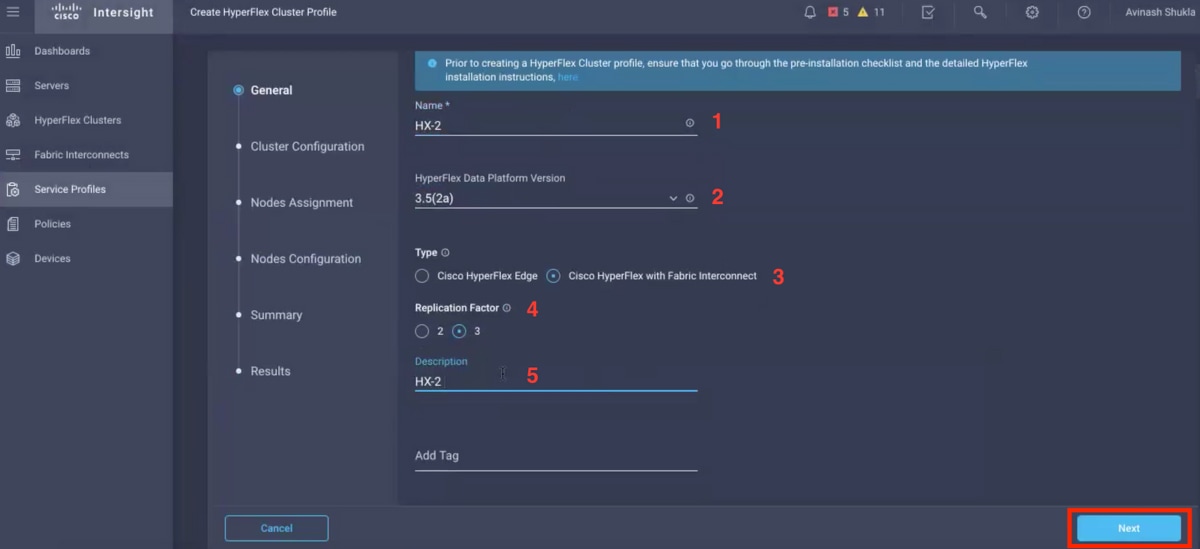
Step 9. Configure the Service Profile using the below steps,
General Tasks
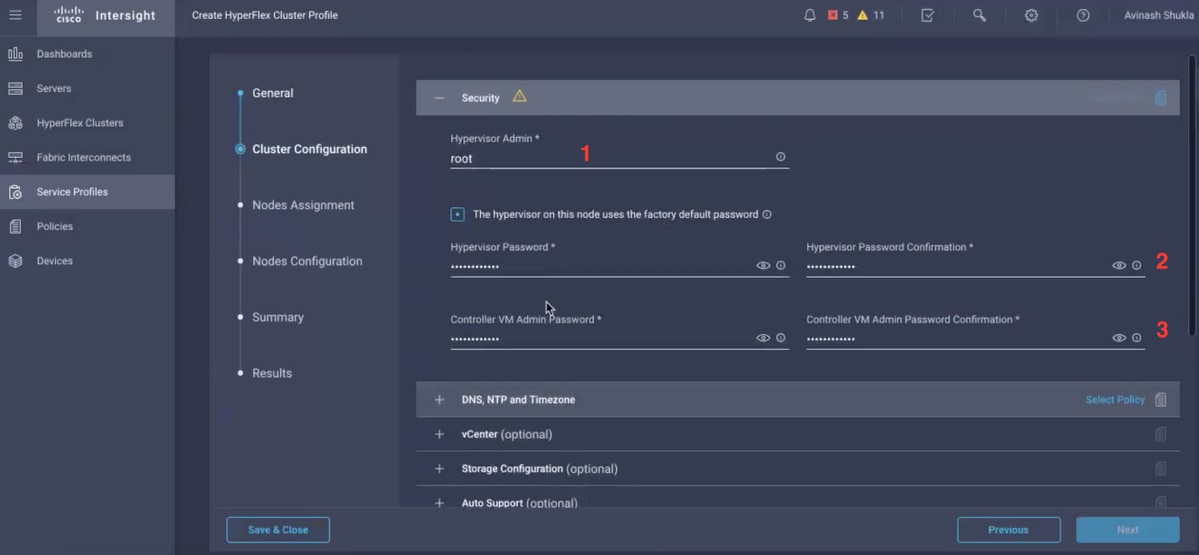
Cluster Configuration - Security
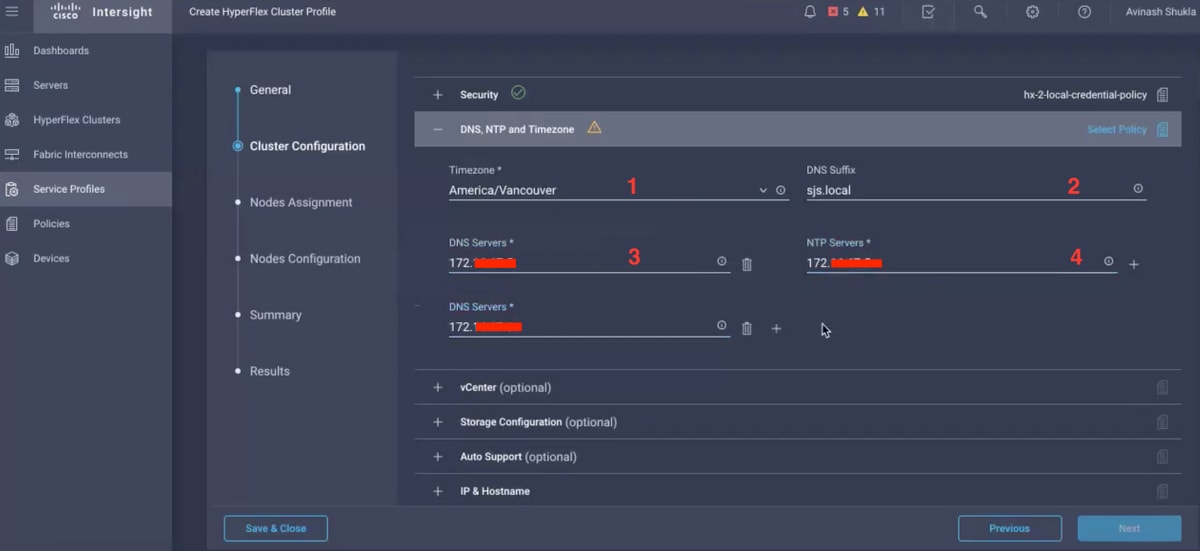
Cluster Configuration - DNS, NTP and Timezone
Cluster Configuration - vCenter Configuration
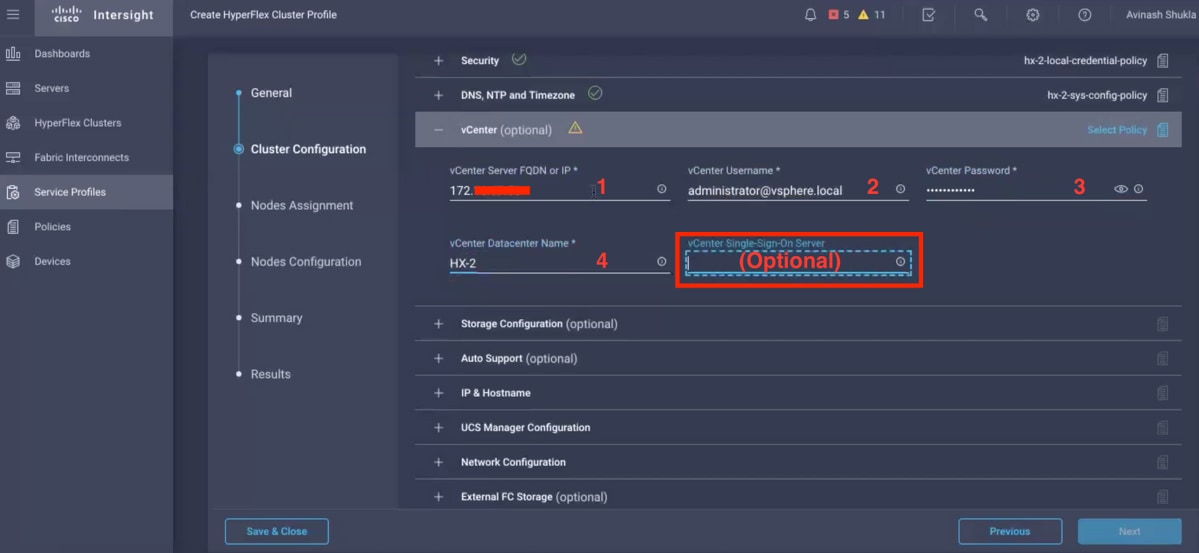
Note:- For vCenter Configuration it is recommended to skip the vCenter Single-Sign-On Server. Please check below document page 27,
https://www.cisco.com/c/dam/en/us/products/collateral/hyperconverged-infrastructure/hyperflex-hx-series/whitepaper-c11-740456.pdf
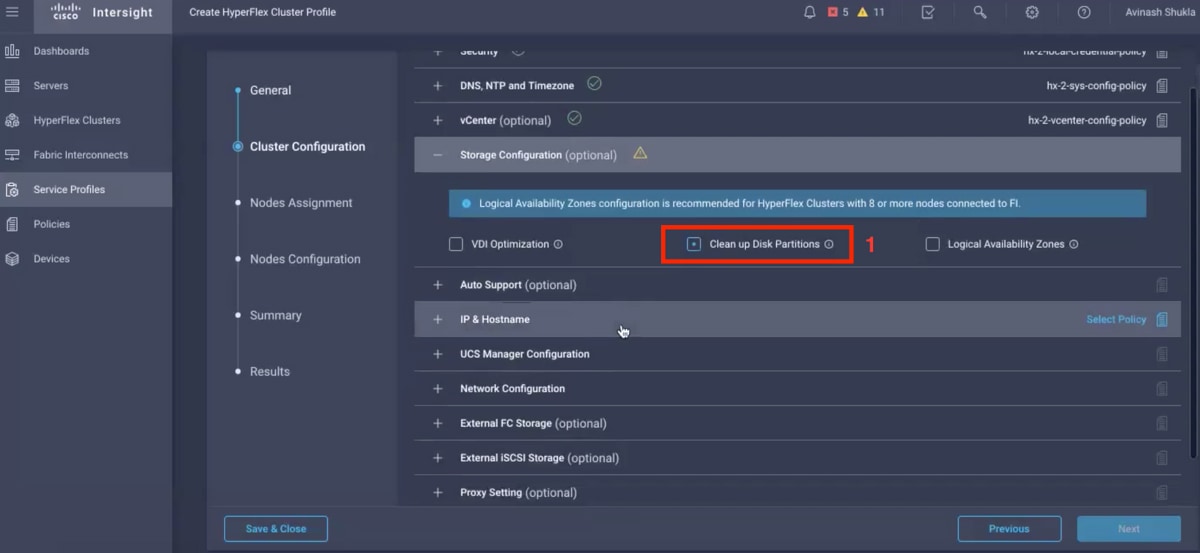
Cluster Configuration - Storage Configuration
Cluster Configuration - Auto Support
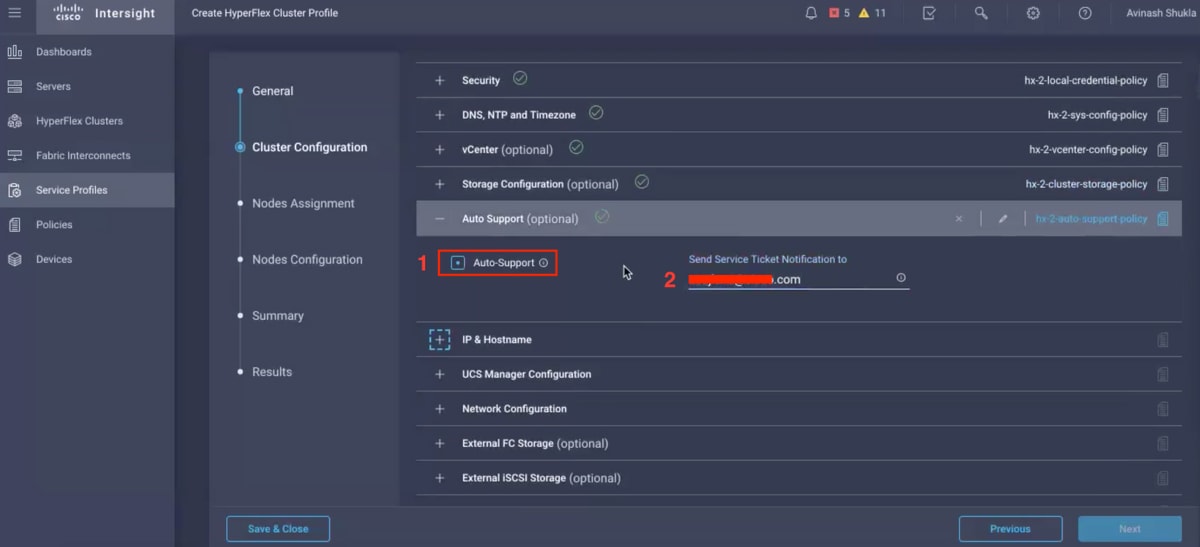
Cluster Configuration - IP & Hostname

Cluster Configuration - UCSM Configuration
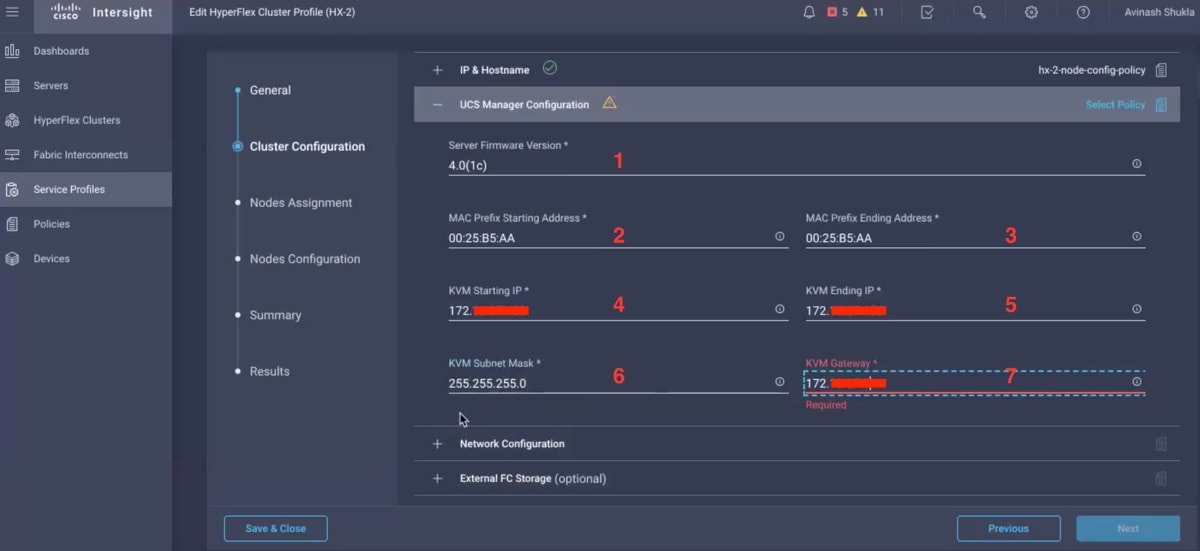
Cluster Configuration - Network
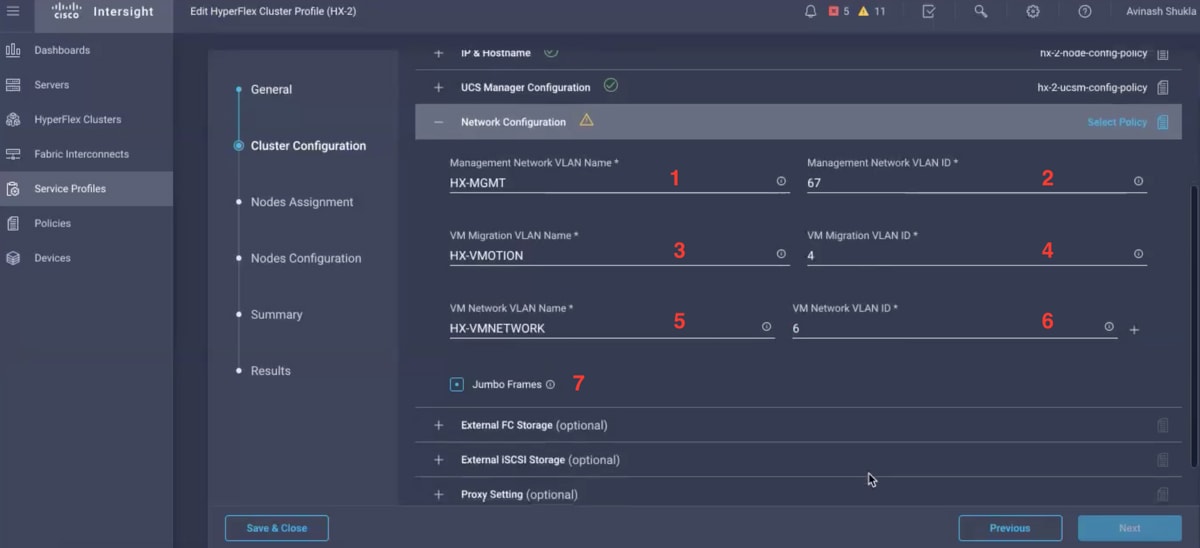
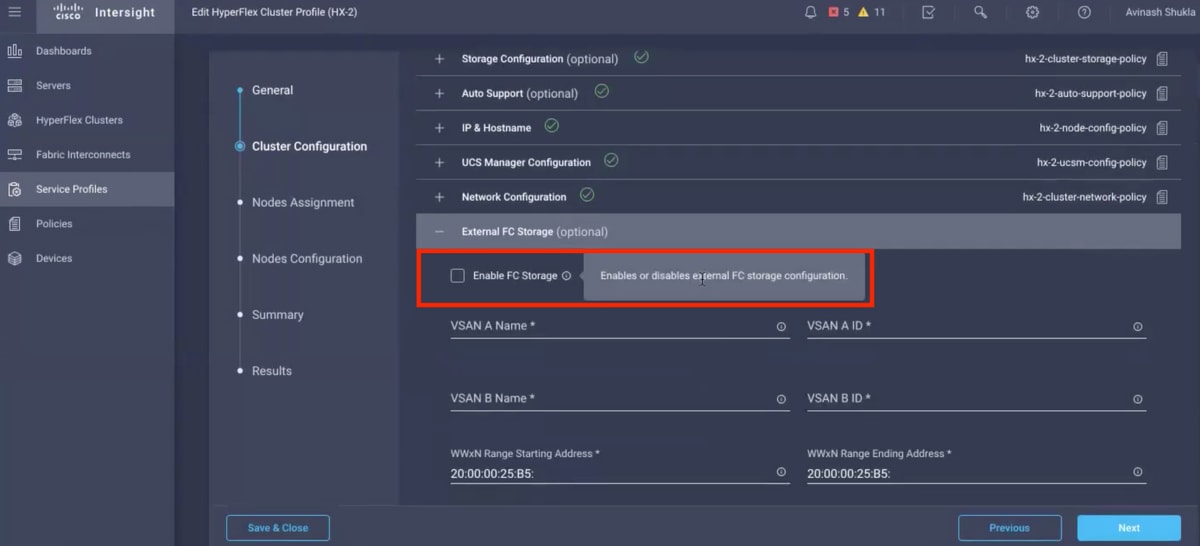
Cluster Configuration - External Storage (Optional)
If enabled, fill the VSAN name and VSAN ID for FI A and FI B respectively.
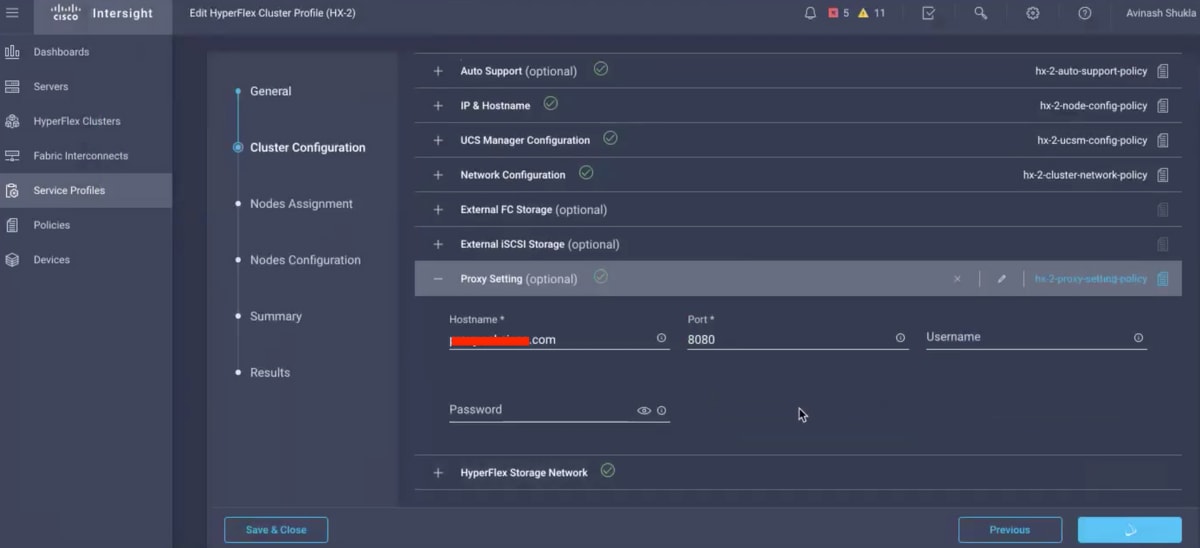
Cluster Configuration - Proxy Setting (Optional)
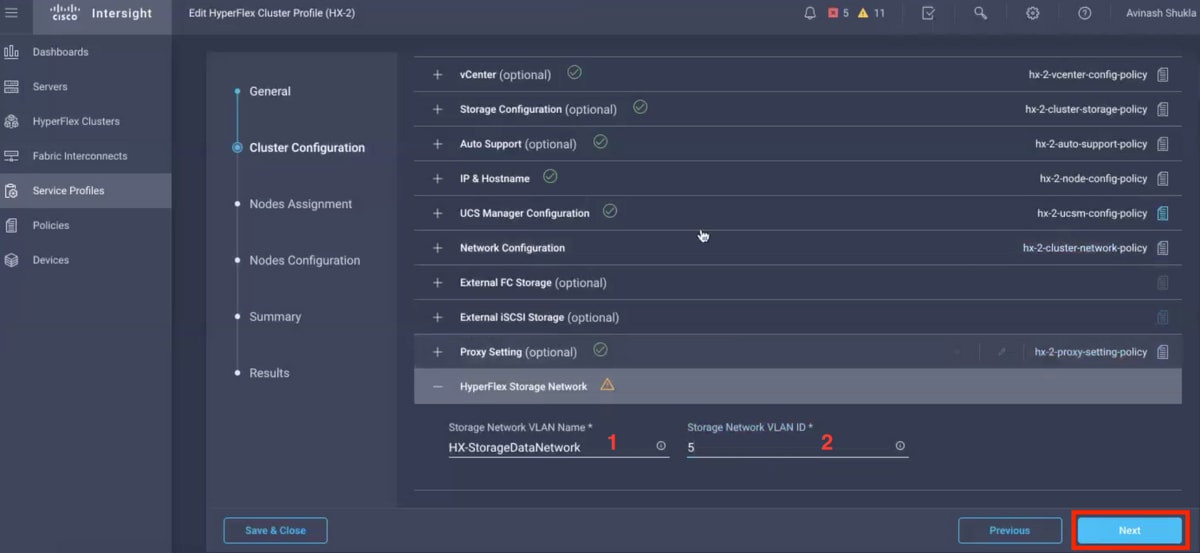
Cluster Configuration - Hyperflex Storage Network
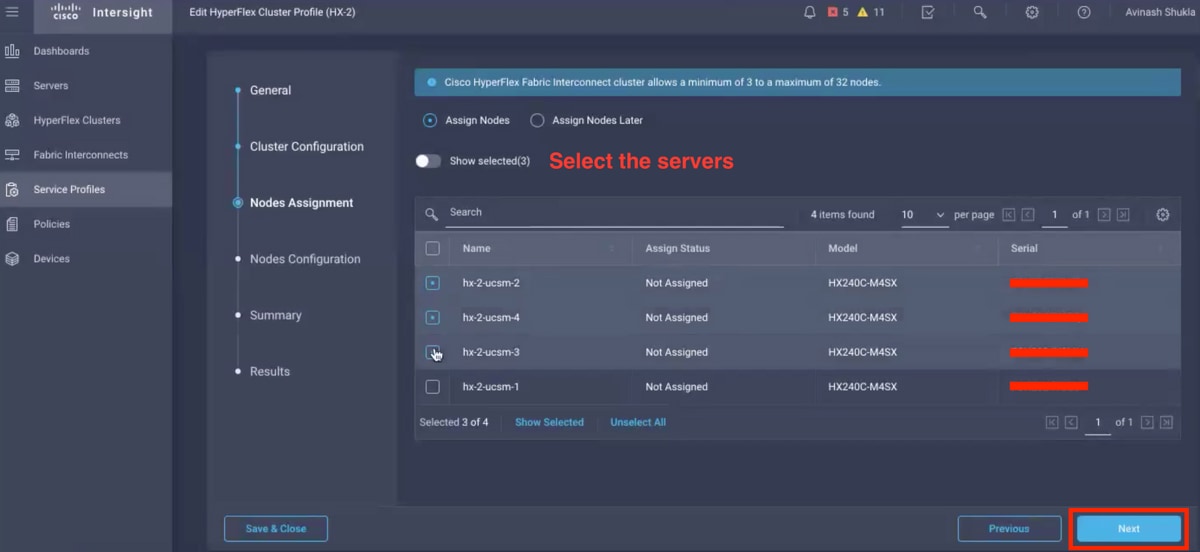
Step 10. Select the servers as a part of Node Assignment.
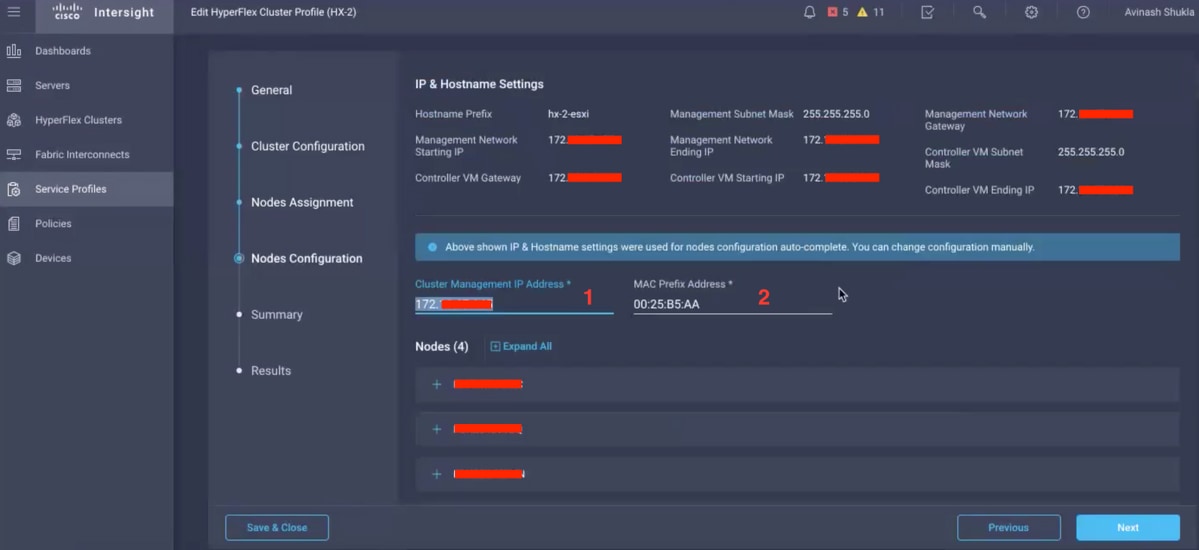
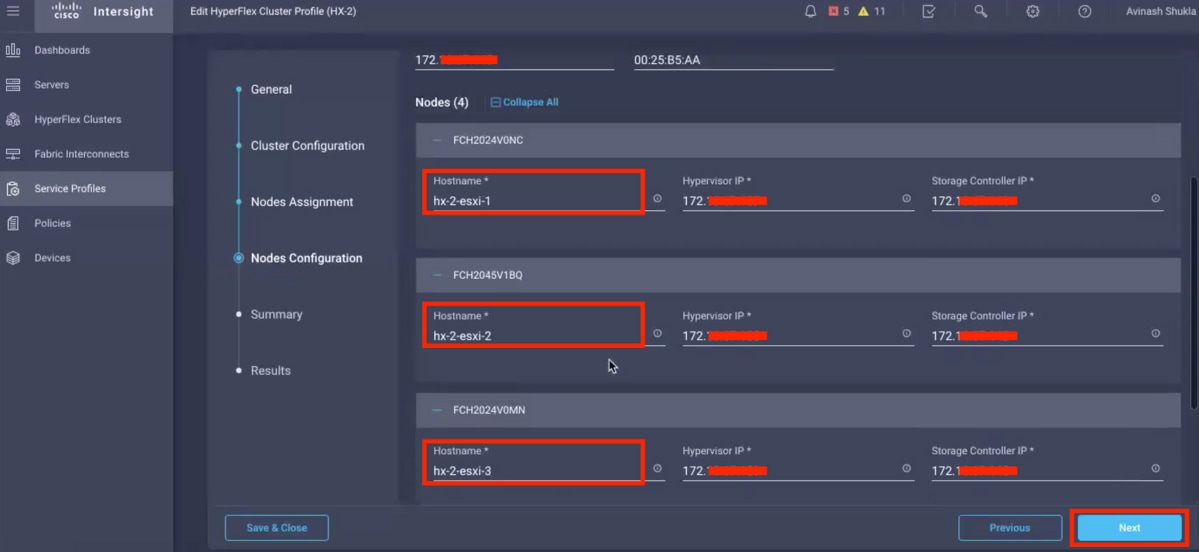
Step 11. Configure and confirm Hypervisor IP & Storage Controller IP address for Node Configuration,
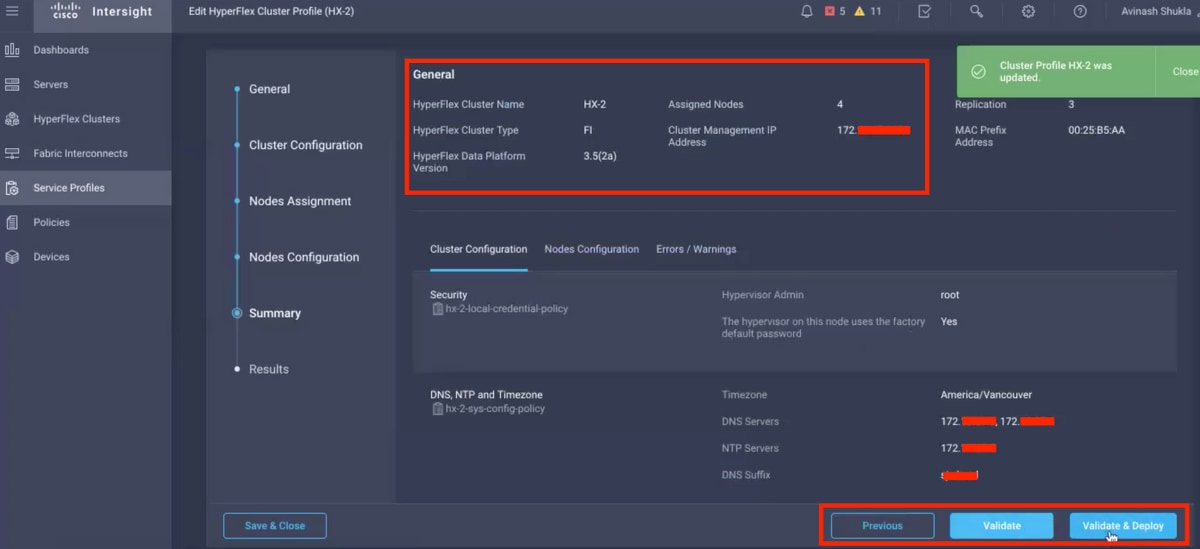
Step 12. Click Validate & Deploy and check the progress status and wait for the installation to complete.
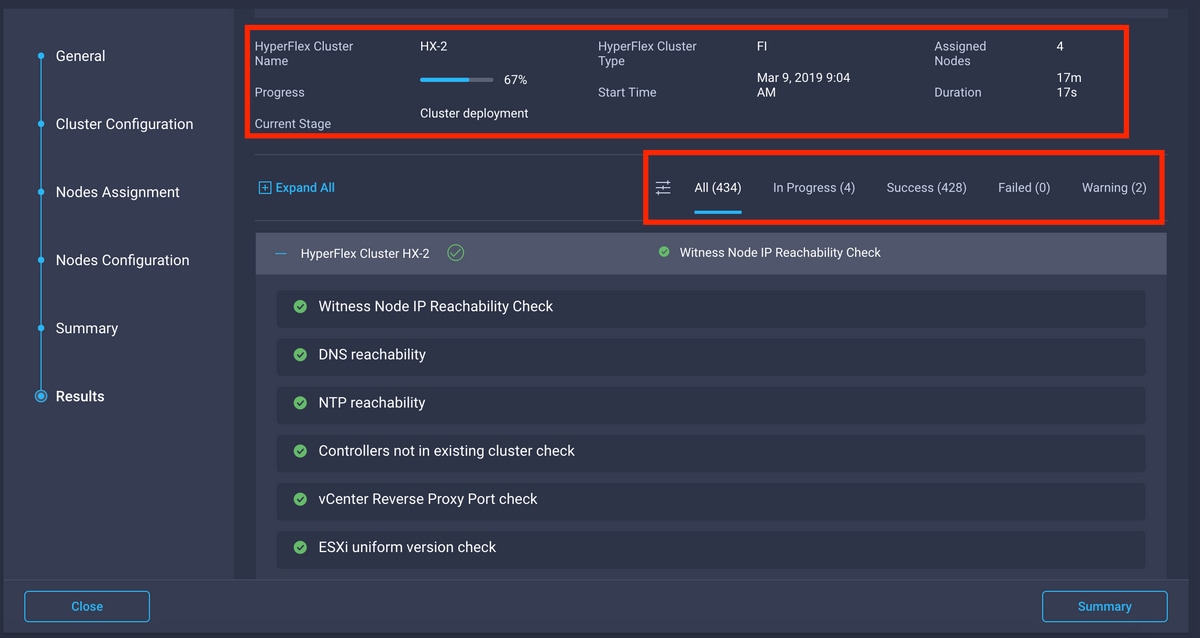
Step 13. Check progress status and wait for the installation to complete.
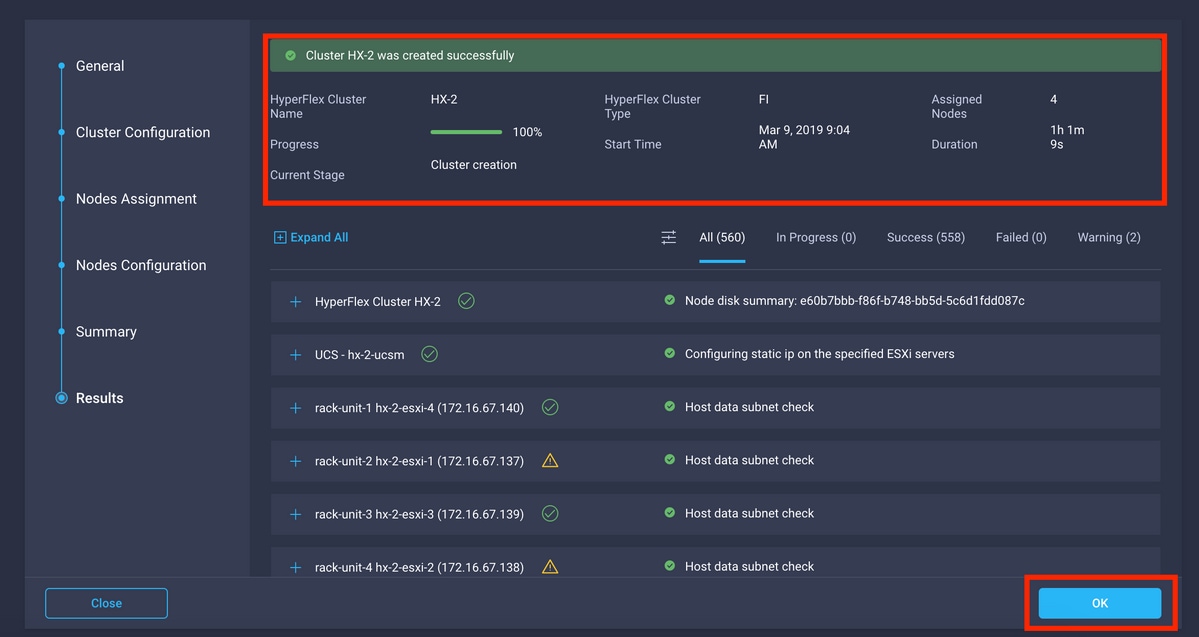
Step 14. Please verify that cluster is ONLINE and HEALTHY and RUN the post_install.py script.
- SSH to the cluster management IP address and login using <root> (HX 4.0 and below) or <admin> (HX 4.5 and above) username and the controller VM password provided during installation.
- Paste the following command in the Shell, and hit enter: hx_post_install
Verify
Step 1. Check the Service Profile status under Service Profiles.

Step 2. Under Hyperflex Cluster, confirm the HX cluster Health and other details,

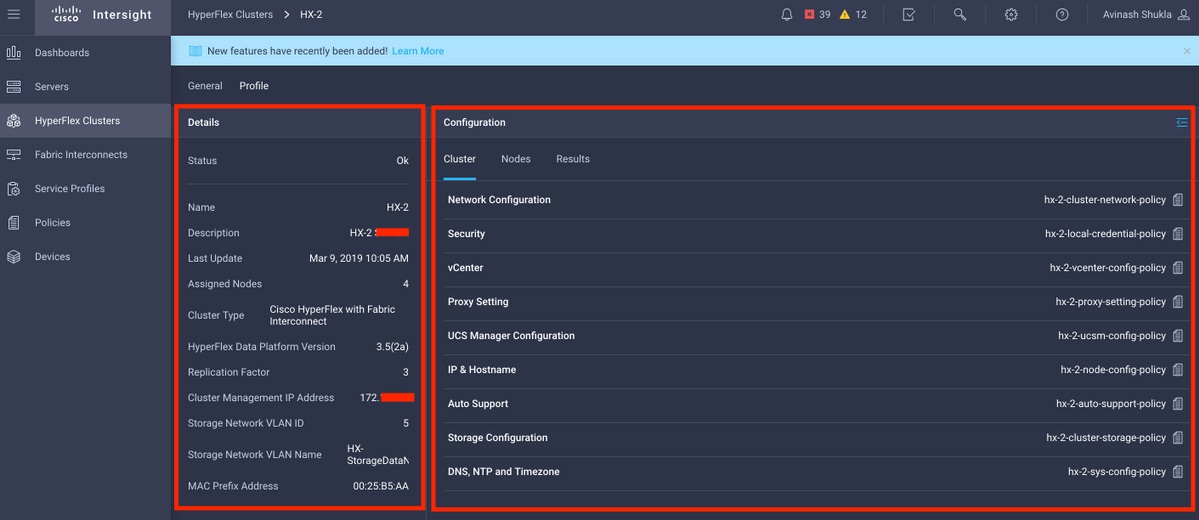
Step 3. Click the Name HX-2 and browse to profile details, verify the following under Details,
- Cluster Management IP Address
- Storage VLAN ID
- Replication Factor
- Cluster Type
Verify the various policies and node details under Configuration,
Step 4. Cross launch Hyperflex Connect from Hyperflex Clusters on Intersight and verify the cluster status from Hyperflex Connect.


 Feedback