Introduction
The article describes the process of generating a traditional evaluation license for Cisco Unified Attendant Console (CUAC) operator. You can generate an evaluation license for either Cisco Unified Attendant Console Standard or Advanced. When you install the application for the first time, CUAC allows the application to fully function for ten days. After this ten day period, you have the option to install an evaluation license or permanent license. The evaluation license is valid for 60 days and this period is not extensible. Once you reach the 60-day mark, you need to install the permanent license on the console.
Prerequisites
Before you start, ensure that you have the following for:
- Cisco Unified Attendant Console Standard
-
CUAC Standard installed on the operator machine
-
Machine/registration code from the CUAC Standard client. You can find the registration code by going to Help, and then About Cisco Unified Attendant Console Standard.
-
If you are installing a Standard license, you will need the license activation code (LAC).
-
If you are installing an Upgrade license, you will need the upgrade license activation code (LAC) and the previously registered machine/registration code or license activation code (LAC).
- Cisco Unified Attendant Console Advanced
-
CUAC Advanced installed on a Windows server
-
Registration code from the CUAC Advanced server website. You can find the registration code by going to Help, and then Licensing.
-
If you are installing a Standard license, you will need the license activation code (LAC).
-
If you are installing an Upgrade license, you will need the upgrade license activation code (LAC) and the previously registered registration code or license activation code (LAC).
Generating a Demo or Evaluation License for CUAC
Step 1:
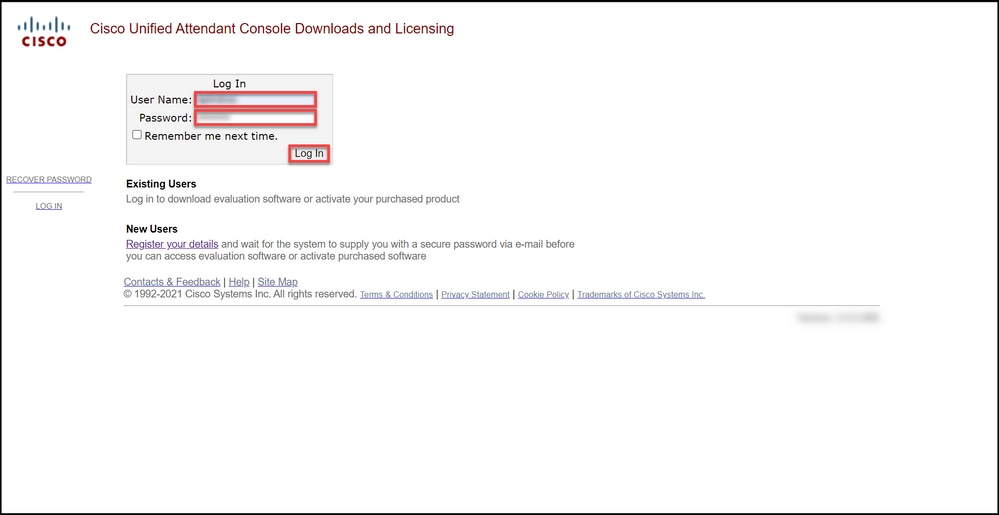
Go to Cisco/OEM User Website and log in with credentials.
Note: The page is not associated with your Cisco.com account, therefore if you do not have an account yet, you can register by clicking the Register your details button. After entering your details, click Register. The system displays a notification message that confirms your successful registration. An email containing your password will be sent to the address that you specified. Once you have received the email, you will be able to log in and use the page.
Step 2:
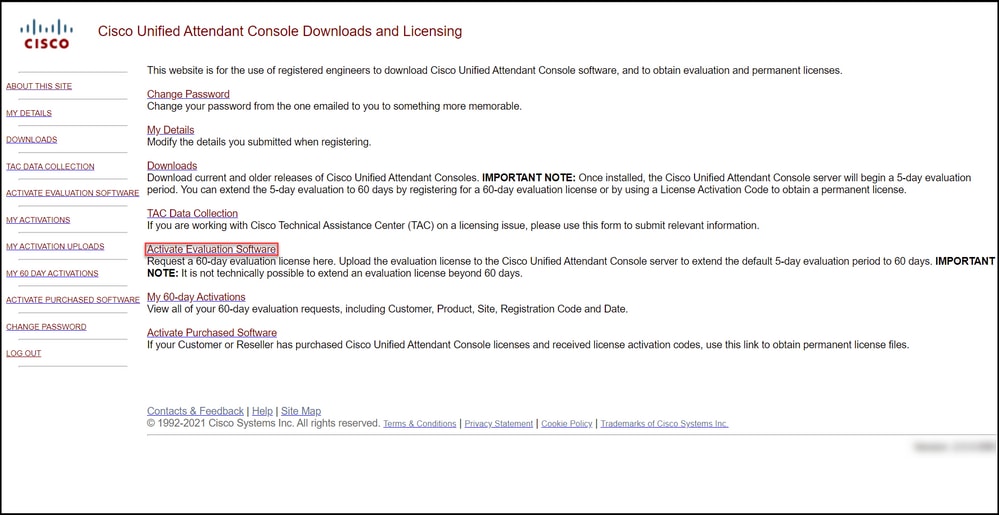
Click Activate Evaluation Software.
Step result: The system displays the 60-Day Evaluation License page.
Step 3:
On the 60-Day Evaluation License page:
|
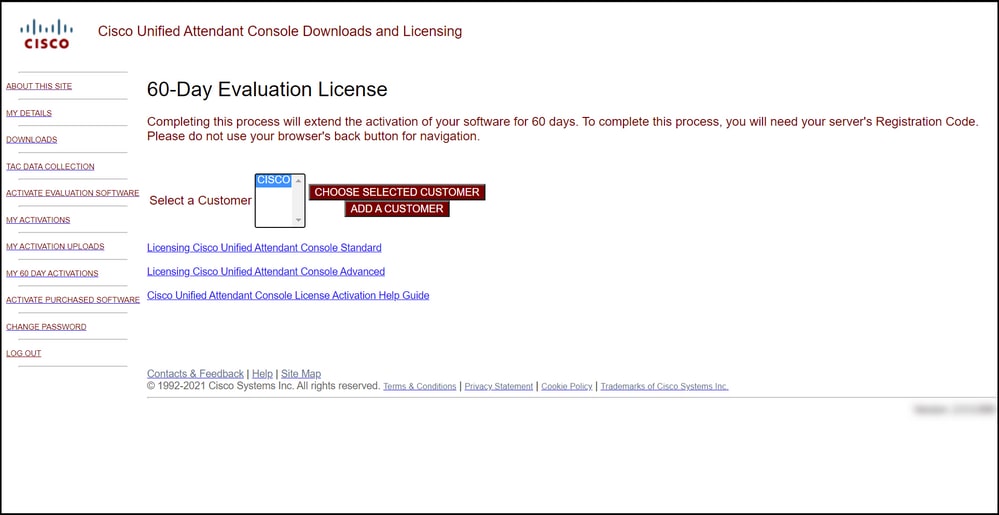
Select one of the following options for the Select a Customer field:
|
And then:
|
|
a. If your customer is on the list, click the customer and then confirm your selection by clicking Choose selected customer.
|
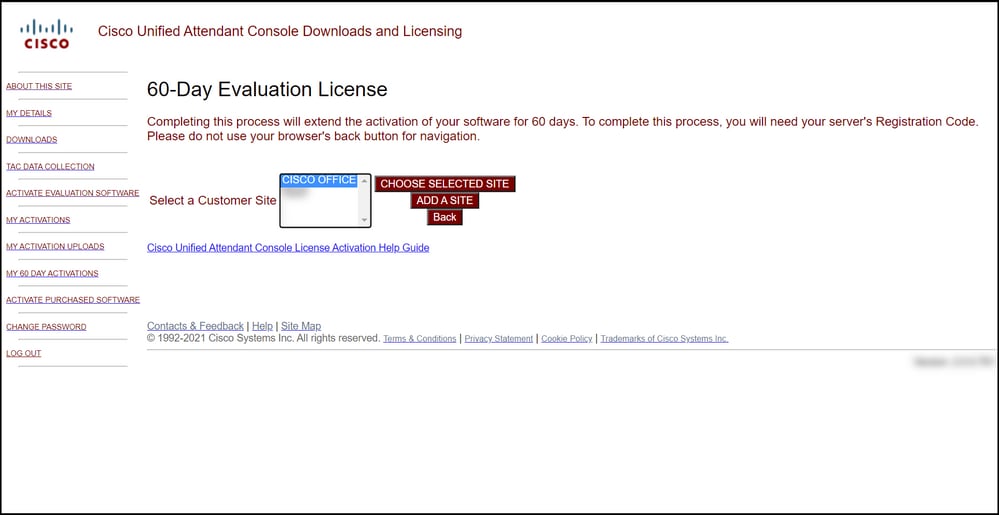
In the Select a Customer Site field select one of the following options:
a. If your customer site is on the list, select the customer site, and then confirm your selection by clicking Choose selected site.
b. If your customer site is not yet on the list, click Add a site. In the Add Customer Site for [customer] page, enter the site name and site address in the respective fields, and then click Next. The system now displays the newly added customer site in the drop-down list. Select the newly added customer site in the Select a Customer Site field, and then click Choose selected site.
|
|
b. If your customer is not yet on the list, click Add a customer.
|
1. In the Customer Name field, enter the customer name, and then click Submit.
2. In the Add Customer Site for [customer] page, enter the site name and site address in the respective fields, and then click Next. The system now displays the newly added customer in the drop-down list.
3. Select the customer from the drop-down list and confirm your selection by clicking Choose selected customer.
|
Step 4:
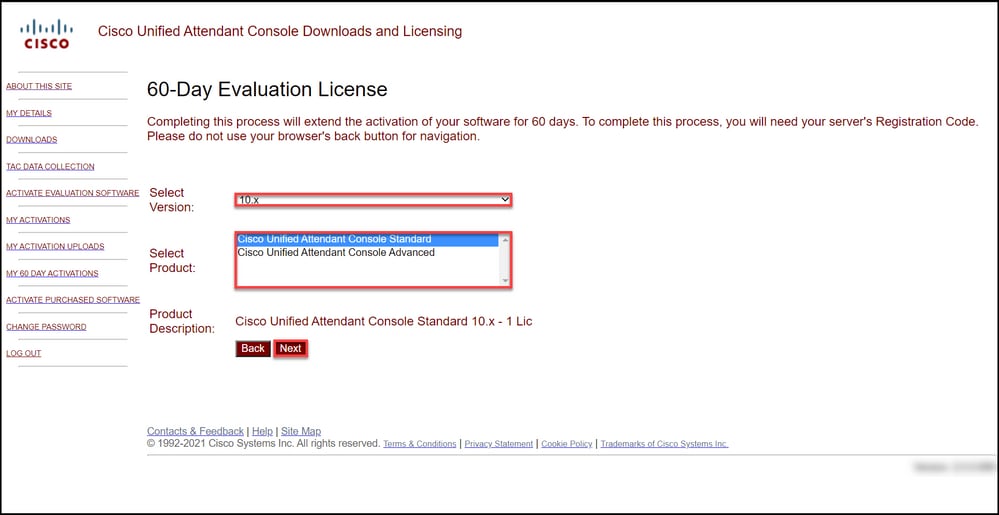
From the Select Version drop-down list, select version 10.x or 11.x, and from the Select Product drop-down list select one of the following options:
a. Cisco Unified Attendant Console Standard
b. Cisco Unified Attendant Console Advanced
Click Next.
Step 5:
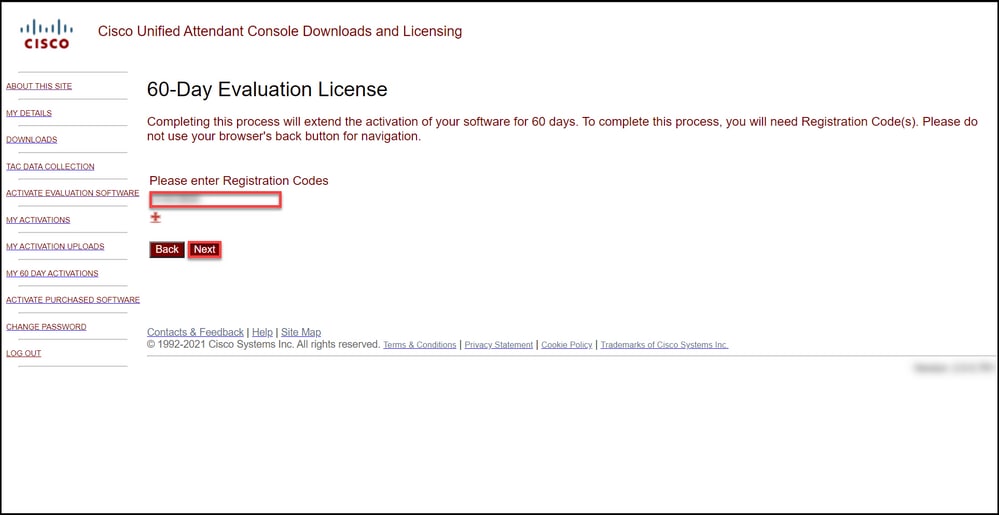
In the Please enter Registration Codes field, enter your registration code.
Step 6:
The system displays the registration code against which it will generate the 60-day evaluation licenses. The system will then send the license file to the email address associated with your login for the Cisco/OEM User Website. In the Additional email address field, you can enter additional email address to which you would like to send the license file. Click Submit.
Step result: The system displays the notification message which confirms that the license activation code was generated and emailed to you.
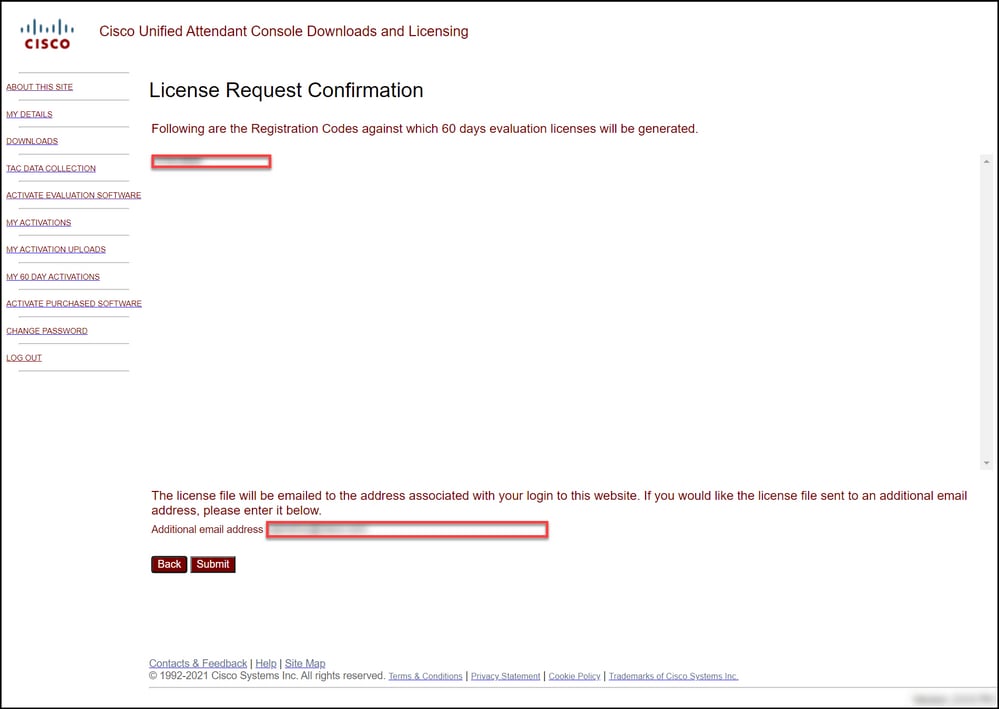
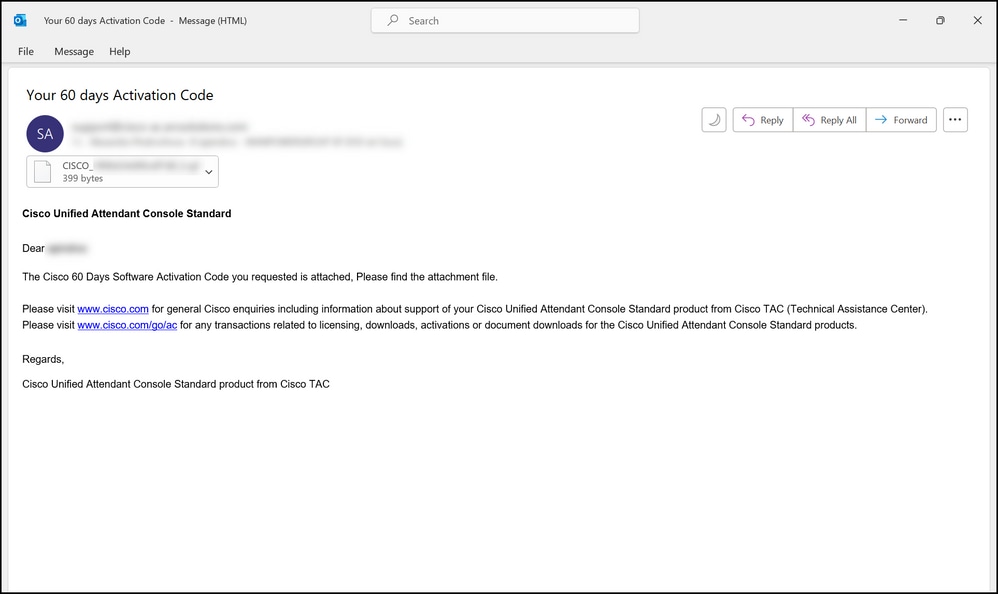
Figure 1 - Example of an email with your software activation code.
Troubleshooting
If you experience an issue with producing a demo or evaluation license, open a case in Support Case Manager (SCM).
Next Steps
After you receive a license key file, refer to the product configuration guide for license installation and guidance.
Related Information
How to Generate a Demo or Evaluation License for Identity Services Engine (ISE)
How to Generate a Demo or Evaluation License for Cisco Unified Communications and Cisco Emergency Responder
How to Generate a Demo or Evaluation License for SEG (IronPort)


 Feedback