Introduction
This document describes the Linux root recovery method to recover the shell password.
Prerequisites
Requirements
Cisco recommends that you have knowledge of these topics:
- Evolved Programmable Network Manager (EPNM)
- Access to the virtual machine that has the EPNM application on it
Components Used
The information in this document is based on these software and hardware versions:
- EPNM software version 5.0
- CentOS-7-x86_64-DVD-2009.iso image
The information in this document was created from the devices in a specific lab environment. All of the devices used in this document started with a cleared (default) configuration. If your network is live, ensure that you understand the potential impact of any command.
Procedure
Note: This process requires a Virtual Machine (VM) restart multiple times. Best to carry out this process in a planned maintenance window.
Step 1. Choose the CentOS-7-x86_64-DVD-2009.iso image to boot the machine.

Step 2. Once booted, choose the troubleshooting option from the menu, and then choose Rescue a CentOS system.

Step 3. Choose the default options for language/keyboard and do not choose the network option.
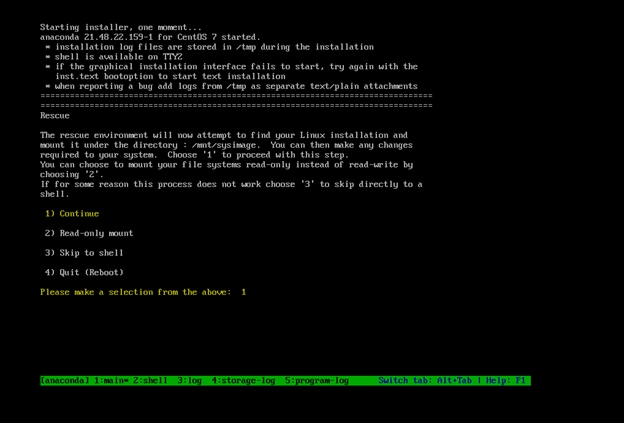
Step 4. You see this message:
The rescue environment now attempts to find your Linux installation and mount it under the directory: /mnt/sysimage. You can then make any changes required to your system.
Choose '1' to process with this step. You can choose to mount your file systems read-only instead of read-write by choosing '2'.
If for some reason this process does not work choose '3' to skip directly to a shell
.
Choose Continue on the screen, as shown in this image.

Step 5. Once the current installation is found, it mounts to the /mnt/sysimage location and you are dropped to the command prompt.

Step 6. Change root to the PI install location with this command:
# chroot /mnt/sysimage

Step 7. Move the /storedconfig/rootpatchpw file with this command:
#mv /storedconfig/rootpatchpw /root/

Step 8. Type exit and click the Enter key.
Step 9. Then, type the reboot command, as shown in this image.

Step 10. Once the system reboots, select the Troubleshooting option again, and this time select Boot from local drive so it boots the EPNM application.
Note: If it brings you back to the CentOS menu, select Boot from local drive again and retry.

Once EPNM is back up and running, you can use the shell command and it prompts you to set the shell password.


 Feedback