Introduction
This document describes how to configure Cisco ISE 3.1 SAML SSO integration with an External Identity Provider like Cisco Duo SSO.
Prerequisites
Requirements
Cisco recommends that you have knowledge of these topics:
- Cisco Identity Services Engine (ISE) 3.1
- Basic knowledge about Security Assertion Markup Language (SAML) Single Sign-On (SSO) deployments (SAML 1.1)
- Knowledge of Cisco DUO SSO
- Knowledge of Windows Active Directory
Components Used
The information in this document is based on these software and hardware versions:
- Cisco ISE 3.1
- Cisco Duo SSO
- Windows Active Directory
The information in this document was created from the devices in a specific lab environment. All of the devices used in this document started with a cleared (default) configuration. If your network is live, ensure that you understand the potential impact of any command.
Background Information
Identity Provider (IdP)
It is the Duo SSO in this case, that verifies and asserts a user identity and access privileges to a requested resource (the 'Service Provider').
Duo SSO acts as an IdP, authenticating your users using existing on-premises Active Directory (AD) with SAML 1.1 or any SAML 2.0 IdP (for example, Microsoft Azure) and prompting for two-factor authentication before permitting access to your service provider application.
When configuring an application to be protected with Duo SSO you must send attributes from Duo SSO to the application. Active Directory works with no additional setup, but if you used a SAML(2.0) IdP as your authentication source, verify that you configured it to send the correct SAML attributes.
Service Provider (SP)
The hosted resource or service that the user intends to access; Cisco ISE Application Server in this case.
SAML
SAML is an open standard that allows IdP in order to pass authorization credentials to SP.
SAML transactions use Extensible Markup Language (XML) for standardized communications between the identity provider and service providers. SAML is the link between the authentication of the identity of the user and the authorization in order to use a service.
SAML Assertion
A SAML Assertion is the XML document that the IdP sends to the service provider that contains the user authorization. There are three different types of SAML Assertions – authentication, attribute, and authorization decision.
- Authentication assertions prove the identification of the user and provide the time the user logged in and what method of authentication they used (for example, Kerberos, two-factor, and so on).
- The attribution assertion passes the SAML attributes, specific pieces of data that provide information about the user, to the SP.
- An authorization decision assertion declares if the user is authorized in order to use the service or if the IdP denied their request due to a password failure or lack of rights to the service.
High-Level Flow Diagram
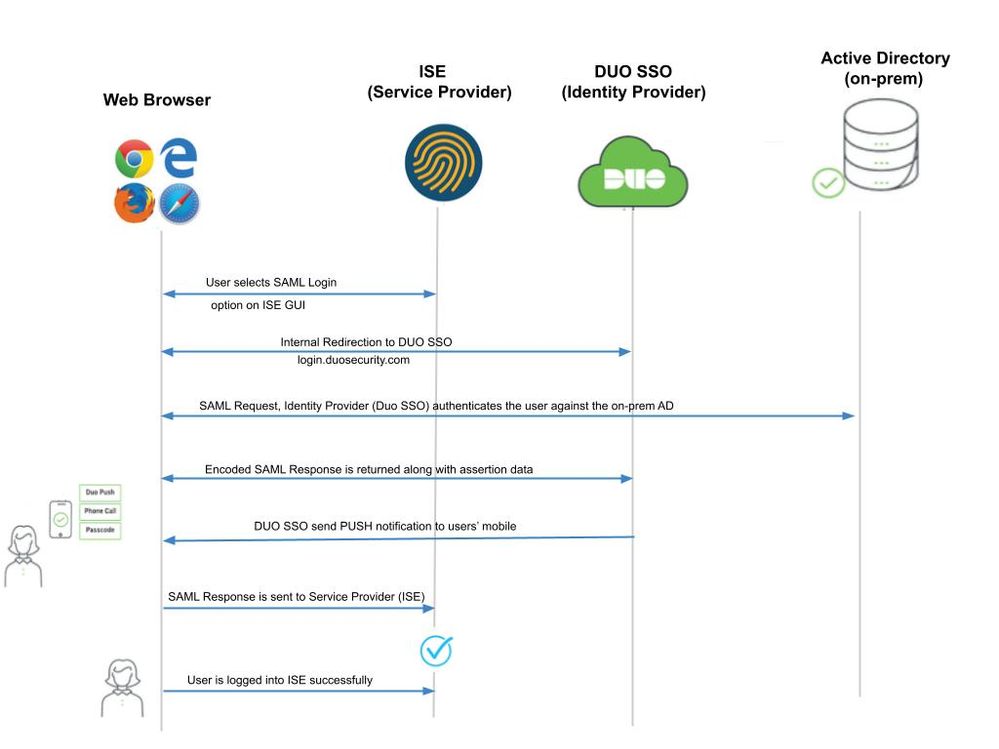
Flow:
- The user logs in to ISE using the Login Via SAML option.
- ISE (SAML SP) redirects the browser of the user to Duo SSO with a SAML request message.

Note: In a distributed environment, you can get an Invalid Certificate error and Step 3. can now work. Hence, for a distributed environment, Step 2. differs slightly in this way:
Issue: ISE temporarily redirects to the Portal of one of the PSN nodes (on port 8443).
Solution: In order to ensure ISE presents the same certificate as the admin GUI certificate, ensure the System Certificate that you trust is valid for Portal usage too on all PSN nodes.
- User logs in with primary AD credentials.
- Duo SSO forwards this to AD which returns a response back to Duo SSO.
- Duo SSO requires the user to complete two-factor authentication by sending a PUSH on the mobile.
- The user completes Duo two-factor authentication.
- Duo SSO redirects the browser of the user to the SAML SP with a response message.
- The user is now able to log in to ISE.
Configure SAML SSO Integration with Duo SSO
Step 1. Configure SAML IdP on ISE
Configure Duo SSO as an External SAML Identity Source
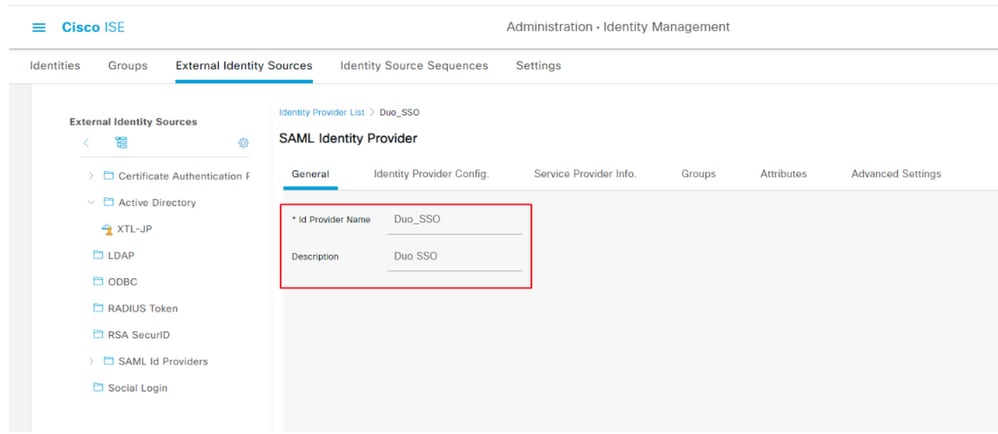
On ISE, navigate to Administration > Identity Management > External Identity Sources > SAML Id Providers and click the Add button.
Enter the name of the IdP and click Submit in order to save it. The IdP name is significant only for ISE as shown in the image:
Import the SAML Metadata XML file from the Duo Admin Portal
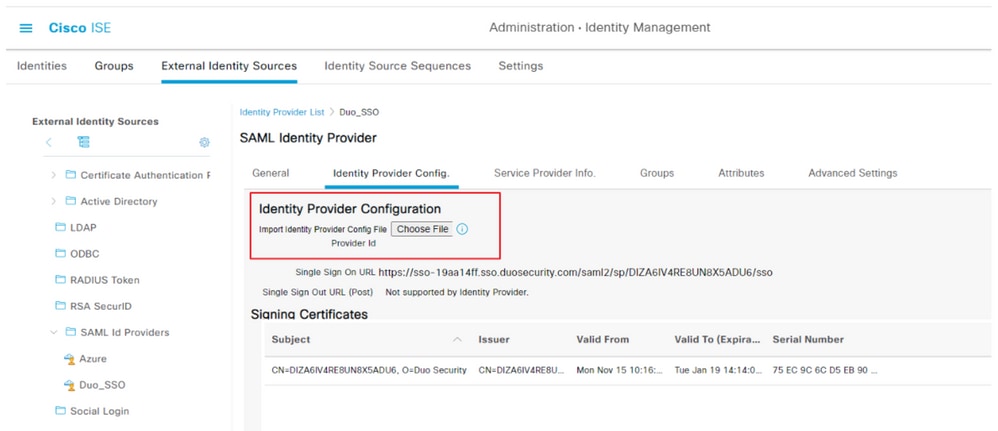
On ISE, navigate to Administration > Identity Management > External Identity Sources > SAML Id Providers. > Choose the SAML IdP you created, click the Identity Provider Configuration and then the Choose File button.
Choose the SSO IDP Metadata XML file exported from Duo Admin portal and click Open in order to save it. (This step is mentioned in the Duo section of this document as well.)
The SSO URL and Signing Certificates are:
Configure ISE Authentication Method
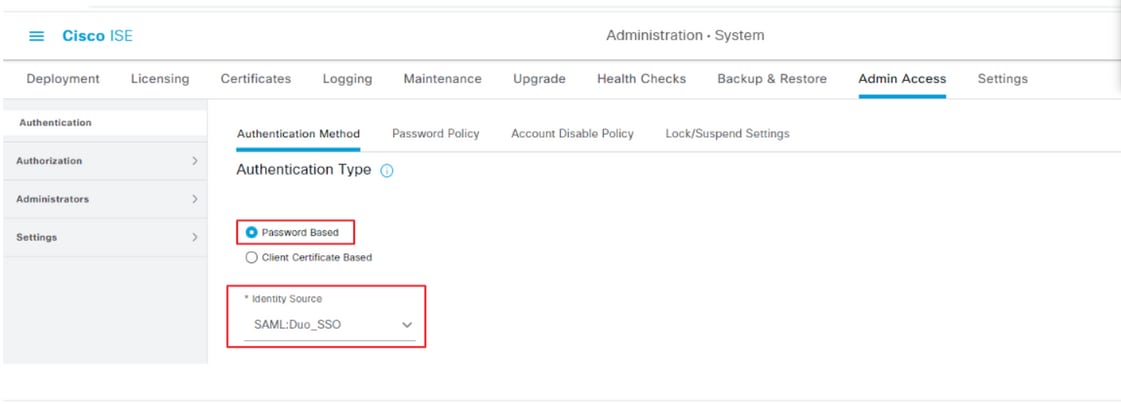
Navigate to Administration > System > Admin Access > Authentication > Authentication Method and choose the Password-Based radio button. Choose the required IdP Name created earlier from the Identity Source drop-down list as shown in the image:
Create an Admin Group
Navigate to Administration > System > Admin Access > Authentication > Administrators > Admin Group and click the Super Admin and then the Duplicate button. Enter the Admin group Name and click the Submit button.
This provides Super Admin privileges to the Admin group.
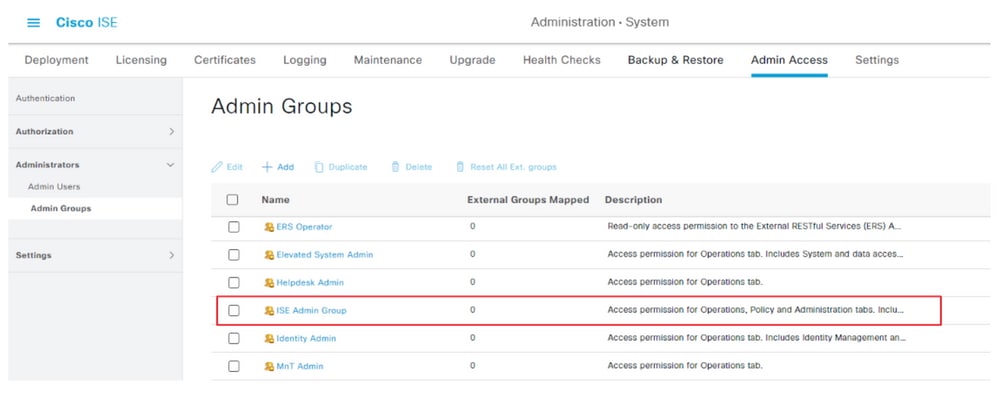
Create an RBAC Policy for the Admin Group
Navigate to Administration > System > Admin Access > Authorization > RBAC Policy and choose the Actions corresponding to Super Admin Policy. Click Duplicate > Add the Name field > Save.
The Permissions for access are the same as the Super Admin Policy.

Add Groups Membership
On ISE, navigate to Administration > Identity Management > External Identity Sources > SAML Id Providers and choose the SAML IdP you created. Click Groups and then the Add button.
Add the Name in Assertion (Name of the ISE Admin group) and from dropdown choose the Role-Based Access Control (RBAC) Group created (Step 4.) and click Open in order to save it. The SSO URL and Signing Certificates are auto-populated:

Export SP Information
Navigate to Administration > Identity Management > External Identity Sources > SAML Id Providers > (Your SAML Provider) .
Switch the tab to SP Info. and click the Export button as shown in the image:
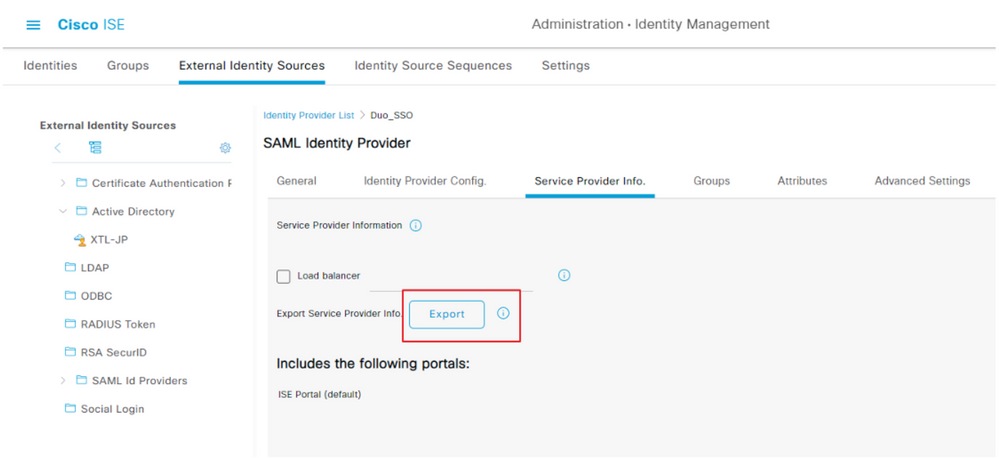
Download the .xml file and save it. Make a note of the AssertionConsumerService Location URL and entityID value as these details are required in the Duo SSO Portal.
<?xml version="1.0" encoding="UTF-8"?><md:EntityDescriptor xmlns:md="urn:oasis:names:tc:SAML:2.0:metadata" entityID="http://CiscoISE/7fdfc239-631e-439c-a3ab-f5e56429779d"><md:SPSSODescriptor AuthnRequestsSigned="false" WantAssertionsSigned="true" protocolSupportEnumeration="urn:oasis:names:tc:SAML:2.0:protocol"><md:KeyDescriptor use="signing"><ds:KeyInfo xmlns:ds="http://www.w3.org/2000/09/xmldsig#"><ds:X509Data><ds:X509Certificate>MIIFUzCCAzugAwIBAgIMNOUWtIWSUFWaealmMA0GCSqGSIb3DQEBDAUAMCcxJTAjBgNVBAMTHFNB
TUxfaXNlMDIueGVyb3RydXN0bGFicy5jb20wHhcNMjExMTE1MjI1OTM0WhcNMjYxMTE0MjI1OTM0
WjAnMSUwIwYDVQQDExxTQU1MX2lzZTAyLnhlcm90cnVzdGxhYnMuY29tMIICIjANBgkqhkiG9w0B
AQEFAAOCAg8AMIICCgKCAgEAxw7scSLMH1ApI3O/7+vWsGP4schoJJHlVeJKHuJVgm19SXViW8Ab
WL9hQEXDr+U/zzp7fAq0YjckeNJg6VMhasao5tY4cutrAZK2F/kYvdVN+0N2cJUSTdJZNdKO+hcj
VmUgClUi6Xa4PJNw+1yhj8PwrDlpzfgXZLi3wlo5sMRGrg8NeSbShPJVakIEF2FoI0hXTOOSH4ZN
sD4q99dzrAv2m6y74vtU0GqwX4RRMOdvr7DIMNd2U/trh41QT85SY5c70l6fRWtY9omZBdU0S2JC
ihWnC9ug7FE0qdPm2h5KiZvxJck9OqVXDHvtRKctW5gwzfX8Hu7DQKqs90h04HRUxg2GEiuiXCQZ
5p63KfoRly5oW50UK0LIMdyhDl+8uP+n+Jo3ufR8lKe42+/rws5Ct1hg4jozddutKkw2vyxMEg5/
ZpAz/goRIOmBN4r3n3FNGZV1uTfbb1Mz8yvY61ccGgTU1/Iynt9maNHxjbFtAP+HaiMPisfTKDRJ
OLx91v+xKpb+opcOxqVK1q0Us0yGVvfycaFNZ3jP5wBNBzSAi7cvXk7sIW9WM7DC84OjC/r9EbaX
Wll7MLV+16Z+FeDnzhzFVjq/cb61eNvXKKwDFryFqBnDLLJGmJuZQ/EgR0wkvseR8tNE3qIYVhOe
qfCKZUpWtZ+lGLDD3r50p9UCAwEAAaN/MH0wIgYDVR0RBBswGYIXaXNlMDIueGVyb3RydXN0bGFi
cy5jb20wDAYDVR0TBAUwAwEB/zALBgNVHQ8EBAMCAuwwHQYDVR0OBBYEFAoHeqyYR5r0XpOVXODT
WdpDycOoMB0GA1UdJQQWMBQGCCsGAQUFBwMBBggrBgEFBQcDAjANBgkqhkiG9w0BAQwFAAOCAgEA
aoIIkyS8slDwjQrRsUVyPi17Lvl0TleCUQBrnr5WNUWlaXIB7Cb9qrG9D2ced72miH6vUcxine78
V4loTsgVu3tVlslQrOLW2eNLSbaN1XqbVUl1sCZkA4wGt8uLPX0t8UYysecEPFXD0NiKGPoIMaFg
3pP5525cJpeLRkgHjw1Z2qT54lsGd8Gdq6V666kliAt73kPwfDiZf/uDsCI+euIHDywLdOad51kJ
RWAsZO7tgxK3tJO9z7JU4oY1fI26DUN43++Ap3KSaDiz9gYJ3fFjR9hP/nF/ywyO0HO5MgHqhsMo
+zBMADukmprYC8qd+0z76+NQ6TLXgUer7NQMty68tQYP4riupvc26CEmgEZ592jBgDdt2tkY9An4
Fl/rqJPhX2RISLdUt50NcBbIZVOJ/IjkqHj9UG1E/U8qYy3krWvZV+VV5ChVNzwiVTWFCEOHNOTh
l/yYdAAsODUBbwTqgJL1G3hNo+dA3LAgg/XKENFr+tt3LQ0kwPAtjKFQsIX/4sgMetV4KSqUI3HZ
qw5u0t9WT578SZ5p1u/qj2cfx2wdqRVk5vSij6TxOpXIaCuY2L5YfeIMP/K49K+DecMBxCrKygNT
vGX0PkVG/yqgQ9OIfQZ1OD3/NZxGyBJdzSSkjHxiUdWf4lWj1tVU+qav8M3imsCRvcZJppaKJNo=</ds:X509Certificate></ds:X509Data></ds:KeyInfo></md:KeyDescriptor><md:NameIDFormat>urn:oasis:names:tc:SAML:2.0:nameid-format:transient</md:NameIDFormat><md:NameIDFormat>urn:oasis:names:tc:SAML:1.1:nameid-format:emailAddress</md:NameIDFormat><md:NameIDFormat>urn:oasis:names:tc:SAML:2.0:nameid-format:persistent</md:NameIDFormat><md:NameIDFormat>urn:oasis:names:tc:SAML:1.1:nameid-format:unspecified</md:NameIDFormat><md:NameIDFormat>urn:oasis:names:tc:SAML:1.1:nameid-format:WindowsDomainQualifiedName</md:NameIDFormat><md:NameIDFormat>urn:oasis:names:tc:SAML:2.0:nameid-format:kerberos</md:NameIDFormat><md:NameIDFormat>urn:oasis:names:tc:SAML:1.1:nameid-format:X509SubjectName</md:NameIDFormat><md:AssertionConsumerService Binding="urn:oasis:names:tc:SAML:2.0:bindings:HTTP-POST" Location="https://10.52.14.44:8443/portal/SSOLoginResponse.action" index="0"/><md:AssertionConsumerService Binding="urn:oasis:names:tc:SAML:2.0:bindings:HTTP-POST" Location="https://ise02.xerotrustlabs.com:8443/portal/SSOLoginResponse.action" index="1"/></md:SPSSODescriptor></md:EntityDescriptor>
Here are the details/attributes of interest gathered from the meta file which needs to be configured in the Duo Generic SAML Integration
entityID = http://CiscoISE/7fdfc239-631e-439c-a3ab-f5e56429779d.
AssertionConsumerService Location = https://10.x.x.x:8443/portal/SSOLoginResponse.action where 10.x.x.x is the ISE IP found on the XML file (Location).
AssertionConsumerService Location = https://isenodename.com:8443/portal/SSOLoginResponse.action where isenodename is the actual ISE FQDN name found on the XML file (Location).
Step 2. Configure Duo SSO for ISE
Check this KB in order to configure Duo SSO with AD as an Authentication Source.

Check this KB in order to enable the SSO with your custom domain.


Step 3. Integrate Cisco ISE with Duo SSO as a Generic SP
Check Step 1. and Step 2. of this KB in order to integrate Cisco ISE with Duo SSO as a Genreic SP.
Configure Cisco ISE SP details in Duo Admin Panel for Generic SP:

Configure SAML Response for Cisco ISE:
|
Name
|
Description
|
|
NameID format
|
urn:oasis:names:tc:SAML:1.1:nameid-format:unspecified
|
|
NameID attribute
|
Username
|

Create a group called Cisco Admin Group in the Duo Admin Panel and add the ISE users to this group or create a group in Windows AD and Sync the same to the Duo Admin panel using the directory Sync feature.

Configure Role attributes for Cisco ISE:
|
Name
|
Description
|
|
Attribute name
|
groups
|
|
SP Role
|
ISE Admin Group
|
|
Duo groups
|
ISE Admin Group
|

In the Settings section provide an appropriate name in the Name tab for this integration.

Click the Save button in order to save the configuration and refer to this KB for more details.
Click Download XML in order to download the SAML Metadata.

Upload SAML MetaData download from Duo Admin Panel to Cisco ISE by navigating to Administration > Identity Management > External Identity Sources > SAML Id Providers > Duo_SSO.
Switch the tab to Identity Provider Config. and click the Choose file button.
Choose the Metadata XML file downloaded in Step 8. and click Save.

Note: This step is mentioned here under the section Configure SAML SSO Integration with Duo SSO; Step 2. Import the SAML Metadata XML file from the Duo Admin portal.

Verify
Testing the Integration with Duo SSO
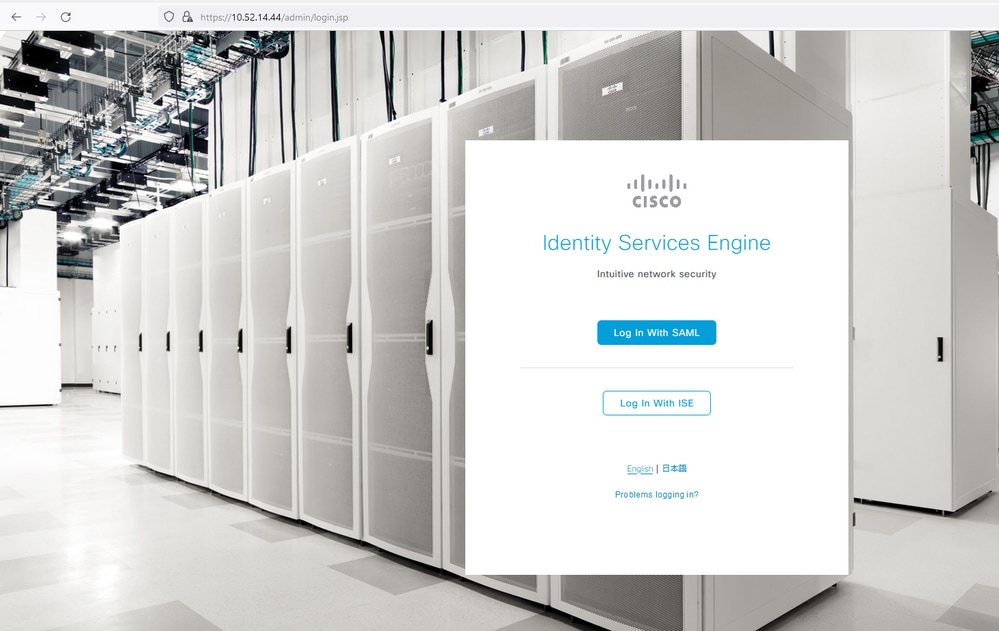
1. Login to the Cisco ISE Admin Panel and click Log In With SAML.
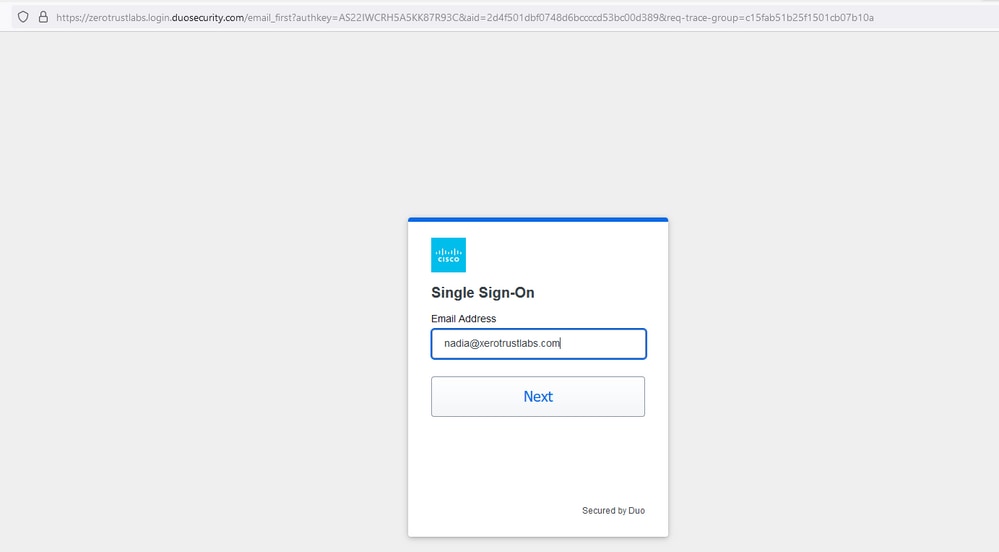
2. Redirected to the SSO page, enter the Email Address and click Next.
3. Enter the password and click Log in.

4. You get a Duo Push prompt on your mobile device.
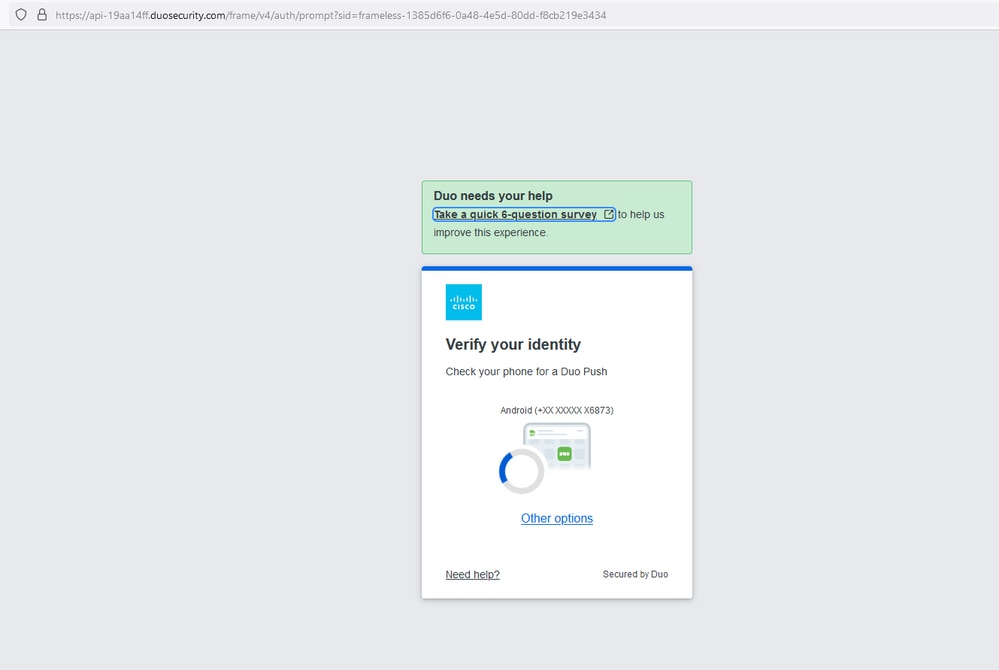
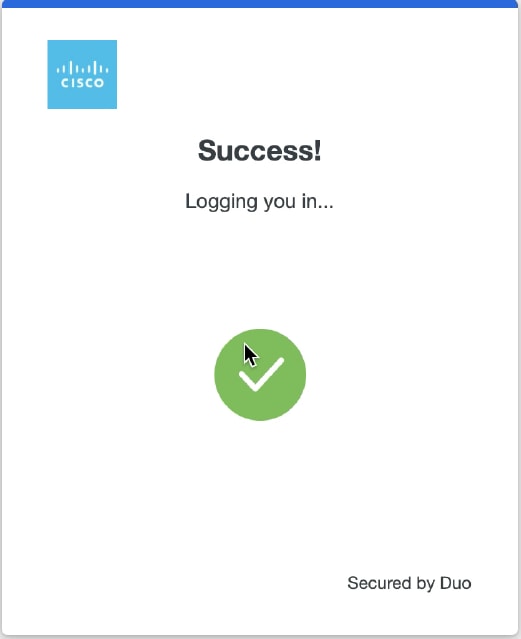
5. Once you accept the prompt, you get a window and are automatically redirected to the ISE Admin page.
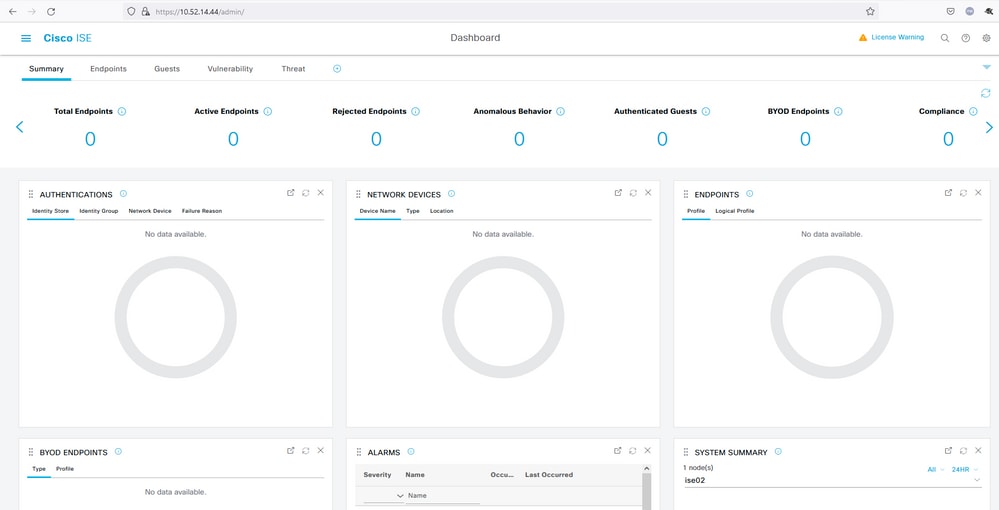
6. ISE Admin GUI Access Page.
Troubleshoot
- Download the SAML tracer extension for Mozilla FF https://addons.mozilla.org/en-US/firefox/addon/saml-tracer/.
- Scroll to the
SSOLoginResponse.action packet. Under the SAML tab, you see a number of attributes sent from Duo SAML: NameID, Recipient (AssertionConsumerService Location URL), and Audience(EntityID).


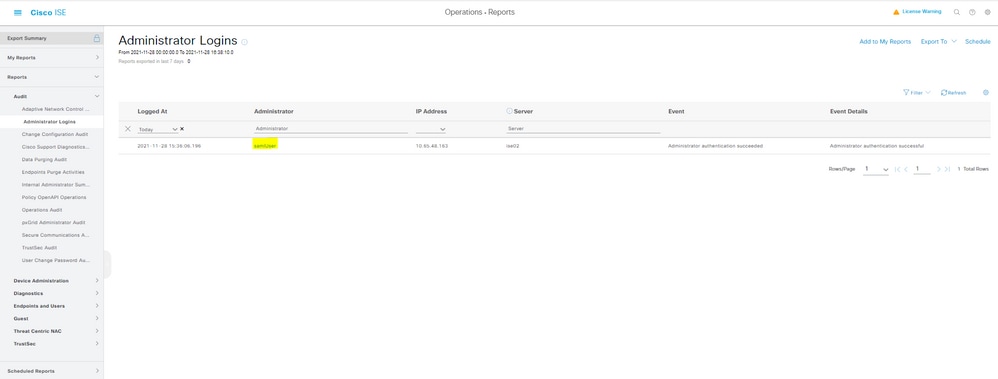
- Administrative Login log on ISE: username: samlUser.


 Feedback