Introduction
This document describes how to push new configurations via Templates from vManage.
Prerequisites
Requirements
Cisco recommends that you have knowledge of these topics:
- Basic Knowledge of SDWAN architecture
- Basic Knowledge of vManage dashboard
Components Used
This document is not restricted to specific software and hardware versions.
The information in this document was created from the devices in a specific lab environment. All of the devices used in this document started with a cleared (default) configuration. If your network is live, ensure that you understand the potential impact of any command.
Configure
To configure common parameters of vEdge devices from vManage controller, you can use Templates.
The example in the image shows you how to use the feature template to configure a new VPN 20 and loopback interface and push it to vEdge devices.
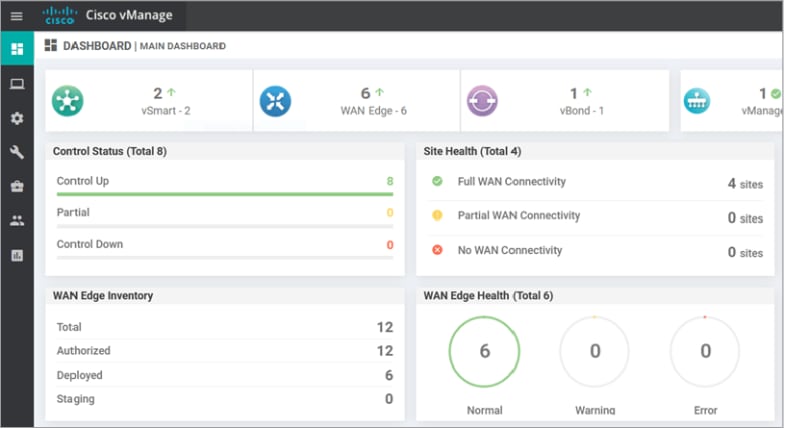
Log in to vManage. You can see that the SD-WAN fabric includes vSmart controllers, WAN Edge routers, vBond orchestrator, and one vManage Network Management Systems (NMS).
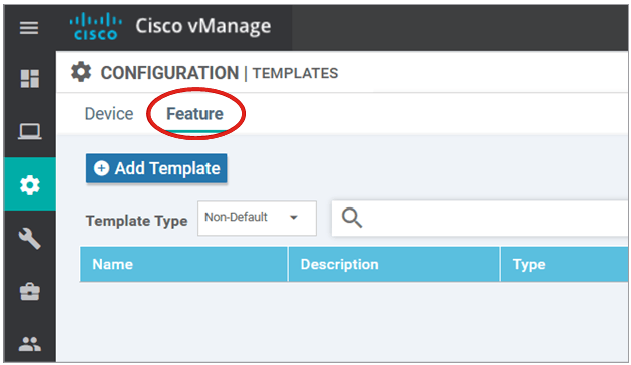
Click the Gear icon (Configuration) in the left menu bar and choose Templates. Click the Feature tab.
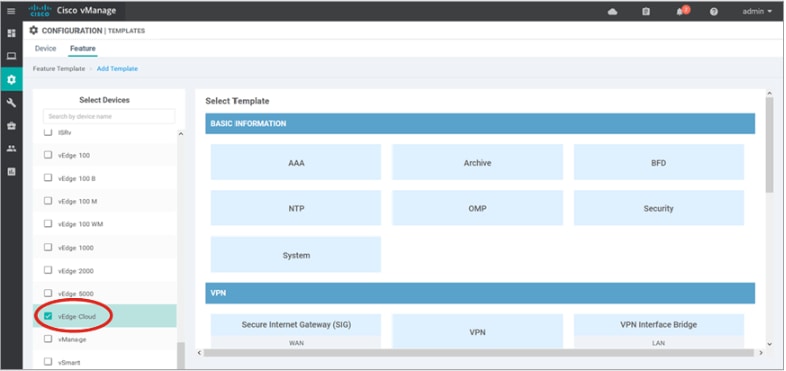
Click Add Template and choose vEdge Cloud from the list of possible devices under the Select Devices option and click the VPN template.
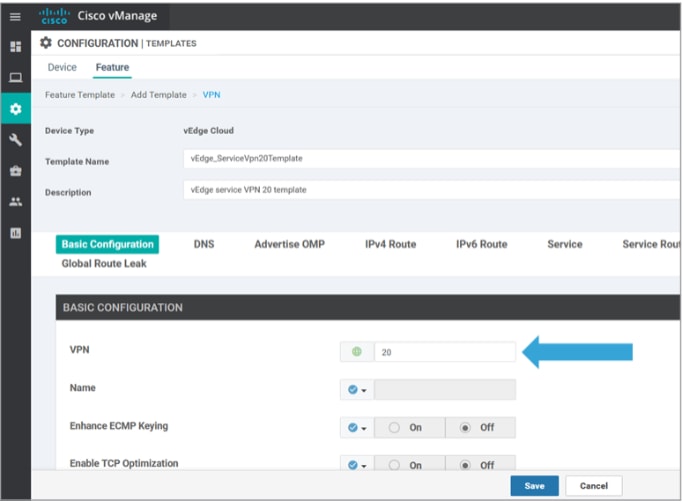
Type these template details:
Template Name: vEdge_ServiceVpn20Template
Description: vEdge service VPN 20 Template
In the Basic Configuration section, enter 20 in the VPN field and click Save.
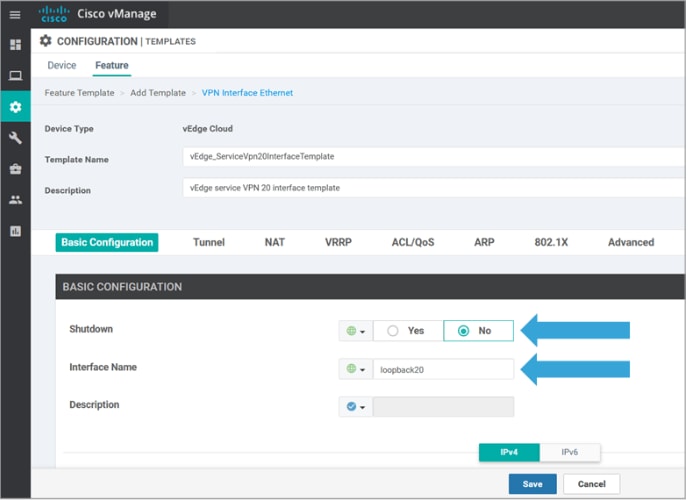
Click Add Template again and choose vEdge Cloud. Click VPN Interface Ethernet and enter these parameters:
Template Name: vEdge_ServiceVpn20InterfaceTemplate
Description: vEdge service VPN20 interface template
In the Basic Configuration section, enter these parameters:
Shutdown (Global): No
Interface Name (Global): loopback20
Scroll down to the IPv4 Configuration section and choose Device Specific as the IPv4 Address, and then click Save.

Click theDevicetab and apply the new feature templates tovEdgeSite1_DeviceTemplate in this way:
-
Click the More Options (...) icon forvEdgeSite1_DeviceTemplateand chooseEdit.
-
Click Service VPN> + Add VPNto add a service VPN.
-
Choose the new VPN 20 template and move it to the right pane. ClickNext.
-
ClickVPN Interfaceunder theAdditional VPN Templatessection in the right pane. This process must add a new VPN Interface field in the left pane.
-
Click the new VPN interface drop-down arrow and choosevEdge_ServiceVpn20Interface Template. ClickAdd.
This process returns you to theService VPNoption inside the service VPN 20 template.
-
ClickUpdate.
Before you click Update, you can see that the new service VPN has been added to the list:

Click theDownloadarrow icon to download and save the templatevEdgeSite1_DeviceTemplate.csvfile. The file is saved automatically to the SD-WAN folder on the Jump Host.
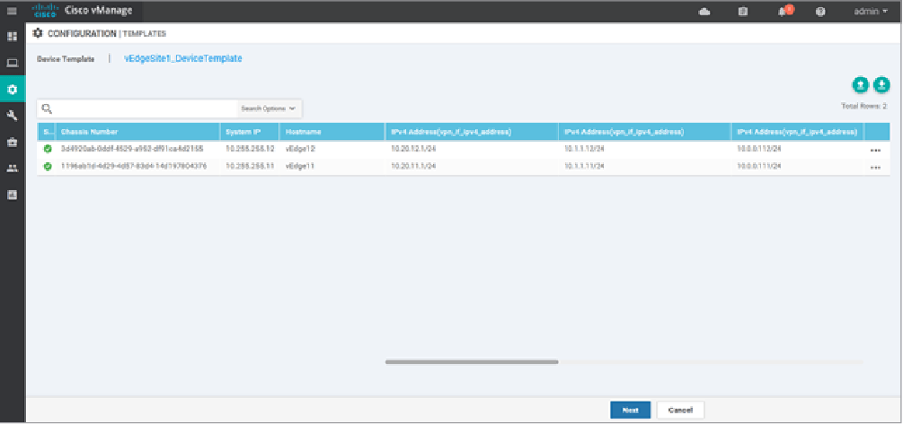
On the Jump Host, browse to the SD-WAN folder and open thevEdgeSite1_DeviceTemplate.csvfile. Add the IP address for loopback 20 for the template’s devices as:
-
vEdge11: 10.20.11.1/24
-
vEdge12: 10.20.12.1/24


Save the updated .csv file.
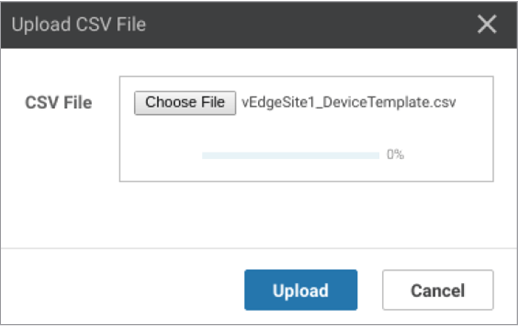
Click theUploadarrow icon on vManage and upload thevEdgeSite1_DeviceTemplate.csvfile.
If vManage times out while you edit the CSV file, repeat the previous step to re-enable the new service VPN and VPN interface.
Click Next to deploy the configuration changes.
Click Configure Devices and confirm the configuration changes. Monitor the deployment status. The configuration is pushed to vEdge11 and vEdge12.
Proceed to the next step once vManage displays a Success status for both devices.

Verify
Click the Monitor icon and choose Network. Click vEdge11 from the list of devices and click Real-Time at the bottom of the left pane. In the Device Options field, choose IP Routes and choose Show Filters. Choose 20 from the VPN drop-down list and click Search. Verify the state of the VPN 20 routing table on vEdge11. Now, you can only see the VPN 20 Loopback 20 interface on the local router.

Troubleshoot
There is currently no specific troubleshoot information available for this configuration.


 Feedback