Introduction
This document describes how to recover your SD-WAN vSmart and vBond access after your credentials are lost.
Prerequisites
Requirements
There are no specific requirements for this document.
Components Used
This document is not restricted to specific software and hardware versions.
The information in this document was created from the devices in a specific lab environment. All of the devices used in this document started with a cleared (default) configuration. If your network is live, ensure that you understand the potential impact of any command.
Problem
Access to vBonds and vSmarts has been lost. This happens when you do not know or remember your credentials or access is locked after excessive and unsuccessful attempts to log into either interface. At the same time, the Control Connections between vManage, vSmarts, and vBonds are still established.
Solution
Step 1. Unlock the Credentials if necessary
These steps help you to identify a locked username and how to unlock them.
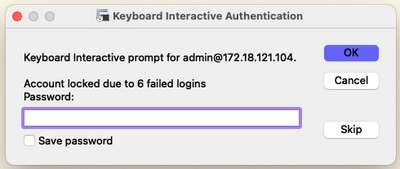
- In case the account has been locked due to excessive failed login attempts you can see the 'Account locked due to X failed logins' message every time we type the username.
host:~pc-host$ ssh admin@172.18.121.104 -p 22255
viptela 20.6.3

(admin@172.18.121.105) Account locked due to 6 failed logins <<<
Option A. Unlock Credentials from vManage GUI
After you confirm the credentials are locked, you need to unlock them. vManage can help you to perform this operation easily.
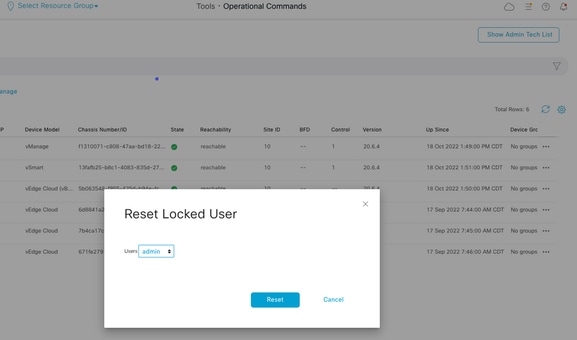
- You can manually unlock the Credentials from vManage GUI for any device.
Navigate to vManage > Tools > Operational Commands > Device > … > Reset Locked User > Select User > Reset
Option B. SSH to the device which has configured an additional credential
In case you have SSH connectivity with an additional Netadmin credential in the device where you confirm the locked credentials are, you can still unlock them from CLI.
request aaa unlock-user username
- In case you unlocked the credentials and the log in still fails, you need to change the password.
Step 2. Recover the Access with a CLI template
You need to create the CLI templates that help you to modify the password for the devices. In case a CLI template is already created and attached to the Device, you can skip to Step 3.
Option A. Load the Running Configuration directly in the CLI template
vManage has an easy way to load the Running Configuration from the devices into the CLI template.
Note: This option cannot be available based on the vManage Version. You can review Option B.
- Create a new CLI template
Navigate to vManage > Configuration > Templates > Create Template > CLI template

- Based on the device model selected, you can choose from which device the vManage loads the Running Configuration.

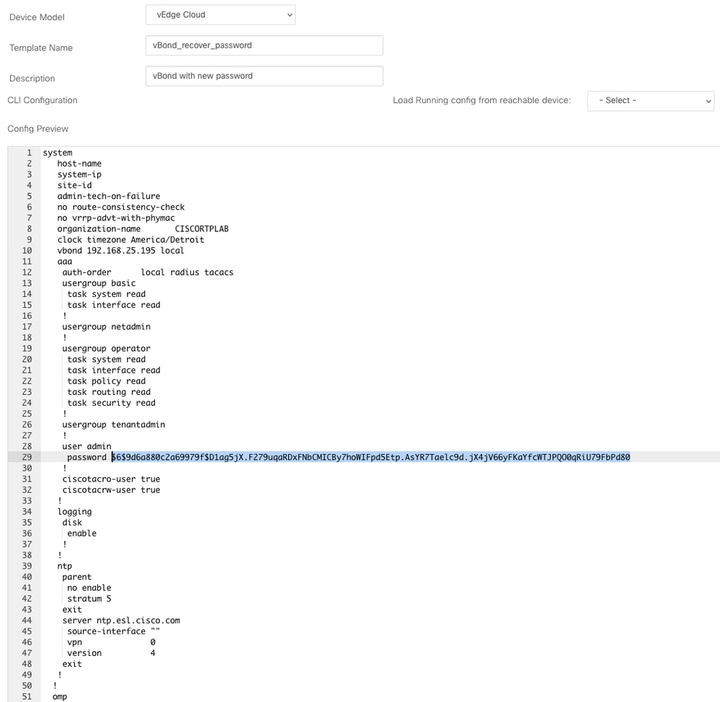
- The Device Model, Template Name, and Description values need to be entered in order to create the Template.
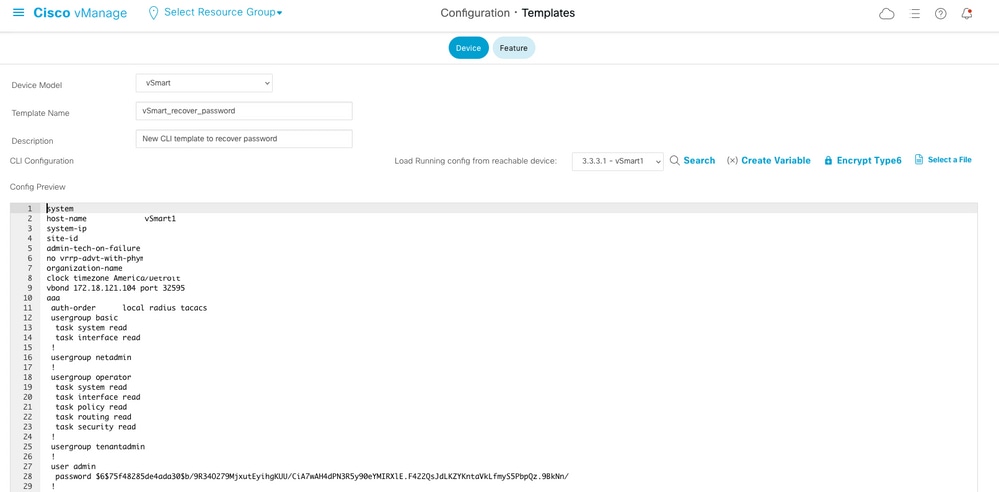
- As soon as the configuration is generated in the CLI template, you can review Step 4 to modify the password.
Option B. Load the Configuration from vManage Database
In case you cannot load the configuration automatically in the CLI, you can still manually obtain the configuration of the device and create the CLI Template from that information.
- vManage always has a backup configuration from all devices stored in its Database.
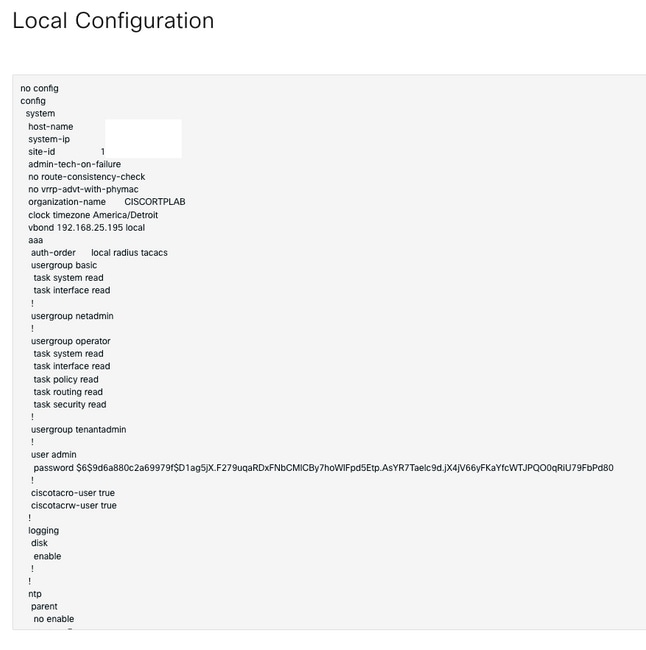
Navigate to vManage>Configuration>Controllers>Device> … >Running Configuration vManage>Configuration>Controllers>Device> … >Local Configuration.
Note: Running vs Local Configuration. Running Configuration means that the vManage needs to request the configuration information for the device. Local Configuration means the vManage shows the information already stored in its Database.
- After the Local Configuration pops up, you can copy the whole configuration into a NotePad.
- You need to create a new CLI template.
Navigate to vManage>Configuration>Templates>Create Template>CLI template.

- The Device Model, Template Name, Description, and Config Preview values need to be entered in order to create the template. The configuration copied from Local Configuration needs to be pasted into config preview.
Caution: For vBond, you must select vEdge cloud. Every other device has its own specific model.
Step 3. New Credentials
After the template is created, you can replace the encrypted password or add new credentials.
Option A. Change the lost password
You can modify the configuration to ensure you use a known password.
- You can highlight and replace the encrypted password with a plain text one.

Note: This plain-text password is encrypted after the template push.
Option B. Add a new username and password with Netadmin privileges
If the changes to the password are not allowed, you can add new credentials to ensure accessibility.

user newusername < Creates username
 password password < Creates the password
 group netadmin < Assigns read-write privileges
- Click Add to Save the Template.
Step 4. Template Push to the Device
The next step is to push the CLI template to the device to change the Running Configuration.
- After the template has been saved, you can attach it to the device.

Navigate to vManage>Configuration>Templates> Select the Template>… >Select the device > Attach.
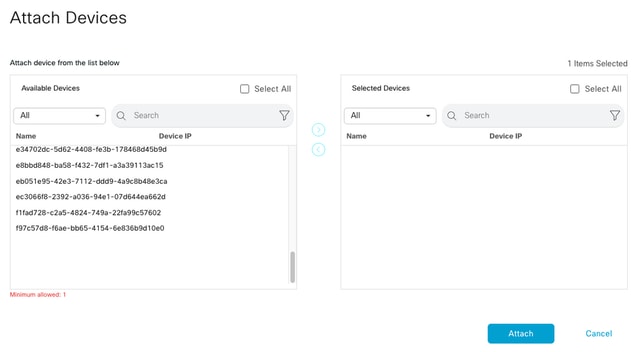
- Click Attach to review the config preview.
- When you check the Config Diff, you can see either the password has changed or the new credentials were added.
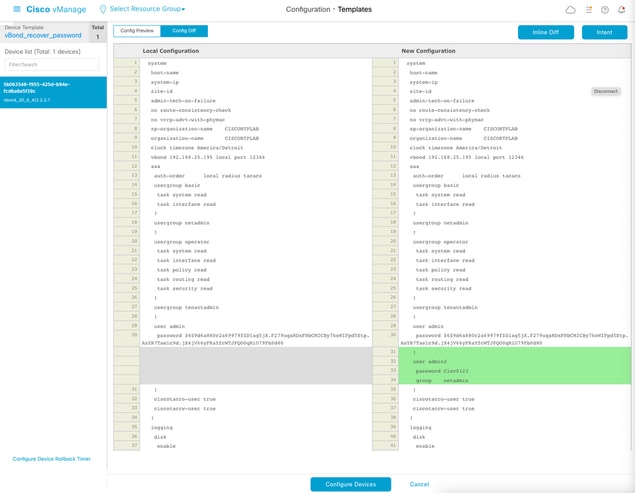
- To push the Template, click Configure Devices.
- After the vManage confirms the Ttemplate push ended successfully, you can use your new credentials to access the device via SSH.


 Feedback