Introduction
This document describes how to integrate OKTA Single Sing-On (SSO) on a Software-Defined Wide Area Network (SD-WAN).
Prerequisites
Requirements
Cisco recommends that you have knowledge of these topics:
- SD-WAN general overview
- Security Assertion Markup Language (SAML)
- Identity Provider (IdP)
- Certificates
Components Used
The information in this document is based on these software and hardware versions:
- Cisco vManage Release 18.3.X or later
- Cisco vManage Version 20.6.3
- Cisco vBond Version 20.6.3
- Cisco vSmart Version 20.6.3
The information in this document was created from the devices in a specific lab environment. All of the devices used in this document started with a cleared (default) configuration. If your network is live, ensure that you understand the potential impact of any command.
Background
Security Assertion Markup Language (SAML) is an open standard for exchange authentication and authorization data between parties, in particular, between an identity provider and a service provider. As its name implies, SAML is an XML-based markup language for security assertions (statements that service providers use to make access-control decisions).
An Identity Provider (IdP) is a trusted provider that lets you use single sign-on (SSO) in order to access other websites. SSO reduces password fatigue and enhances usability. It decreases the potential attack surface and provides better security.
Configure
vManage Configuration
1. In Cisco vManage, navigate to Administration > Settings > Identify Provider Settings > Edit.
 Configuration > Settings
2. Click Enabled.
3. Click to download the SAML metadata and save the content in a file. This is needed on the OKTA side.
 Download SAML

Tip: You need these information from METADATA to configure OKTA with Cisco vManage.
a. Entity ID
b. Sign certificate
c. Encryption certificate
d. Log out URL
e. Log in UR

Note: Certificates must be in x.509 format and save them with .CRT extension.
 X.509 Certificate
OKTA Configuration
1. Log in OKTA account.
2. Navigate to Applications > Applications.
 Applications > Apllications
3. Click Create App Integration.
 Create Application
4. Click SAML 2.0 and next.
 Configure SAML2.0
General Settings
1. Enter a name of application.
2. Add logo for application (optional).
3. App visibility (optional).
4. Click NEXT.
 SAML General Settings
Configure SAML
This table describe the parameters must need configure on this section.
|
Component
|
Value
|
Configuration
|
|
Single sign on URL
|
https://XX.XX.XX.XX:XXXX/samlLoginResponse
|
Get it from the metadata.
|
|
Audience URI (SP Entity ID)
|
XX.XX.XX.XX
|
Ip address or DNS for Cisco vManage
|
|
Default RelayState
|
|
EMPTY
|
|
Name ID format
|
|
As per your preference
|
|
Application username
|
|
As per your preference
|
|
Update application username on
|
Create and update
|
Create and update
|
|
Response
|
Signed
|
Signed
|
|
Assertion Signature
|
Signed
|
Signed
|
|
Signature Algorithm
|
RSA-SHA256
|
RSA-SHA256
|
|
Digest Algorithm
|
SHA256
|
SHA256
|
|
Assertion Encryption
|
Encrypted
|
Encrypted
|
|
Encryption Algorithm
|
AES256-CBC
|
AES256-CBC
|
|
Key Transport Algorithm
|
RSA-OAEP
|
RSA-OAEP
|
|
Encryption Certificate
|
|
Encryption certificate from metadata, must be on format x.509.
|
|
Enable Single Logout
|
|
muct be checked.
|
|
Single Logout URL
|
https://XX.XX.XX.XX:XXXX/samlLogoutResponse
|
Get from the metadata.
|
|
SP Issuer
|
XX.XX.XX.XX
|
Ip address or DNS for vManage
|
|
Signature Certificate
|
|
Encryption certificate from the metadata, must be on format x.509.
|
|
Assertion Inline Hook
|
None(disable)
|
None(disable)
|
|
Authentication context class
|
X.509 Certificate
|
|
|
Honor Force Authentication
|
Yes
|
Yes
|
|
SAML issuer ID string
|
SAML issuer ID string
|
Type an string text
|
|
Attributes Statements (optional)
|
Name ► Username
Name format (optional) ► Unspecified
Value ►user.login
|
Name ► Username
Name format (optional) ► Unspecified
Value ►user.login
|
|
Group Attribute Statements (optional)
|
Name ► Groups
Name format (optional) ► Unspecified
Filter ►Matches regex ►.*
|
Name ► Groups
Name format (optional) ►Unspecified
Filter ►Matches regex ►.*
|

Note: Must use Username and Groups, exactly as shown in CONFIGURE SAML table.
 Configure SAML Part 1
 Configure SAML Part 2


Feedback
1. Select one of the option as your preference.
2. Click Finish.
 SMAL Feedback
Configure Groups in OKTA
1. Navigate to Directory > Groups.
 OKTA Groups
2. Click Add group and creat new group.
 Add Group

Note: Groups must match with the Cisco vManage groups and they need to be in lower case.
Configure Users in OKTA
1. Navigate to Directory > People.
 OKTA Users
2. Click Add person, create a new user, assigne it to the group and save it.
 Add User

Note: Active Directory can be use instead of OKTA users.
Assign Groups and Users in Application
1. Navigate to Applications > Applications > Select the new application.
2. Click Assign > Assign to Groups.
 Application > Groups
3. Identify the group and click Assign > Done.
 Assign Group and User
4. Group and Users now must be assigned to application.
Verify
Once the configuration be completed, you can get access to Cisco vManage through OKTA.
 SSO Login Vmanage
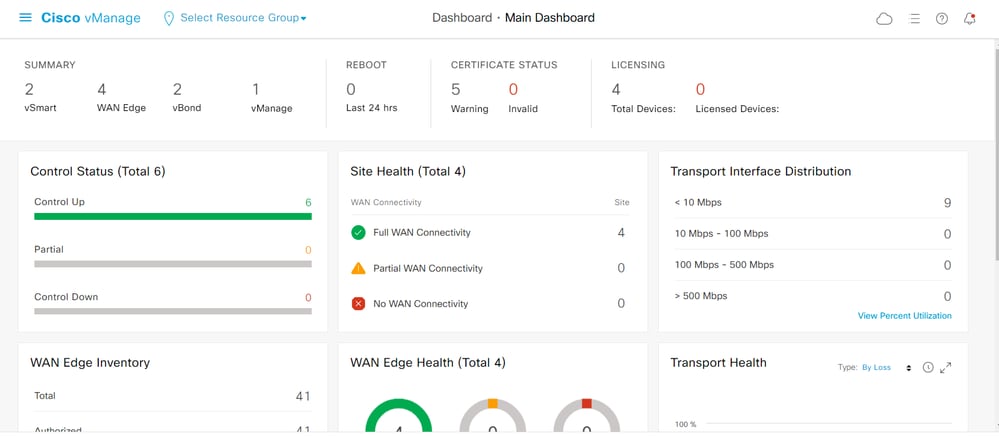
 Vmanage GUI

Note: To bypass SSO login can be use https://<vmanage>/login.html
Troubleshoot
In Cisco vManage to view the logs related with SSO, check the file: var/log/nms/vmanage-server.log
Related Information


 Feedback