Introduction
This document describes how to initiate an SAML-Trace and HAR File in an Software Defined Wide Area Network (SD-WAN) environment.
Prerequisites
Requirements
Cisco recommends that you have knowledge of Cisco SD-WAN.
Components Used
This document is based on Cisco vManage and Web browsers such Firefox and Chrome.
The information in this document was created from the devices in a specific lab environment. All of the devices used in this document started with a cleared (default) configuration. If your network is live, ensure that you understand the potential impact of any command.
Background Information
When you initiate an SAML-Trace or HAR file in an Software Defined Wide Area Network (SD-WAN) environment, this is intended to help capture information for the Technical Assistance Center (TAC) in order to assist it to troubleshoot an issue with vManage Single Sing-On (SSO) and dashboard respectivetly. It helps to capture the SAML-Trace and HAR File in the problem state.
This document covers the usage of either both browsers such Firefox and Chrome.
Collect SAML-Trace
Option 1. From Firefox Browser Option
Step 1. Download SAML-tracer extension of this Link.
Step 2. Open your Extension button and select SAML-tracer.
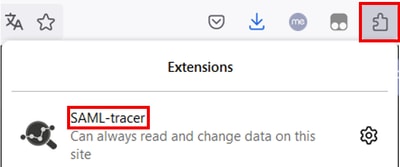
Step 3. Open Single Sign-On (SSO) login vManage page.
- Make sure no other application run at the same time. Close all of them expect by SSO login vManage page.
- Clean up any old entry before to test. Click Pause and then Clear.

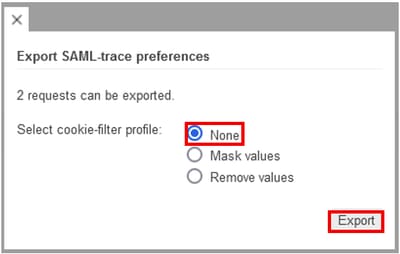
Step 4. Next, try to login. SAML-Tracer automatically catches GET and POST responses. Once you get SSO failure response, you must export all flows by clicking in Export. option.

Step 5. Finally, chose None and then Export.
Option 2. From Chrome Browser Option
Step 1. Download SAML-tracer extension of this Link.
Step 2. Open your Extension button and select SAML-tracer.
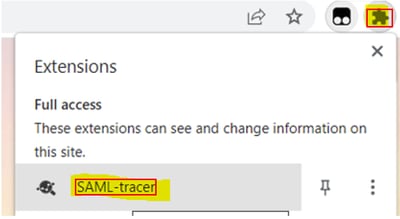
Step 3. Repeat the same steps described in Firefox Browser.
Collect HAR File
Option 1. From Firefox Browser Option
Step 1. Open Firefox Browser and login on your vManage.
Step 2. Look for the three lines located on the right-side corner and open More Tools menu to then select Web Developer Tools.
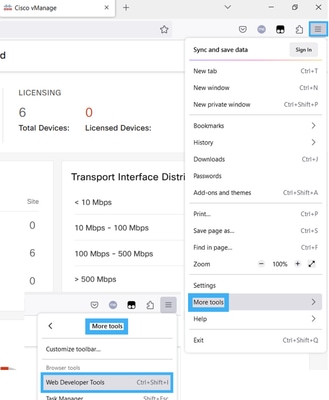
Step 3. Set HTTP Archive File (HAR). Click on Network then activate Preserve Log and Record Network log.

Step 4. Clean up for HAR buffer. The intention is to have only HTTP response when you replicate the issue. Use the bucket icon.
 Before Clean Up
 After Clean Up
Step 5.Once the buffet is clear, then proceed to reproduce the issue. HTTP responses are collected into Network Development tool.
.
Step 6. Finally, click on engine icon and chose the option Save All As HAR.

Option 2. From Chrome Browser Option
Step 1. Open Chrome Browser and login on your vManage.
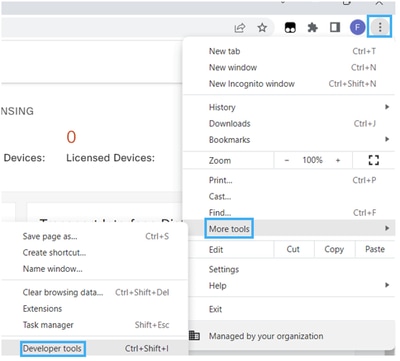
Step 2. Look for the three dots located on the right-side corner and open More Tools menu to then select Developer Tools.
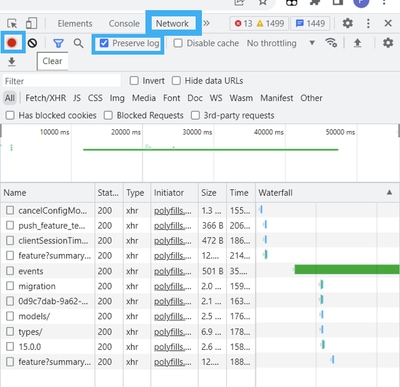
Step 3. Set HTTP Archive File (HAR). To do so, click on Network then activate Preserve Log and Record Network log (red circle icon).
Step 4. Clean up HAR buffer. The intention is to have only HTTP response when the issue replicated. Use the circle in grey icon.
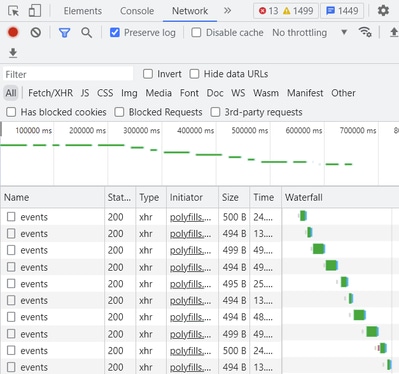 Before Clean Up
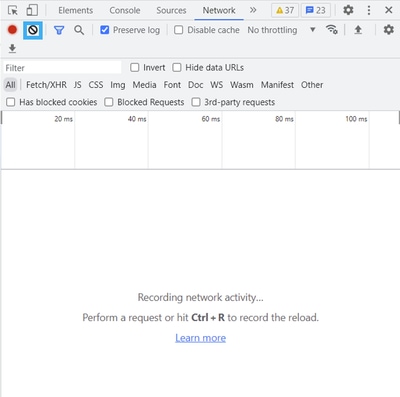 After Clean Up
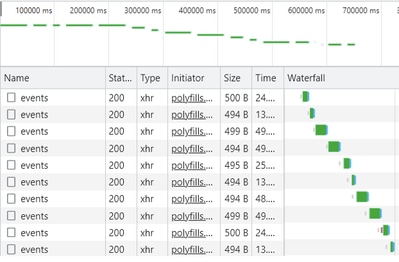
Step 5. Once the buffet is clear, then proceed to reproduce the issue. HTTP responses are collected into Network Development tool.
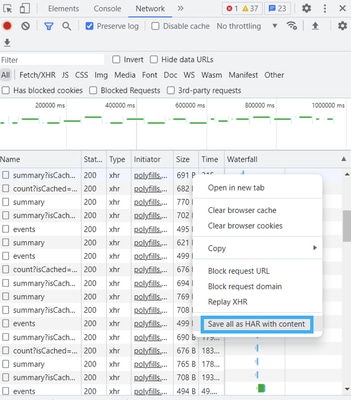
Step 6. Finally, do right-click on http(s) response and download file by using the option Save all as HAR with content.
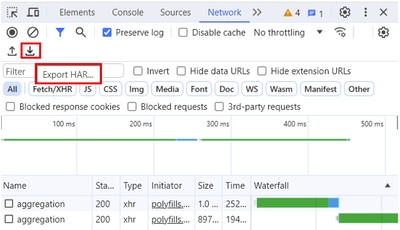
Step 7. Or Do click on arrow-down and HAR file to save recording entries.


 Feedback