Introduction
This document describes the procedure to migrate Cisco Adaptive Security Appliance (ASA) to Cisco Firepower.
Contributed by Ricardo Vera, Cisco TAC Engineer.
Prerequisites
Requirements
Cisco recommends that you have knowledge of Cisco Firewall Threat Defense (FTD) and Adaptive Security Appliance (ASA).
Components Used
The information in this document is based on these software and hardware versions:
- Windows PC with Firepower Migration Tool (FMT) v3.0.1
- Adaptive Security Appliance (ASA) v9.16.1
- Secure Firewall Management Center (FMCv) v7.0.1
- Secure Firewall Threat Defense Virtual (FTDv) v7.0.1
The information in this document was created from the devices in a specific lab environment. All of the devices used in this document started with a cleared (default) configuration. If your network is live, ensure that you understand the potential impact of any command.
Background Information
Specific requirements for this document include:
- Cisco Adaptive Security Appliance (ASA) Version 8.4 or later
- Secure Firewall Management Center (FMCv) Version 6.2.3 or later
The Firewall Migration Tool supports this list of devices:
- Cisco ASA (8.4+)
- Cisco ASA (9.2.2+) with FPS
- Check Point (r75-r77)
- Check Point (r80)
- Fortinet (5.0+)
- Palo Alto Networks (6.1+)
Before you proceed with the migration, please consider the Guidelines and Limitations for the Firewall Migration Tool.
Configure
Network Diagram

Configuration Steps
- Download the most recent Firepower Migration Tool from Cisco Software Central:

- Click the file you previously downloaded to your computer.
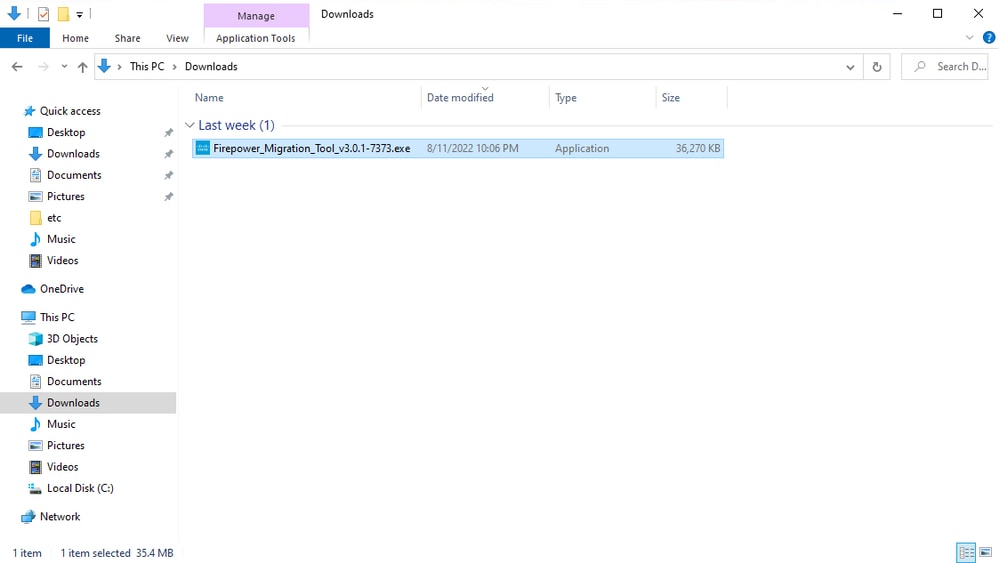
Note: The program opens up automatically and a console auto generates content on the directory where you ran the file.


- After you run the program, it opens up a web browser that displays the “End User License Agreement”.
- Mark the check box to accept terms and conditions.
- Click Proceed.

- Log in to the migration tool.
- You can either log in with the CCO account or with the local default account.
- Local default account credentials are:
admin/Admin123

- Select the Source Firewall to migrate.
- In this example, Cisco ASA (8.4+) is used as a source.

- Select the extraction method to be used to get the configuration.
- Manual Upload requires you to upload the
Running Config file of the ASA in “.cfg” or “.txt” format.
- Connect to the ASA to extract configurations directly from the firewall.

Note: For this example, connect directly to the ASA.
- A summary of the configuration found on the firewall is displayed as a dashboard, please click Next.

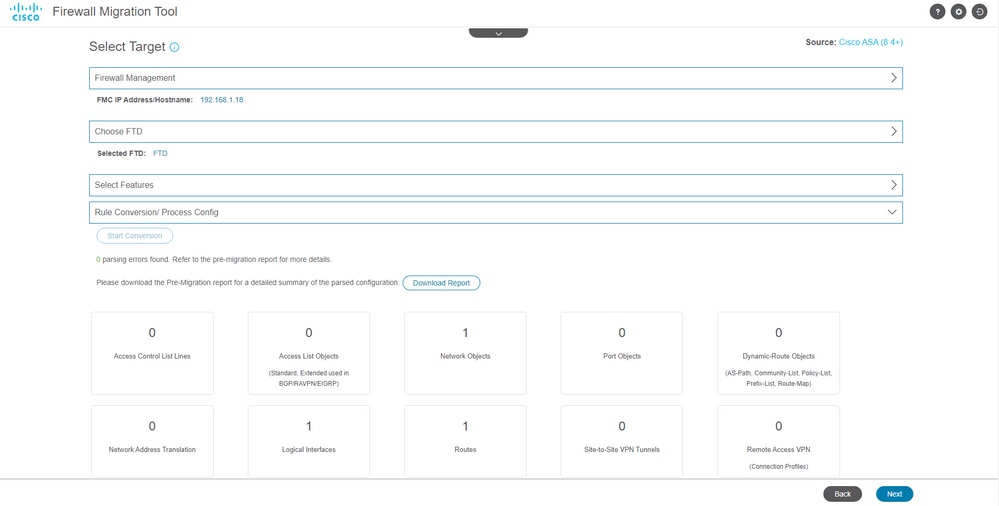
- Select the target FMC to use on the migration.
- Provide the IP of the FMC.
- It opens a pop-up window where it prompts you for the log in credentials of the FMC.

- (Optional) Select the Target FTD you want to use.
- If you choose to migrate to an FTD, select the FTD you want to use.
- If you do not want to use an FTD you can fill the check box
Proceed without FTD

- Select the configurations you want to migrate, options are displayed on the screenshots.

- Start the conversion of the configurations from ASA to FTD.

- Once the conversion finishes, it displays a dashboard with the summary of the objects to be migrated (restricted to compatibility).
- You can optionally click on
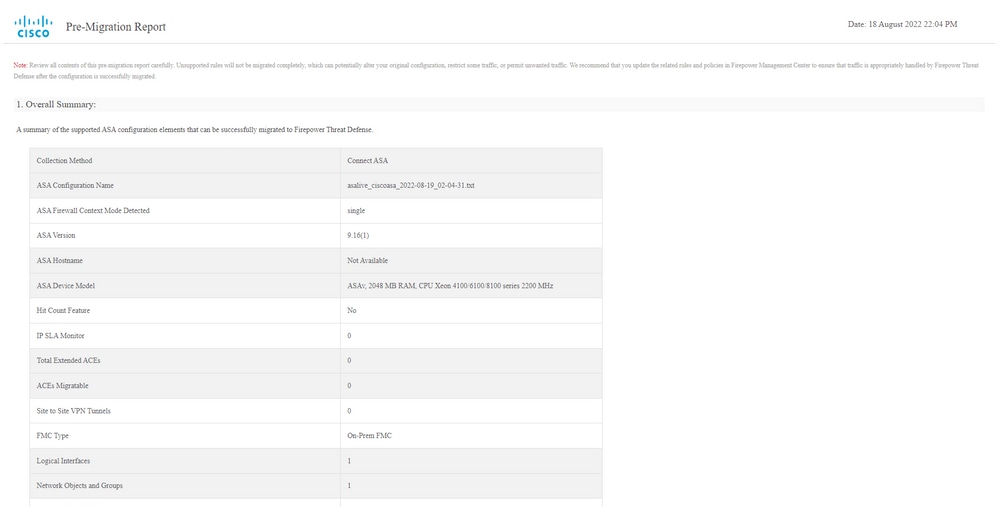
Download Report to receive a summary of the configurations to be migrated.
Pre-Migration report example, as shown in the image:
- Map the ASA interfaces with the FTD interfaces on the Migration Tool.

- Create the Security Zones and Interface Groups for the interfaces on the FTD
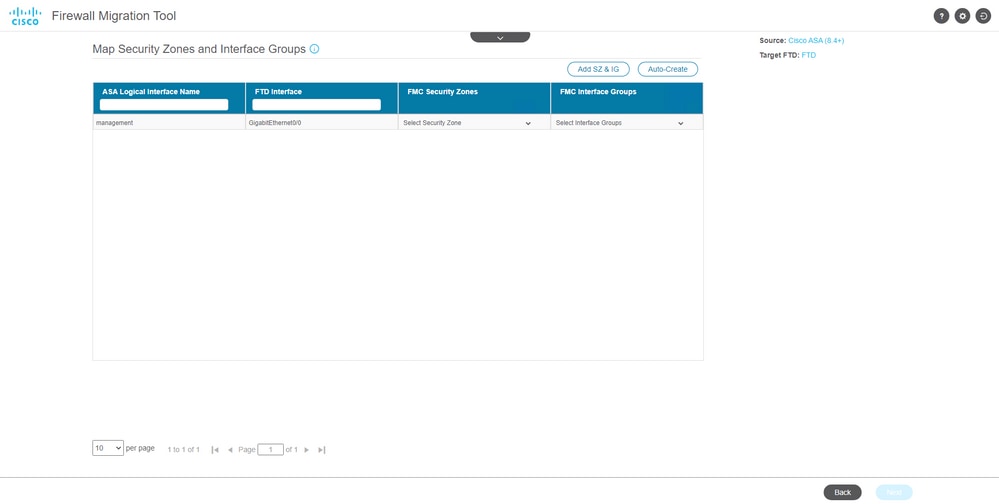
Security Zones (SZ) and Interface Groups (IG) are auto-created by the tool, as shown in the image:

- Review and validate the configurations to be migrated on the Migration Tool.
- If you have already finished the review and optimization of the configurations, click
Validate.

- If the validation status is successful, push the configurations to the target devices.
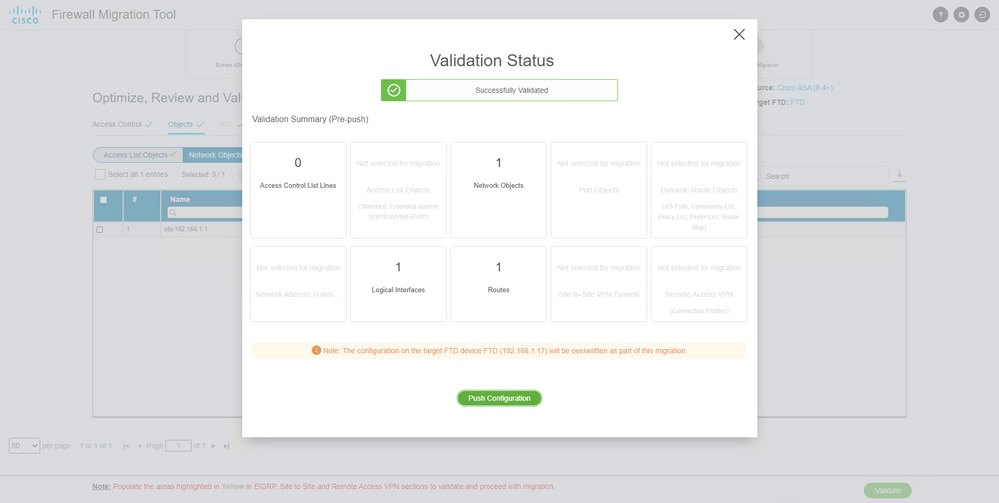
Example of configuration pushed through the migration tool, as shown in the image:

Example of a successful migration, as shown in the image:

- (Optional) If you selected to migrate the configuration to an FTD, it requires a deployment to push the available configuration from the FMC to the firewall, in order to deploy the configuration:
- Log in to the FMC GUI.
- Navigate to the
Deploy tab.
- Select the deployment to push configuration to the firewall.
- Click
Deploy.

Troubleshoot
This section provides information you can use to troubleshoot your configuration.
Verify the logs in the directory where the Firepower Migration Tool File was placed, for example:
Firepower_Migration_Tool_v3.0.1-7373.exe/logs/log_2022-08-18-21-24-46.log
 Feedback