Introduction
This document describes the process to retrieve logs from the AnyConnect application (app) for iOS devices where the Diagnostic and Reporting Tool (DART) is not available.
Contributed by Hugo Olguin, Cisco Engineer.
Prerequisites
Requirements
Cisco recommends that you have knowledge of these topics:
- AnyConnect Client
- Apple iOS
Components Used
The information in this document is based on these software versions:
- iOS 14.6
- AnyConnect 4.10.01084
The information in this document was created from the devices in a specific lab environment. All of the devices used in this document started with a cleared (default) configuration. If your network is live, make sure that you understand the potential impact of any command.
Background information
This document does not describe any Virtual Private Networks (VPN) configuration for AnyConnect, just the required steps in order to gather logs from the mobile app.
If you are in search for the Anyconnect configuration example document, please refer to "Configure AnyConnect VPN Client on FTD: Hairpining and NAT Exemption" document.
Configure
Configure AnyConnect Debug Collection
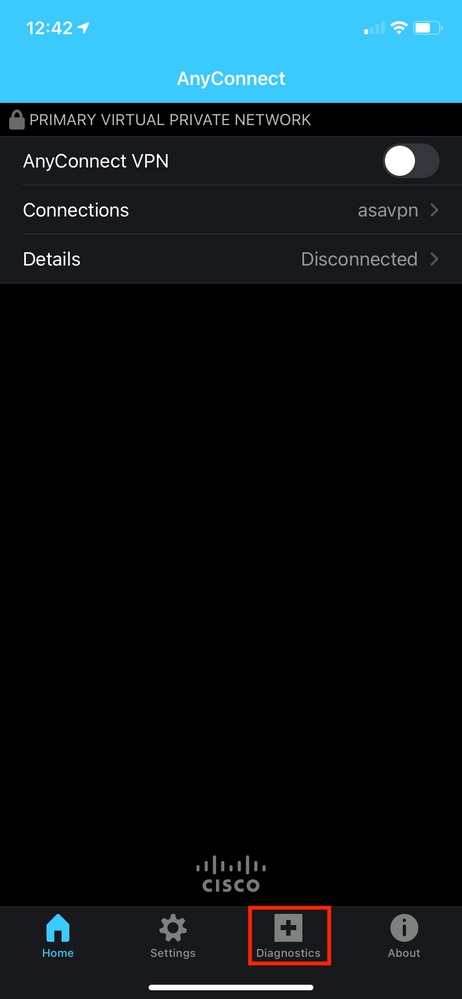
1. Open the AnyConnect app, in the main menu you may locate the Diagnostics section.
2. Ensure the VPN Debug Logs option is enabled (toggled).
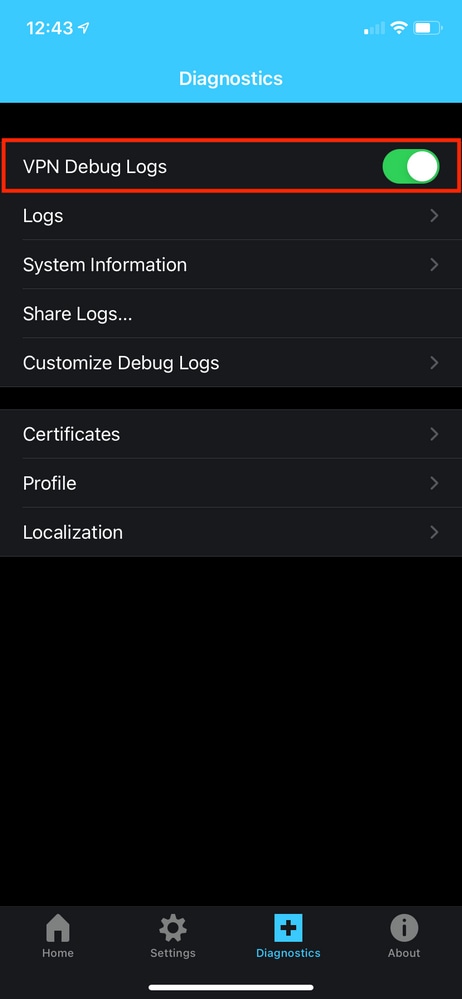
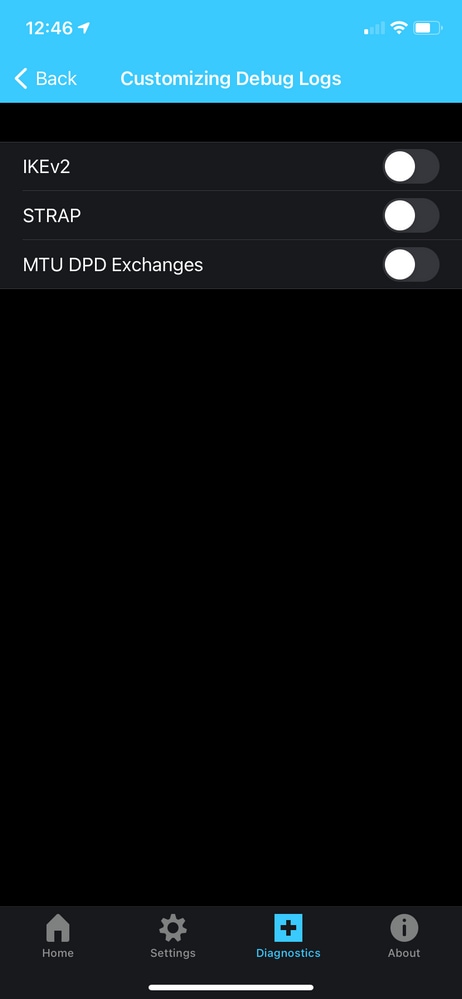
2.1. In order to enable custom debugs, select Customize Debug Logs from step 2.
This option allows you to enable additional debugs, as shown in the image below.
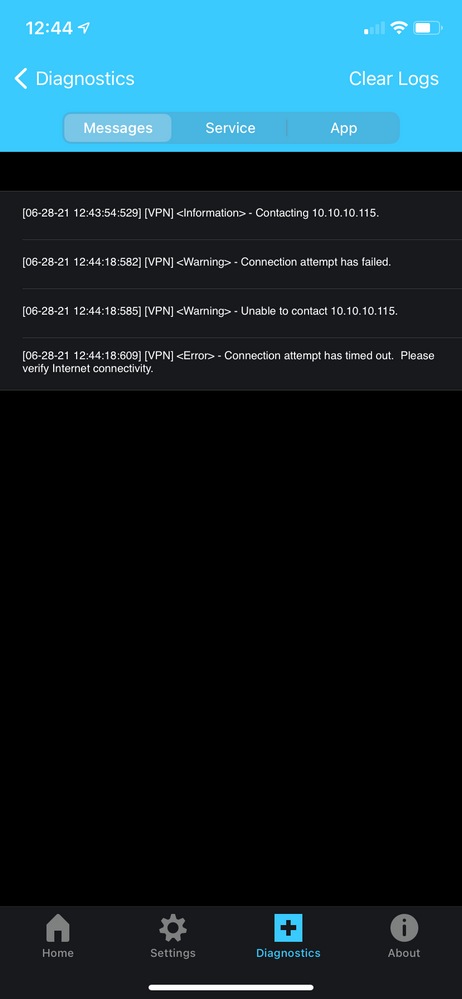
2.2. From step 2, select the Logs option in order to verify the app retrieves log events. Logs must be displayed, as shown in the image below.
4. In order to retrieve the logs. Navigate to the previous screen (Step 2) and select the Share Logs option.
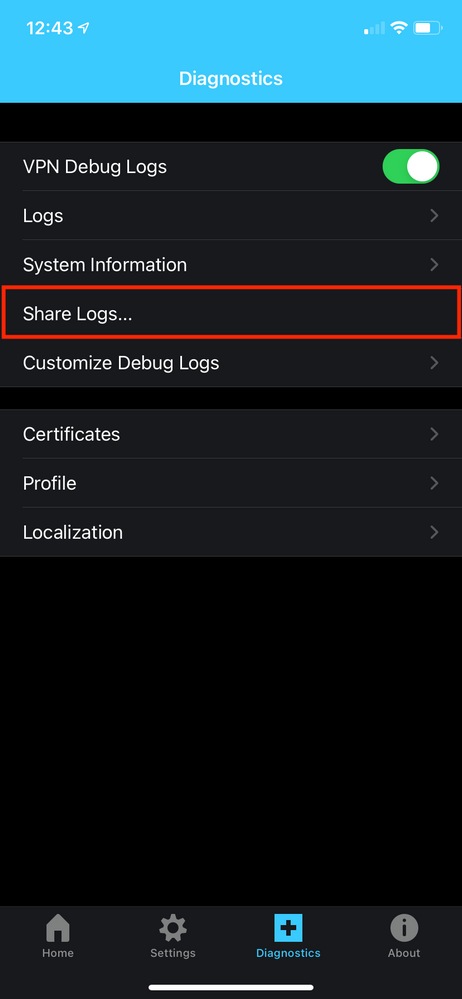
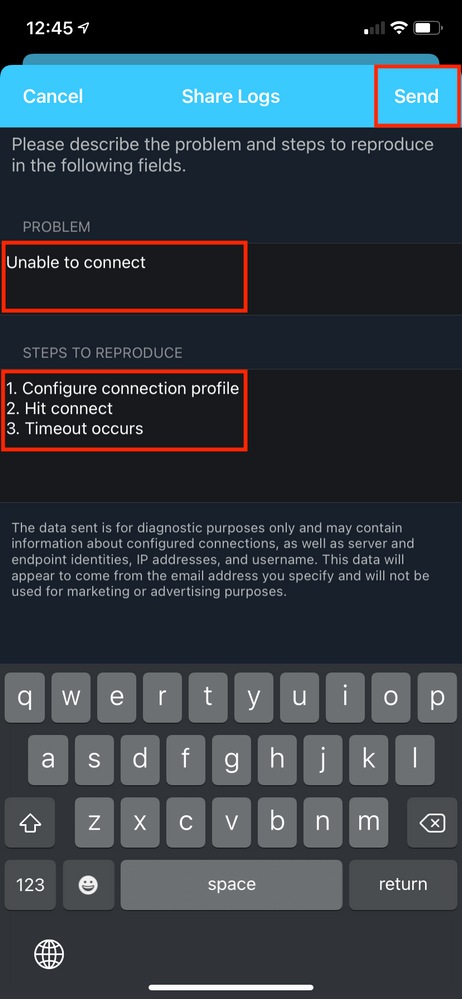
5. Assign a name in the problem section and describe the steps to reproduce. Click on Send once you finish with the problem description.
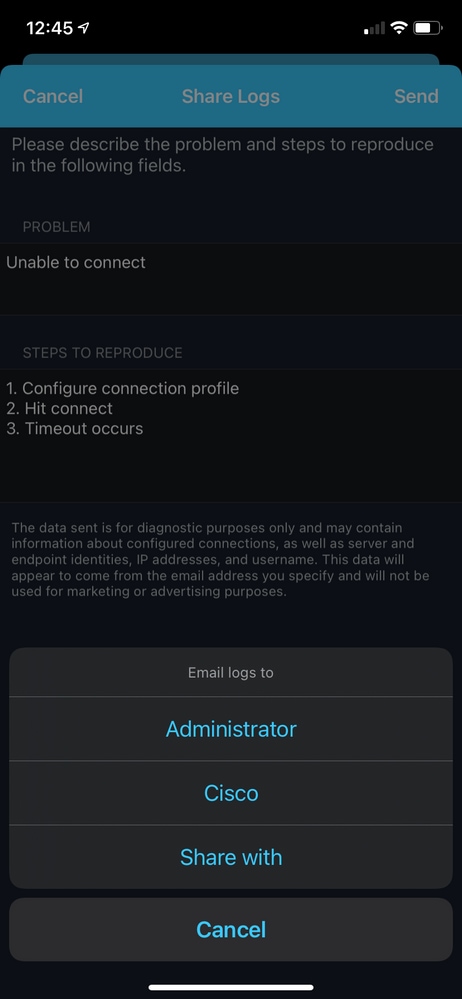
6. Select the desired option in order to send the logs.
Note: In case you have your email configured in the device, you may select either the Administrator or Cisco options from the displayed menu. Otherwise, select the Share with option in order to select an external email app, an Instant messaging (IM) app or via AirDrop.
Verify
Use this section to confirm your logs were successfully collected.
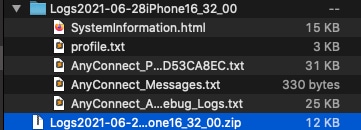
- Once the logs are received, extract the zip folder and locate the extracted files, as shown in the image below:


 Feedback