Introduction
This document describes how to configure TACACS+ for device administration of Cisco Wireless LAN Controller (WLC) with Identity Service Engine (ISE).
Prerequisites
Requirements
Cisco recommends that you have knowledge of these topics:
- Basic knowledge of Identity Service Engine (ISE)
- Basic knowledge of Cisco Wireless LAN Controller (WLC)
Components Used
The information in this document is based on these software and hardware versions:
- Cisco Identity Service Engine 2.4
- Cisco Wireless LAN Controller 8.5.135
The information in this document was created from the devices in a specific lab environment. All of the devices used in this document started with a cleared (default) configuration. If your network is live, ensure that you understand the potential impact of any command.
Configuration
Step 1. Check Device Administration License.
Navigate to Administration > System > Licensing tab and verify Device Admin license is installed, as shown in the image.
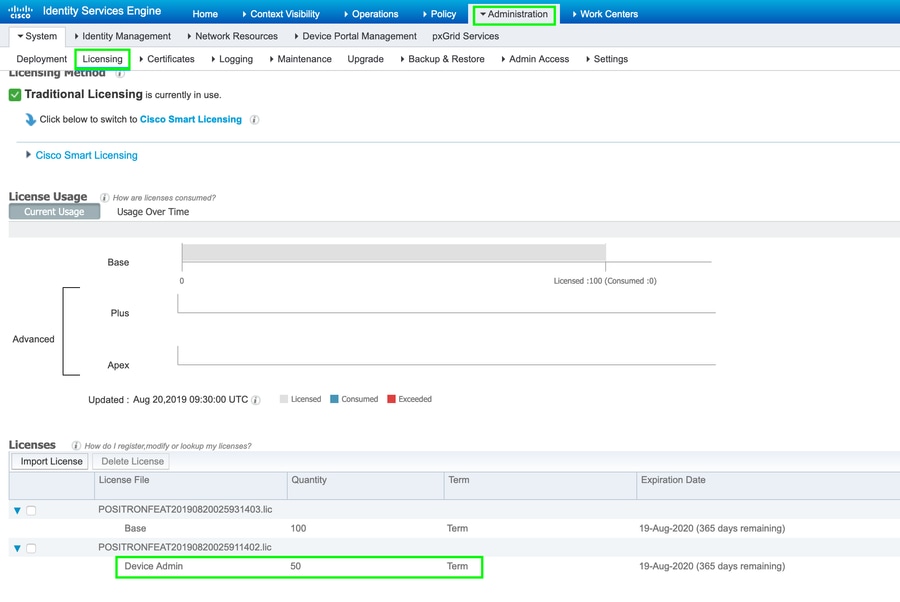
Note: Device admin license is required to use the TACACS+ feature on ISE.
Step 2. Enable Device Administration on ISE PSN Nodes.
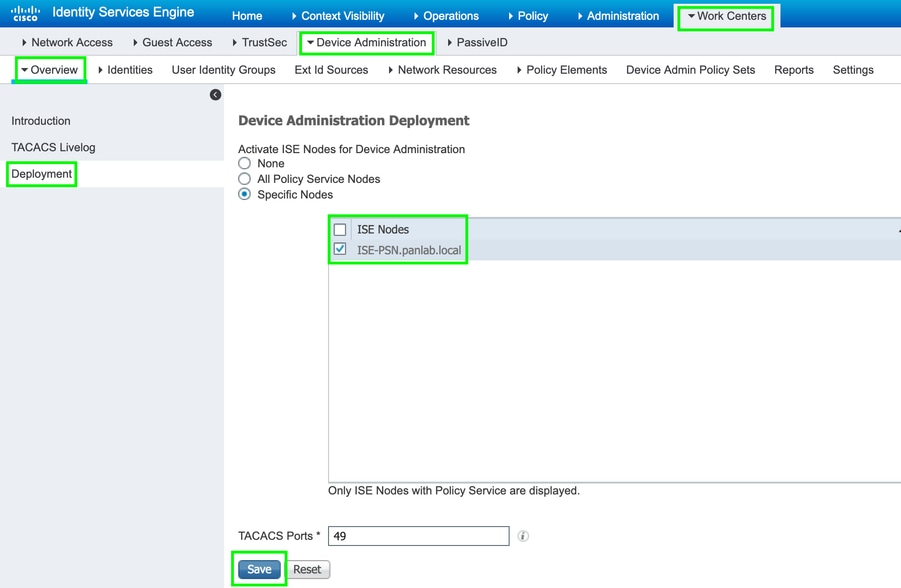
Navigate to Work Centers > Device Administration > Overview, click Deployment tab, select the Specific PSN Node radio button. Enable Device Administration on the ISE node by selecting the checkbox and click Save, as shown in the image:
Step 3. Create a Network Device Group.
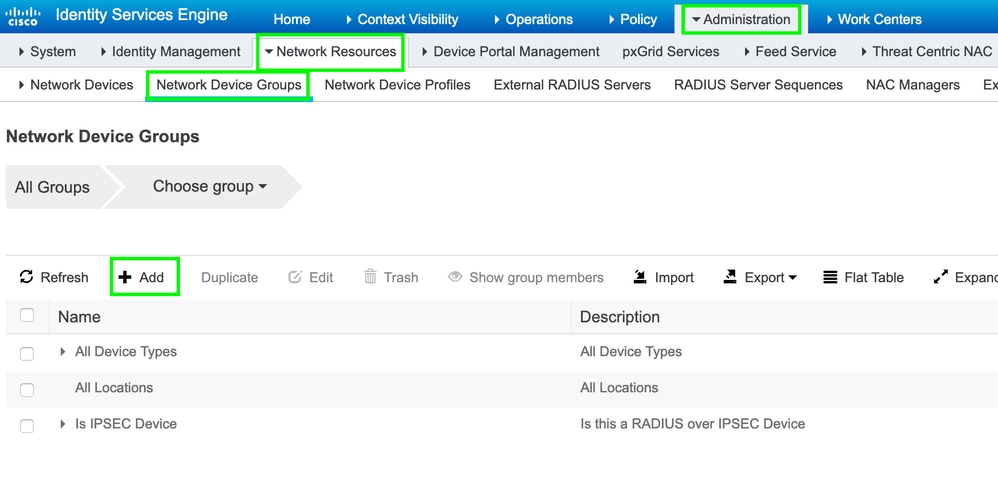
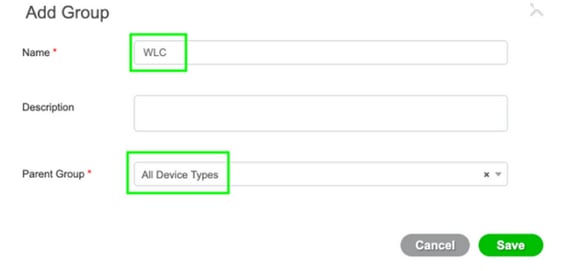
In order to add WLC as a network device on the ISE, navigate to Administration > Network Resources > Network Device Groups > All Device Types, create a new group for WLC, as shown in the image:
Step 4. Add WLC as a Network Device.
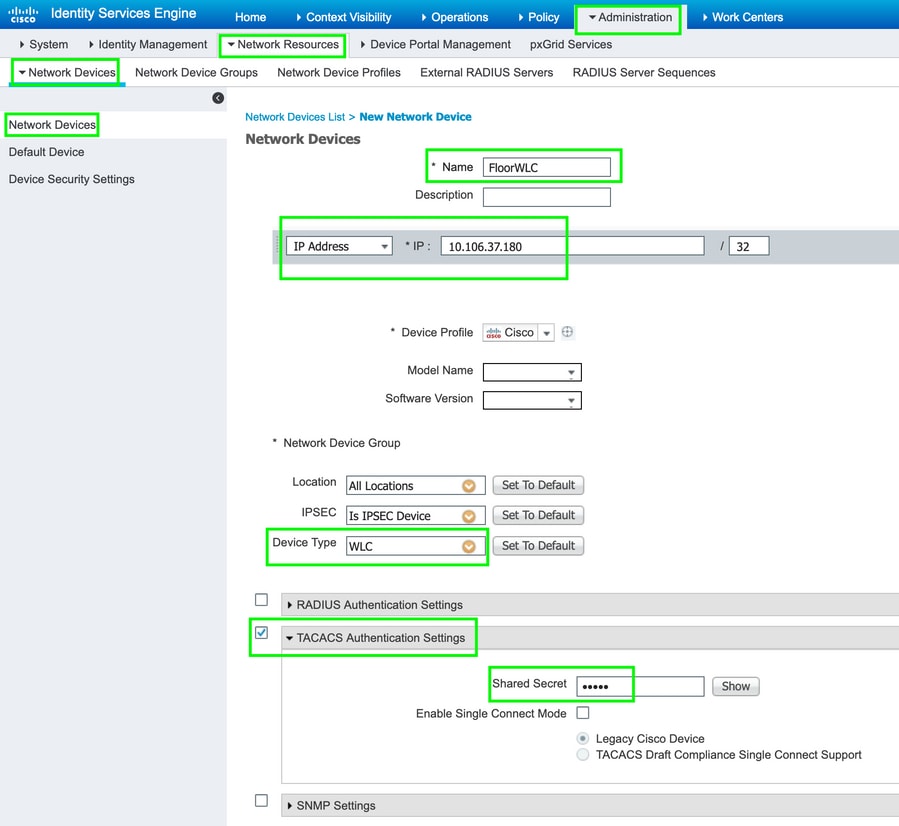
Navigate to Work Centers > Device Administration >Network Resources > Network Devices. Click Add, provide Name, IP Address and select the Device type as WLC, select TACACS+ Authentication Settings checkbox and provide the Shared Secret key, as shown in the image:
Step 5. Create a TACACS Profile for WLC.
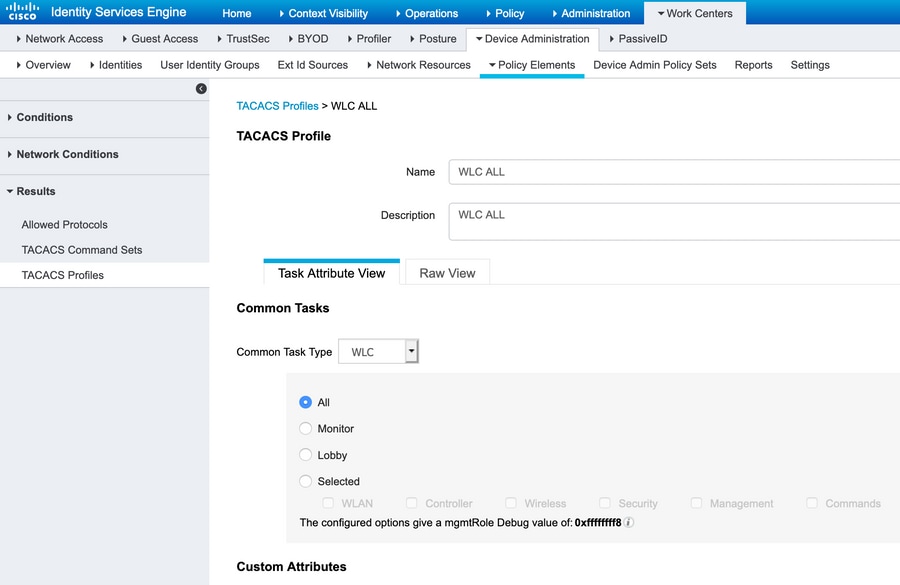
Navigate to Work Centers > Device Administration > Policy Elements > Results > TACACS Profiles. Click Add and provide a Name. In the Task attribute view tab, select WLC for Common Task Type. There are default profiles present from which select Monitor to allow limited access to users, as shown in the image.

There is another default profile All which allows full access to the user as shown in the image.
Step 6. Create a Policy Set.
Navigate to Work centers > Device administration > Device Admin Policy Sets. Click (+) and give a name to the Policy Set. In the policy condition select Device Type as WLC, Allowed protocols can be Default Device Admin, as shown in the image.

Step 7. Create Authentication and Authorization Policies.
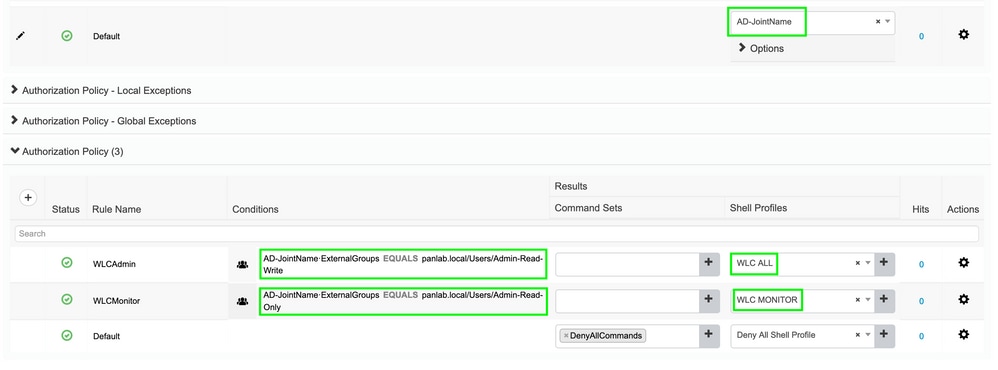
In this document, two sample groups Admin-Read-Write and Admin-Read-Only are configured on the Active directoryand one user inside each group admin1, admin2 respectively. Active Directory is integrated with the ISE via a joinpoint named AD-JointName.
Create two authorization policies, as shown in the image:
Step 8. Configure WLC for Device Administration.
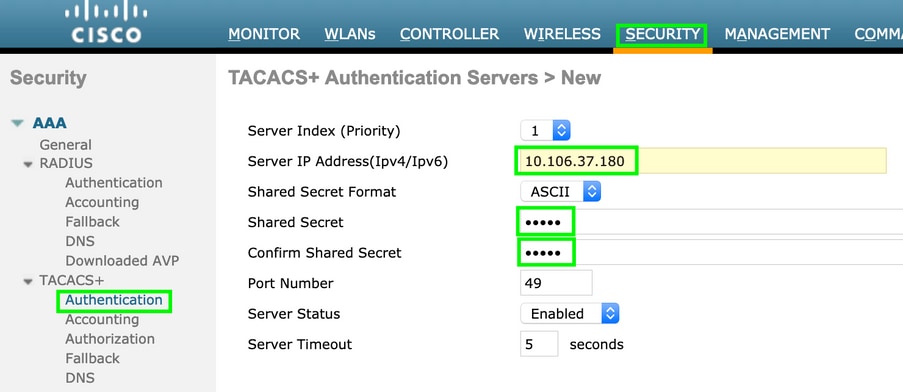
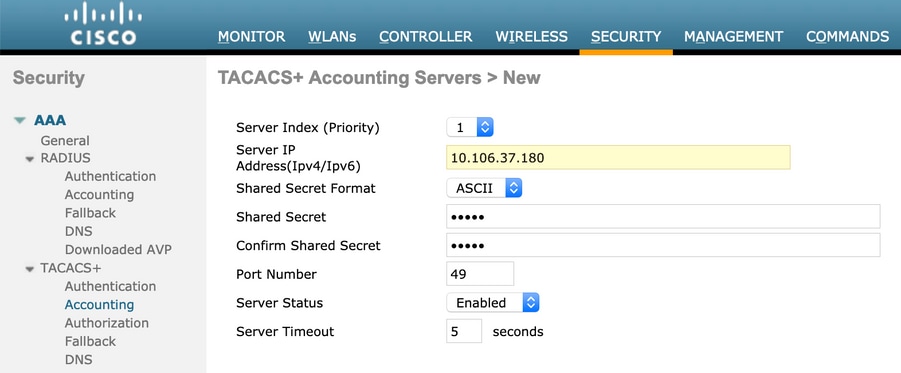
Navigate to Security > AAA > TACACS+ click New and add Authentication, Accounting server, as shown in the image.
Change priority order and make TACACS+ on top and Local to bottom, as shown in the image:
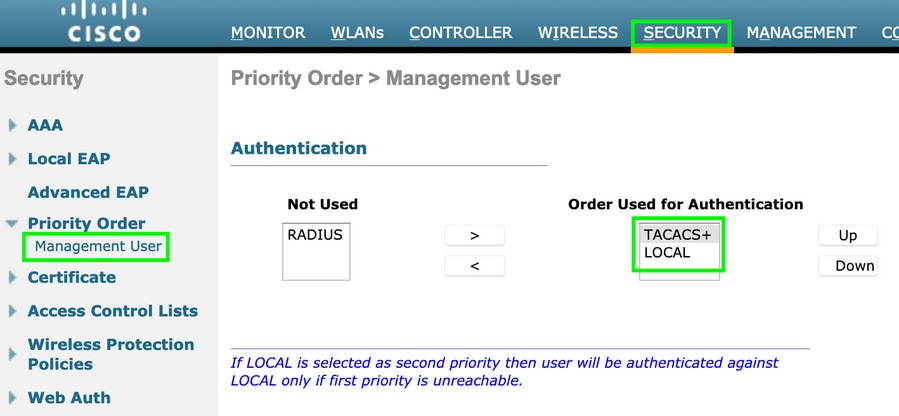
Caution: Do not close the current WLC GUI session. Its recommended to open WLC GUI in different web-browser and check whether login with TACACS+ credentials works or not. If not, verify the configuration and connectivity to the ISE node on TCP port 49.
Verify
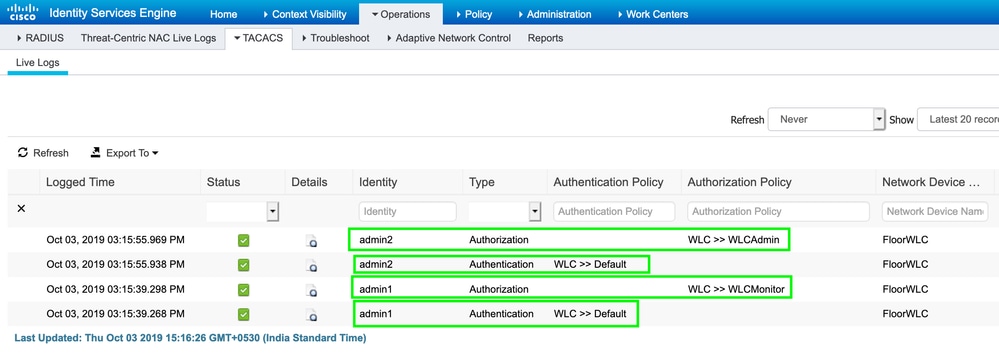
Navigate to Operations > TACACS > Live logs and monitor the Live Logs. Open WLC GUI and log in with Active Directory user credentials, as shown in the image
Troubleshoot
There is currently no specific troubleshooting information available for this configuration.


 Feedback