Introduction
This document describes how to configure Prime Infrastructure to authenticate via TACACS with ISE 2.x.
Requirements
Cisco recommends that you have a basic knowledge of these topics:
- Identity Services Engine (ISE)
- Prime Infrastructure
Configure
Cisco Prime Network Control System 3.1
Cisco Identity Service Engine 2.0 or later.
(Note: ISE only supports TACACS starting with version 2.0, however it is possible to configure Prime to use Radius. Prime includes the list of Radius attributes in addition to TACACS if you would prefer to use Radius, with an older version of ISE or a Third Party solution.)
Prime Configuration
Navigiate to the following screen: Administration / Users/ Users, Roles & AAA as seen below.
Once there, select the TACACS+ Servers tab, then select the Add TACACS+ Server option in the upper right hand corner and select go.
On the next screen the configuration of the TACACS server entry is available(this will have to be done for each individual TACACS server)
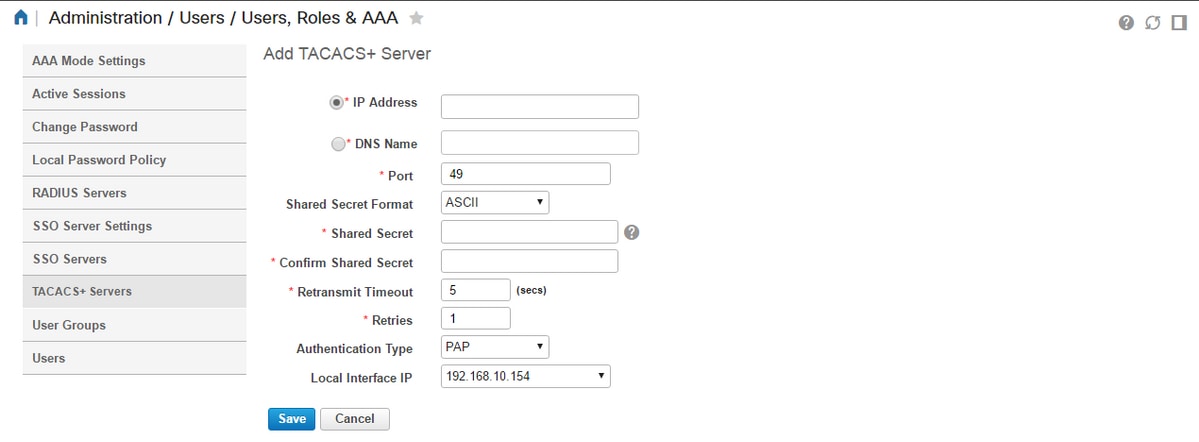
Here you will need to enter either IP address or DNS address of the server, as well as the Shared Secret Key. Also please note the Local Interface IP that you would like to use, as this same IP address needs to be used for the AAA client in ISE later on.
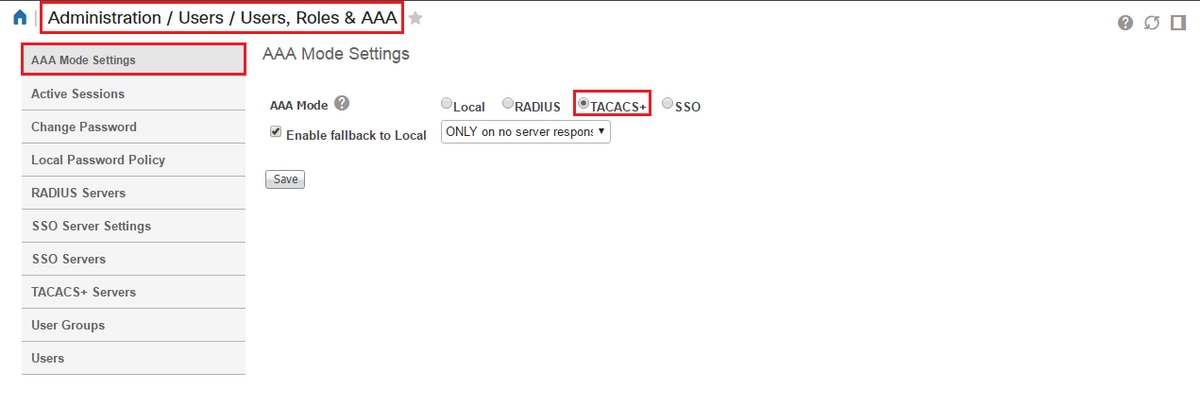
In order to complete the configuration on Prime. You will need to enable TACACS under Administration / Users / Users, Roles & AAA under the AAA mode settings tab.
(Note: It is recommended to check the Enable fallback to Local option, with either ONLY on no server response or the On no response or failure option, especially while testing the configuration)
ISE configuration
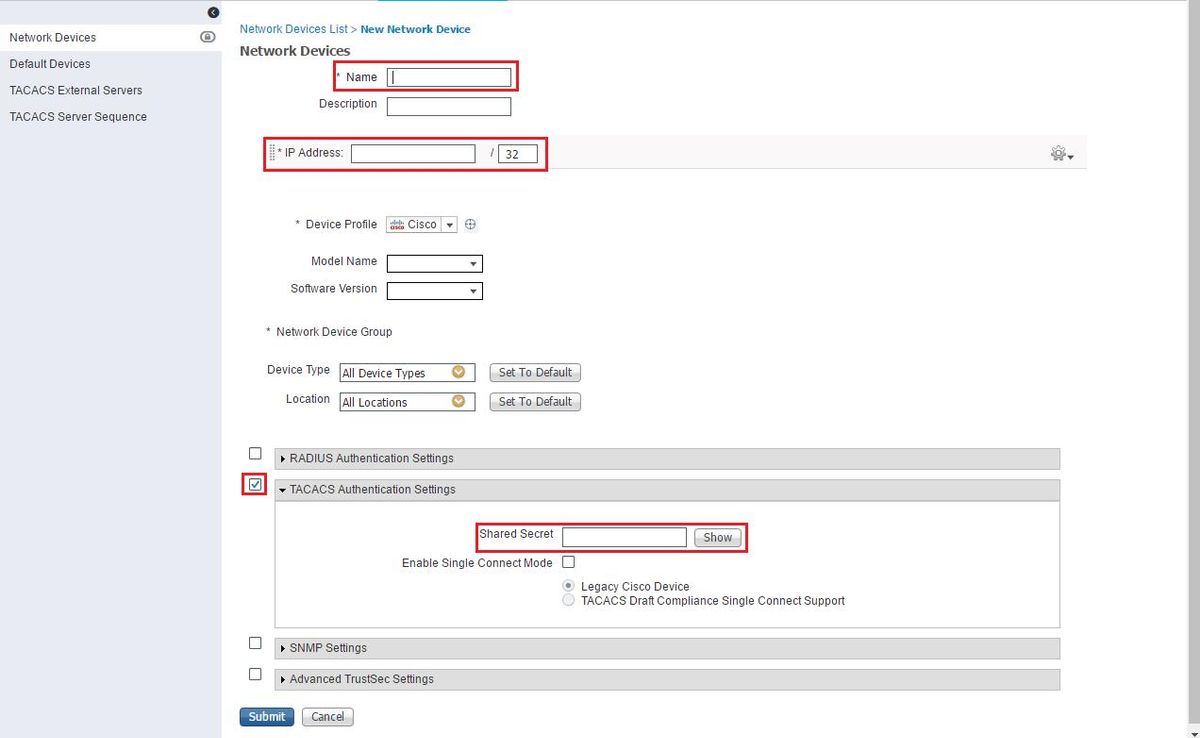
Configure Prime as a AAA client on ISE at Work Centers / Device Administration / Network Resources / Network Devices / Add

Enter the information for the Prime server. The required attributes you need to include are Name, IP address, select the option for TACACS and the Shared Secret. You may additionally wish to add a Device Type, specifically for Prime, in order to use later on as a Condition for the Authorization Rule or other information, however this is optional.
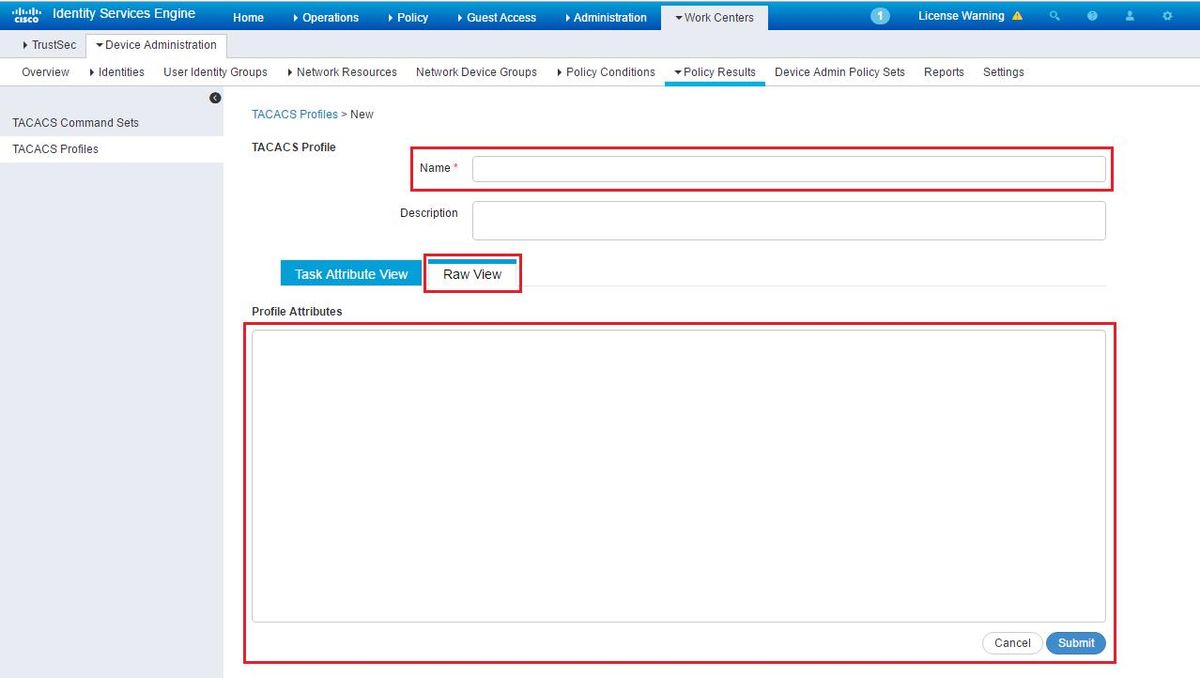
Then create a TACACS profile result to send the required attributes from ISE to Prime, to provide the correct level of access. Navigate to Work Centers / Policy Results / Tacacs Profiles and select the Add option.

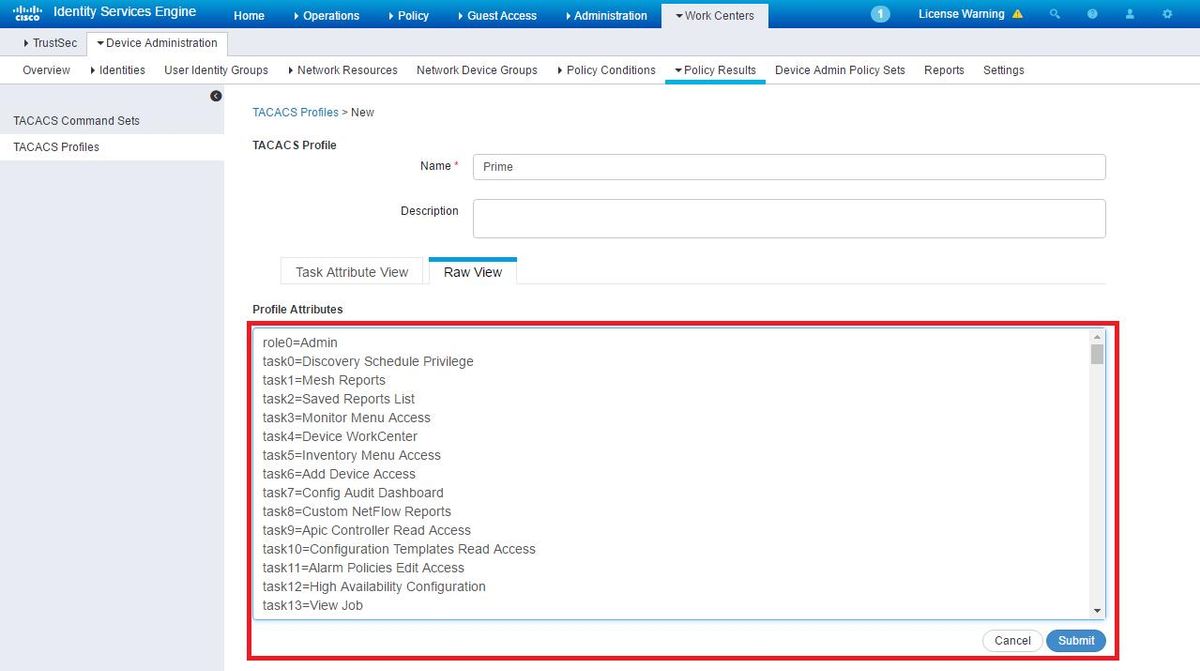
Configure the name, and use the Raw View option in order to enter the attributes under the Profile attributes box. The attributes will come from the primer server itself.
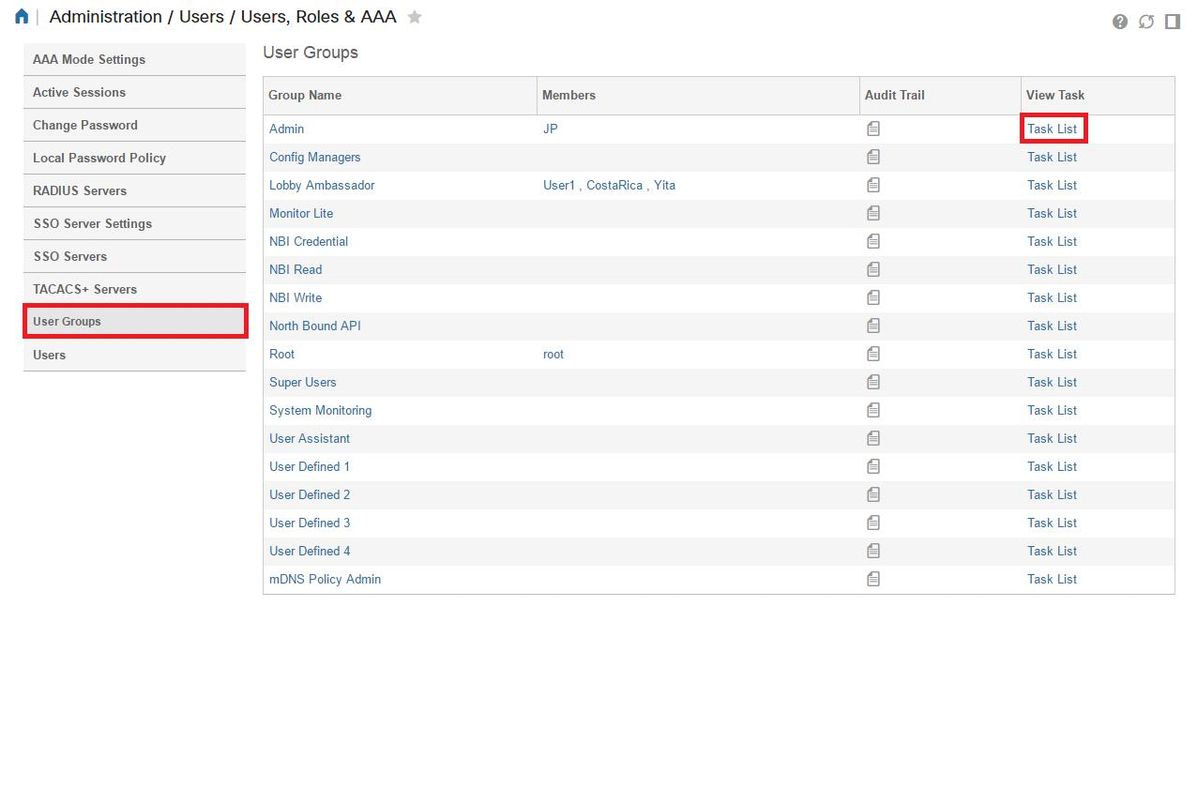
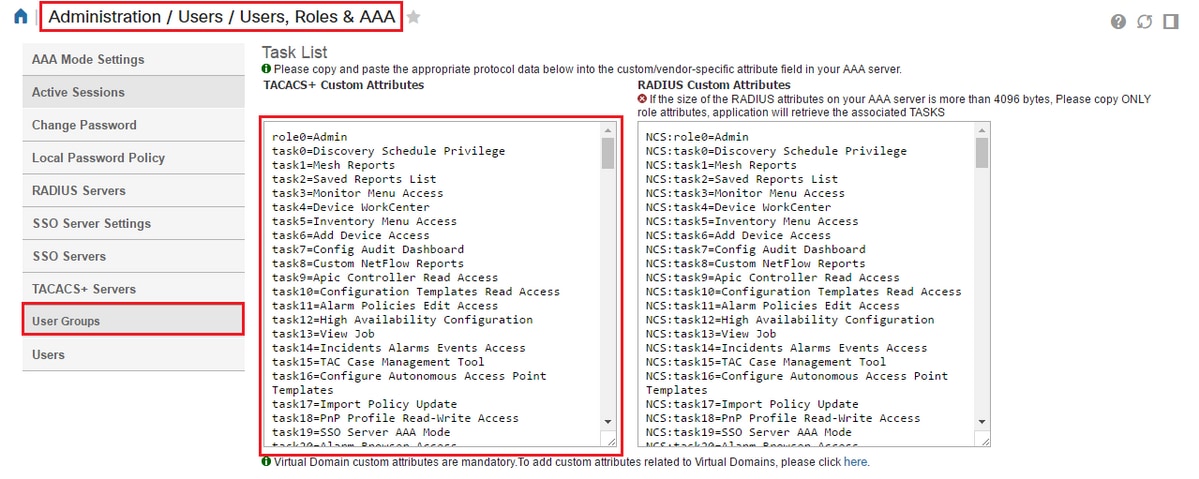
Get the attributes under the Administration / Users/ Users, Roles & AAA screen, and select the User Groups tab. Here you select the Group level of access you wish to provide. In this example Admin access is provided by selecting the appropriate Task List on the left hand side.
Copy all of the TACACS custom attributes.
Then paste them in the Raw View section of the Profile on ISE.
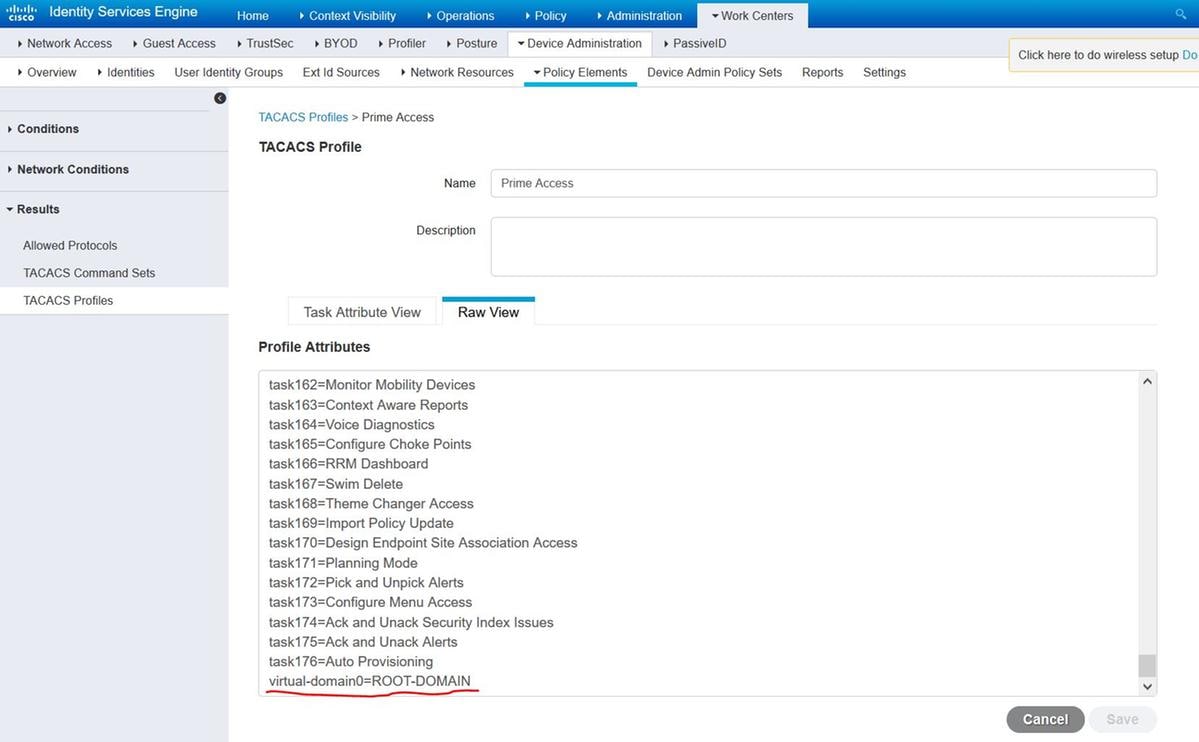
Virtual Domain custom attributes are mandatory. Root-Domain information can be found under Prime Administration -> Virtual Domains.

Name of Prime Virtual Domain has to be added as attribute virtual-domain0="virtual domain name"
Once that is done all you need to do is create a rule to assign the Shell Profile created in the previous step, under Work Centers / Device Administration / Device Admin Policy Sets
(Note: “Conditions” will vary depending on deployment, however you may use "Device Type" specifically for Prime or another type of filter such as Prime’s IP address, as one of the “Conditions” so that this rule properly filters requests)
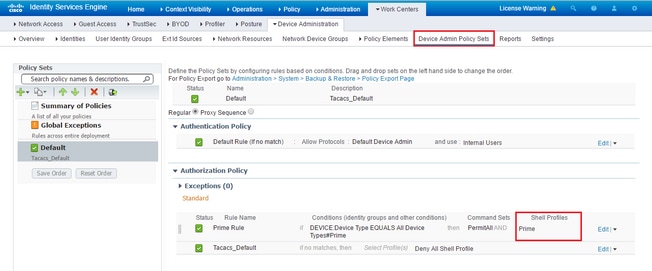
At this point the configuration should be complete.
Troubleshoot
If this configuration is unsuccessful and if the local fall back option was enable on Prime, you can force a fail over from ISE, by removing the IP address of Prime. This will cause ISE to not respond and force the use of local credentials. If local fallback is configured to be performed on a reject, the local accounts will still work and provide access to the customer.
If ISE shows a successful authentication and is matching the correct rule however Prime is still rejecting the request you may wish to double check the attributes are configured correctly in the profile and no additional attributes are being sent.


 Feedback