Introduction
This document describes the configuration of a per-user Dynamic Access Control List (dACL) for users present in a type of identity store.
Prerequisites
Requirements
Cisco recommends that you have knowledge of policy configuration on Identity Services Engine (ISE).
Components Used
The information in this document is based on these software and hardware versions:
- Identity Services Engine 3.0
- Microsoft Windows Active Directory 2016
The information in this document was created from the devices in a specific lab environment. All of the devices used in this document started with a cleared (default) configuration. If your network is live, ensure that you understand the potential impact of any command.
Background Information
The configuration of a per-user Dynamic Access Control List is for users present in either the ISE internal identity store or an external identity store.
Configure
Per-user dACL can be configured for any user in the internal store that uses a custom user attribute. For a user in the Active Directory (AD), any attribute of type string can be used to achieve the same. This section provides information required to configure the attributes both on ISE and AD along with the configuration required on ISE for this feature to work.
Configure a New Custom User Attribute on ISE
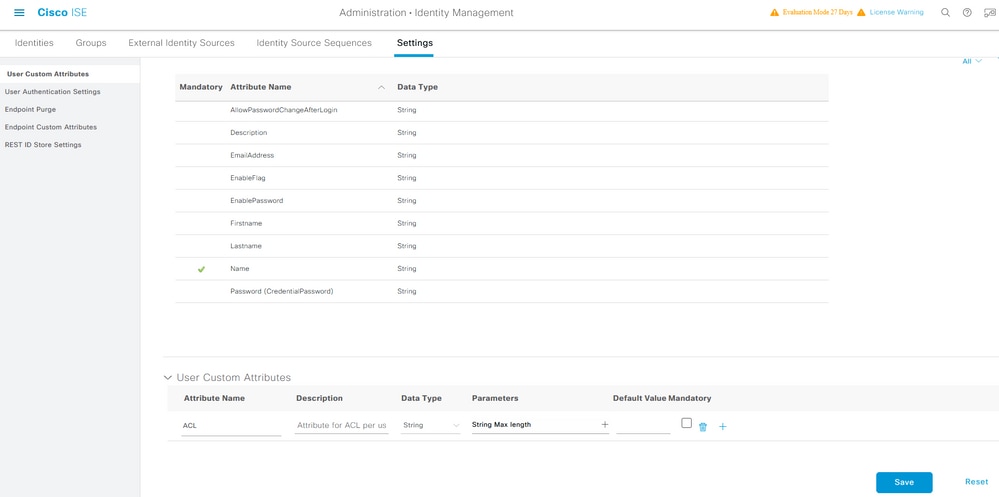
Navigate to Administration > Identity Management > Settings > User Custom Attributes. Click the + button, as shown in the image, to add a new attribute and save the changes. In this example, the name of the custom attribute is ACL.
Configure dACL
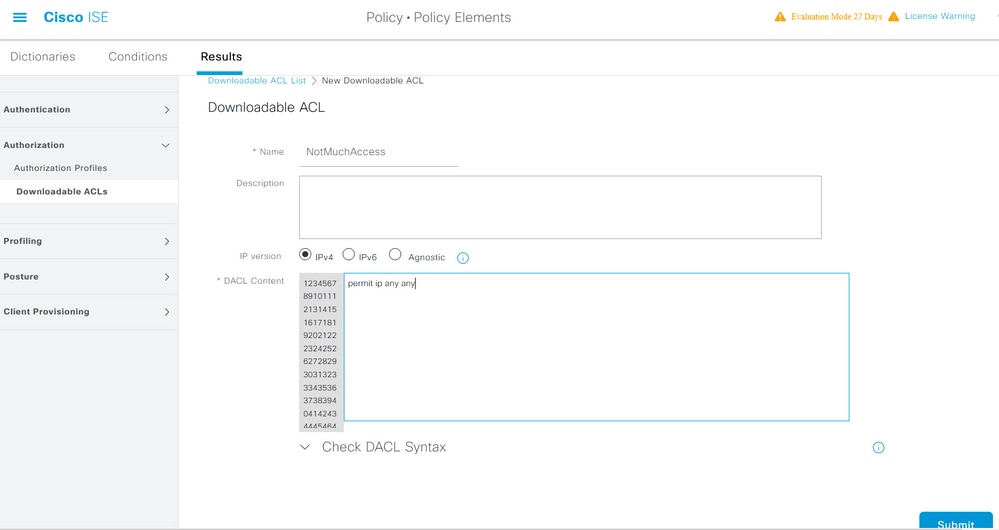
In order to configure downloadable ACLs, navigate to Policy > Policy Elements > Results > Authorization > Downloadable ACLs. Click Add. Provide a name, content of the dACL, and save the changes. As shown in the image, the name of the dACL is NotMuchAccess.
Configure an Internal User Account with the Custom Attribute
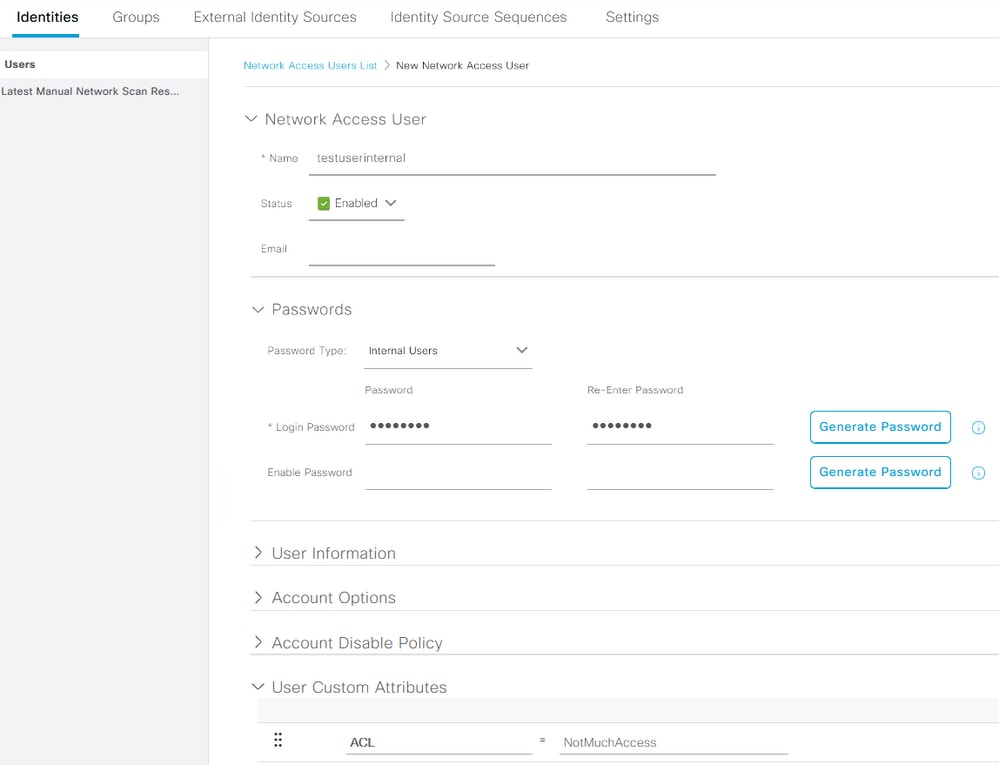
Navigate to Administration > Identity Management > Identities > Users > Add. Create a user and configure the custom attribute value with the name of the dACL that the user needs to get when authorized. In this example, the name of the dACL is NotMuchAccess.
Configure a AD User Account
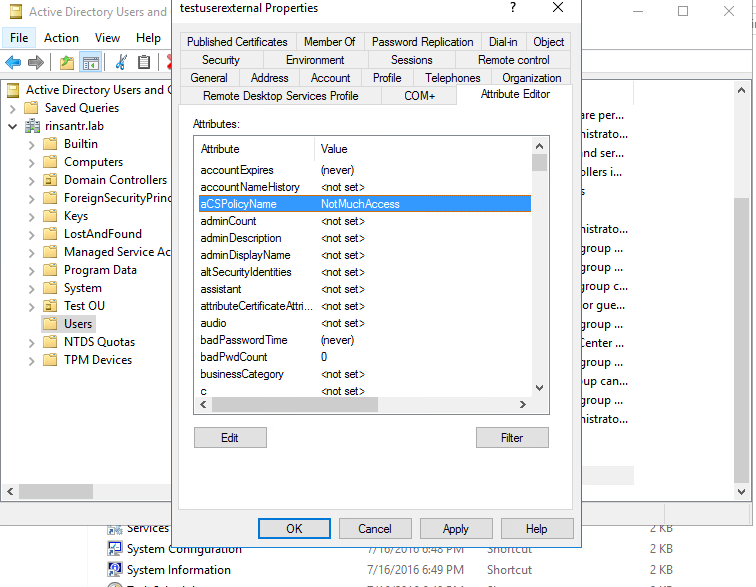
On the Active Directory, navigate to the user account properties and then on to the Attribute Editor tab. As shown in the image, aCSPolicyName is the attribute used to specify the dACL name. However, as mentioned earlier, any attribute which can accept a string value can be used as well.
Import the Attribute from AD to ISE
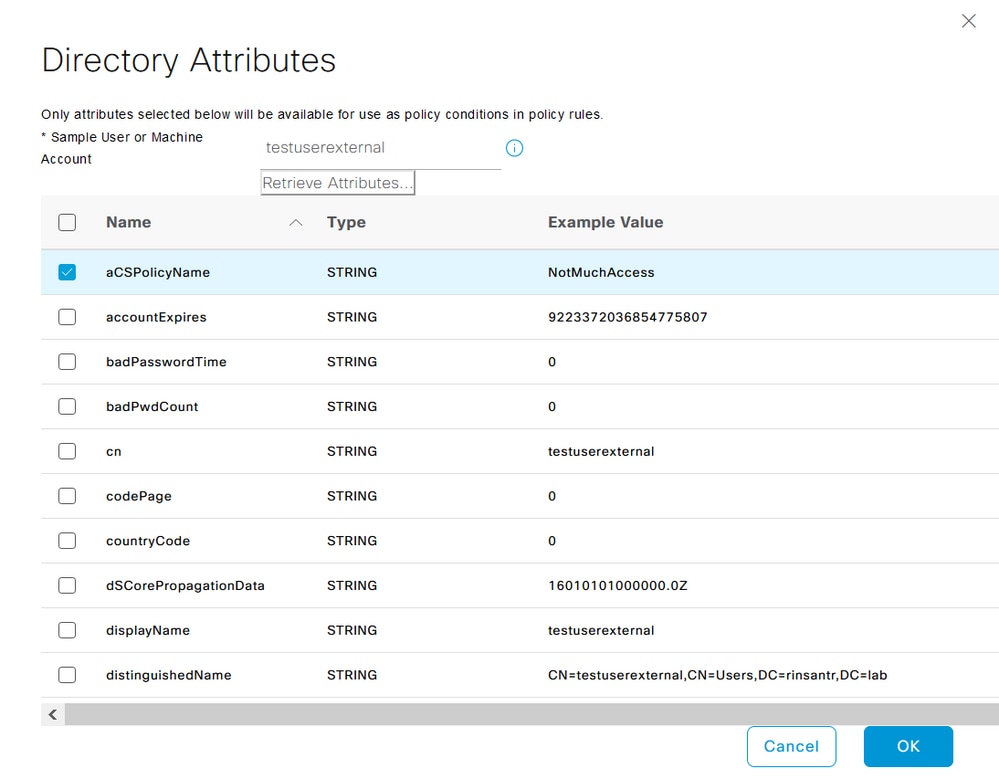
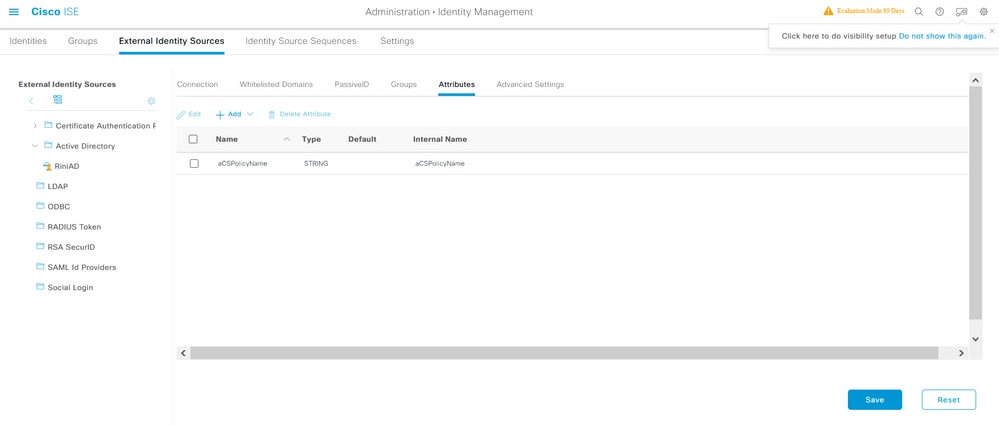
To use the attribute configured on AD, ISE needs to import it. In order to import the attribute, navigate to Administration > Identity Management > External Identity Sources > Active Directory > [Join point configured] > Attributes tab. Click Add and then Select Attributes From Directory. Provide the user account name on the AD and then click Retrieve Attributes. Select the attribute configured for the dACL, click OK and then click Save. As shown in the image, aCSPolicyName is the attribute.
Configure Authorization Profiles for Internal and External Users
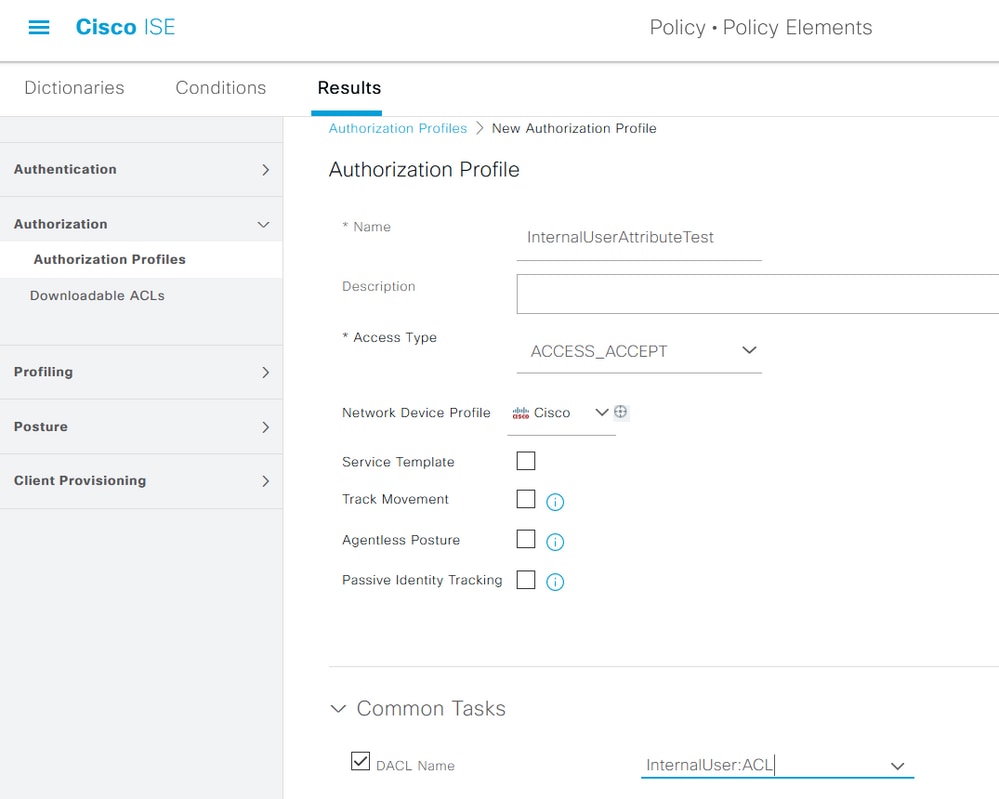
In order to configure Authorization Profiles, navigate to Policy > Policy Elements > Results > Authorization > Authorization Profiles. Click Add. Provide a name and choose the dACL name as InternalUser:<name of custom attribute created> for internal user. As shown in the image, for internal user, the profile InternalUserAttributeTest is configured with the dACL configured as InternalUser:ACL.
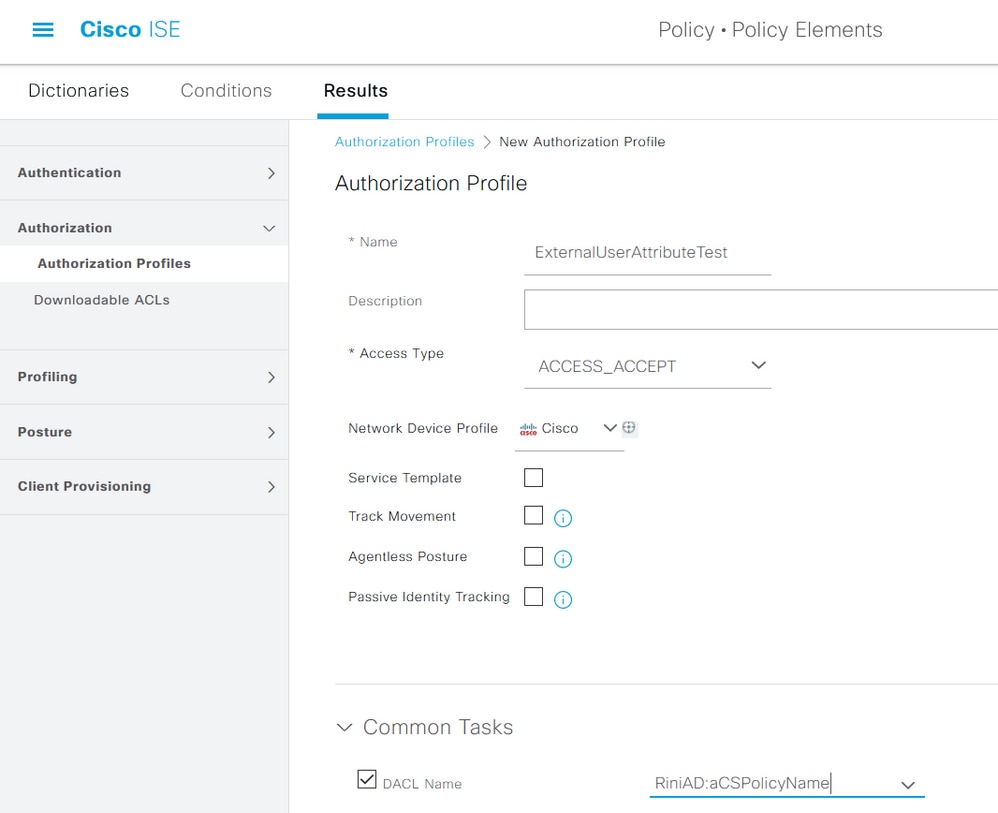
For external user, use <Join point name>:<attribute configured on AD> as the dACL name. In this example, the profile ExternalUserAttributeTest is configured with the dACL configured as RiniAD:aCSPolicyName where RiniAD is the Join point name.
Configure Authorization Policies
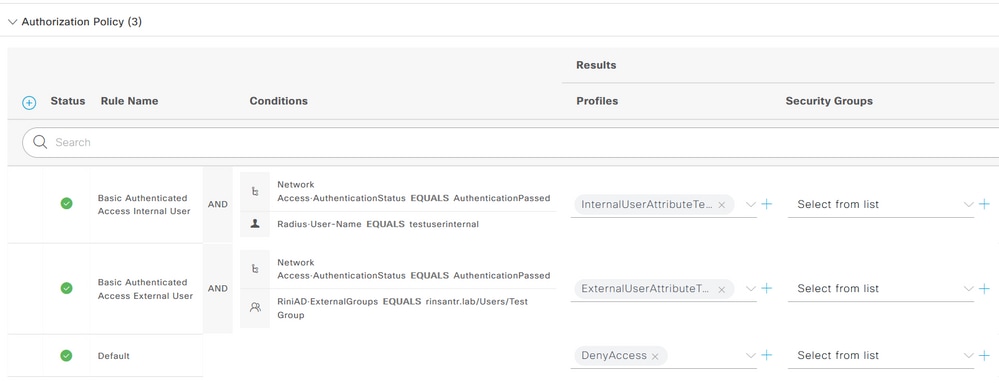
Authorization policies can be configured at Policy > Policy Sets based on the groups in which the external user is present on the AD and also based on the username in the ISE internal identity store. In this example, testuserexternal is a user present in the group rinsantr.lab/Users/Test Group and testuserinternal is a user present in the ISE internal identity store.
Verify
Use this section to verify if the configuration works.
Check the RADIUS live logs to verify the user authentications.
Internal user:

External user:

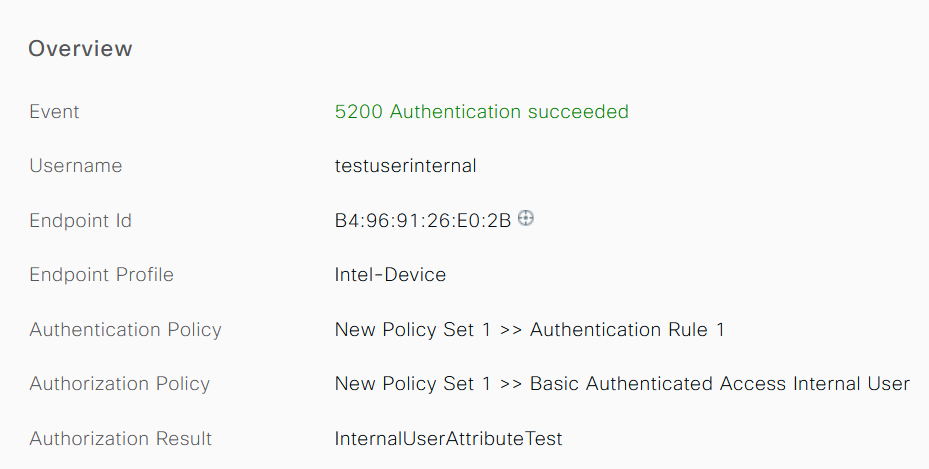
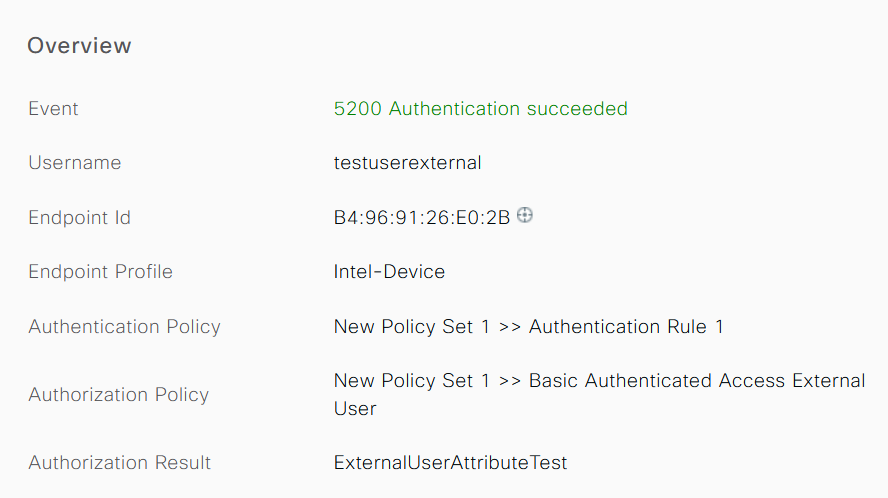
Click the magnifying glass icon on the successful user authentications to verify if the requests hit the correct policies in the Overview section of the detailed live logs.
Internal user:
External user:
Check the Other Attributes section of the detailed live logs to verify if the user attributes have been retrieved.
Internal user:

External user:

Check the Result section of the detailed live logs to verify if the dACL attribute is sent as a part of Access-Accept.

Also, check the RADIUS live logs to verify if the dACL is downloaded after the user authentication.

Click the magnifying glass icon on the successful dACL download log and verify the Overview section to confirm the dACL download.
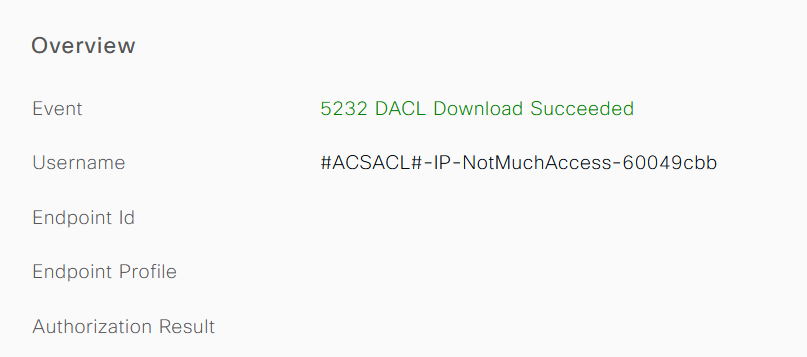
Check the Result section of the this detailed report to verify the contents of the dACL.

Troubleshoot
There is currently no specific information available to troubleshoot this configuration.


 Feedback