Introduction
This document describes how to configure a Linux server with CentOS distribution as a Secure File Transfer Protocol (SFTP) server with Public Key Infrastructure (PKI) authentication towards Identity Services Engine (ISE).
Prerequisites
Requirements
Cisco recommends that you have knowledge of these topics:
- General ISE knowledge
- ISE repository configuration
- Basic Linux general knowledge
Components Used
The information in this document is based on these software and hardware versions:
- ISE 2.2
- ISE 2.4
- ISE 2.6
- ISE 2.7
- ISE 3.0
- CentOS Linux release 8.2.2004 (Core)
The information in this document was created from the devices in a specific lab environment. All of the devices used in this document started with a cleared (default) configuration. If your network is live, please ensure that you understand the potential impact of any command.
Background Information
To enforce security for file transfers, ISE can authenticate via PKI certificates through SFTP in order to ensure a more secure way to access repositories files.
Configure
1. Configure CentOS Server
1.1 Create a directory as a root user.
mkdir -p /cisco/engineer
1.2. Create a user group.
groupadd tac
1.3. This command adds the user to the Main directory (files), it specifies the user belongs to the group engineers.
useradd -d /cisco/engineer -s /sbin/nologin engineer
usermod -aG tac engineer
Note: The /sbin/nologin portion of the command indicates the user won't be able to log in through Secure Shell (SSH).
1.4. Proceed to create the directory to upload the files.
mkdir -p /cisco/engineer/repo
1.4.1 Set permissions for the directory files.
chown -R engineer:tac /cisco/engineer/repo
find /cisco/engineer/repo -type d -exec chmod 2775 {} \+
find /cisco/engineer/repo -type f -exec chmod 664 {} \+
1.5. Create the directory and the file in which the CentOS server performs the check for the certificates.
Directory:
mkdir /cisco/engineer/.ssh
chown engineer:engineer /cisco/engineer/.ssh
chmod 700 /cisco/engineer/.ssh
File:
touch /cisco/engineer/.ssh/authorized_keys
chown engineer:engineer /cisco/engineer/.ssh/authorized_keys
chmod 600 /cisco/engineer/.ssh/authorized_keys
1.6. Create the login permissions in the sshd_config system file.
In order to edit the file, you can use the vim Linux tool with this command.
vim /etc/ssh/sshd_config
1.6.1 Add the specified lines below.
#Subsystem sftp /usr/libexec/openssh/sftp-server
Subsystem sftp internal-sftp
Match Group tac
ChrootDirectory %h
X11Forwarding no
AllowTCPForwarding no
ForceCommand internal-sftp
1.7. Run the command in order to verify the sshd_config system file syntaxis.
sshd -t
Note: No output means the syntax of the file is correct.
1.8. Proceed to restart the SSH service.
systemctl restart sshd
Note: Some Linux servers have selinux enforcement, to confirm this parameter, you can use the getenforce command. As a recommendation, if it is on enforce mode, change it to permissive.
1.9. (optional) Edit the semanage.conf file to set the enforcement to permissive.
vim /etc/selinux/semanage.conf
Add the command setenforce0.
setenforce0
2. Configure ISE Repository
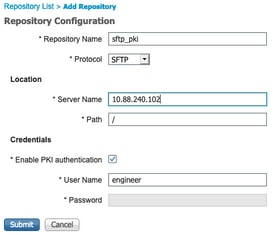
2.1. Proceed to add the repository through the ISE Graphic User Interface (GUI).
Navigate to Adminitration>System Maintenance>Repository>Add

2.2. Enter the proper configuration for your repository.

Note: If you need access to the repo directory instead of the root directory of engineer the target path needs to be /repo/.

3. Generate key pairs on the ISE server
3.1. ISE GUI
Navigate to Adminitration>System Maintenance>Repository>Generate key pairs, as shown in the image.
Note: You must generate key pairs from the ISE GUI and Command Line Interface (CLI), in order to have full bidirectional access to the repository.

3.1.1. Enter a passphrase, this is required in order to protect the key pair.

Note: First generate the key pairs before the public keys are exported.
3.1.2. Proceed to export the Public key.
Navigate to Adminitration>System Maintenance>Repository>Export public key.
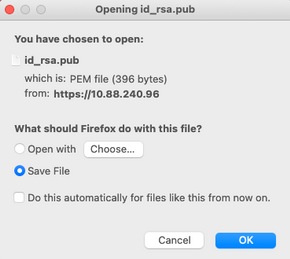
Select Export public key. A file is generated with the name id_rsa.pub (ensure this is saved for future references).

3.2. ISE CLI
3.2.1. Navigate to the CLI of the node in which you want to finish the configuration of the repository.
Note: From this point forward, the next steps are needed on each node that you would like to allow access to the SFTP repository with the use of the PKI authentication.
3.2.2. Run this command in order to add the IP of the Linux server to the host_key system file.
crypto host_key add host <Linux server IP>

3.2.3. Generate public CLI key.
crypto key generate rsa passphrase <passphrase>

3.2.4. Export the public key files from the CLI of ISE with this command.
crypto key export <name of the file> repository <repository name>
Note: You must have a previously accessible repository to which you can export the public key file.

4. Integration
4.1. Log in to your CentOS server.
Navigate to the folder in which you previously configured the authorized_key file.
4.2. Edit the authorized key file.
Run the vim command in order to modify the file.
vim /cisco/engineer/.ssh/authorized_keys
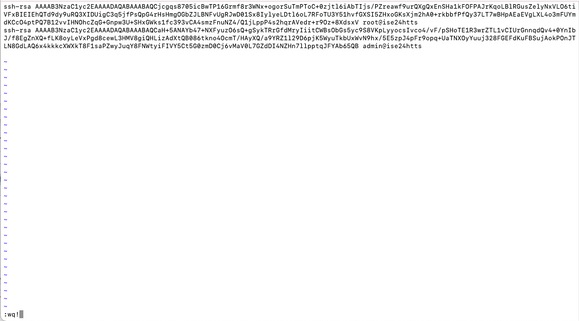
4.3. Copy and paste the content generated on steps 4 and 6 from the Generate key pairs section.
Public key generated from ISE GUI:

Public key generated from ISE CLI:

Authorized_key file on the Linux server:

4.4. After you paste the keys on the file, press ESC, proceed to run the wq! command in order to save the file.
Verify
1. From the Linux server execute this command as root.
tail -f /var/log/secure
The output must be displayed, as shown in the image.

2. For ISE verification.
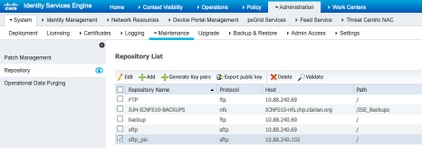
Navigate to Administration>System>Maintenance>Repository on the GUI.
Select the desired repository from the Repository List and select Validate.

You must see a pop-up which states the Server Response on the bottom right corner of the screen.

From the CLI, run the command show repo sftp_pki in order to validate the keys.

In order to further debug ISE, execute this command on CLI:
debug transfer 7
The output must be displayed, as shown in the image:

Related Information
https://www.cisco.com/c/en/us/td/docs/security/ise/2-2/admin_guide/b_ise_admin_guide_22/b_ise_admin_guide_22_chapter_01011.html
