Introduction
This document describes how to upgrade an existing ISE deployment from version 2.7 to 3.1 using the Full Upgrade method.
Prerequisites
Requirements
Cisco recommends that you have knowledge of these topics:
- Identity Services Engine (ISE)
- Understanding of terminology used to describe different types of ISE deployments
Components Used
The information in this document is based on these software and hardware versions:
- ISE, Release 2.7, patch 4
- ISE, Release 3.1
The information in this document was created from the devices in a specific lab environment. All of the devices used in this document started with a cleared (default) configuration. If your network is live, ensure that you understand the potential impact of any command.
Note: The procedure is similar or identical to other ISE versions. These steps can be used on 2.6 to upgrade to 3.1 and the ISE Software Releases unless stated otherwise.
Background Information
It also includes how to use the Health Checks feature to detect and fix any potential deployment issues. The legacy method of upgrade is now termed as Split Upgrade and is available as an alternate option if the Full Upgrade method is not preferred.
Supported Paths
Full upgrade to ISE 3.1 is supported from
- ISE 2.6 patch 10 and later
- ISE 2.7 patch 4 and later
- ISE 3.0 patch 3 and later
Split upgrade to ISE 3.1 is supported from ISE 2.6 and later versions, with or without any patch.
Comparison of Full Upgrade with Split Upgrade Method
Sequence of Node Upgrade with Split Upgrade Method in a Distributed Deployment
Requires a minimum of 5 steps for a fully distributed deployment to upgrade to the newer version.

Considering approximate 240 minutes for each step, the total upgrade process here would take 240*5 minutes = 20 hours.
Sequence of Node Upgrade with Full Upgrade Method in a Distributed Deployment
Requires only 2 steps for a fully distributed deployment to upgrade to the newer version.
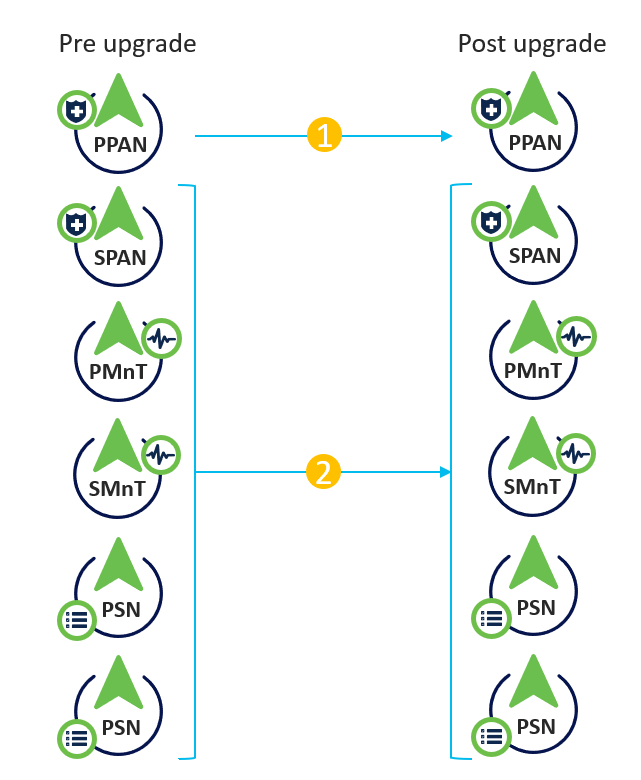
Again, considering approximate 240 minutes for each step, the total upgrade process is now reduced to 240*2 minutes = 8 hours.
Advantages of Full Upgrade over Split Upgrade Method
- The Full Upgrade method consumes lesser time for the overall activity because the nodes are upgraded in parallel, whereas the Split Upgrade method needs to be planned well with a longer duration of the maintenance window.
- The Full Upgrade method is hassle-free in terms of upgrade sequence as there are just 2 steps. The Split Upgrade method requires the nodes to be sequenced appropriately before starting the upgrade process.
- The Full Upgrade method retains the roles and personas as it was prior to the upgrade. The Split Upgrade method switches the primary and secondary admin roles in the upgraded version.
- The points of failures have been reduced in the Full Upgrade method by eliminating the API dependency with deployment-related changes during the upgrade process.
- The Full Upgrade method allows to track the upgrade status from the secondary admin node when the primary admin node goes down for an upgrade. This is not possible in the Split Upgrade method.
- Patch installation post-upgrade is automated and is provided as an option in the Full Upgrade method.
Caution: Full upgrade requires a complete downtime because all the PSNs go down for upgrade at the same time. Ensure that the activity is planned during a scheduled maintenance window.
Full Upgrade Flow
This document demonstrates the upgrade flow of a 4 node deployment. The overall process remains the same for two-node or other multi-node deployments.

Upgrade UI
Navigate to Administration > System > Upgrade in order to begin the activity as shown in the image.
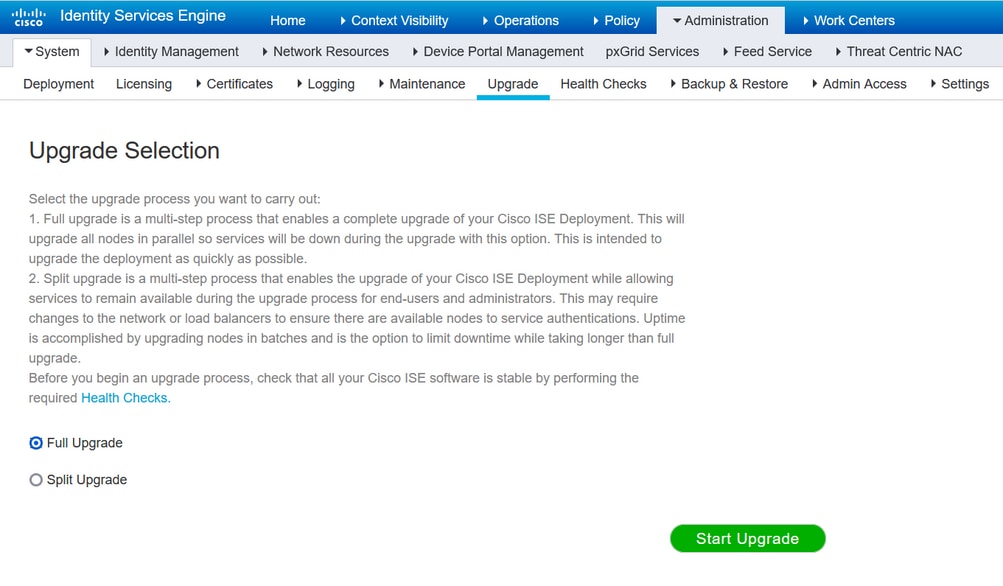
Note: Only the Split Upgrade method is supported on ISE 2.6 patch 9 and below, ISE 2.7 patch 3 and below, and ISE 3.0 patch 2 and below. By default, the Split Upgrade window is launched for these versions. The Split Upgrade process can be referred from here. Select the Full Upgrade radio button and click Start Upgrade.
Welcome Page
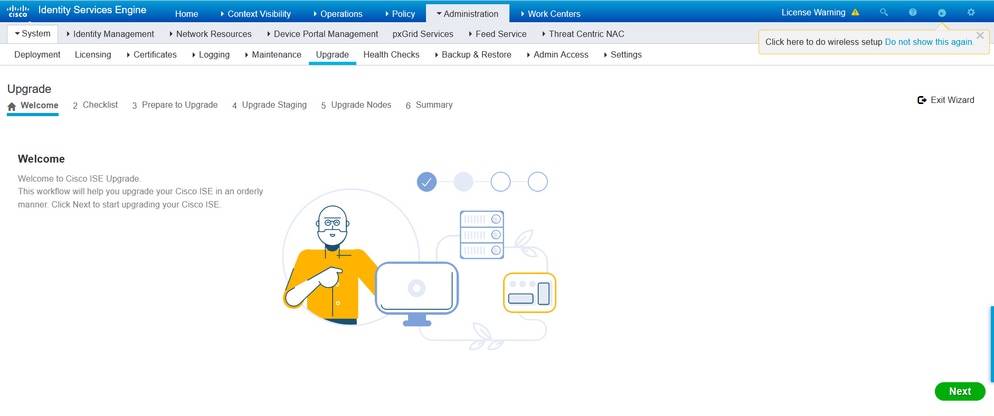
On the welcome page wizard, click Next in order to proceed further.
Checklist
Review the checklist and ensure to complete the tasks before you proceed further.

Tick the checkbox that states I have reviewed the checklist and click Next.
Prepare to Upgrade
A pre-check is run on the complete deployment prior to the upgrade and the results are displayed on this page. Apart from the checks, at this step the upgrade bundle is downloaded on all the nodes, offline data upgrade (ODU) is run on the secondary admin node (this is analogous to the Upgrade Readiness Tool (URT) simulation of the Split Upgrade method) and finally, it also displays the time estimate for the activity.
Upgrade bundle is to be downloaded from the Cisco Software Download page.

In order to run the pre-upgrade check, select the Repository name in which the upgrade bundle is placed. Select the upgrade bundle file name from the Bundle dropdown box.
Note: Full Upgrade method also introduces automatic patch installation post-upgrade. The patch file is to be placed in the same repository along with the upgrade bundle and the patch file name can be selected from the dropdown if automatic patch installation is desired.
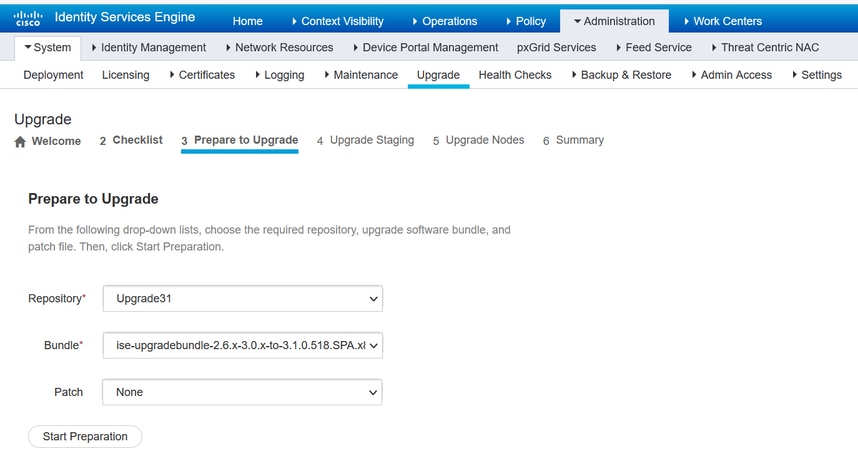
Click on Start Preparation in order to start running the pre-checks. All the prechecks, except the Bundle Download and Configuration Data Upgrade check expire automatically after 4 hours of initiating the system validation. Configuration Data Upgrade, which is nothing but the ODU, expires after 12 hours.
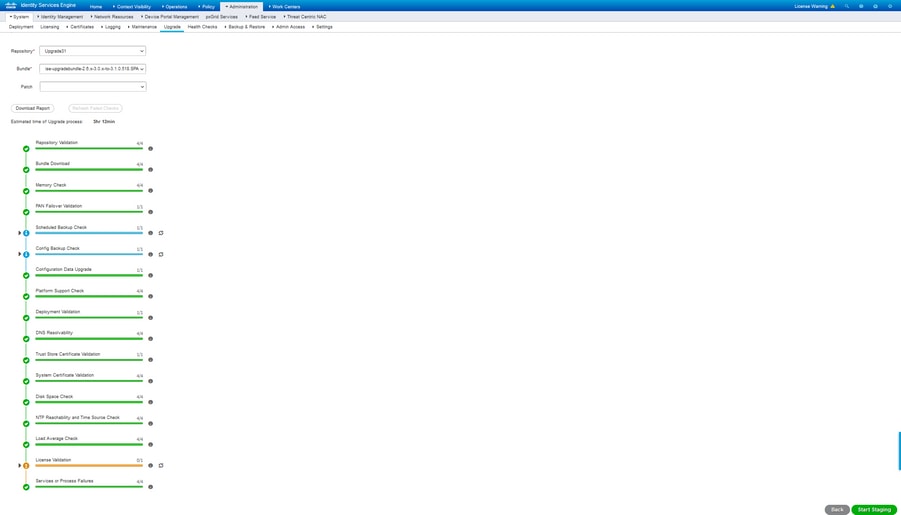
Note: Disable PAN failover setting before upgrade activity. If not done manually, it gets automatically disabled once the upgrade is triggered.
Note: ISE 3.0 and listed mandates the use of Smart Licensing. It does not support Traditional Licensing. In case Smart Licensing is not enabled or registered prior to the upgrade, ISE lands on Smart Licensing Evaluation period by default post-upgrade. License Migration reference link: Products - ISE Licensing Migration Guide - Cisco. When you upgrade ISE from 2. x to 3.x, it involves licensing tier changes.
Caution: All types of configuration changes on ISE are to be avoided once the Configuration Data Upgrade is triggered. Any changes made would be lost after the upgrade.
If any of the component pre-checks fail, they are displayed in red or orange colour based on their criticality. The failures highlighted in red need to be mandatorily rectified before proceeding further. The warnings highlighted in orange cannot stop the upgrade process, however, it is good to fix them as best practice and to avoid impacting the deployment features and functionalities in future.
Once the errors are rectified, click on Start Staging to proceed further.
Upgrade Staging
During upgrade staging, the upgraded database file is copied to all the nodes in the deployment and the configuration files are backed up on all nodes of the deployment.
The dump file is already present on the Secondary admin node as part of the ODU. Hence, in this step, the secondary admin node only creates backup files for CA NSS DB, Smart Licensing and DHCP/DNS configuration. All other nodes also create these files but need to additionally copy the dump file from the secondary admin node.
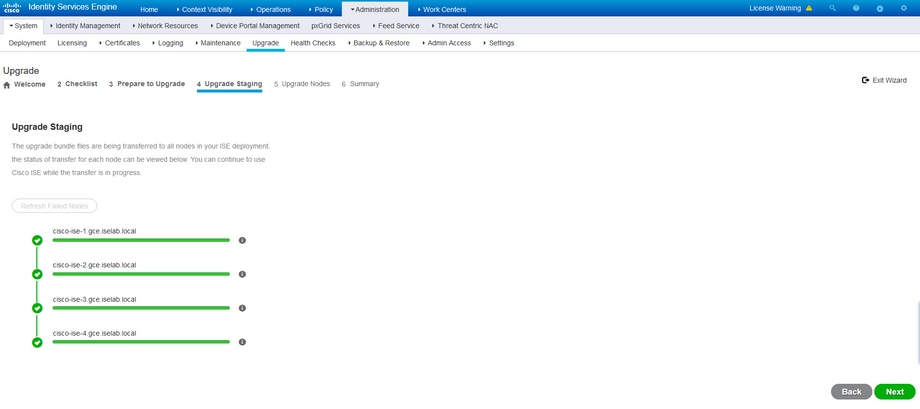
Click Next when the staging completes for all the nodes.
Upgrade Nodes
Click on Start in order to trigger the upgrade.

A pop-up message confirms that the upgrade is triggered and all the nodes are displayed in a queue with the upgrade status. Since the upgrade is initiated on the primary admin node first, the system logs out of this node and now the upgrade status can be monitored from the secondary admin node's GUI. Navigate to Administration > System > Upgrade on the secondary admin node's GUI in order to continue viewing the status.
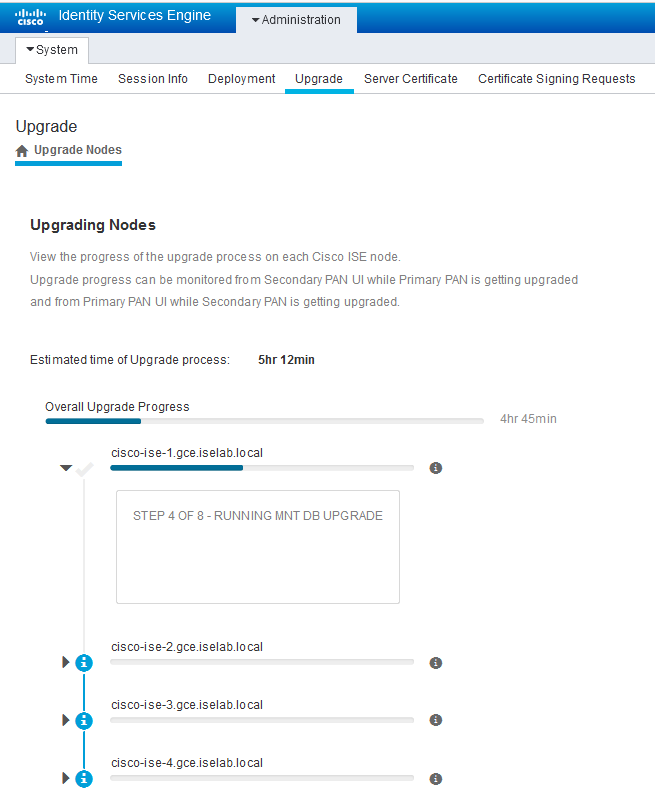
Once the primary admin node gets upgraded and the services come up, the system logs out of the secondary admin node's GUI. Users can now switch back to monitoring the status from the primary admin node's GUI while all the other nodes of the deployment go down for the upgrade simultaneously.

Once all the nodes get upgraded successfully, the status changes to green colour.

If there are any failed nodes, a pop-up window with information about the failed node is displayed. Click OK in the popup window to de-register the failed nodes from the deployment. These have to be individually upgraded/re-imaged and joined back to the deployment if any.
Click Next in order to view the overall upgrade summary reports.
Summary
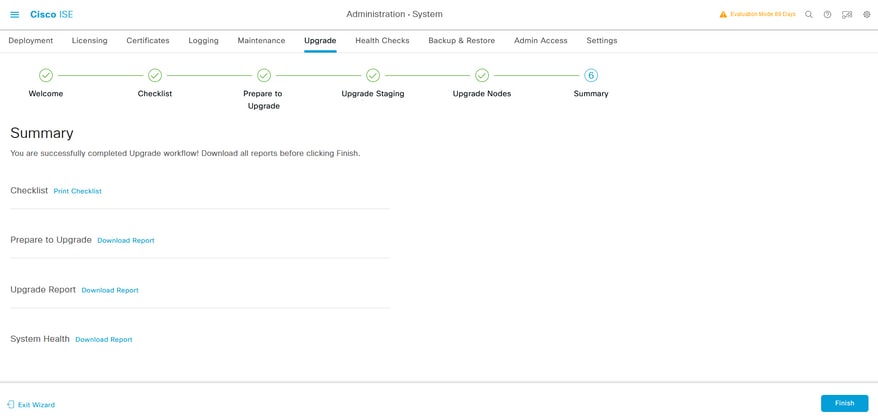
After the upgrade process is complete, the diagnostic upgrade reports for the deployment can be viewed and downloaded from this page.
Health Checks
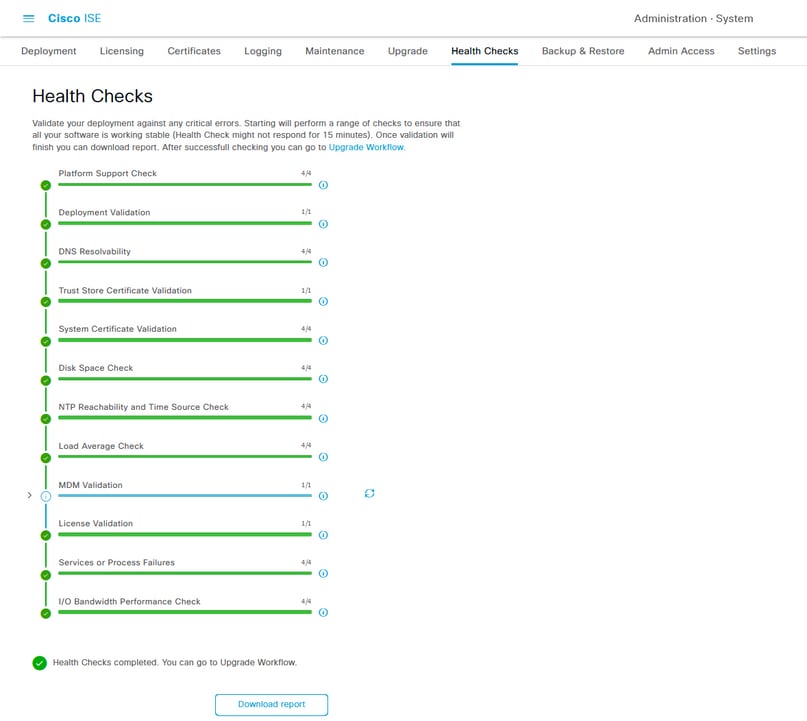
In order to validate the deployment status post-upgrade, a health check runs automatically to verify the deployment's status. This report can be downloaded from the Summary page of the upgrade flow. If an on-demand health check is required at any point in time, navigate to Administration > System > Health Checks and click on Start Health Checks.
Post Upgrade Tasks
When a user logs in to the primary admin node's GUI after you complete the upgrade, a pop-up message is displayed regarding post-upgrade tasks.

Click the post-upgrade tasks hyperlink on the pop-up message in order to review the task details and complete them.
Issues and Remedies
- If the primary admin node upgrade fails, promote the secondary admin to the primary admin and then re-try the upgrade.
- If the upgrade fails on any other node apart from primary admin, the node would have to be deregistered from the deployment. This node has to be upgraded individually or reimaged directly to the upgraded version and can be joined back to the deployment.


 Feedback