Introduction
This document describes the steps to install ISE on an SNS appliance using NFS instead of a KVM virtual drive.
Prerequisites
- SNS Server
- Identity Services Engine (ISE) ISO
- Network File System (NFS) Server
Requirements
Cisco recommends that you have basic knowledge of ISE and SNS Cisco Integrated Management Controller (CIMC).
Components Used
The information in this document is based on these software and hardware versions:
The information in this document was created from the devices in a specific lab environment. All of the devices used in this document started with a cleared (default) configuration. If your network is live, ensure that you understand the potential impact of any command.
Configuration
Section 1. Enabling the NFS Server on Ubuntu
Step 1. Install the NFS server on Ubuntu using the command sudo apt install nfs-kernel-server.
Step 2. Create a directory for the NFS share with the command sudo mkdir -p /mnt/nfs_share.
Step 3. Remove restriction on the folder with sudo chown -R superadmin:admin_group /mnt/nfs_share/.
As per the command, superadmin refers to the user and admin_group refers to the user group. By this, you can restrict the user according to the user account and user group.
Step 4. Provide Read & Write privileges for the folder using sudo chmod 327 /mnt/nfs_share.
According to chmod, 327 folder name gives write and execute (3) permission for the user, w (2) for the group, and read, write, and execute for the users.
Step 5. Grant Access to the client system for the NFS folder with sudo vim /etc/exports.
After running the command, press I in order to insert the file path and client subnet to access the NFS share using /mnt/nfs_share 192.168.146.0/24(rw,sync,nosubtree_check).
/mnt/nfs_share: The NFS folder which has been created on the system
192.168.146.0/24: The subnet that has been added is the client subnet which can access the NFS share
rw: Read & Write permission for the folder
sync: Write permission to the Harddisk
no_subtree_check: In order to skip the subtree check on the folder
Press esc, then type :wq in order to write and exit from the file /etc/exports.
Step 6. Export the NFS shared directory on the system using sudo exportfs -a.
Step 7. Restart the NFS service on the system in order to make the changes take effect using sudo systemctl restart nfs-kernel-server.

Note: Ensure that the NFS port is open on the operating system and establish communication between the NFS server and the ISE server to prevent any interruptions.
Section 2. Mapping the ISO to the Boot Device on Hardware
In order to download the ISE ISO from Cisco.com, navigate to Downloads > Products > Security > Access Control and Policy > Identity Services Engine > Identity Services Engine Software, here.

Note: Ensure to check the release notes for supported hardware before preparing to install the ISO to the hardware.
Step 1. The NFS server must be mapped to the SNS box in order to proceed with the installation. In CIMC, navigate to Compute > Remote Management > Virtual Media > Add New Mapping.

In volume, the name of the Drive is provided and the Mount Type must be chosen as NFS.
Under Remote Share, enter the server IP:/File path in order to fetch the image from the NFS server. In the Remote File, enter the file name of the image to be loaded on the Hardware SNS box.

Verify the status of the mapped drive to be Successful.
Step 2. After that, the Boot order must be configured so that the ISE ISO can be booted from the SNS box.
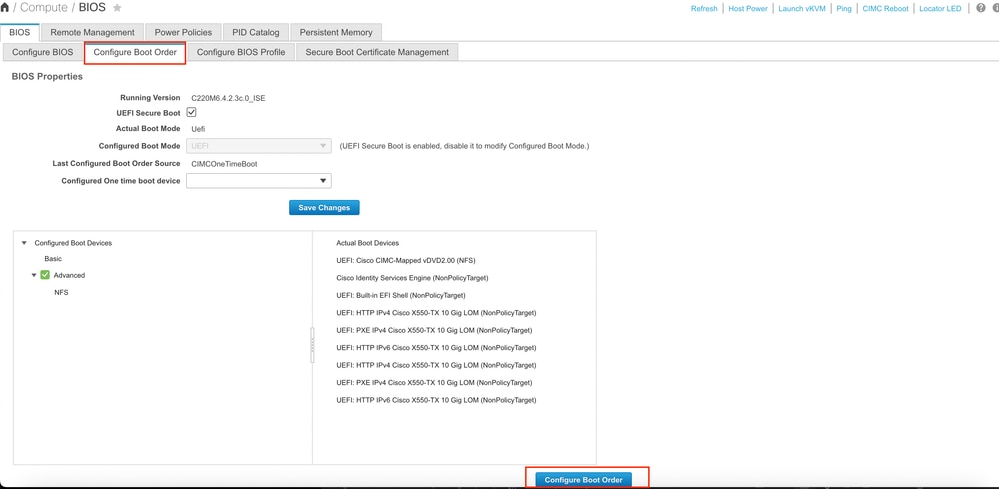
Navigate to BIOS > Configure Boot Order > Configure Boot Order. Refer to the next screenshot in order to navigate to the location.
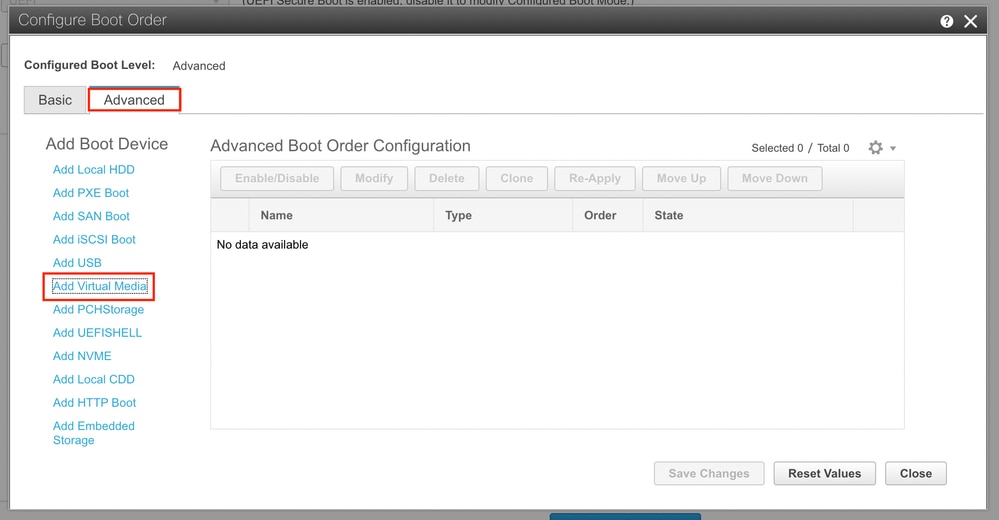
Then, click the Advanced Tab, and choose Add Virtual Media from the list of Add Boot Device List.
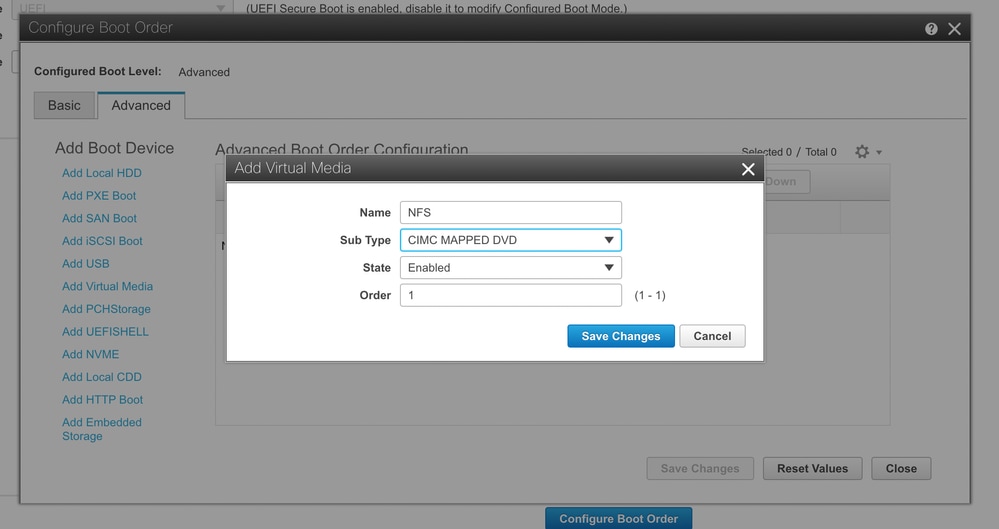
In the Name field, you can update the name of your preference. You must choose CIMC Mapped DVD under the subtype and save the changes.
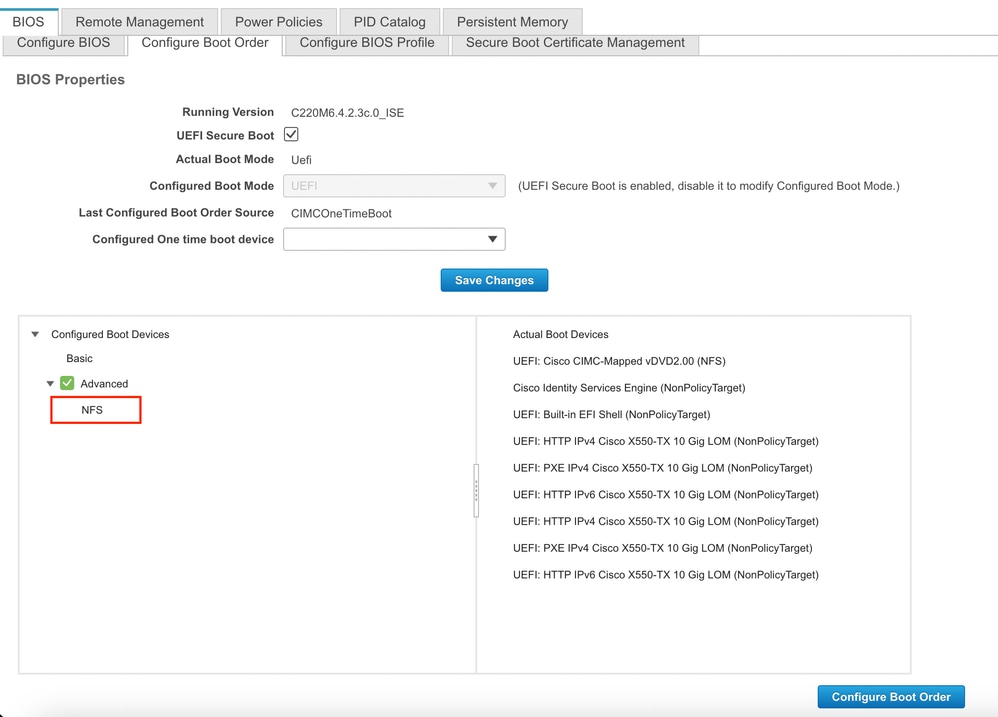
The Name of the Virtual media populates under Advanced in the Configure Boot Order.

Note: The Boot drive mapping for 36xx and 37xx pursue similar steps.
Section 3. Installation of ISE of 37xx Hardware
Step 1. Launch the Keyboard/Video/Mouse (KVM) console from the SNS box by clicking on Launch vKVM from the top right corner of the CIMC GUI.

Step 2. The KVM console launches on a new tab on the browser. On the left side of the screen, click Boot Device and choose the Name of the Virtual Media you created.

After choosing the Virtual Media in the KVM console, a prompt is populated on the screen. Click confirm in order to proceed further with booting the SNS box from the ISO image from the NFS server.

Step 3. Power cycle the SNS box or turn on the SNS server in order to boot the server from the ISO. In order to turn on the SNS box or Power cycle the box, navigate to Power under KVM console.

After the server completes the booting process, you land on the installation menu of ISE. Choose Cisco ISE Installation (Keyboard/Monitor) in order to proceed with the installation.

Section 4. Installation of ISE of 36xx Hardware
In 36xx SNS Box, the steps to initiate the installation of ISE are similar but the KVM console GUI of 36xx is different from 37xx.
Step 1. Launch the KVM console from the SNS box by clicking the Launch vKVM from the top right corner of the CIMC GUI.
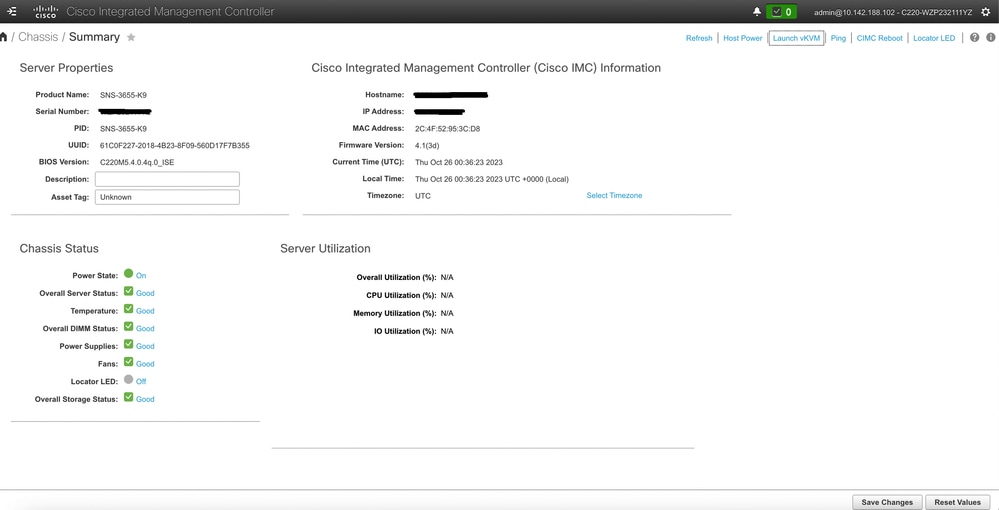
Step 2. The KVM console pops up on the new browser window. Click Boot Device and choose the Name of the Virtual Media you had created.
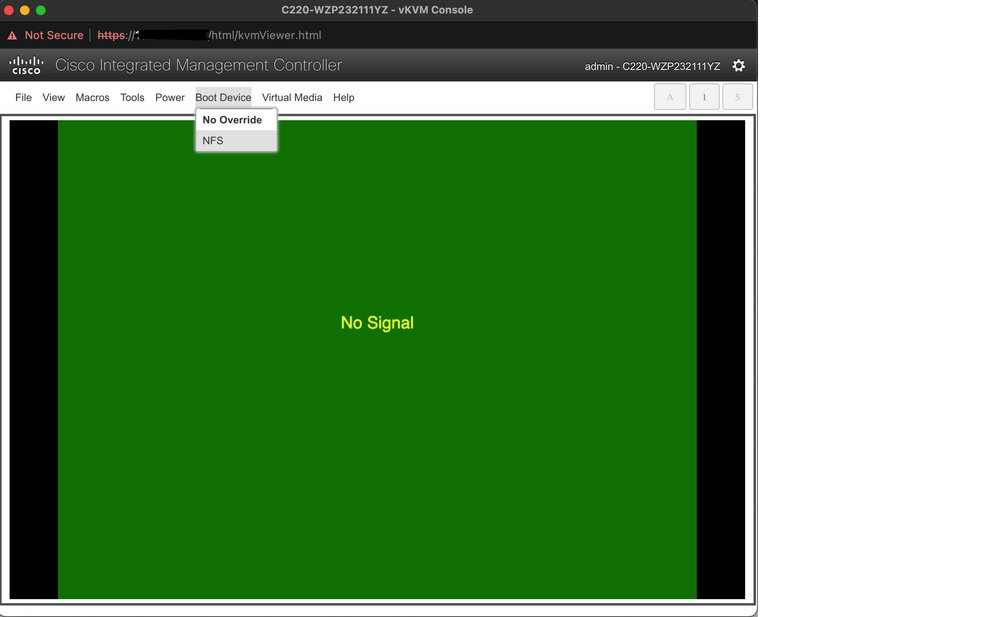
After choosing the Virtual Media in the KVM console, a prompt is populated on the screen. Click Confirm in order to proceed further with booting the SNS box from the ISO image from the NFS server.

Step 3. Power cycle the SNS box or turn on the SNS server in order to boot the server from the ISO. In order to turn on the SNS box or power cycle the box, navigate to Power under the KVM console.

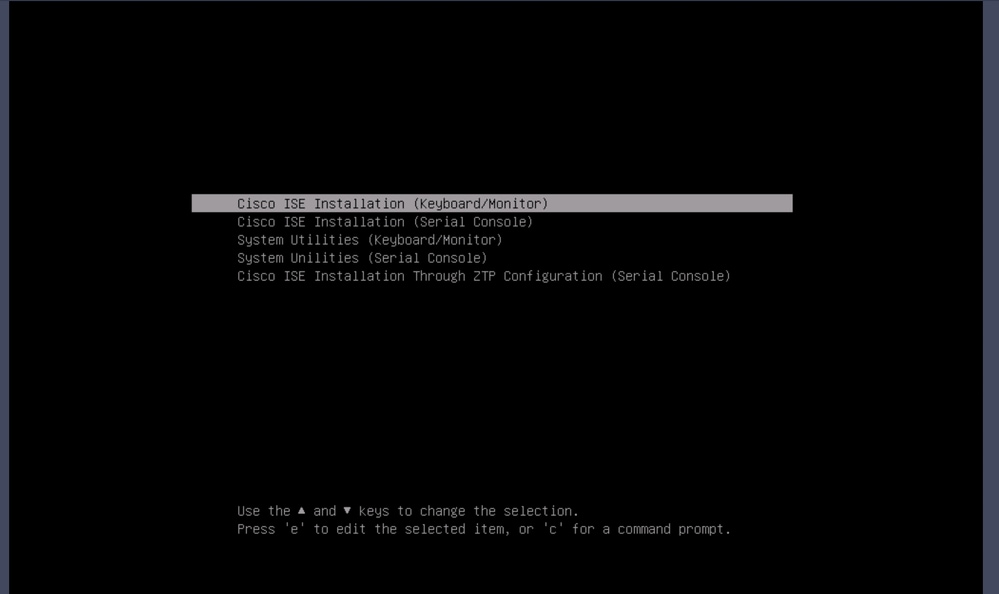
After the server completes the booting process, you land on the installation menu of ISE. Choose Cisco ISE Installation (Keyboard/Monitor) in order to proceed with the installation.
Section 5: Unmounting the ISO Image from the CIMC Box (SNS 36xx and SNS 37xx)
Step 1. In CIMC, navigate to BIOS > Configure Boot Order > Configure Boot Order. Refer to the next screenshot in order to navigate to the location.

Step 2. Then, click the Advanced Tab, and choose Add Virtual Media.

Step 3. Choose the Virtual media from the list and click delete from the list. This unmounts the ISO from the CIMC.


 Feedback