Introduction
This document describes the configuration of internal users in Cisco ISE by leveraging either JSON or XML data formats in conjunction with API calls.
Prerequisites
- ISE 3.0 or higher.
- API Client Software.
Components Used
The information in this document was created from the devices in a specific lab environment. All of the devices used in this document started with a cleared (default) configuration. If your network is live, ensure that you understand the potential impact of any command.
Network Diagram
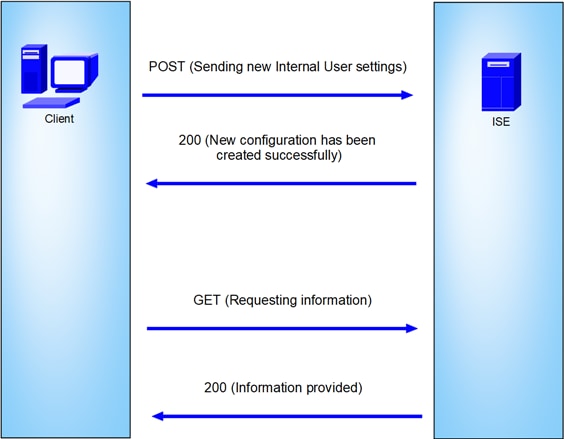 General topology
GET and POST are two of the most common HTTP methods used in API (Application Programming Interface) calls. They are used to interact with resources on a server, typically to retrieve data or to submit data for processing.
GET API Call
The GET method is used to request data from a specified resource. GET requests are the most common and widely used methods in APIs and websites. When you visit a webpage, your browser is making a GET request to the server hosting the webpage.
POST API Call
The POST method is used to send data to the server to create or update a resource. POST requests are often used when submitting form data or uploading a file.
Configurations
We need to send the exact information from the API Client Software to ISE node to create an Internal User.
ISE configurations
Enable the ERS feature.
1. Navigate to Administration > System > Settings > API Settings > API Service Settings.
2. Enable the ERS (Read/Write) option.
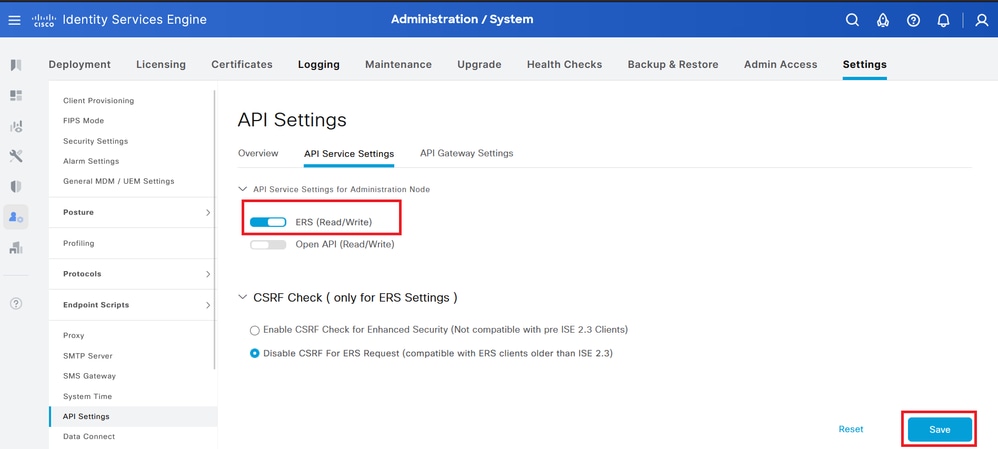 API Settings
JSON request.
- Open Insomnia.
- Add a new HTTPS request on the left side.
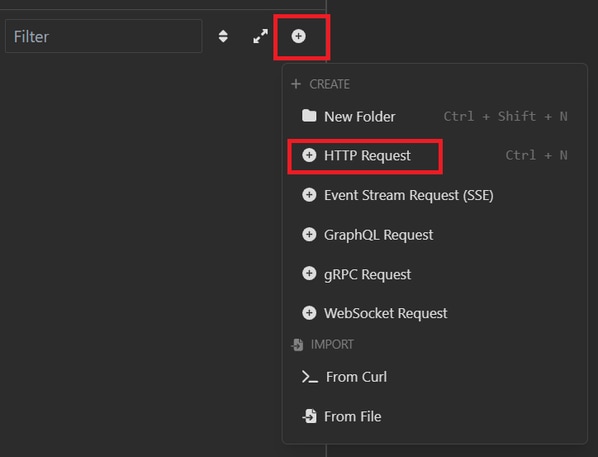 JSON Request
- You need to choose POST to send the information to your ISE node.
The URL that you need to enter depends on the IP address of you ISE node.
URL: https://x.x.x.x/ers/config/internaluser
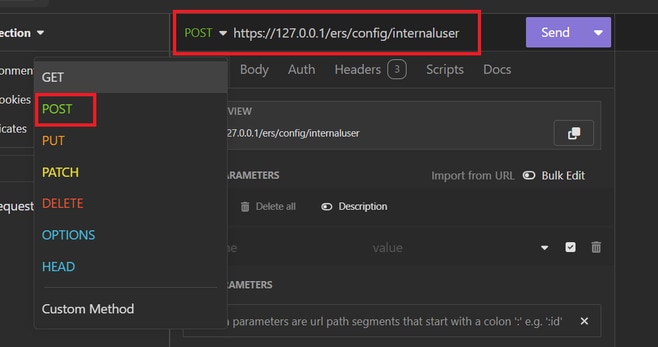 JSON POST
- Then click Body and choose JSON
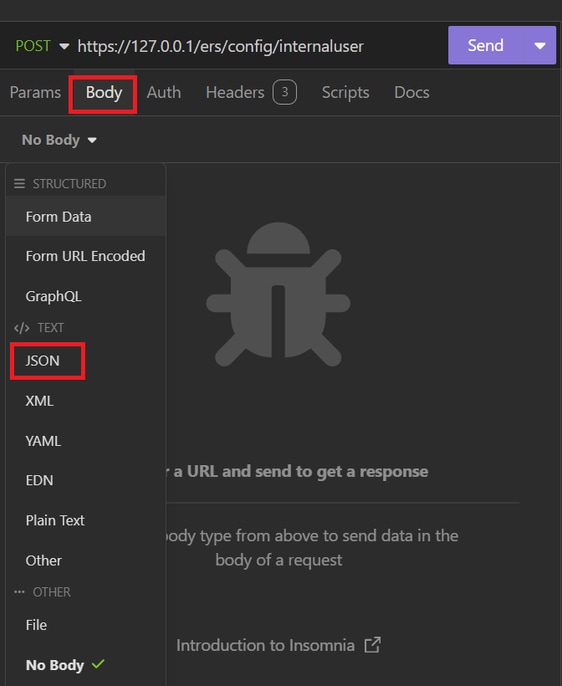 JSON Body
- You can paste the syntax and change the parameters depending on what you want.
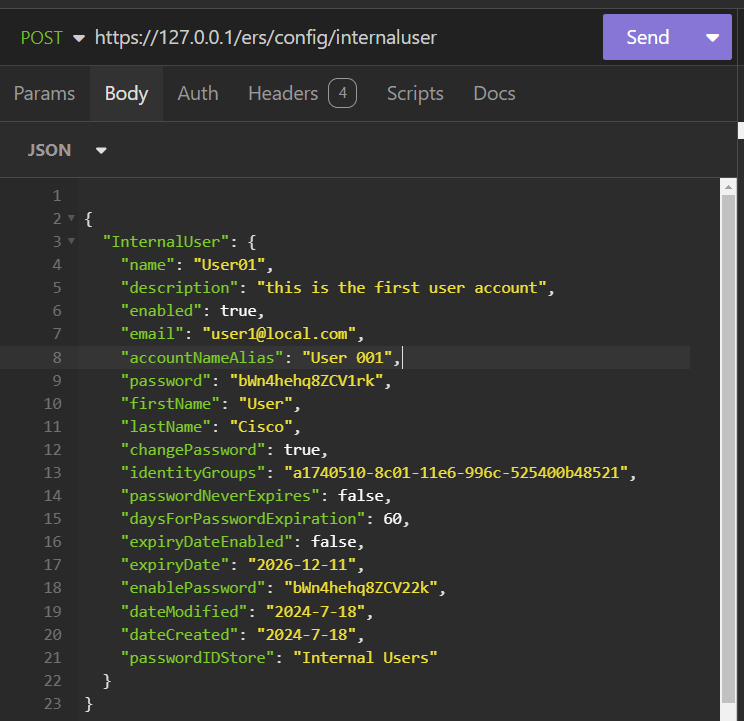 JSON Syntax
JSON syntax
{

  "InternalUser": {

    "name": "name",

    "description": "description",

    "enabled": true,

    "email": "email@domain.com",

    "accountNameAlias": "accountNameAlias",

    "password": "password",

    "firstName": "firstName",

    "lastName": "lastName",

    "changePassword": true,

    "identityGroups": "identityGroups",

    "passwordNeverExpires": false,

    "daysForPasswordExpiration": 60,

    "expiryDateEnabled": false,

    "expiryDate": "2016-12-11",

    "enablePassword": "enablePassword",

    "dateModified": "2015-12-20",

    "dateCreated": "2015-12-15",

    "customAttributes": {

      "key1": "value1",

      "key2": "value3"

    },

    "passwordIDStore": "Internal Users"

  }

}
- Click Auth and choose Basic.
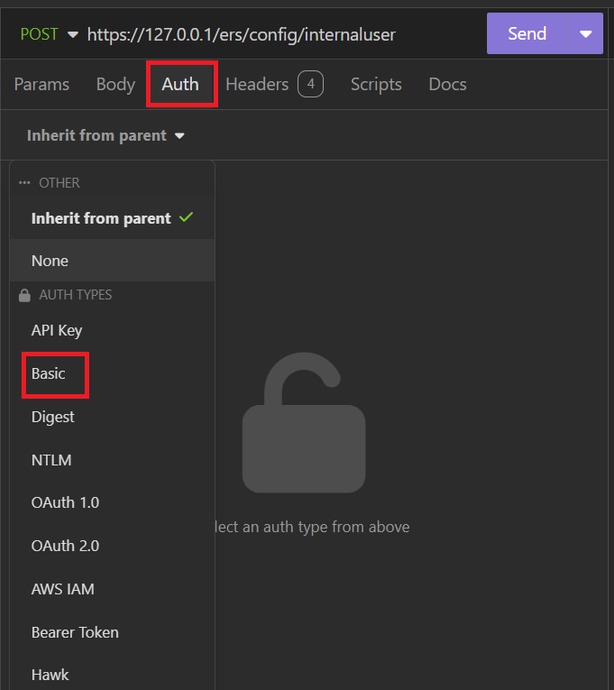 JSON auth
- Enter the ISE GUI credentials.
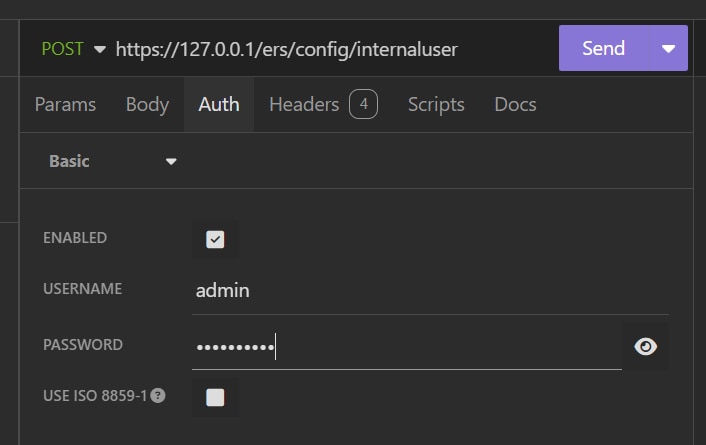 Admin JSON credentials
- Click Headers to add the next methods:
- Content-Type: application/json
- Accept: application/json
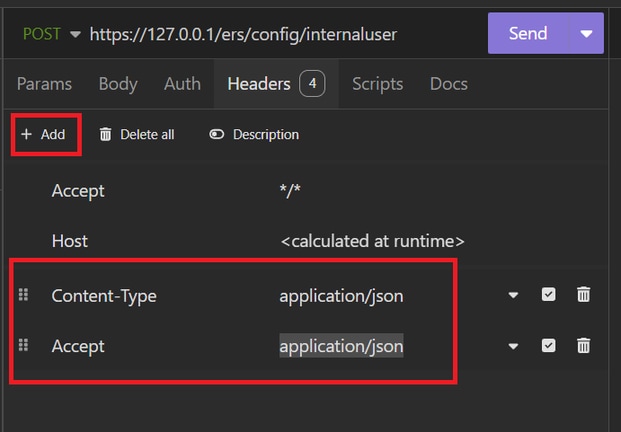 JSON Headers
- Finally, click Send.

Note: If you want to assign an Identity Group to the new user account, you need to use the ID of the Identity Group. Check the Troubleshooting section for more information.
Validation
- After sending the POST request you are going to see the status “201 Created”. It means that the process has been completed successfully.
 Successful JSON request
- Open the ISE GUI and navigate to Administration > Identity Management > Identities > Users > Network Access Users
 JSON User Account
XML request
- Open Insomnia.
- Add a new HTTPS request on the left side.
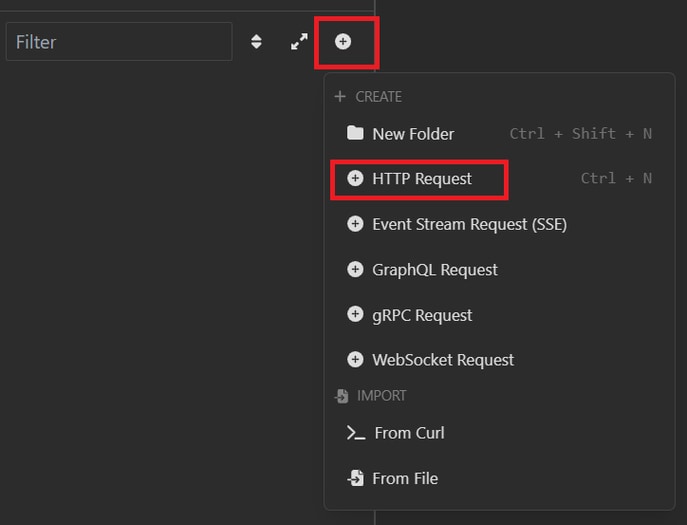 XML Request
- You need to choose POST to send the information to your ISE node.
The URL that you need to enter depends on the IP address of you ISE node.
URL: https://x.x.x.x/ers/config/internaluser
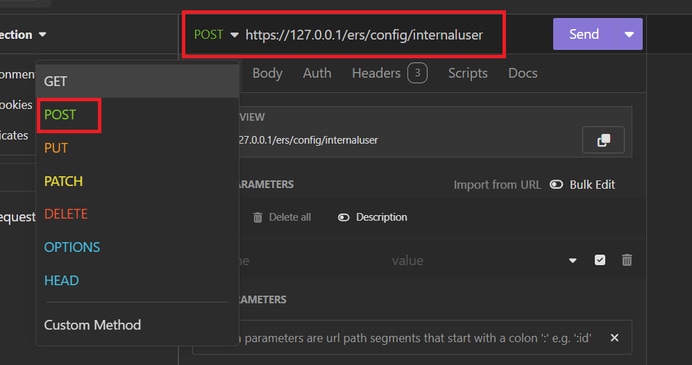 XML POST
- Then click Body and choose XML.
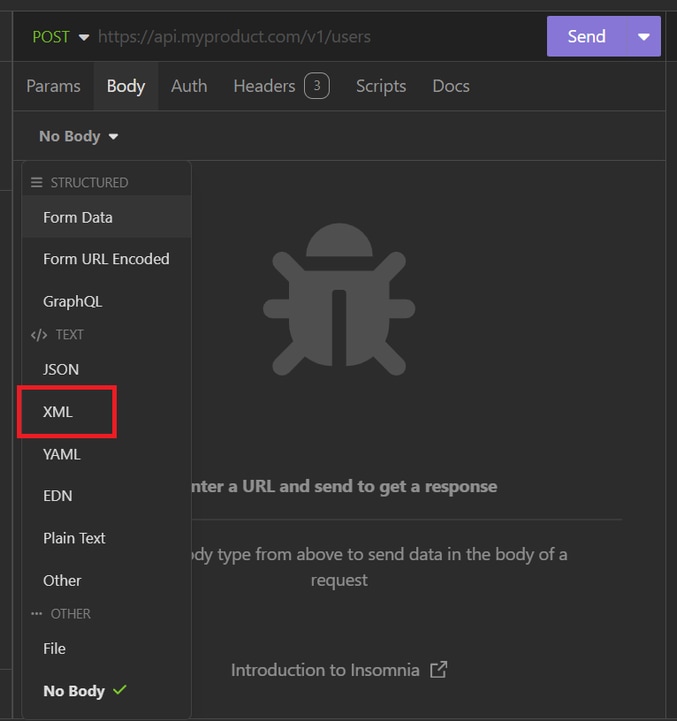 XML Body
- You can paste the syntax and change the parameters depending on what you want.
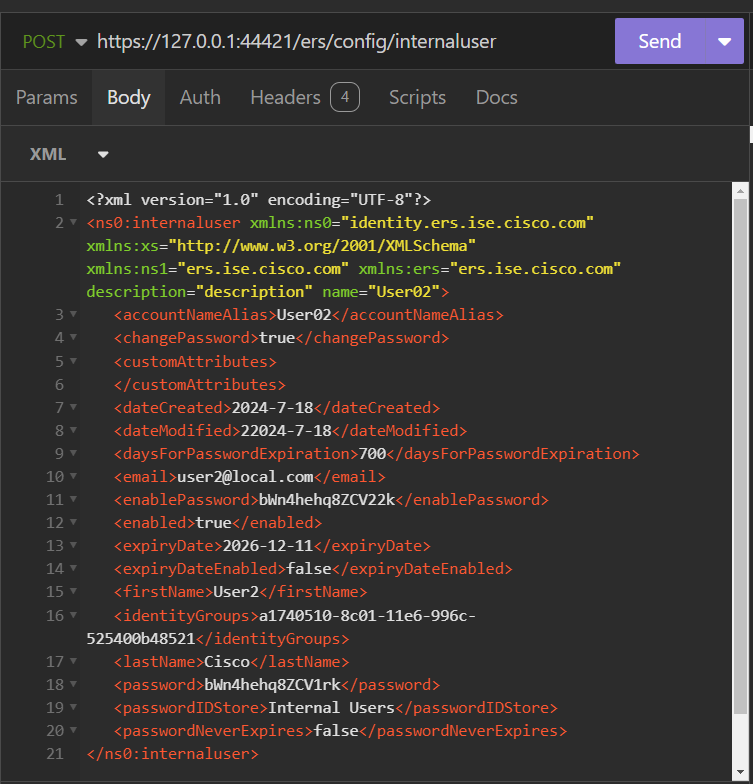 XML Post
XML syntax
<?xml version="1.0" encoding="UTF-8"?>

<ns0:internaluser xmlns:ns0="identity.ers.ise.cisco.com" xmlns:xs="http://www.w3.org/2001/XMLSchema" xmlns:ns1="ers.ise.cisco.com" xmlns:ers="ers.ise.cisco.com" description="description" name="name">

   <accountNameAlias>accountNameAlias</accountNameAlias>

   <changePassword>true</changePassword>

   <customAttributes>

      <entry>

         <key>key1</key>

         <value>value1</value>

      </entry>

      <entry>

         <key>key2</key>

         <value>value3</value>

      </entry>

   </customAttributes>

   <dateCreated>2015-12-15</dateCreated>

   <dateModified>2015-12-20</dateModified>

   <daysForPasswordExpiration>60</daysForPasswordExpiration>

   <email>email@domain.com</email>

   <enablePassword>enablePassword</enablePassword>

   <enabled>true</enabled>

   <expiryDate>2016-12-11</expiryDate>

   <expiryDateEnabled>false</expiryDateEnabled>

   <firstName>firstName</firstName>

   <identityGroups>identityGroups</identityGroups>

   <lastName>lastName</lastName>

   <password>password</password>

   <passwordIDStore>Internal Users</passwordIDStore>

   <passwordNeverExpires>false</passwordNeverExpires>

</ns0:internaluser>
- Click Auth and choose Basic
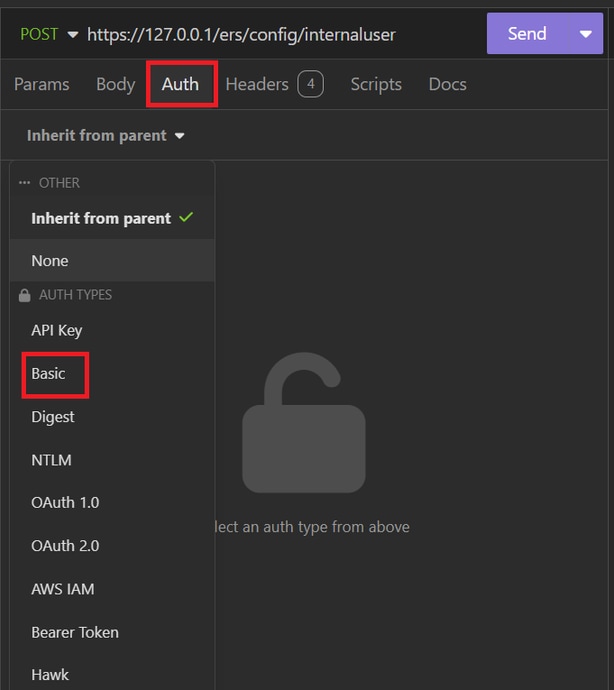 XML auth
- Enter the ISE GUI credentials.
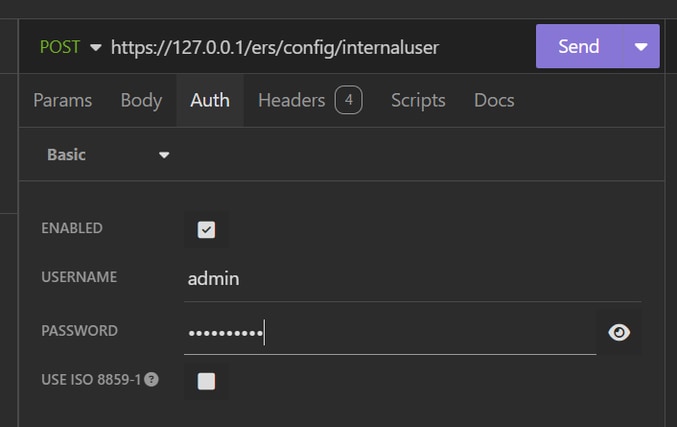 XML credentials
- Click Headers to add the next methods:
- Content-Type: application/xml
- Accept: application/xml
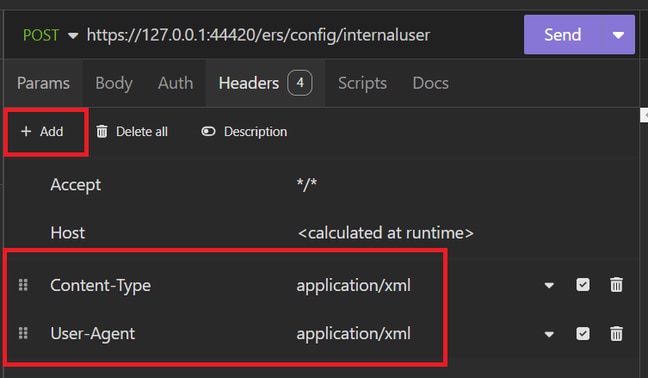 XML Headers
- Finally, click Send.

Note: If you want to assign an Identity Group to the new user account, you need to use the ID of the Identity Group. Check the Troubleshooting section for more information.
Validation
- After sending the POST request you are going to see the status “201 Created”. It means that the process has been completed successfully.
 Successful XML request
- Open the ISE GUI and navigate to Administration > Identity Management > Identities > Users > Network Access Users
 Validation of User Accounts
Troubleshoot
1. Identify the ID of the identity group.
Use GET and the https://X.X.X.X/ers/config/identitygroup query.
 GET option
JSON output.
Identify the ID next to the description.
 ID Identity Group 01
XML output.
Identify the ID next to the description.
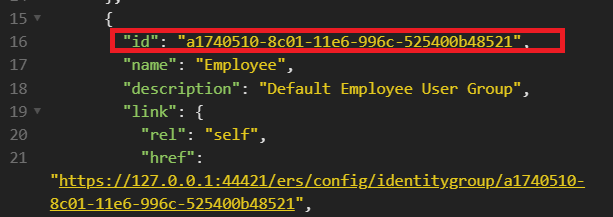 ID Identity Group 02
2. 401 Unauthorized error.
 401 error
Solution: Check the access credentials configured in the Auth section
3. Error: Could not connect to server
 Connection error
Solution: Check the IP address of the ISE node configured in Insomnia or validate the connectivity.
4. 400 Bad Request.
 400 error
There are multiple reasons to face this error, the most common are:
- Mismatches with the security password policy
- Some parameters have been wrongly configured.
- Sintaxis error.
- Information duplicated.
5. Error: SSL peer certificate or SSH remote key was not OK
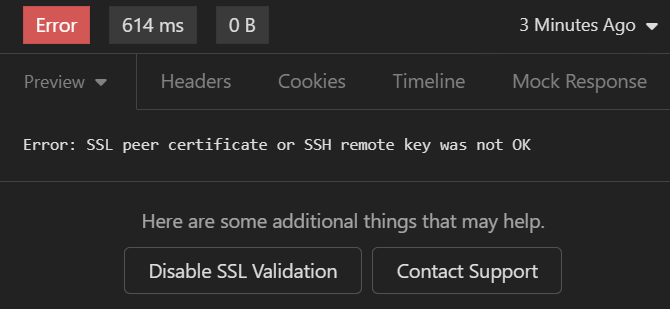 SSL certificate error
Solution:
- Click Disable SSL Validation.
- Under Request / Response, disable the Validate Certificates option.
 Validate certificates option
6. CSCwh71435  defect.
The enable password is configured randomly although you have not configured it. This behavior happens when the enable password syntax is removed or left empty as the value. Check the next link for more information:
https://bst.cloudapps.cisco.com/bugsearch/bug/CSCwh71435
API call references.
You can see all the information about the API calls that ISE supports.
1. Navigate to Administration > System > Settings > API Setting.
2. Click the ERS API information link.
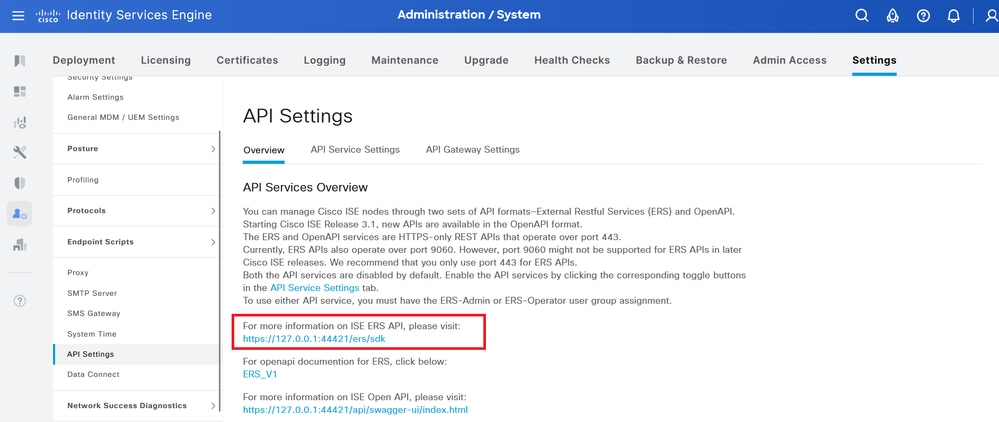 API Settings
3. And click API documentation.
 API Documentation


 Feedback