Introduction
This document describes how to deploy Cisco Secure Client Icon customization objects using Cisco Secure Firewall managed by FMC.
Prerequisites
Requirements
Cisco recommends that you have knowledge on these topics:
- Cisco Secure Firewall Management Center (FMC)
- Cisco Secure Firewall (CSF)
- Cisco Secure Client (CSC)
Components Used
The information in this document is based on these software and hardware versions:
- Cisco Secure Firewall Management Center Virtual Appliance Version 7.4.1
- Cisco Secure Firewall Virtual Appliance Version 7.4.1
- Cisco Secure Client Version 5.1.4.74
The information in this document was created from the devices in a specific lab environment. All of the devices used in this document started with a cleared (default) configuration. If your network is live, ensure that you understand the potential impact of any command.
Background Information
Starting with version 7.4.1 of the FMC, it is now possible to deploy Secure Client GUI customization objects for Windows and Linux. This allows a company to distribute logos to their users to substitute the existing default Secure Client theme to create one according to their needs.
This guide displays a basic customization deployment to modify the main screen, about dialog and toast logos as well as the taskbar icon. This symbol is used throughout the guide to customize the original Secure Client icons:

Refer to the table for specifications of each element covered in this guide.
For more customization options, refer to the Cisco Secure Client Administrator Guide.
Configure
Configurations
In this document, it is assumed that you already have a working Remote Access VPN configuration.
1. In the FMC, navigate to Devices > Remote Access, click the Edit button on the Remote Access Policy where you want to deploy the customization objects, and navigate to the Advanced tab.
2. Click the Secure Client Customization tab to expand it and click Icons and Images.
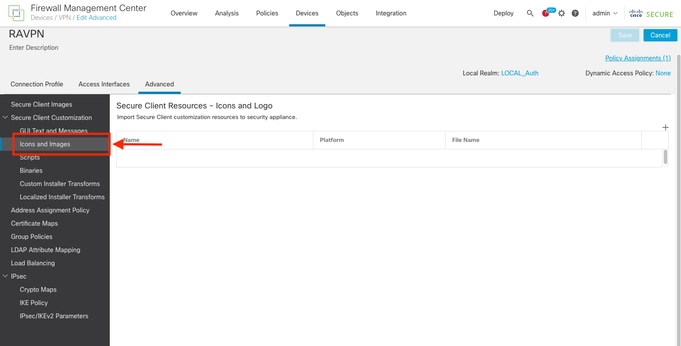
3. Click the + button to add a new Customization Object:
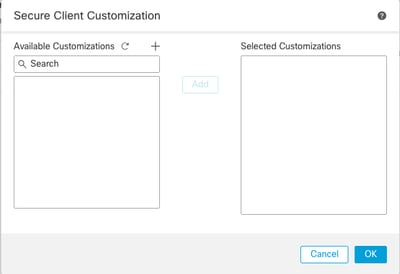
4. On this menu, click the + button to add a new Customization File.
5. Define the CSC file intended to use as Main Screen Logo

Note: The file name and extension you upload, must match the name and extension of the file you want to customize. Refer to the Cisco Secure Client Administrator Guide for a list of the available file names to customize.
- Name: MainScreenLogo
- File Name: vpn_logo_72.png
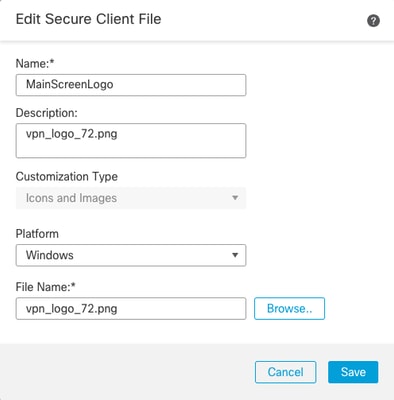
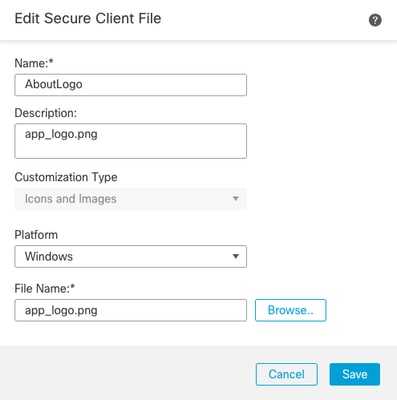
6. Create the remaining customization files for the about dialog logo, toast logo, and taskbar icon.
- Name: AboutLogo
- File Name: app_logo.png
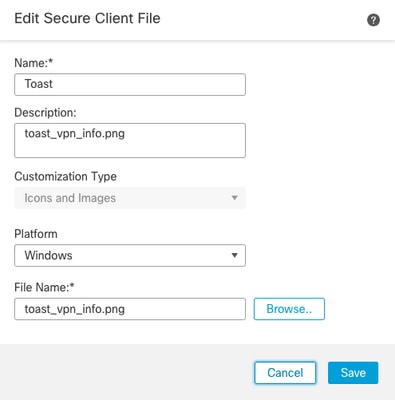
- Name: ToastLogo
- File Name: toast_vpn_info.png
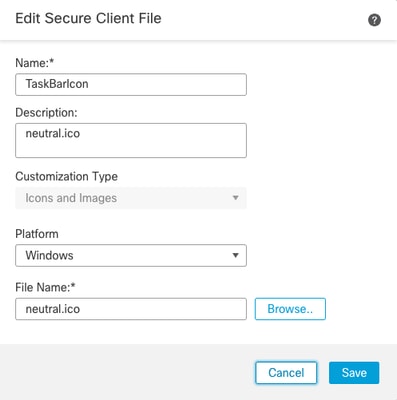
- Name: TaskBarIcon
- File Name: neutral.ico
7. Select your newly created Customization Objects and click Add to move them to the Selected Customizations column.
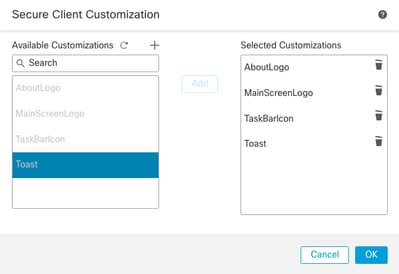
8. Click OK, then Save and deploy the configuration.
Cisco Secure Client needs to connect to the headend for the customization objects to be deployed to the user. The customization objects are not always reflected until CSC is restarted.
Verify
To verify if the configuration was applied successfully, you can use the CLI of the CSF.
firepower# show import webvpn AnyConnect-customization
OEM resources for AnyConnect client:
win/resource/app_logo.png
win/resource/neutral.ico
win/resource/toast_vpn_info.png
win/resource/vpn_logo_72.png
To verify that the images were downloaded to a client, you can also check this folder on Windows clients.
%PROGRAMFILES(x86)%\Cisco\Cisco Secure Client\UI\res
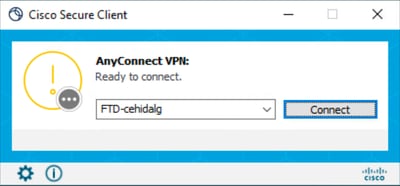
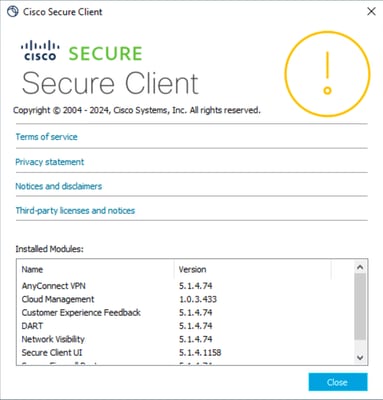
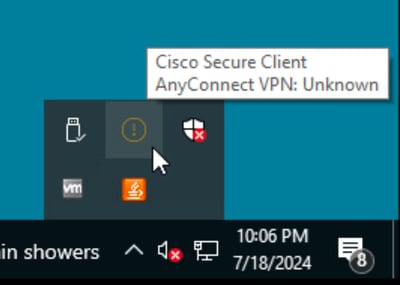
These are the results of deploying the Customization Objects from this guide:
- File Name: vpn_logo_72.png
- File Name: toast_vpn_info.png

Troubleshoot
- Restart the Secure Client application for the changes to take effect.
- If you do not see the customization in the Cisco Secure Client application, verify that the file has been applied in this path.
%PROGRAMFILES(x86)%\Cisco\Cisco Secure Client\UI\res
- Confirm that the file in the customization object matches the name of the file you want to modify


 Feedback