Introduction
This document describes the configuration required between the Email Security Appliance (ESA) / Security Management Appliance (SMA) and Cisco Identity Services Engine (ISE) for a successful implementation of External Authentication with RADIUS.
Prerequisites
Requirements
Cisco recommends that you have knowledge of these topics:
- Authentication, Authorization, and Accounting (AAA)
- RADIUS CLASS Attribute.
- Cisco ISE Identity Management and Authorization Policies.
- Cisco ESA/SMA User Roles.
Components Used
The information in this document is based on these software and hardware versions:
- Cisco ISE 2.4
- Cisco ESA 13.5.1, 13.7.0
- Cisco SMA 13.6.2
The information in this document was created from the devices in a specific lab environment. All of the devices used in this document started with a cleared (default) configuration. If your network is live, ensure that you understand the potential impact of any command.
Related Products
Version outside the listed ones in the components used section was not tested.
Background Information
Radius CLASS Attribute
Used for Accounting, it is an arbitrary value that the RADIUS server includes in all accounting packets.
The class attribute is configured in ISE (RADIUS) on a per-group basis.
When a user is deemed to be part of the ISE/VPN group that has attribute 25 tied to it, the NAC enforce the policy based on the configured mapping rules in the Identity Services Engine server (ISE).
Configure
Network Diagram

Identity Service Engine accepts the authentication requests from ESA/SMA and matches them against a user identity and group.
Step 1. Create an Identity Group for Authentication.
Log in the ISE server and Create an Identity Group:
Navigate to Administration->Identity Management->Groups->User Identity Group. As shown in the image.

Note: Cisco recommends an Identity Group in ISE for each ESA/SMA role assigned.
Step 2. Create Local Users for Authentication.
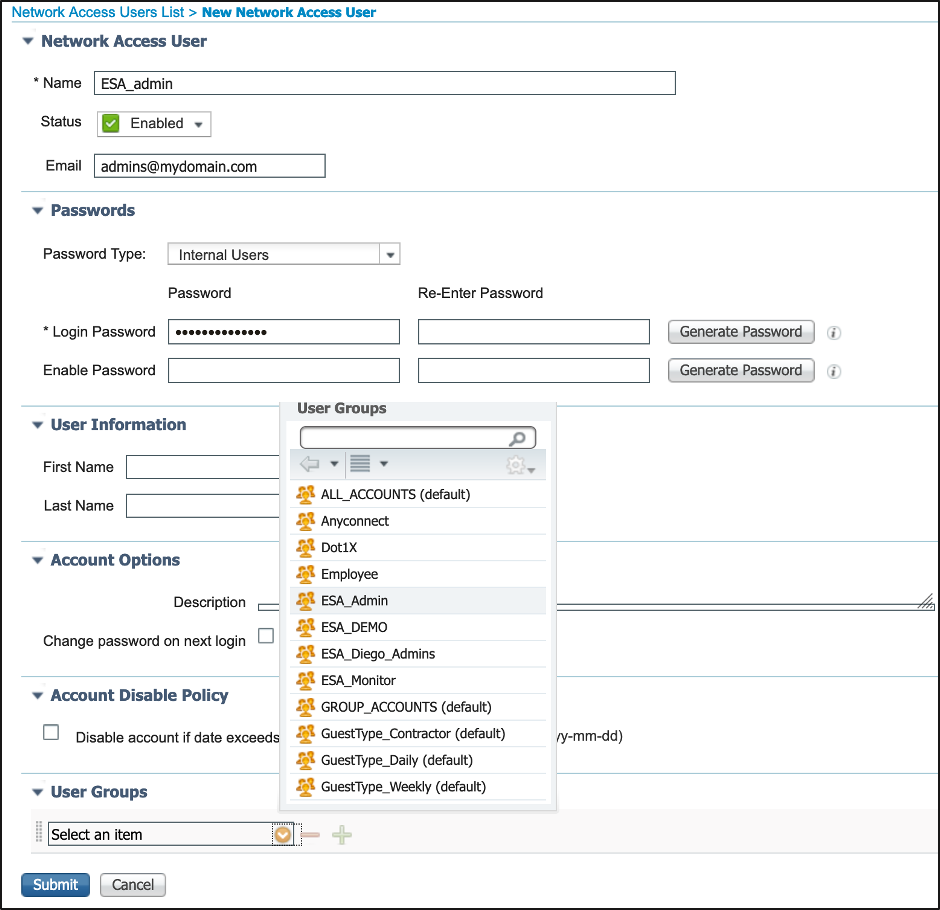
In this step, create new users or assign users that already exist to the Identity Group we created in Step 1. Please log in to ISE and navigate to Administration->Identity Management->Identities and either create new users or assign to users in the group(s) you have created. As shown in the image.

Step 3. Create Authorization Profiles.
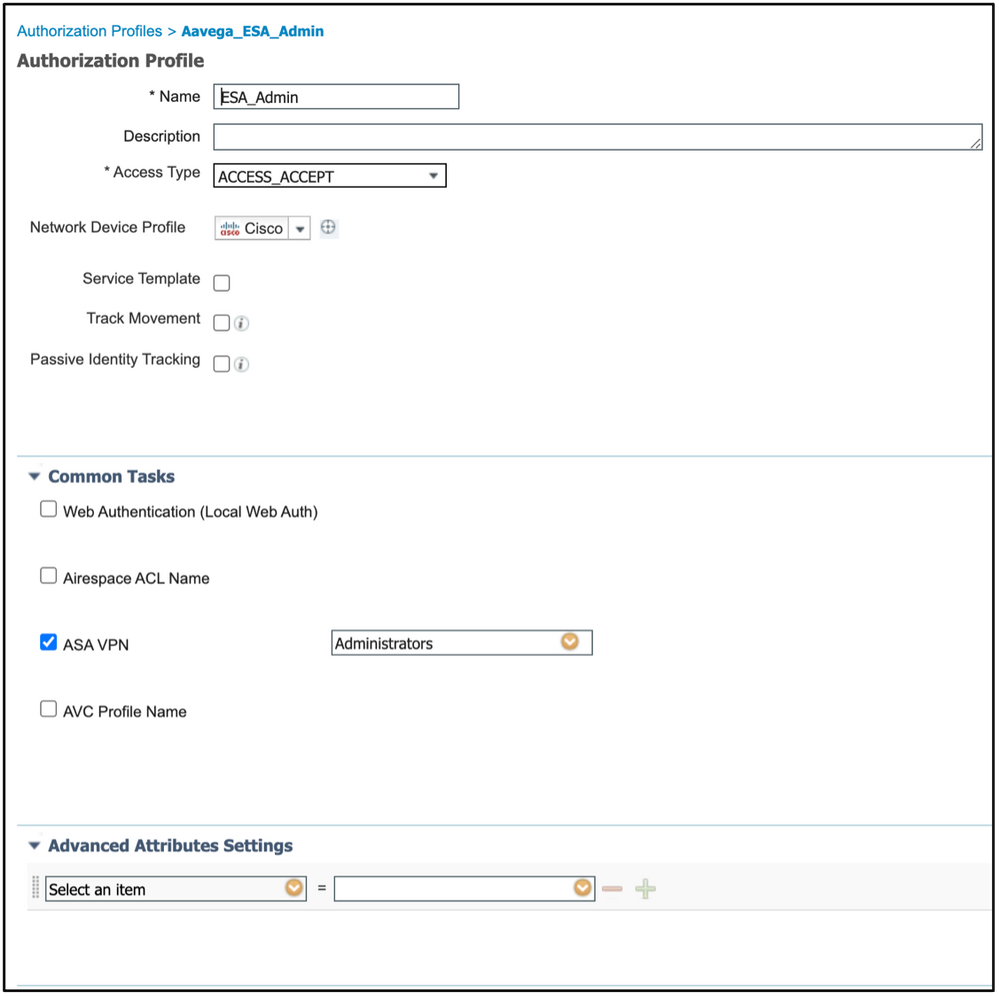
RADIUS authentication can be successfully completed with no Authorization Profiles, however, no roles be assigned. For complete setup, please navigate to Policy->Policy Elements->Results->Authorization->Authorization profile.
Note: Create one authorization profile per role to be assigned.

Note: Ensure to use radius class attribute 25 and give a name. This name must match with the configuration on AsyncOS (ESA/SMA). From Figure 3 Administrators is the CLASS attribute name.
Step 4. Create an Authorization Policy.
This last step allows ISE server to identify user log in attempts and map to the correct Authorization Profile.
In the event of a successful authorization, ISE returns an access-accept along the CLASS value defined into the Authorization Profile.
Navigate to Policy > Policy Sets > Add (+ symbol)

Assign a name and select the plus symbol to add the required conditions. This lab environment uses a Radius. NAS-IP-Address. Save the new policy.

In order to properly match the authorization requests, the conditions must be added. Select  icon and add conditions.
Lab environment uses InternalUser-IdentityGroup and matches to each Authorization Profile.

Step 5. Enable External Authentication into AsyncOS ESA/ SMA.
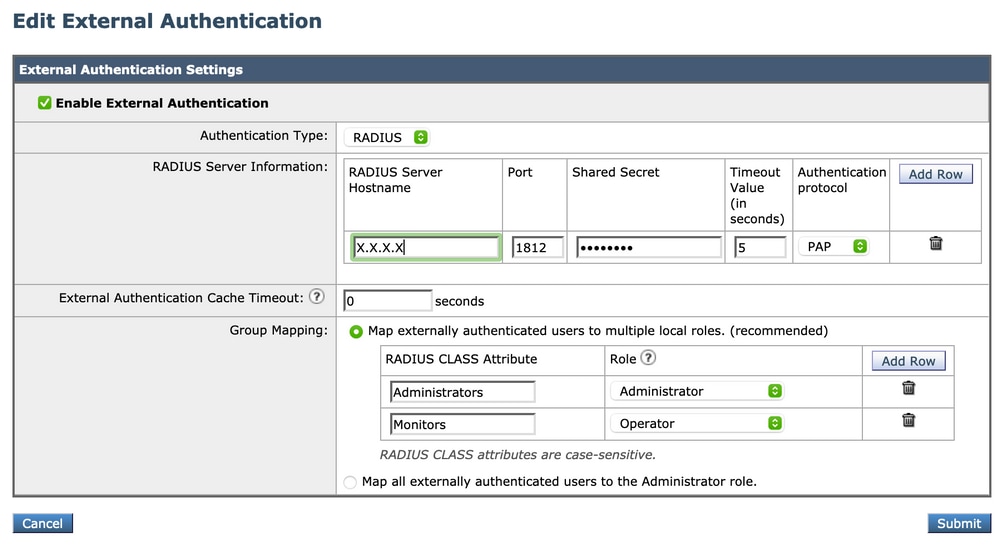
Log in AsyncOS appliance (ESA/SMA/WSA). And navigate to System Administration > Users > External Authentication > Enable External Authentication on ESA.

Provide these values:
- RADIUS Server Hostname
- Port
- Shared Secret
- Timeout Value (in seconds)
- Authentication protocol
Select Map externally authenticated users to multiple local roles (recommended). As shown in the image.

Note: Radius CLASS Attribute MUST Match with the attribute Name defined in Step 3 (Under common tasks mapped as ASA VPN).
Verify
Use this section to confirm that your configuration works properly.
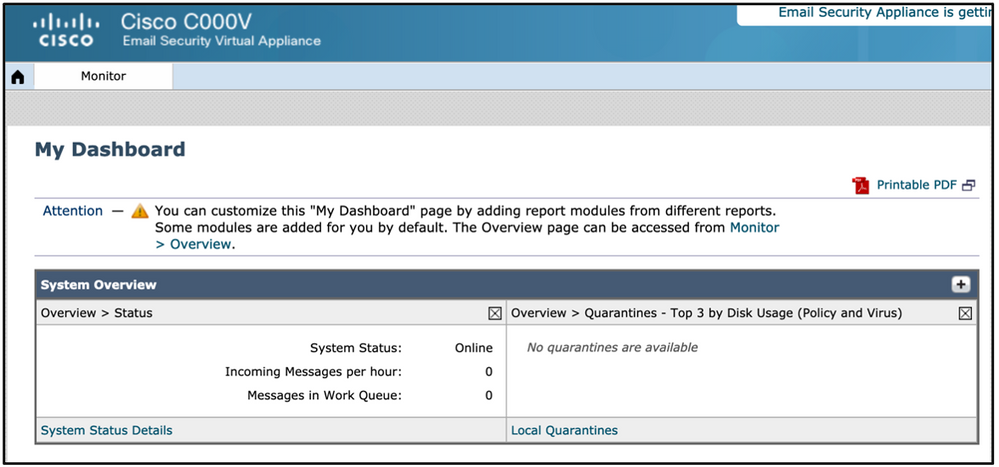
Please log in to your AsyncOS appliance and confirm access was granted and the assigned role was properly assigned. As shown in the image with the guest user role.

Troubleshoot
This section provides information you can use to troubleshoot your configuration.
If log in attempt fails to work on ESA with the message “Invalid username or password”. The issue might be on the Authorization Policy.
Log in to ESA and from External Authentication select Map all externally authenticated users to the Administrator role.

Submit and commit the changes. Do a new login attempt. In the event of a successful log in, double-check ISE Radius Authorization Profile (CLASS attribute 25) and Authorization Policy setup.
Related Information
