Introduction
This document describes the process to uninstall a Cisco Secure Endpoint (CSE) connector installed on Windows devices with different methods.
Prerequisites
Requirements
Cisco recommends that you have knowledge of these topics:
- Secure Endpoint Connector
- Secure Endpoint Console
- Secure Endpoint APIs
Components Used
The information in this document is based on these software and hardware versions:
- Secure Endpoint console version v5.4.2024042415
- Secure Endpoint Windows connector version v8.2.3.30119
- Secure Endpoint API v3
The information in this document was created from the devices in a specific lab environment. All of the devices used in this document started with a cleared (default) configuration. If your network is live, ensure that you understand the potential impact of any command.
Background Information
The procedure described in this document is helpful in situations where you are looking to uninstall the Secure Endpoint connector.
Uninstalling the connector is an option to get rid of the connector altogether, either for fresh installations or simply not having the connector on a Windows device anymore.
Uninstall Methods
Once you want to uninstall the Secure Endpoint connector on a Windows computer, follow the mehtod that better suits your needs.
Manually Uninstall
In order to uninstall a connector locally.
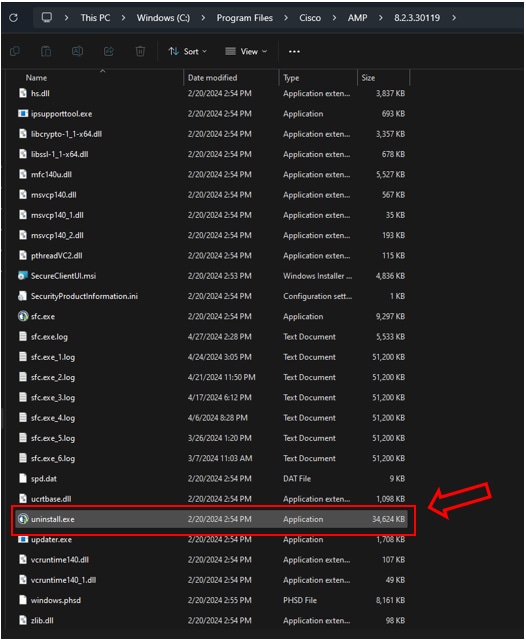
Step 1. In the device, navigate to Program Files > Cisco > AMP > x (Where x is the version of the CSE connector).
Step 2. Locate the uninstall.exe file. As shown in the image.
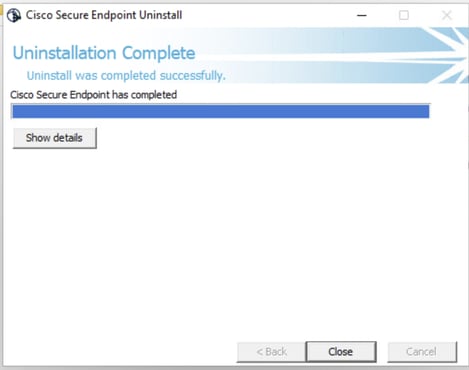
Step 3. Execute the file and follow the wizard until getting the Uninstallation Complete screen. As shown in the image.
Step 4. After finishing the uninstallation process, you will get the following dialog box asking "Do you plan on installing Cisco Secure Endpoint again?". As shown in the image.
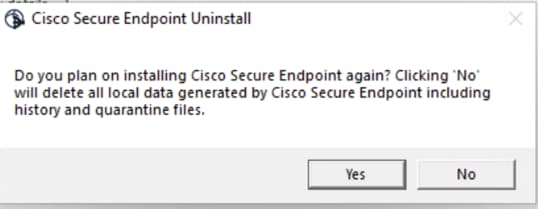

Note: In case you select No on the uninstall dialog box, a full reboot of the device will be required to get completely rid of any CSE remaining folders.
Uninstall Connector from Secure Endpoint console.
If you need to uninstall remotely from the console, you can do it using the Uninstall connector button.
Step 1. In the console, navigate to Management > Computers.
Step 2. Locate the computer you want to uninstall and click to display details.
Step 3. Click on Uninstall Connector button. As shown in the image.

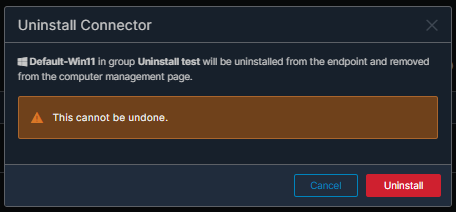
Step 4. Click Uninstall when you are asked to connfirm the action. As shown in the image.
Step 5. You will receive a confirmation message at the top of Secure Endpoint console. As shown in the image.

The connector registration in the console will disappear instantly. Upon reviewing the information locally, the connector will momentarily move to an uninstall policy and a few minutes later, it will be completely removed from the device. As shown in the image.


Note: Keep on mind that the period of time that the connector uses to perform this to perform this task may vary depending on your environment.

Caution: Ensure that the device receiving the uninstall remains connected throughout the process.

Note: This function can only be executed individually, i.e. it does not allow mass uninstallation or uninstallation of a group of devices. For more details on the feature, please refer to the User Guide in the Remote Uninstall section Secure Endpoint User Guide.
Uninstall Connector Using APIs
In case you have failed to uninstall the connector via the Secure Endpoint console, a viable option is to use APIs.
The Secure Endpoint API requires access via an authenticated and authorized account. Only authorized accounts are able to submit requests to API operations. All operations must communicate over a secure HTTPS connection.
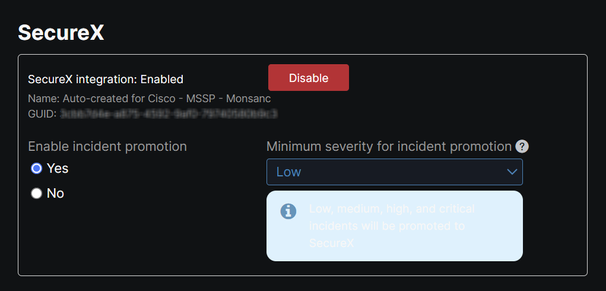
Step 1. Integrate Secure Endpoint with SecureX. As shown in the image.
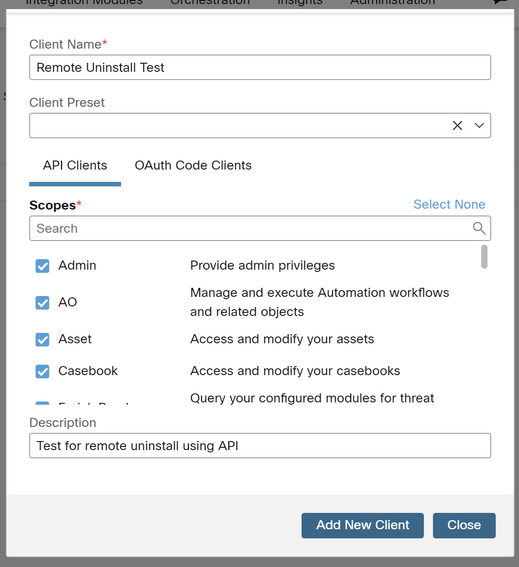
Step 2. Register SecureX API client. As shown in the image.
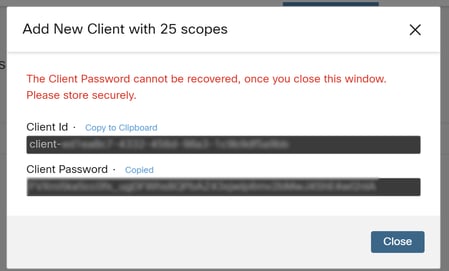
Step 3. Securely store credentials. As shown in the image.
Step 4. Run examples.sh (retrieved from examples.sh) the file using any script file program of your choice.
Step 5. Run the file and enter your credentials. As shown in the image.

Step 6. Scroll until you find "access token". Copy this value to later authenticate in the use of APIs. As shown in the image.


Note: For the creation of this document we made use of git.bash. This tool is not supported by Cisco, any doubt or question related to it, it is recommended to contact the support of this tool.
Step 7. Once the authentication token is obtained, you can use a tool that allows the use of APIs.

Note: For the creation of this document we made use of Postman. This tool is not supported by Cisco, any doubt or question related to it, it is recommended to contact the support of this tool.
Step 8. Based on the API reference syntax (Request a connector uninstallation). Make the connector uninstallation request using the GUID of the device to be uninstalled.

Note: You can get the connector GUID in the following two simple ways:
- On the Secure Endpoint portal navigate to Management > Computers > Navigate to the desired computer > Display the details > Get GUID.
- Open Tray Icon > Navigate to Statistics tab > Get GUID.
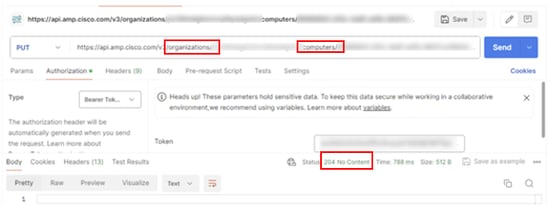
Step 9. Select Bearer Token as authentication method and enter the access token previously obtained on Step 6. As shown in the image.
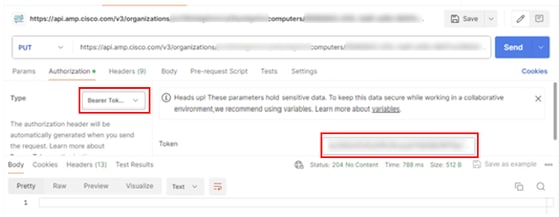
Step 10. Fill in the required fields of the API call and click on Send button. Wait for the 204: No Content response. As shown in the image.
The connector registration in the console will disappear instantly. Upon reviewing the information locally, the connector will momentarily move to an uninstall policy and a few minutes later, it will be completely removed from the device. As shown in the image.


Note: Keep on mind that the period of time that the connector uses to perform this to perform this task may vary depending on your environment.

Caution: Ensure that the device receiving the uninstall remains connected throughout the process.
If all the above instances (uninstalling methods) have been exhausted and you still have not succeeded in uninstalling the desired connector, you can opt for the last resort option listed in the following method.
Uninstall Connector Using Command Line Switches
The Installer has built-in command line switches that allows you to perform numerous actions in the endpoint as mentioned in the following article: Command Line Switches for Secure Endpoint.
In order to uninstall the CSE connector with command-line switches use the following instructions.
Step 1. Open Command Prompt with administrative privileges.
Step 2. Navigate to the location where the installation package is located. As the example shown in the image.

Step 3. Type the package name followed by the command line switches to be executed. As shown in the image.

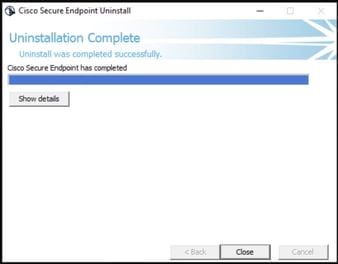
Step 4. Follow the wizard until getting the Uninstallation Complete screen. As shown in the image.

Note: The switch for uninstallation must be run against the installation package and not uninstall.exe
To perform a silent and complete uninstallation of the connector, the switch is:
FireAMPSetup.exe /R /S /remove 1

Note: You can also perform these in non-silent modes by removing the /S switch.
To perform a complete uninstallation of a connector that has password protection, the switch is:
FireAMPSetup.exe /uninstallpassword [Connector Protection Password]
As a last resort, running the uninstaller on the device on which the connector needs to be uninstalled will solve the need.
Step 1. Open Command Prompt with administrative privileges.
Step 2. Navigate to the location where the Secure Endpoint connector is located. Where x is the version of the CSE connector. As shown in the image.
C:\Program Files\Cisco\AMP\x>

Step 3. Execute the file using the following arguments. As shown in the image.
uninstall.exe/full 1

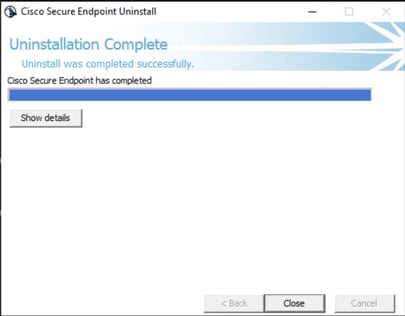
Step 4. Follow the wizard until getting the Uninstallation Complete screen. As shown in the image.

Note: In case the AMP path does not exist, you have to run the command without indicate the path, just run the command with the indicated arguments.

Note: If necessary, it is possible to run the uninstaller.exe of another connector in order to uninstall the desired connector.
Related Information


 Feedback