Introduction
This document describes the steps to upgrade an environment of Secure Firewall Management Center (FMC) in High Availability (HA).
Prerequisites
Requirements
Cisco recommends you have knowledge of these topics:
- High Availability concepts
- Secure FMC configuration
Components Used
The information in this document is based on virtual Secure FMC, version 7.1.0.
The information in this document was created from the devices in a specific lab environment. All of the devices used in this document started with a cleared (default) configuration. If your network is live, ensure that you understand the potential impact of any command.
Background Information
The upgrade must be one peer at a time.
First, pause synchronization between the peers.
Then the upgrade needs to be first done in the Standby, followed by the Active FMC.

Warning: While the standby peer is working on pre-checks / installation, both peers switch to active; this is called split-brain.
It is totally expected while the upgrade. During this time, you must not make or deploy any configuration change.
If you do any configuration change, it can be lost after synchronization is restarted.
Pre-upgrade
- Plan your upgrade path. In FMC deployments, you usually upgrade the FMC, then its managed devices. Always know which upgrade you just performed, and which is next.
- Read all upgrade guidelines and plan configuration changes.
- Check bandwidth. Ensure your management network has the bandwidth to perform large data transfers.
- Schedule maintenance windows.
- Back up the configuration before and after upgrade. System > Back up / Restore > Firepower Management backup. Download the backup to your local machine.
- Upgrade virtual hosting. This is required when you are running an older version of VMware.
- Check configurations.
- Check NTP synchronization.
FMC: Choose System > Configuration > Time.
Devices: Use the show time CLI command.
- Check disk space.
- Deploy configurations. In FMC high availability deployments, you only need to deploy from the active peer.
- Check running tasks. Ensure there is no pending deployments.
Upgrade Procedure
Step 1. Pause Synchronization
On the Active unit, navigate to the High Availability tab on the FMC.
System > Integration > High Availability
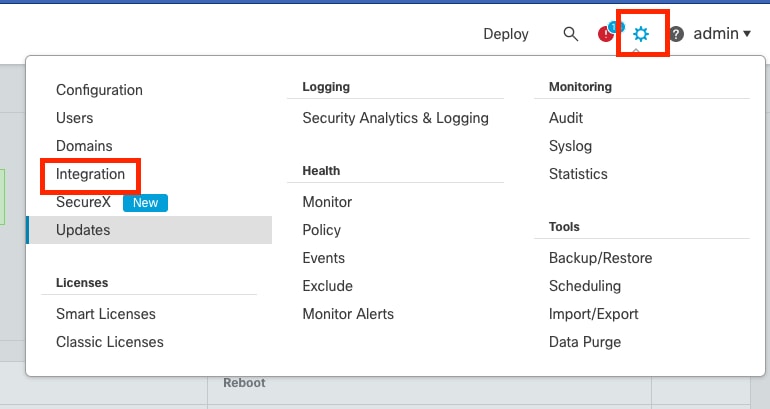 Pause Synchronization. Select System and Integration
 Pause Synchronization. Select High Availability
Select Pause Synchronization.
 Pause Synchronization
Wait for the synchronization to be paused. Status must be Paused by user when complete.
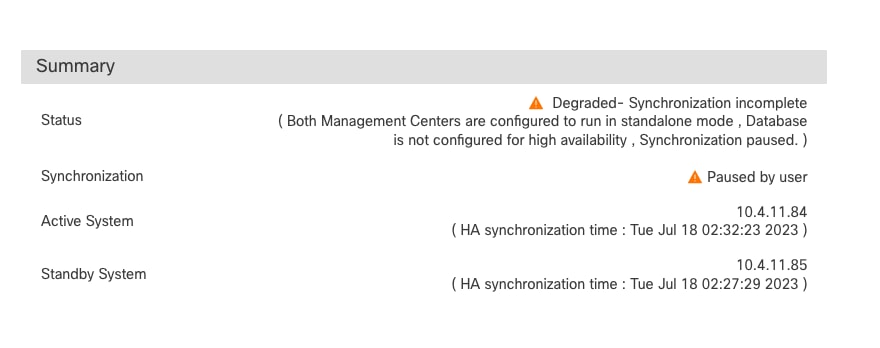 Synchronization Status must be Paused per User
Step 2. Upload the Upgrade Package
Log in to the Standby unit and upload the upgrade package.
System > Updates > Upload Update
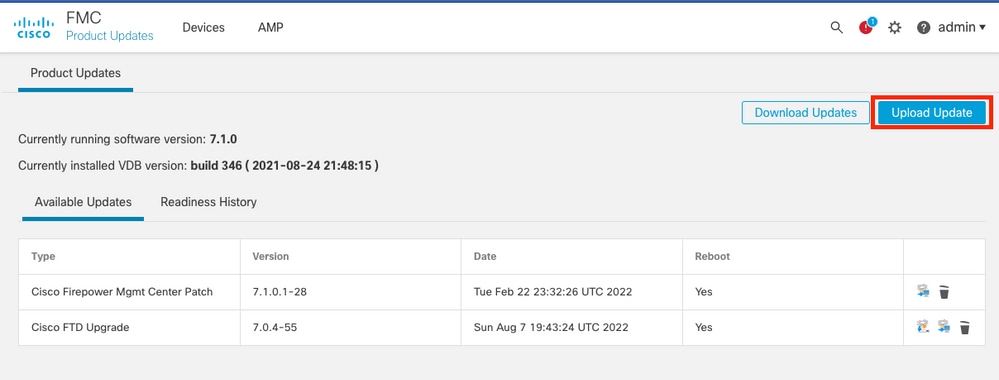 Upload the Upgrade Package
Browse the previously downloaded package of the version to be upgraded.
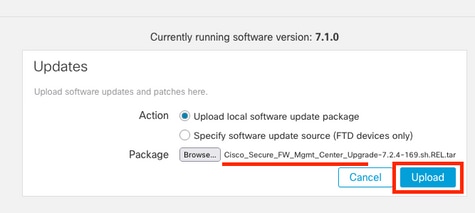 Select Upgrade File
Step 3. Readiness Check
Run a readiness check on the appliance to be upgraded.
Click the install icon next to the appropriate upgrade package.
 Install Upgrade Package for Readiness Check
Select the appliance you want to check and click Check Readiness.
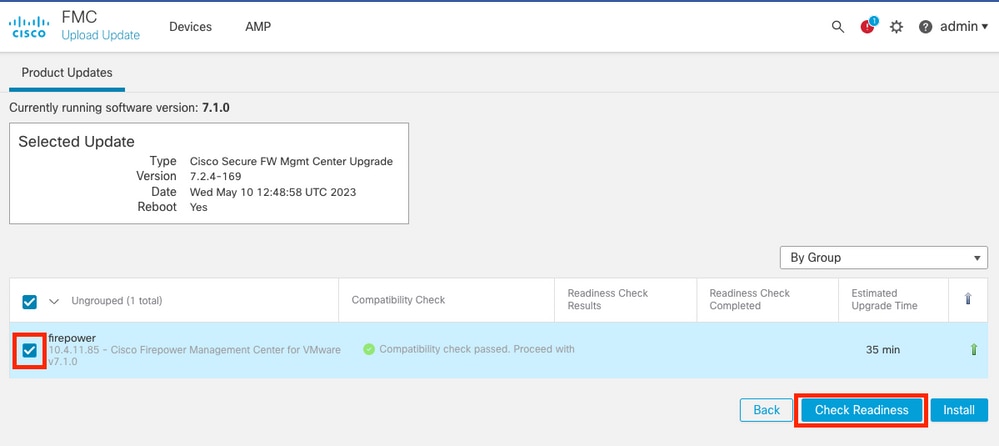 Select Check Readiness
The progress can be checked in the message center.
Messages > Tasks > Running
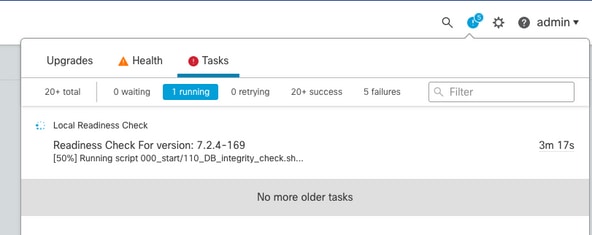 Readiness Check in Progress
Once completed, you can see the status in the Readiness Check Results.
If successful, then you can continue with the installation of the package.
Step 4. Install the Upgrade Package
Select the appliance to upgrade. Click Install.
 Install the Upgrade Package
Warning for the split brain, click OK.
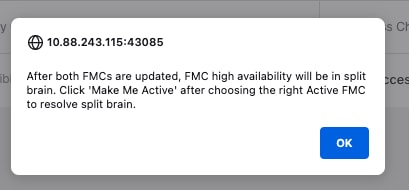 Warning About Split Brain
Progress can be checked in Messages > Tasks.
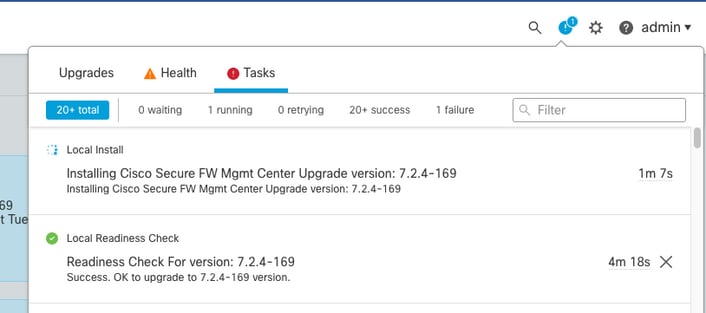 Monitor Installation

Note: Installation takes around 30 minutes to complete.
If you have CLI Access, progress can be checked in upgrade folder /var/log/sf; move to expert mode and enter root access.
> expert
admin@firepower:~$ sudo su
Password:
root@firepower:/Volume/home/admin# cd /var/log/sf/

root@firepower:/var/log/sf# ls
Cisco_Secure_FW_Mgmt_Center_Upgrade-7.2.4

root@firepower:/var/log/sf/Cisco_Secure_FW_Mgmt_Center_Upgrade-7.2.4# ls
000_start  AQ_UUID  DBCheck.log  exception.log  flags.conf  main_upgrade_script.log  status.log  status.log.202307180405  upgrade_readiness  upgrade_status.json  upgrade_status.log  upgrade_version_build

root@firepower:/var/log/sf/Cisco_Secure_FW_Mgmt_Center_Upgrade-7.2.4# tail -f status.log
When the upgrade completes, the FMC reboots.
ui:[100%] [1 mins to go for reboot]Running script 999_finish/999_zzz_complete_upgrade_message.sh...
ui:[100%] [1 mins to go for reboot] Upgrade complete
ui:[100%] [1 mins to go for reboot] The system will now reboot.
ui:System will now reboot.

Broadcast message from root@firepower (Tue Jul 18 05:08:57 2023):

System will reboot in 5 seconds due to system upgrade.

Broadcast message from root@firepower (Tue Jul 18 05:09:02 2023):

System will reboot now due to system upgrade.

ui:[100%] [1 mins to go for reboot] Installation completed successfully.
ui:Upgrade has completed.
state:finished

Broadcast message from root@firepower (Tue Jul 18 05:09:25 2023):

The system is going down for reboot NOW!
After reboot, the physical FMC must show the correct model in FMC.
GUI > Help > About
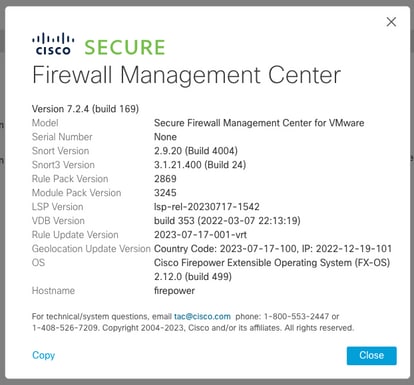 Model and Version Information in FMC
Integration > High Availability
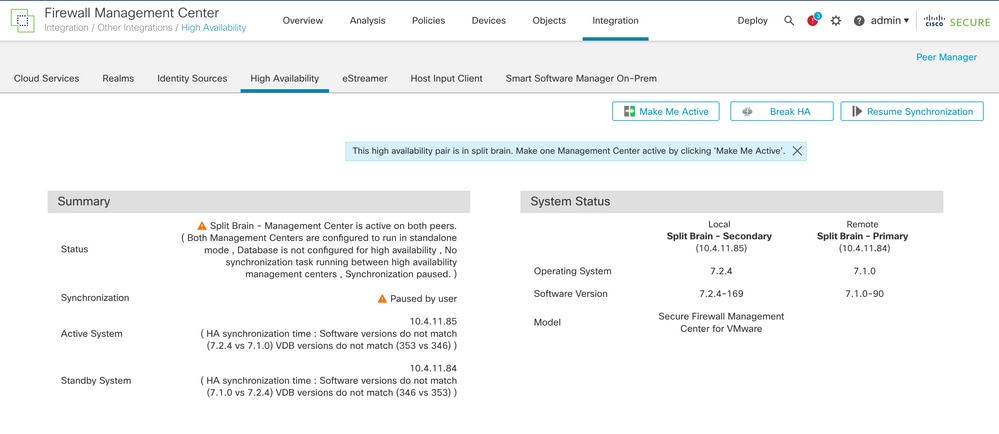 HA Summary when only Standby FMC is Upgraded
Over CLI, the version can be checked after accepting the EULA.
Copyright 2004-2023, Cisco and/or its affiliates. All rights reserved.
Cisco is a registered trademark of Cisco Systems, Inc.
All other trademarks are property of their respective owners.

Cisco Firepower Extensible Operating System (FX-OS) v2.12.0 (build 499)
Cisco Secure Firewall Management Center for VMware v7.2.4 (build 169)

>
> show version
-------------------[ firepower ]--------------------
Model                     : Secure Firewall Management Center for VMware (66) Version 7.2.4 (Build 169)
UUID                      : 1c71ae24-1e60-11ed-8459-9758e19f1a24
Rules update version      : 2023-01-09-001-vrt
LSP version               : lsp-rel-20220511-1540
VDB version               : 353
----------------------------------------------------
Step 5. Upgrade Active Peer
Repeat Steps two to four in the Active unit:
- Upload the Upgrade Package.
-
Readiness Check.
-
Install the Upgrade Package.
Step 6. Make the Desired FMC Active
After the upgrade has been completed on both FMC, log in to the FMC that you want to make the Active unit and select the option Make Me Active.
Integration > High Availability > Make Me Active
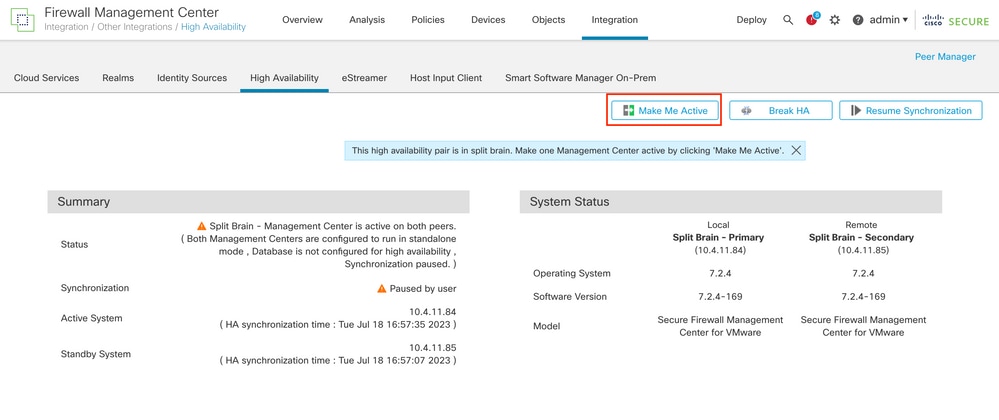 Make the Desired FMC Active
Warnings about processes and overwrite any configuration done in the standby peer, select YES to continue.
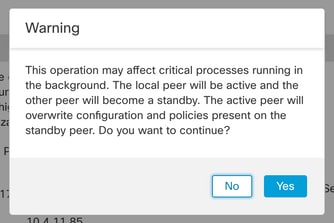 Warning About Active Overwriting Configuration on Standby Peer
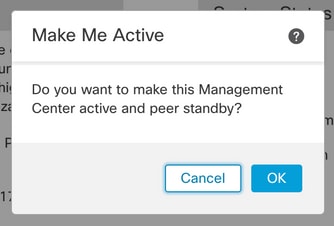 Select OK
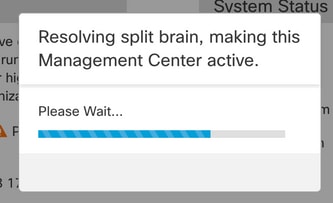 Resolving Split Brain
Wait until synchronization restarts and the other FMC switches up standby mode.
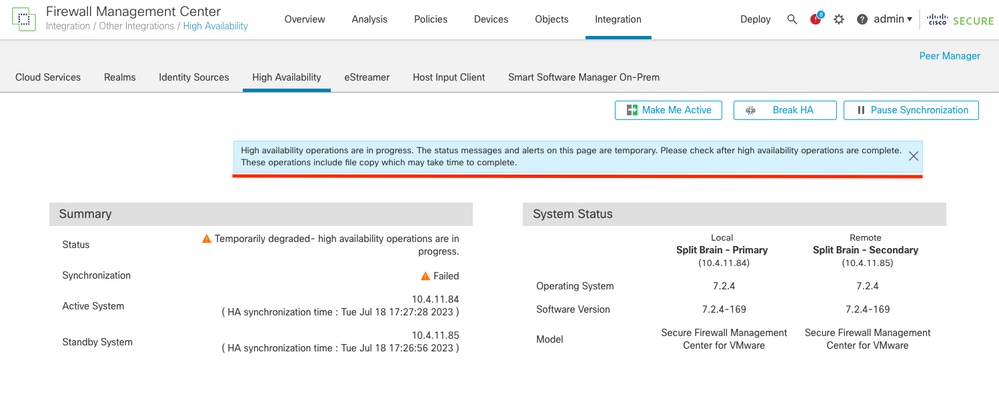 FMC Synchronization

Note: Synchronization can take up to 20 minutes to complete.
Deploy pending changes on the FMC Active unit to complete upgrade process.
Validation
After both FMC are in the same version and synchronization has completed, HA Summary tab must look like this:
Integration > High Availability
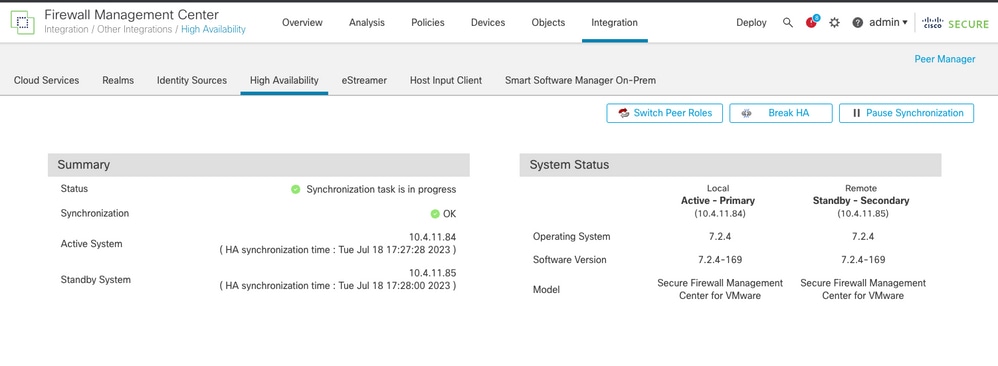 Upgrade Validation in FMC

Warning: If the final synchronization status shows degraded or other result than OK, please contact TAC.


 Feedback