Introduction
This document describes how to configure the BFD Protocol in Secure Firewall Management Center (FMC) running 7.3 and later.
Requirements
Cisco recommends that you have knowledge of these topics:
- Border Gateway Protocol (BGP) protocol
- Bidirectional Forwarding Detection (BFD) concepts
Components Used
The information in this document is based on these software and hardware versions:
- Secure FMC Virtual version 7.3.1
- BGP configured in Cisco Secure Firewall Threat Defense (FTD) with Cisco Secure FMC running version 7.3 and later
The information in this document was created from the devices in a specific lab environment. All of the devices used in this document started with a cleared (default) configuration. If your network is live, ensure that you understand the potential impact of any command.
Background Information
BFD is a detection protocol designed in order to provide fast-forwarding path failure detection times for all media types, encapsulations, topologies, and routing protocols.
Configure
Refer to these steps for BFD configurations in FMC running versions 7.3 and later.
Step 1. Navigate to the Devicesbutton on the top and click the Device Managementbutton.
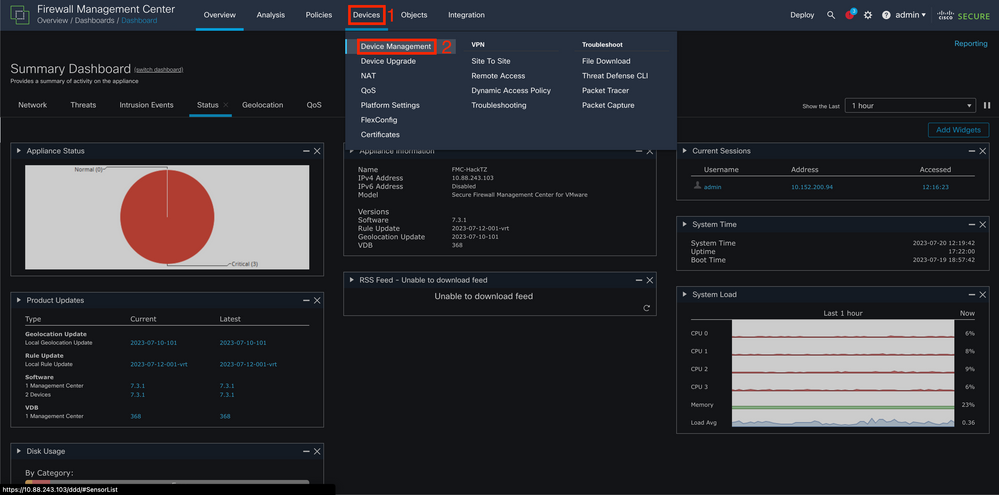 Image 1. FMC Dashboard.
Step 2. Choose the device you want to configure the BFD protocol.
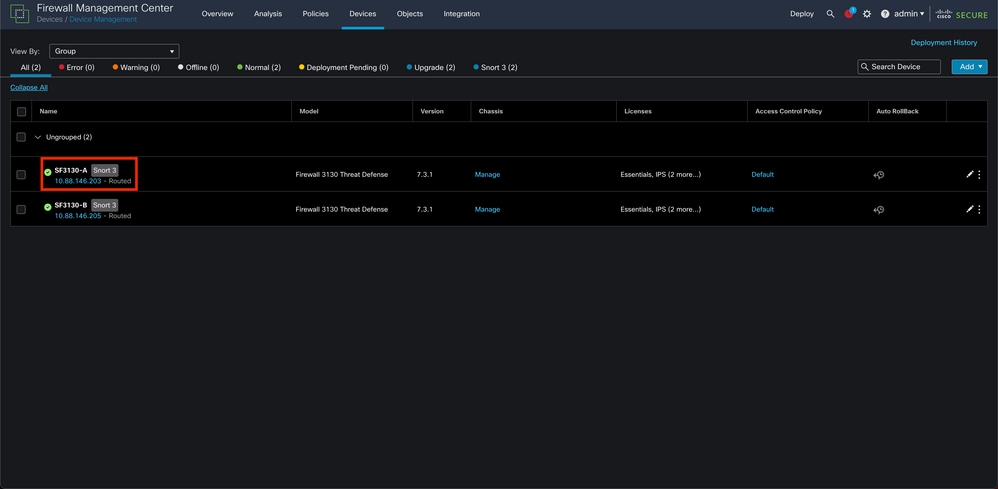 Image 2. Device Management Section.
Step 3. Click the Routingtab, then click the BFD option on the left column. Choose the option you want to configure (Single-Hop or Multi-Hop), and click Add.
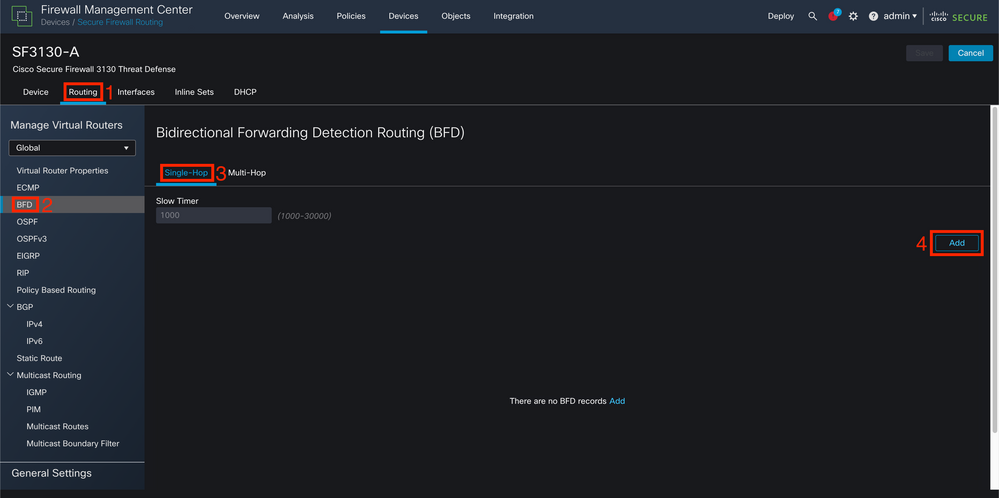 Image 3. Device Routing Section.
Step 4. Select the Interface in which the BFD protocol is going to be configured, and create a new template by clicking the + button.
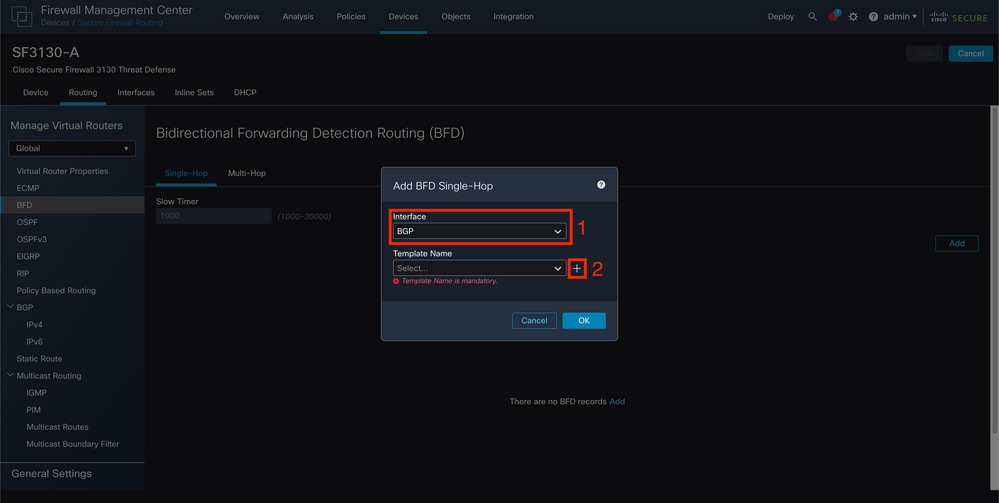 Image 4. Interface Selection.
Step 5. Name the template and configure the parameters desired for the BFD and then click the Save button.
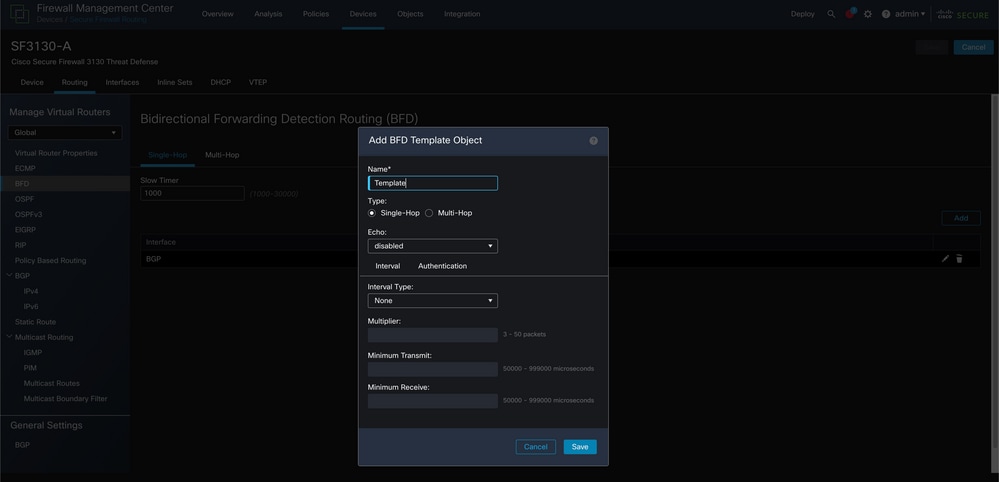 Image 5. Template Configuration.
Note: The echo feature is only available in Single-Hop mode.
Step 6. Choose the template you already created in the earlier step and click OK.
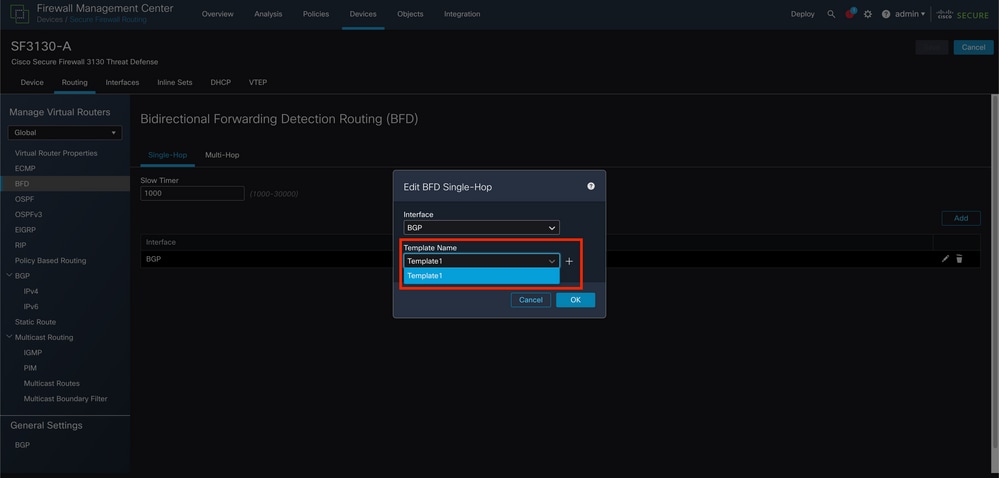 Image 6. Template Selection.
Step 7 (Optional). For BFD fall over, click the IPv4 or IPv6button depending on your configuration of BGP on the left column. Choose theNeighbor tab, and then click the edit pencil on the right for the desired neighbor address.
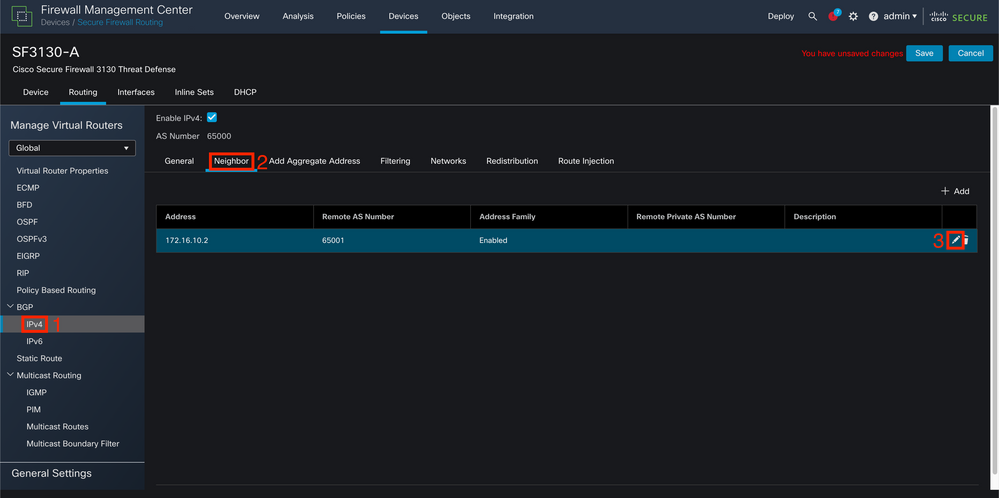 Image 7. Neighbor Configuration.
Step 8 (Optional). Choose the option BFD Failover for single_hop or multi_hop and click OK.
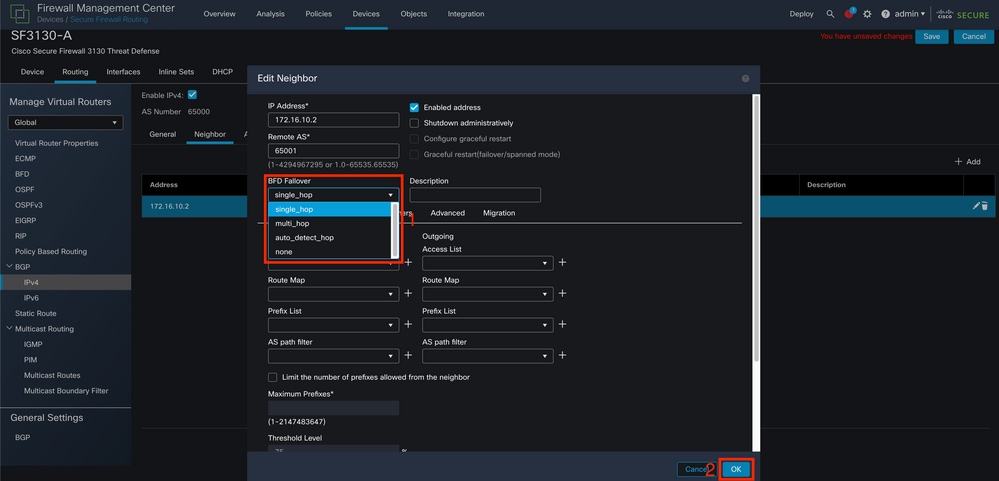 Image 8. BFD Fallover Configuration.
Step 9. In order to save your configuration click the Save button.
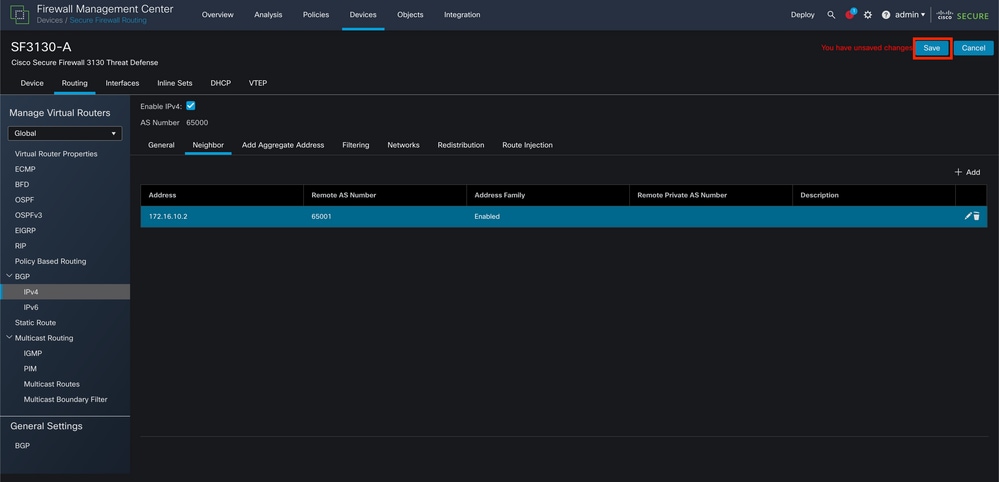 Image 9. Save Configurations.
Step 10. Click the Deploy button at the top on the right, click the checkbox for the device to which you applied the changes, and then again the Deploy button.
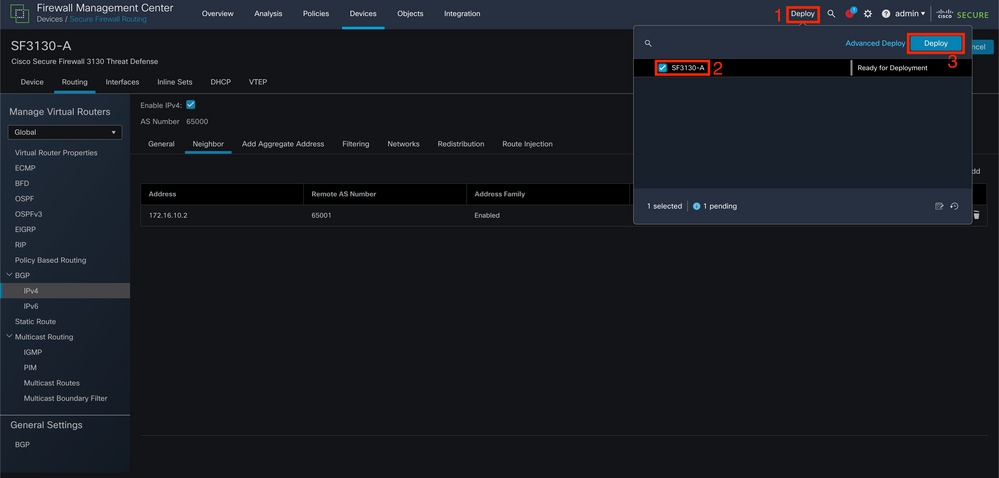 Image 10. Deploying Changes.
Verify
Verify the BFD configuration and the status directly on the CLI session with these commands:
> system support diagnostic-cli
Attaching to Diagnostic CLI ... Press 'Ctrl+a then d' to detach.
Type help or '?' for a list of available commands.

SF3130-A> enable
Password:
SF3130-A# show running-config | inc bfd
bfd-template single-hop Template
 bfd template Template
  neighbor 172.16.10.2 fall-over bfd single-hop
SF3130-A#
SF3130-A# show bfd summary
                    Session          Up          Down
Total               1                1           0
SF3130-A#
SF3130-A# show bfd neighbors

IPv4 Sessions
NeighAddr                                       LD/RD         RH/RS       State   Int
172.16.10.2                                      1/1          Up          Up      BGP
Troubleshoot
There is currently no specific troubleshooting information available for this configuration.


 Feedback