Introduction
This document describes the process of how to configure and deploy an Identity Policy for a Secure FTD traffic through Secure FMC.
Prerequisites
1. Realm already configured in FMC.
2. Identity Source already Configured - ISE, ISE-PIC.

Note: ISE and Realm configurations instructions are out of the scope of this document.
Requirements
Cisco recommends having knowledge of these topics:
- Secure Firewall Management Center (FMC)
- Secure Firewall Thread Defense (FTD)
- Cisco Identity Services Engine (ISE)
- LDAP/AD servers(s)
- Authentication Methods
- Passive Authentication : Use of external identity user source such as ISE
- Active authentication : Use of the managed device as Authenticate source (captive portal or remote vpn acess)
- No Authentication
Components Used
- Secure Firewall Management Center for VMWare v7.2.5
- Cisco Secure Firewall Threat Defense for VMWare v7.2.4
- Active Directory Server
- Cisco Identity Services Engine (ISE) v3.2 patch 4
- Passive Authentication Method
The information in this document was created from the devices in a specific lab environment. All of the devices used in this document started with a cleared (default) configuration. If your network is live, ensure that you understand the potential impact of any command.
Configure
Configurations
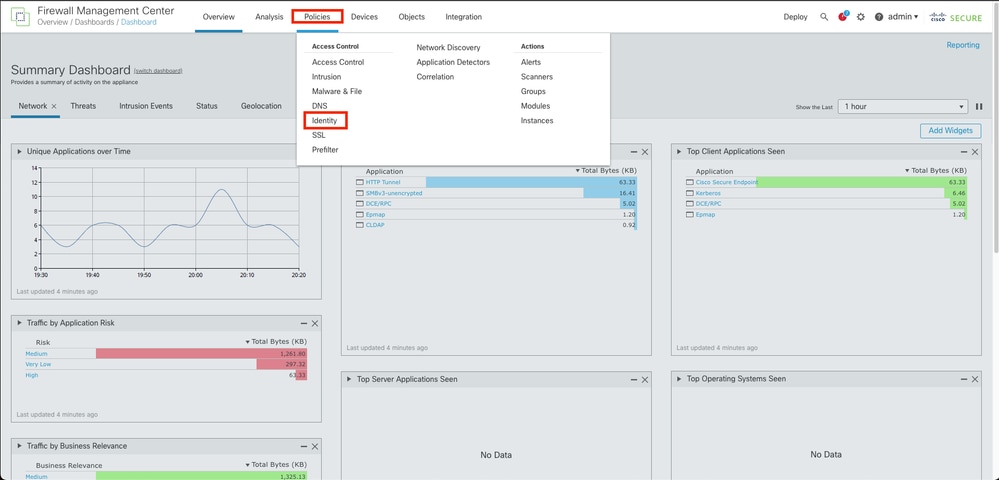
Step 1.In the FMC GUI , Navigate to Policies > Access Control > Identity
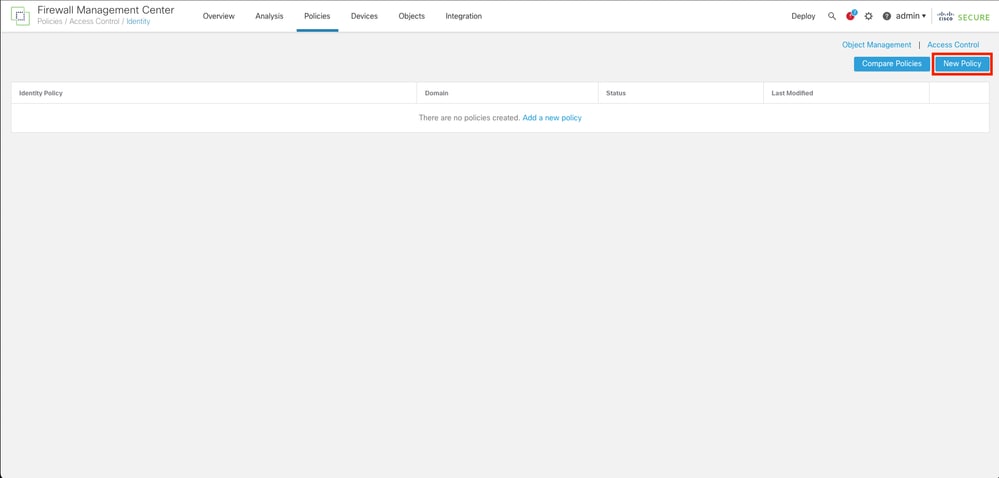
Step 2. Click New Policy.
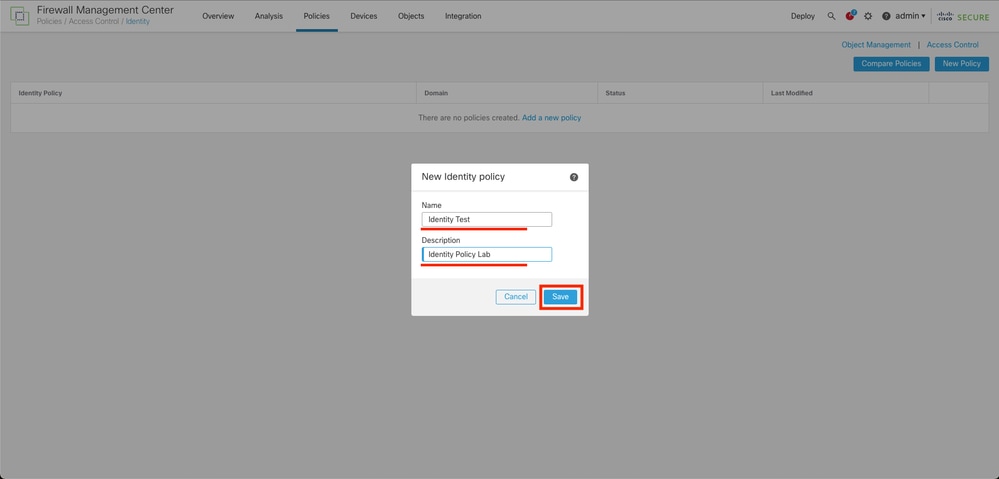
Step 3. Assign a name and description to the new Identity Policy, then click Save.
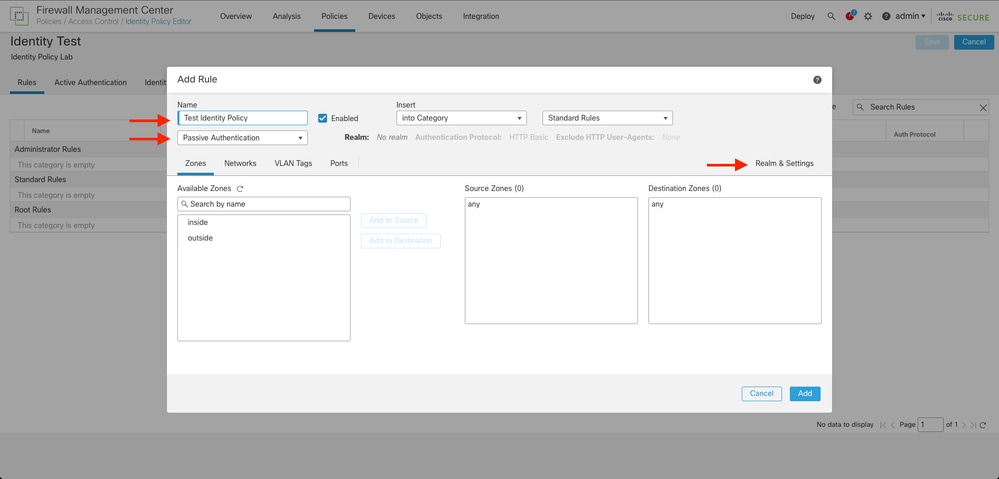
Step 4. Click on + Add Rule Icon.
- Assign a name to the new rule.
- Under the name field, choose the authentication method, select : Passive Authentication.
- At the right of the screen select Realm & Settings.
4. Select a Realm from the drop down menu.
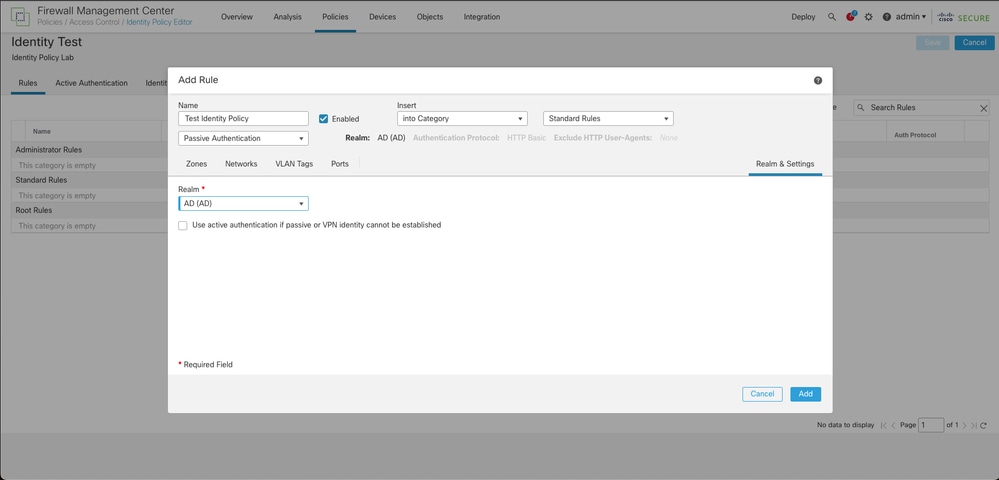
5. Click on Zones at the left of the screen.
6. From the Avaliable Zones menu assign a source and destination zone based in the traffic path that is needed to detect users. To add a zone click on the name of the zone and then select depending on the case Add to Source or Add to Destination.

Note: In this documentation the user detection is going to be applied only for the traffic comes from the inside zone and it is forwarded to the outside zone.
7. Select Add and Save.
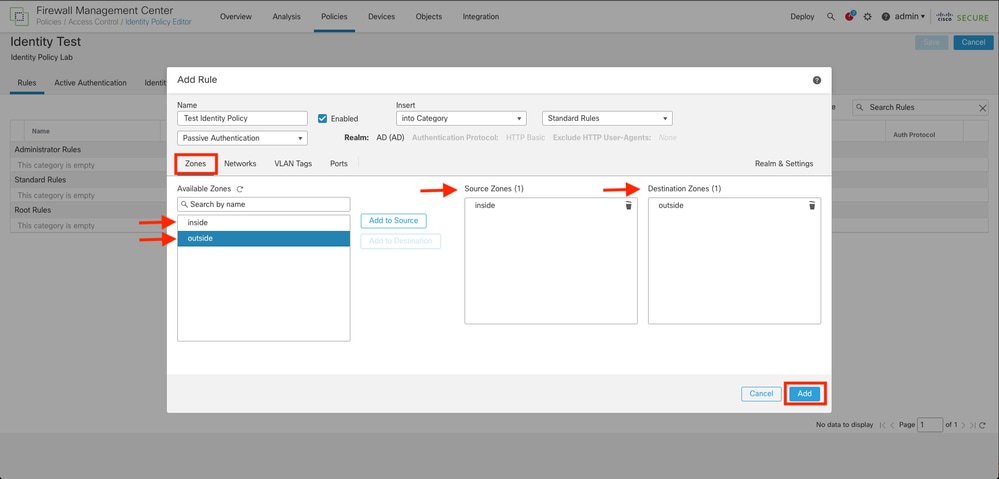
Step 5. Validate the new Rule is in the Identity Policy and click on Save.
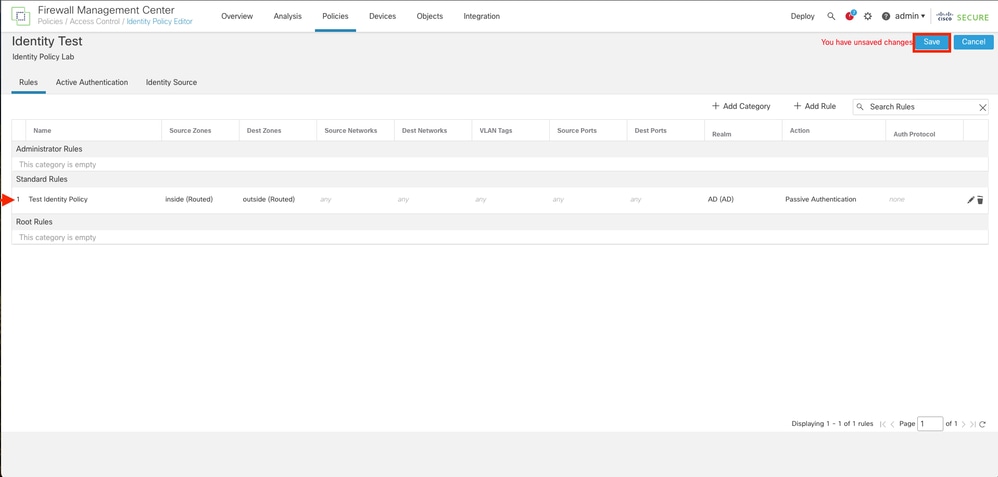
Step 6. Navigate to Policies > Access Control
Step 7. Identify the Access Control Policy that it is going to be deployed in the Firewall handling the users traffic and click over the pencil icon in order to edit the policy.
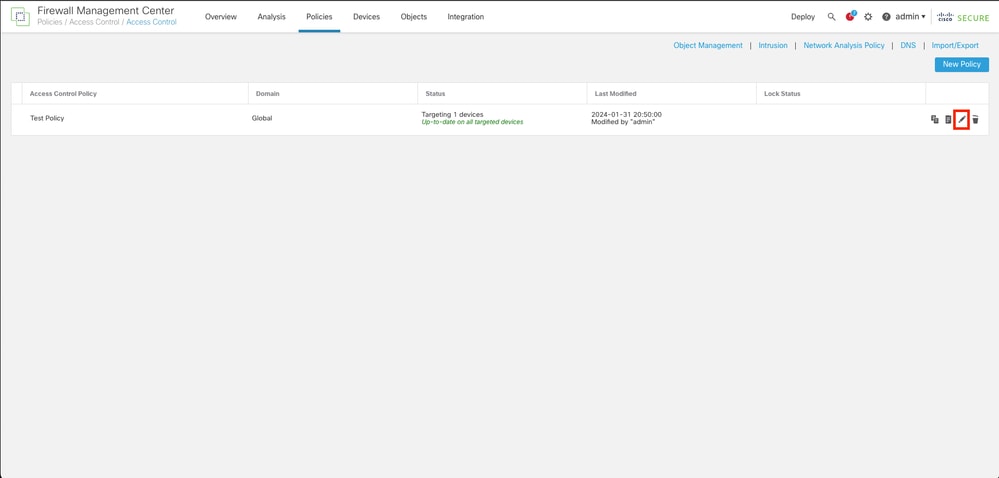
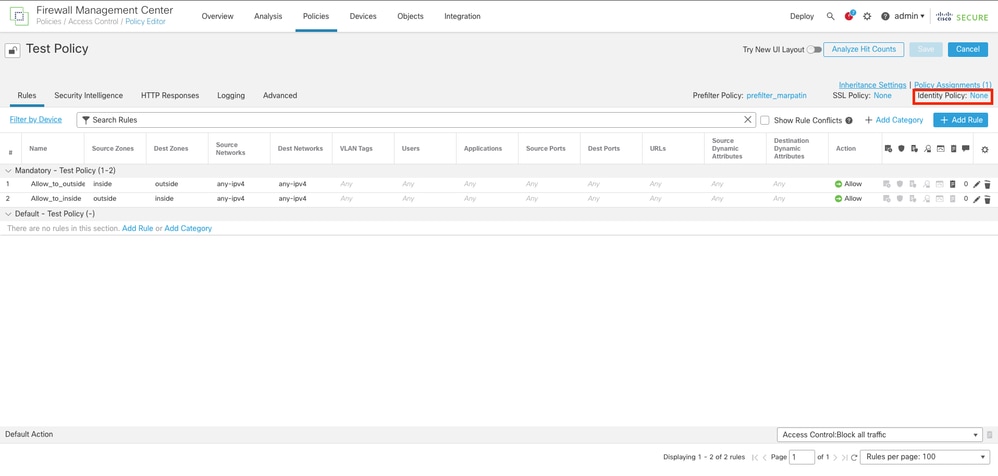
Step 6. Click on None in the Identity Policy field.
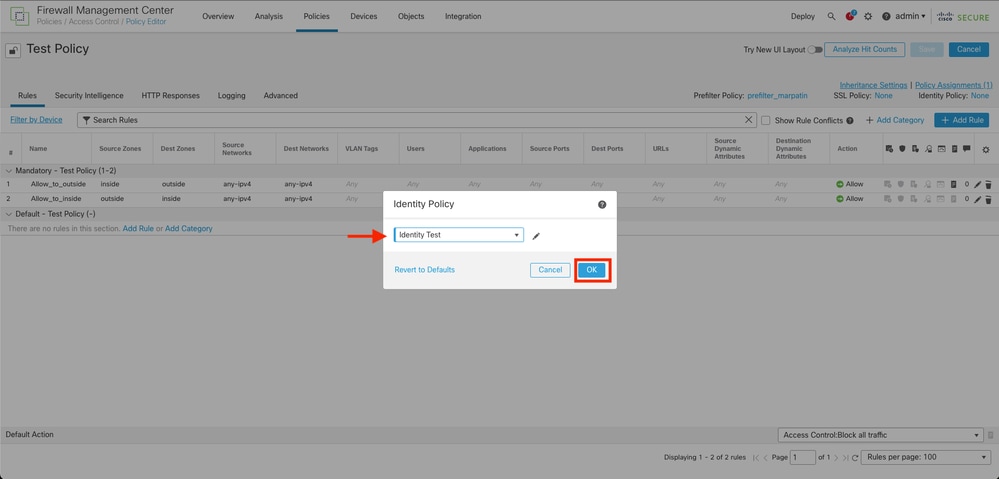
Step 7. From the Drop down menu, select the Policy created previously in step 3, then, click OK to finish the configuration.
Step 8. Save and deploy the configuration to the FTD.
Verify
1. In the FMC GUI navigate to Analysis > Users: Active Sessions

3. Validation from Analysis > Connection> Events: Table view of Connections events


Note: Users matching the traffic criteria for the Identity Policy and Access Control Policy are shown their username in the User field.


 Feedback