Introduction
This document describes configuring ISE server authorization policies for certificate authentication in RAVPN connections managed by CSF on FMC.
Prerequisites
Requirements
Cisco recommends that you have knowledge of these topics:
- Cisco Secure Firewall (CSF)
- Cisco Secure Firewall Management Center (FMC)
- Cisco Identity Services Engine (ISE)
- Certificate Enrollment and SSL basics.
- Certificate Authority (CA)
Components Used
The content of this document is based on these software and hardware versions.
- Cisco Secure Client Version 5.1.6
- Cisco Secure Firewall Version 7.2.8
- Cisco Secure Firewall Management Center Version 7.2.8
The information in this document was created from the devices in a specific lab environment. All of the devices used in this document started with a cleared (default) configuration. If your network is live, ensure that you understand the potential impact of any command.
Configure
Step 1: Install a Trusted CA Certificate

Note: This step needs to be followed if the CA certificate is different from the one that is used to for the server authentication. If the same CA server issues the users certificates, then it is not necessary to import the same CA certificate again.

a. Navigate to Devices > CertificatesAdd.
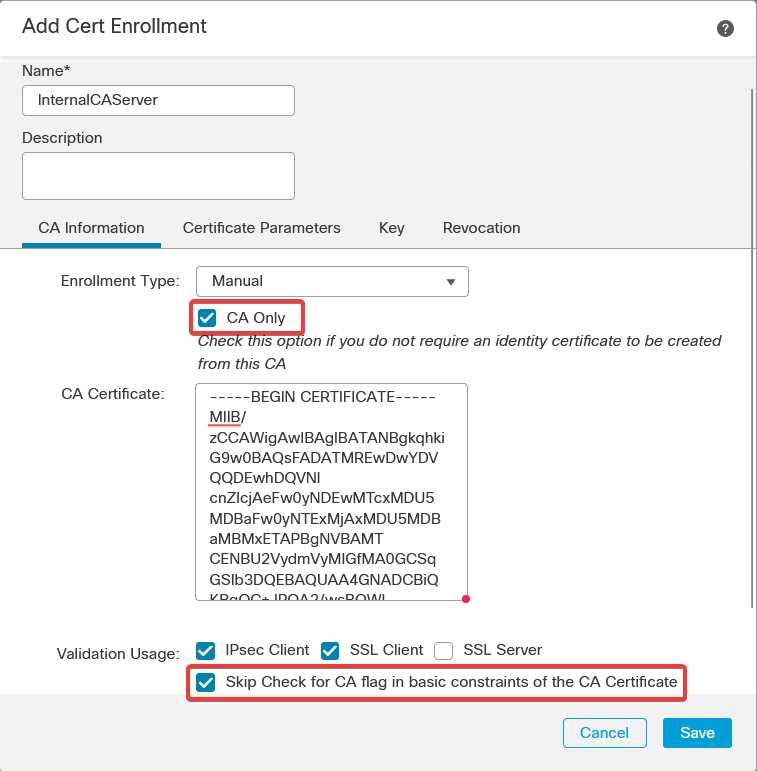
b. Enter a trustpoint name and select Manual as the enrollment type under CA information.
c. Check CA Only and paste the trusted/Internal CA certificate in pem format.
d. Check Skip Check for CA flag in basic constraints of the CA Certificate and click Save.
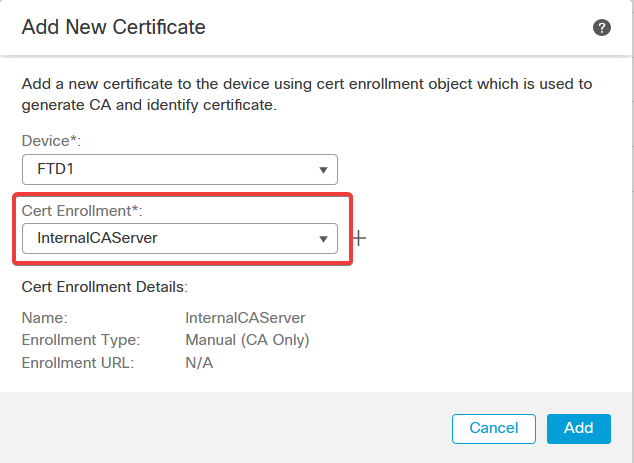
e. Under Cert Enrollment, select the trustpoint from the drop-down which was just created and click Add.
Step 2: Configure ISE/Radius Server Group and Connection Profile
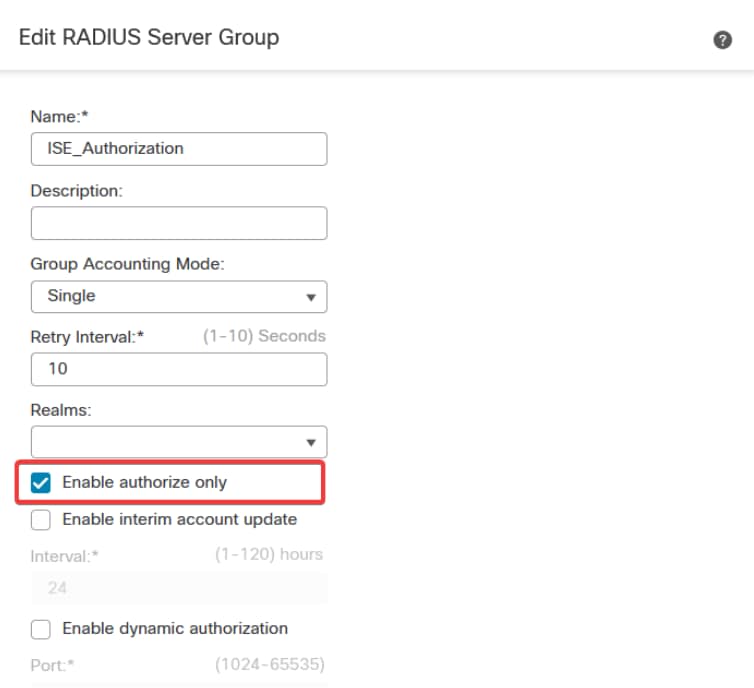
a. Navigate to Objects > AAA Server > RADIUS Server Group and click Add RADIUS Server Group. Check Enable authorize only option.

Warning: If the Enable authorize only option is not checked, the firewall sends an authentication request. However, the ISE expects to receive a username and password with that request, and a password is not used in certificates. As a result, the ISE marks the request as authentication failed.
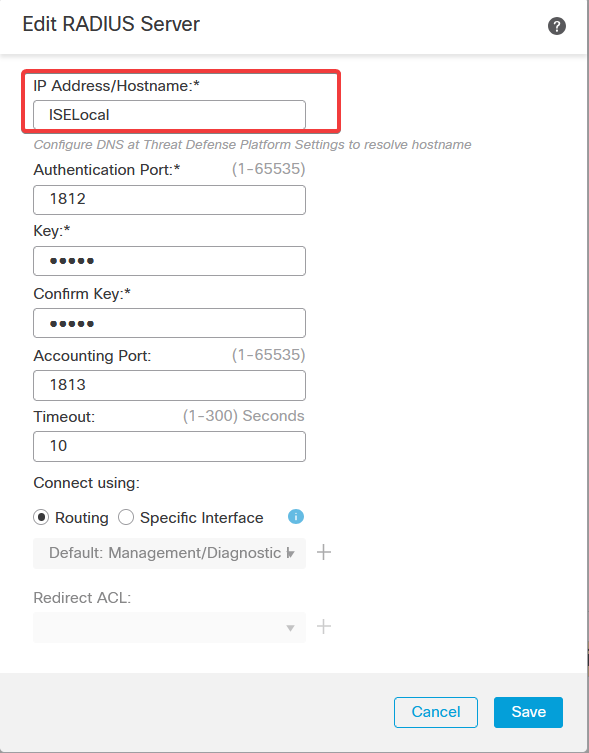
b. Click Add (+) icon, then add the Radius server/ISE server using the IP address or a hostname.
c. Navigate to Devices > Remote Access configuration . Create a new connection profile and set the authentication method to Client Certificate Only. For the Authorization Server, choose the one that was created in the previous steps.
Ensure you check the Allow connection only if user exists in authorization database option. This setting ensures that the connection to RAVPN is completed only if the authorization is permitted.
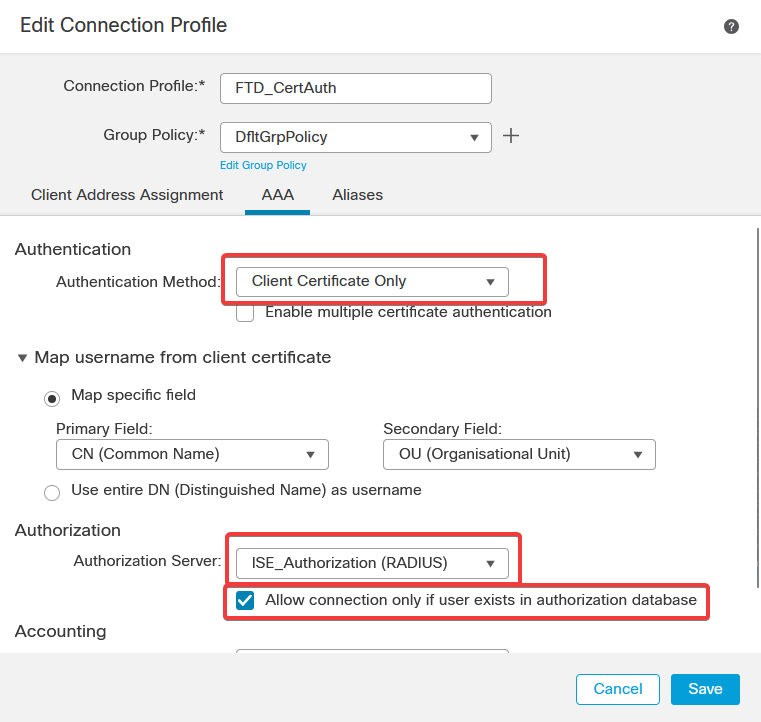
Map Username from the client certificate refers to the information obtained from the certificate to identify the user. In this example, you keep the default configuration, but it can be changed depending on which information is used to identify the users.
Click Save.
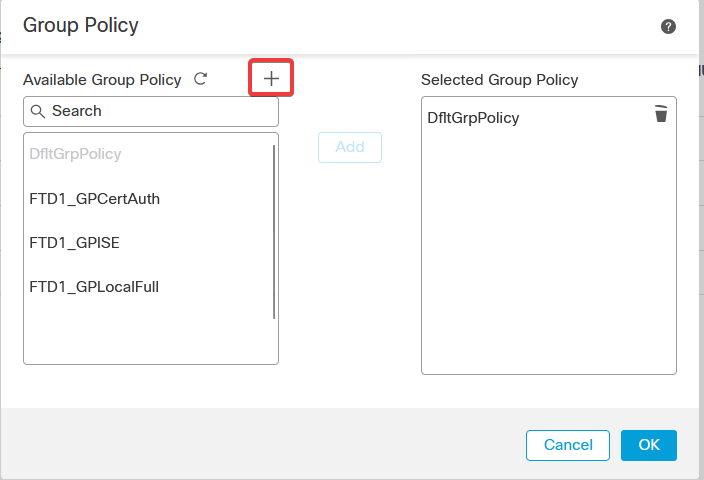
d. Navigate to Advanced > Group Policies. Click Add (+) icon on the right side.

e. Create the group policies. Each group policy is configured based on the organization groups and the networks each group can access.
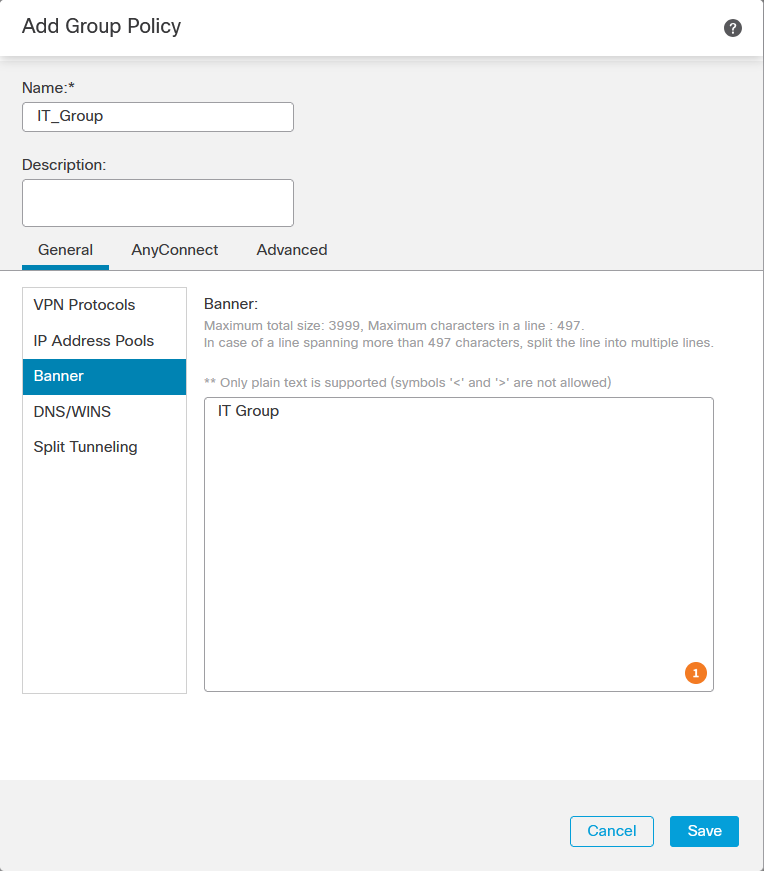
f. On the group policy, perform the configurations specific to each group. A banner message can be added to display after a successful connection.
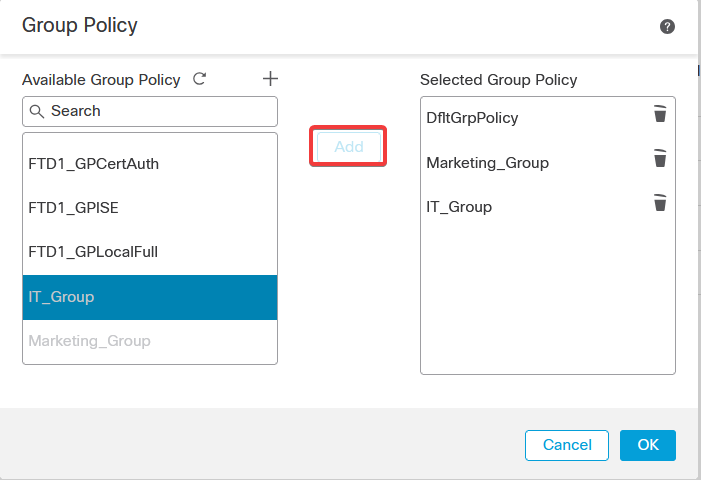
g. Select the group policies on the left side and click Add to move them to the right side. This specifies which group policies are being used in the configuration.
e. Deploy the changes.
Step 3: Configure ISE
Step 3.1: Create Users, Groups, and Certificate Authentication Profile
a. Log into the ISE server and navigate to Administration > Network Resources > Network Devices.
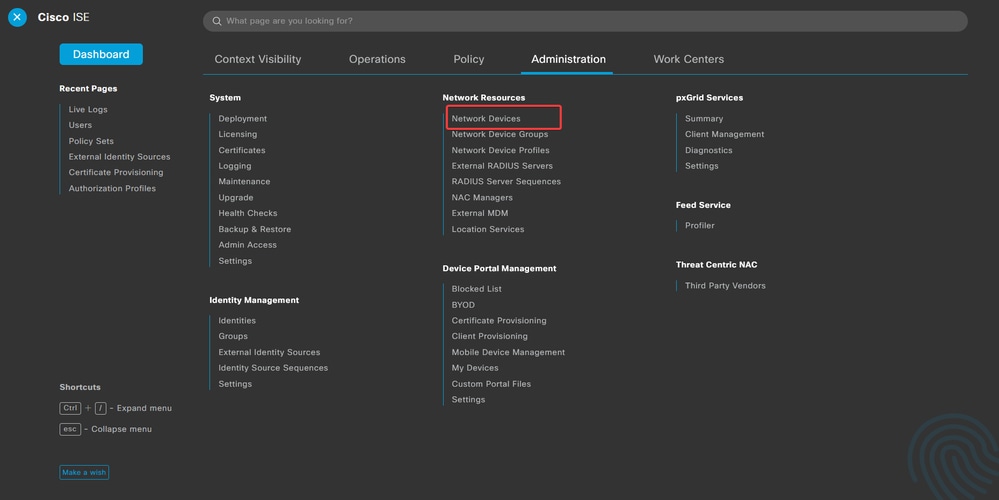
b. Click Add to configure the Firewall as a AAA client.

c. Enter the network device Name and IP Address fields and then check RADIUS Authentication Settings box and add the Shared Secret. This value must be the same one that was used when the RADIUS Server object on FMC was created. Click Save.
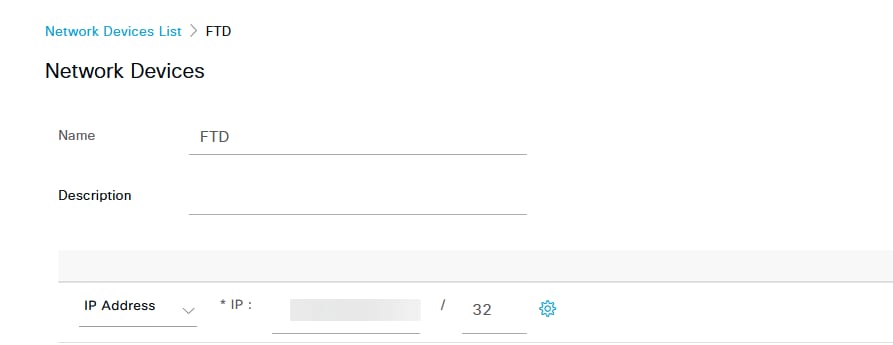

d. Navigate to Administration > Identity Management > Groups.
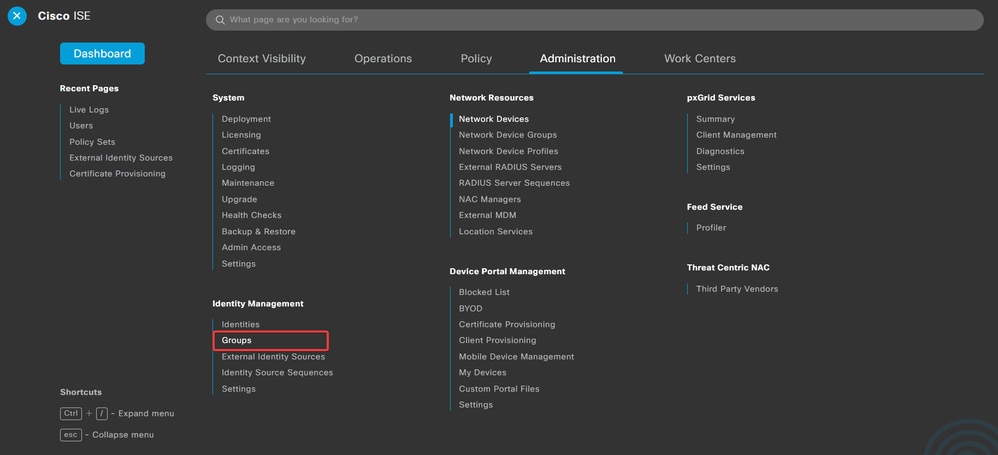
e. Click User Identity Groups and then click Add.
Enter the group NameSubmit.


Note: Repeat to create as many groups as needed.
d. Navigate to Administration > Identity Management > Identities.
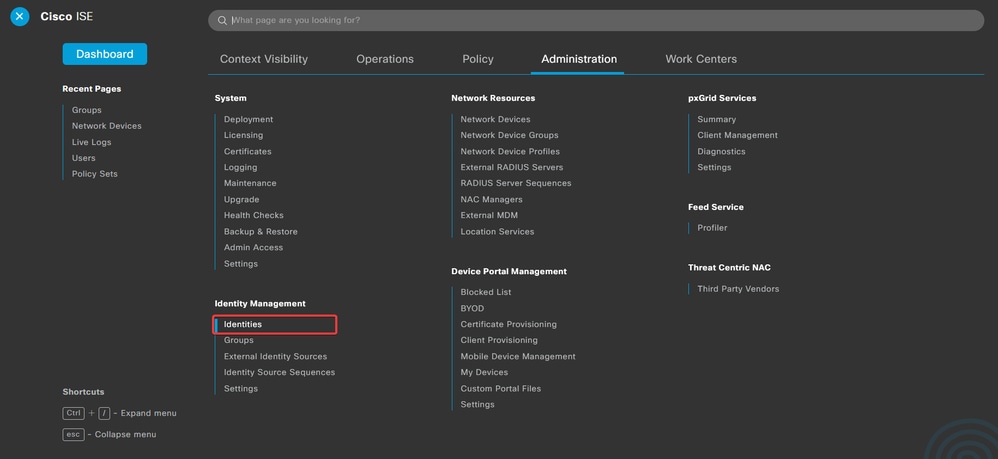
e. Click Add in order to create a new user in the server local database.
Enter the Username and Login Password. Then, navigate to the end of this page and select the User Group.
Click Save.

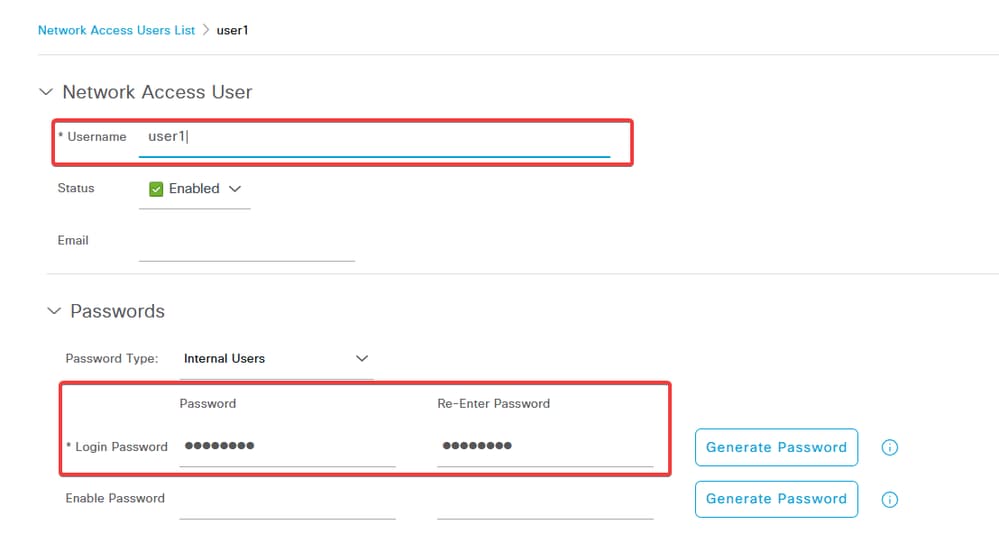


Note: It is necessary to configure a username and password to create internal users. Even though it is not required for RAVPN authentication, which is performed using certificates, these users can be used for other internal services that do require a password. Therefore, be sure to use a strong password.
f. Navigate to Administration > Identity Management > External Identify Sources.
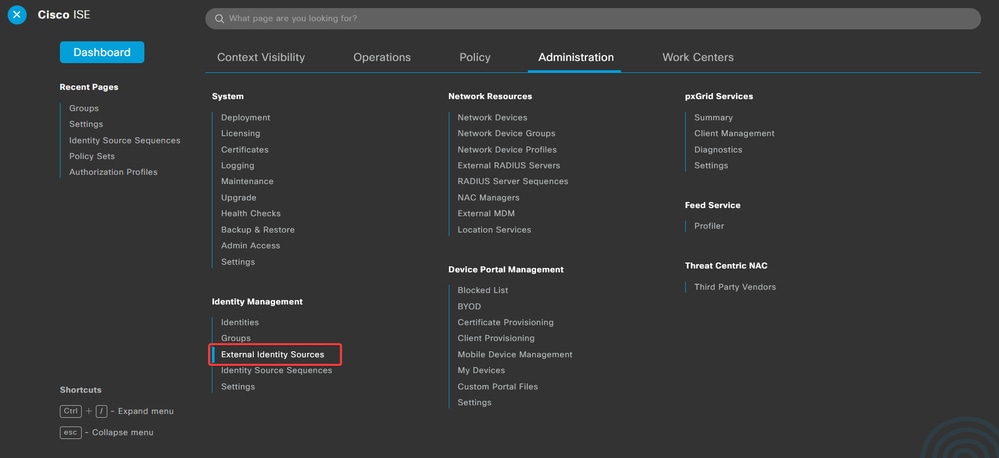
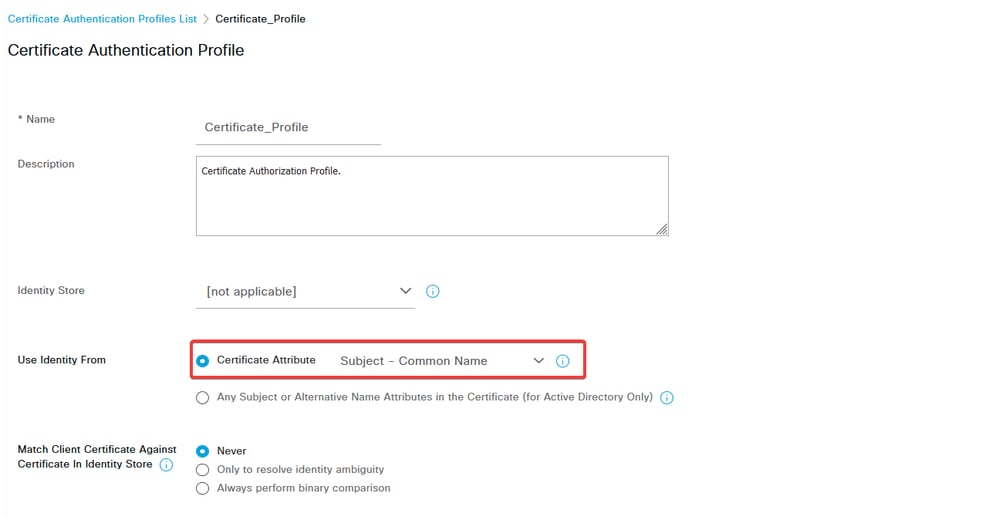
g. Click Add to create a Certificate Authentication Profile.
Certificate Authentication Profile specifies how client certificates are validated, including which fields in the certificate can be checked (Subject Alternative Name, Common Name, and so on).

Step 3.2: Configure Authentication Policy
The authentication policy is used to authenticate that the request is originated from the firewall and from the specific Connection Profile.
a. Navigate to Policy > Policy Sets.
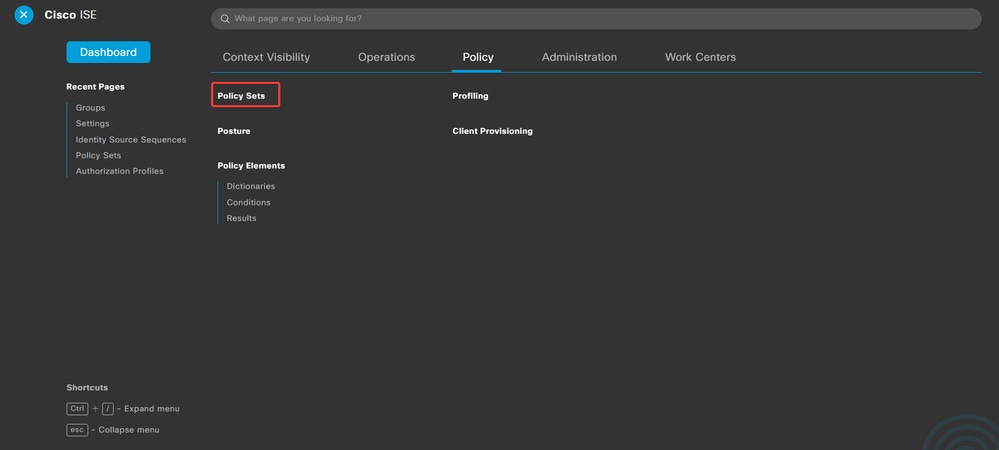
Select the default authorization policy by clicking the arrow on the right side of the screen:
b. Click the drop-down menu arrow next to Authentication Policy to expand it. Then, Click the add (+) icon in order to add a new rule.

Enter the name for the rule and select the add (+) icon under Conditions column.

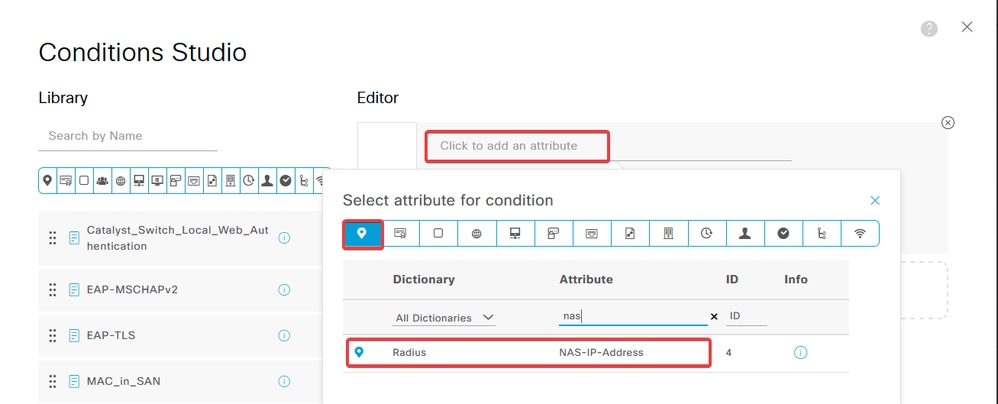
c. Click the Attribute Editor textbox and click the NAS-IP-Address icon. Enter the IP address of the firewall.
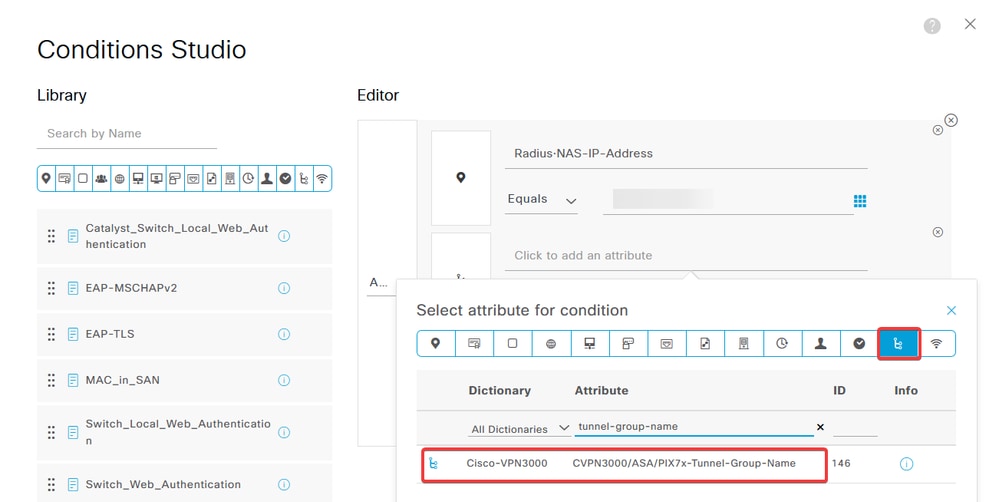
d. Click New and then add the other attribute Tunnel-Group-name. Enter the Connection Profile name that was configured on the FMC.
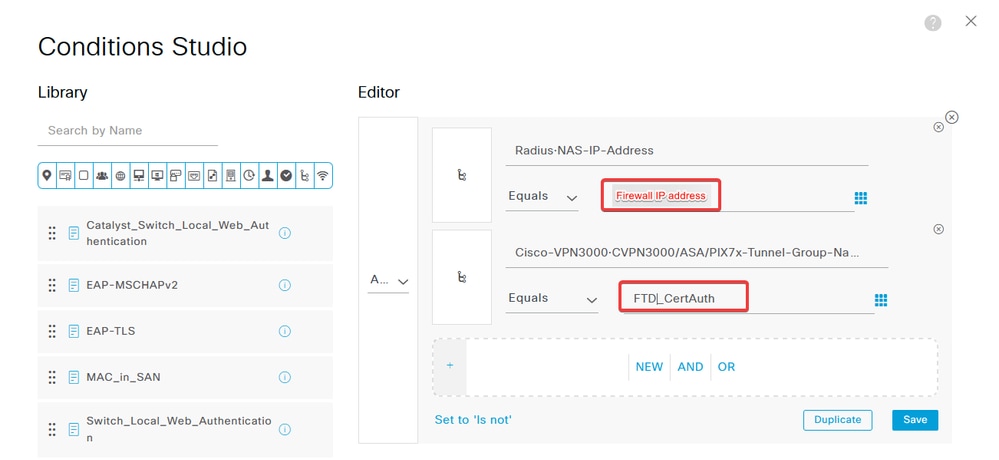
e. Under the Use column, select the Certificate Authentication Profile that was created. By doing this, it specifies the information defined in the profile that is used to identify the users.

Click Save.
Step 3.3: Configure Authorization Policy
a. Click the drop-down menu arrow next to Authorization Policy to expand it. Then, click the add (+) icon in order to add a new rule.

Enter the name for the rule an select the add (+) icon under Conditions column.

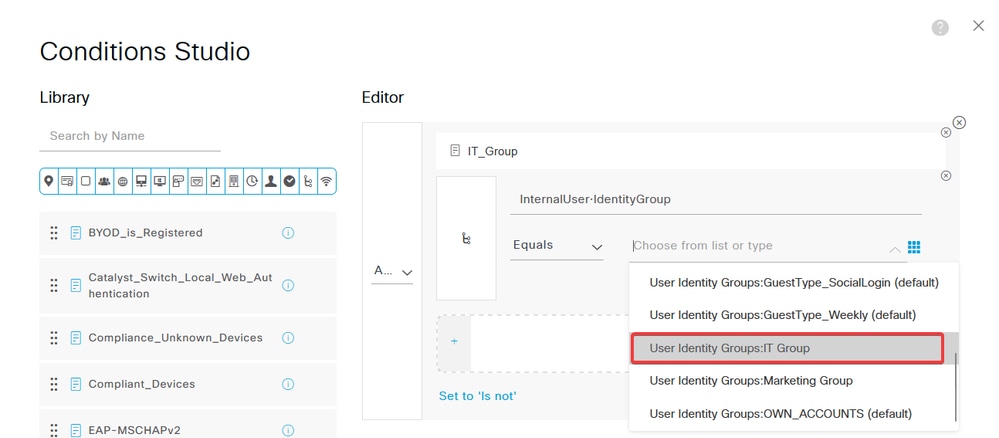
b. Click the Attribute Editor textbox and click the Identity group icon. Select the Identity group - Name attribute.
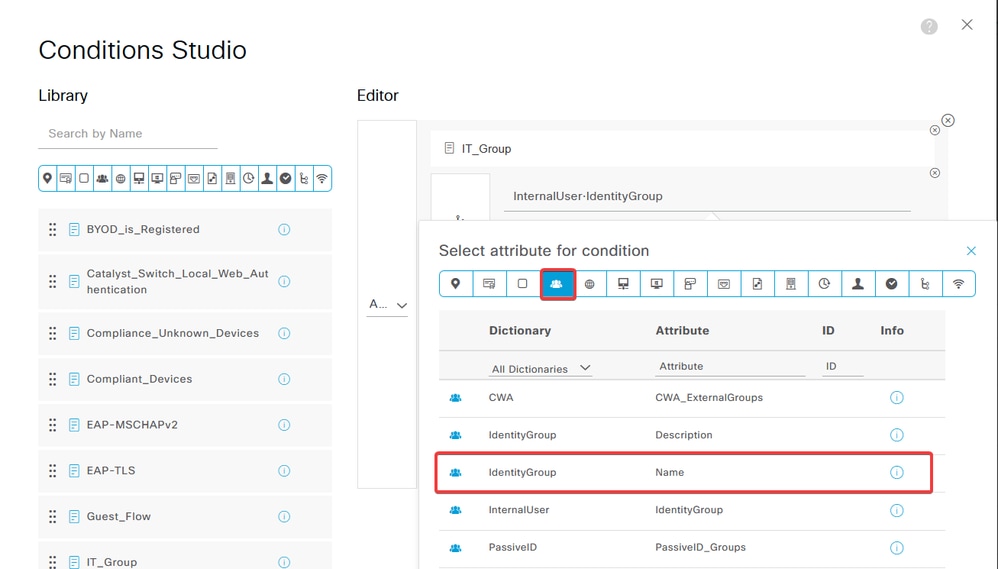
Select Equals as the operator then, click the drop-down menu arrow to show the available options and select User Identity Groups:<GROUP_NAME>.
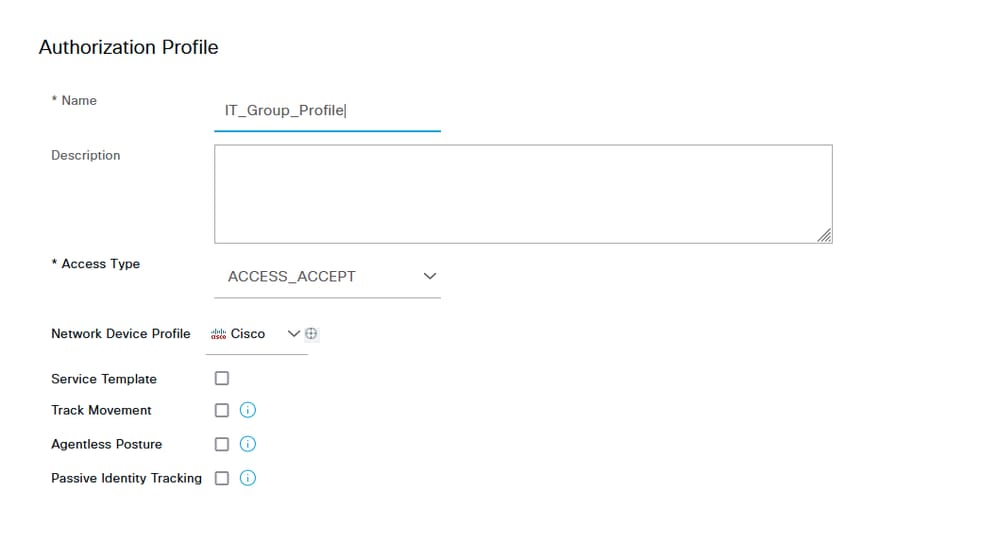
c. In the Profiles column, click the add (+) icon and choose Create a New Authorization Profile.

Enter the profile Name.
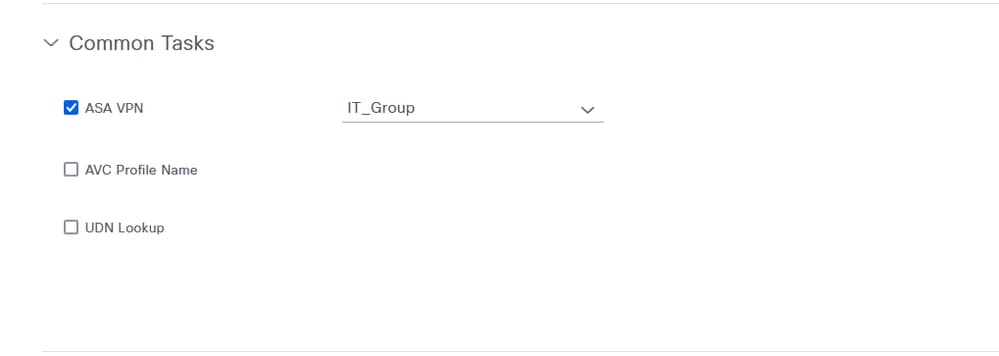
Navigate to Common Tasks and check ASA VPN. Then, type the group policy name, which needs to be the same as the one created on the FMC.
The attributes that come next were assigned to each group:

Click Save.

Note: Repeat Step 3.3: Configure Authorization Policy for each group that was created.
Verify
1. Run the command show vpn-sessiondb anyconnect and verify if the user is using the correct group policy.
firepower# show vpn-sessiondb anyconnect

Session Type : AnyConnect
Username      : user1                  Index        : 64
Assigned IP   : 192.168.55.2           Public IP    :
Protocol      : AnyConnect-Parent
License       : AnyConnect Premium
Encryption    : AnyConnect-Parent: (1)none
Hashing       : AnyConnect-Parent: (1)none
Bytes Tx      : 15084                  Bytes Rx     : 99611
Group Policy  : IT_Group               Tunnel Group : FTD_CertAuth
Login Time    : 22:21:43 UTC Tue Oct 22 2024
Duration      : 3h:03m:50s
Inactivity    : 0h:41m:44s
VLAN Mapping  : N/A                    VLAN         : none
Audt Sess ID  : 96130a0f0004000067182577
Security Grp  : none                   Tunnel Zone  : 0

Username      : User2                  Index        : 70
Assigned IP   : 192.168.55.3           Public IP    :
Protocol      : AnyConnect-Parent SSL-Tunnel DTLS-Tunnel
License       : AnyConnect Premium
Encryption    : AnyConnect-Parent: (1)none SSL-Tunnel: (1)AES-GCM-256 DTLS-Tunnel: (1)AES-GCM-256
Hashing       : AnyConnect-Parent: (1)none SSL-Tunnel: (1)SHA384 DTLS-Tunnel: (1)SHA384
Bytes Tx      : 15112                  Bytes Rx     : 19738
Group Policy  : Marketing_Group        Tunnel Group : FTD_CertAuth
Login Time    : 01:23:08 UTC Wed Oct 23 2024
Duration      : 0h:02m:25s
Inactivity    : 0h:00m:00s
VLAN Mapping  : N/A                    VLAN         : none
Audt Sess ID  : 96130a0f0004600067184ffc
Security Grp  : none                   Tunnel Zone  : 0

firepower#
- In the group policy, you can configure a banner message that is displayed when the user successfully connects. Each banner can be used to identify the group that has authorization.
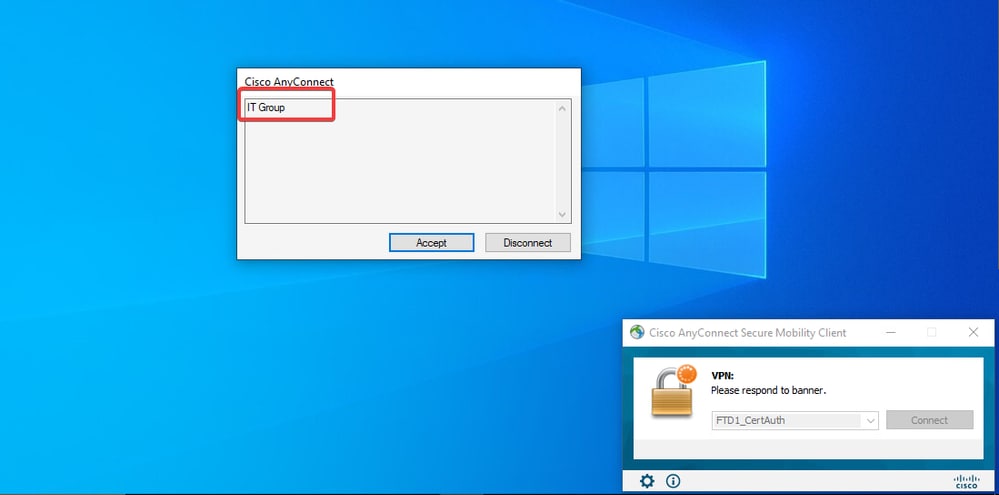
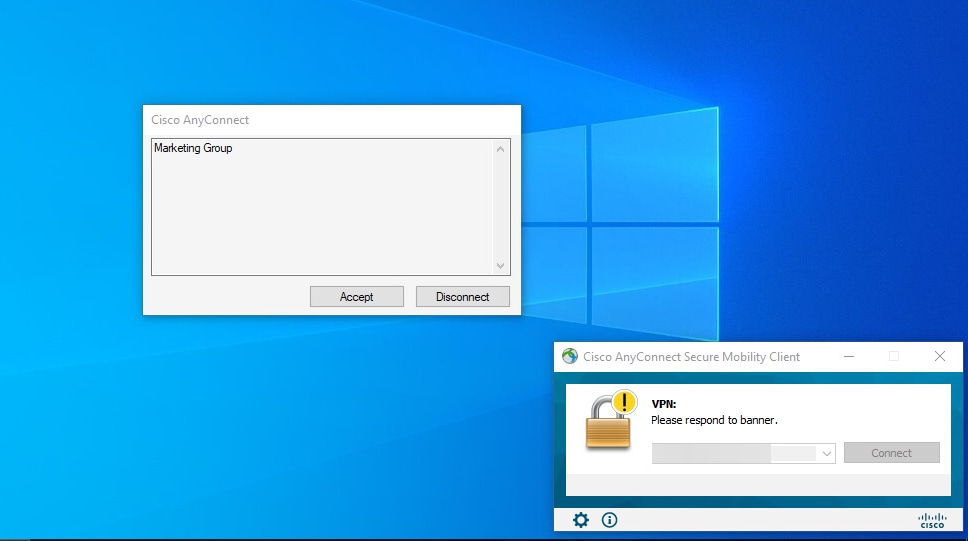
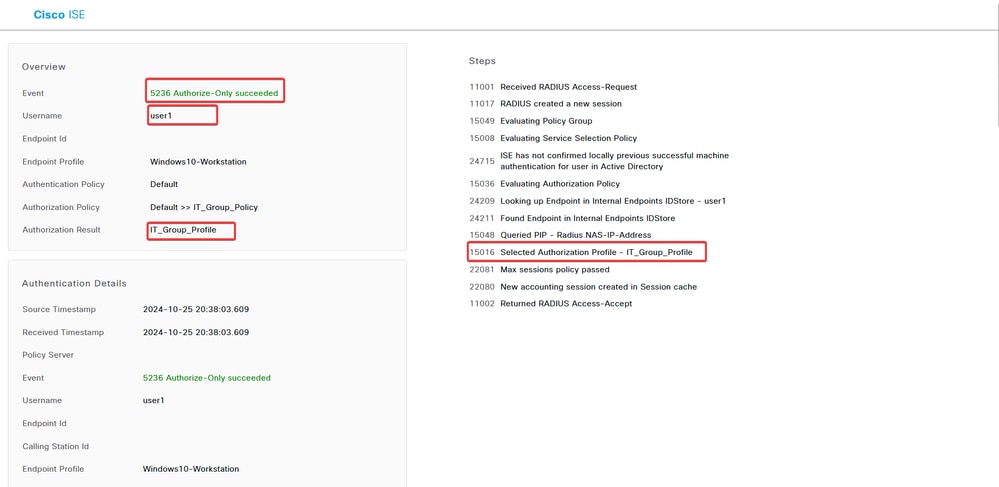
- In live logs, verify if the connection is using the appropriate authorization policy. Click
Detailsand show the Authentication Report.

Troubleshoot
This section provides information you can use in order to troubleshoot your configuration.
1. Debugs can be run from the diagnostic CLI of the CSF for Certificate Authentication.
debug crypto ca 14
debug webvpn anyconnect 255
debug crypto ike-common 255
2. Use AAA debugs to verify the assignment of local and/or remote attributes.
debug aaa common 255
debug aaa shim 255
debug aaa authentication
debug aaa authorization
debug radius all
On ISE:
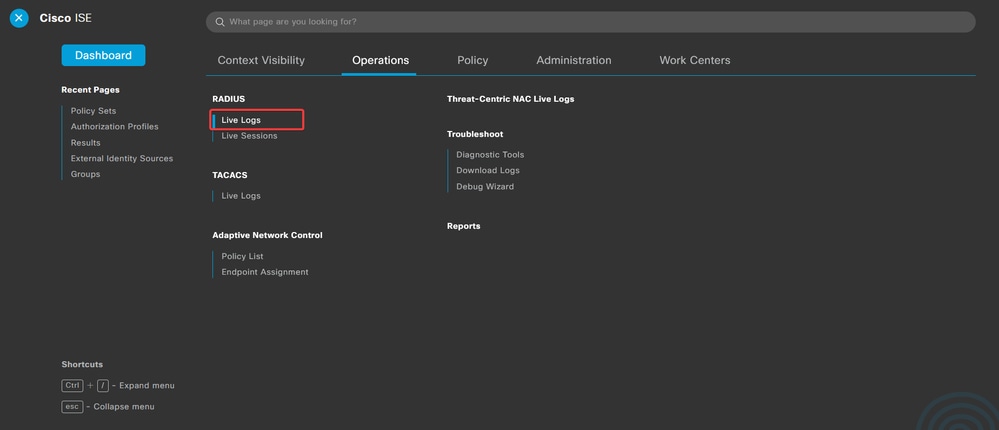
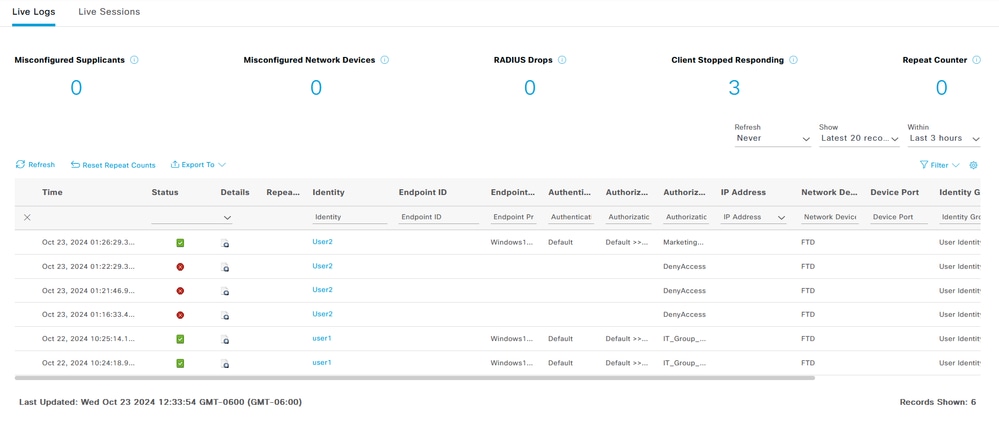
1. Navigate to Operations > RADIUS > Live Logs.


 Feedback