Introduction
This document describes how to configure second factor authentication on Secure Web Appliance with Cisco Identity Service Engine as a RADIUS server.
Prerequisites
Requirements
Cisco recommends that you have knowledge of these topics:
- Basic knowledge in SWA.
- Knowledge of authentication and authorization policies configuration on ISE.
- Basic RADIUS knowledge.
Cisco recommends that you also have:
- Secure Web Appliance (SWA) and Cisco Identity Service Engine (ISE) administration access.
- Your ISE is integrated to Active Directory or LDAP.
- Active Directlory or LDAP is configured with a username 'admin' to authenticate SWA default 'admin' account.
- Compatible WSA and ISE versions.
Components Used
The information in this document is based on these software versions:
- SWA 14.0.2-012
- ISE 3.0.0.
The information in this document was created from the devices in a specific lab environment. All of the devices used in this document started with a cleared (default) configuration. If your network is live, ensure that you understand the potential impact of any command.
Background Information
When you enable second factor authentication for administrative users on SWA, the device verifies the user credential with the RADIUS server for the second time after verify credentials configured in SWA.
Network Topology
 Image- Network Topology Diagram
Administrative users access SWA on port 443 with their credentials. SWA verifies the credentials with the RADIUS server for second factor authentication.
Configuration Steps
ISE Configuration
Step 1. Add a new Network Device. Navigate to Administration > Network Resources > Network Devices > +Add.
 Add SWA as Network Device in ISE
Step 2. Configure Network device in ISE.
Step 2.1. Assign a Name to the network device object.
Step 2.2. Insert the SWA IP address.
Step 2.3. Check the RADIUS checkbox.
Step 2.4. Define a Shared Secret.

Note: The same key must be used later to configure the SWA.
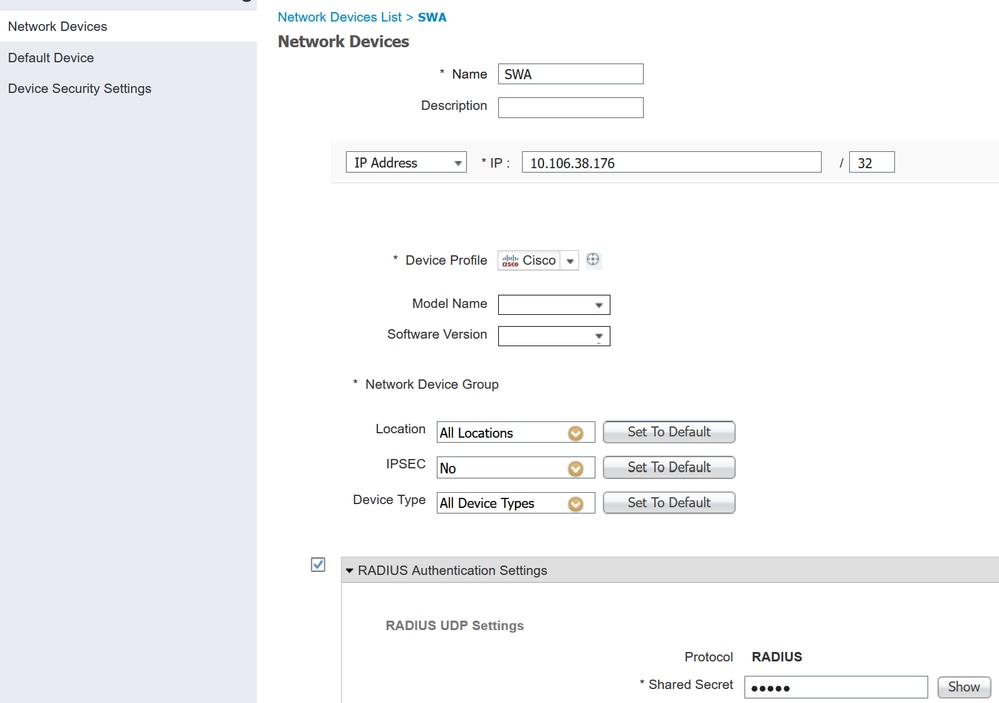 Configure SWA Network Device Shared Key
Step 2.5. Click Submit.
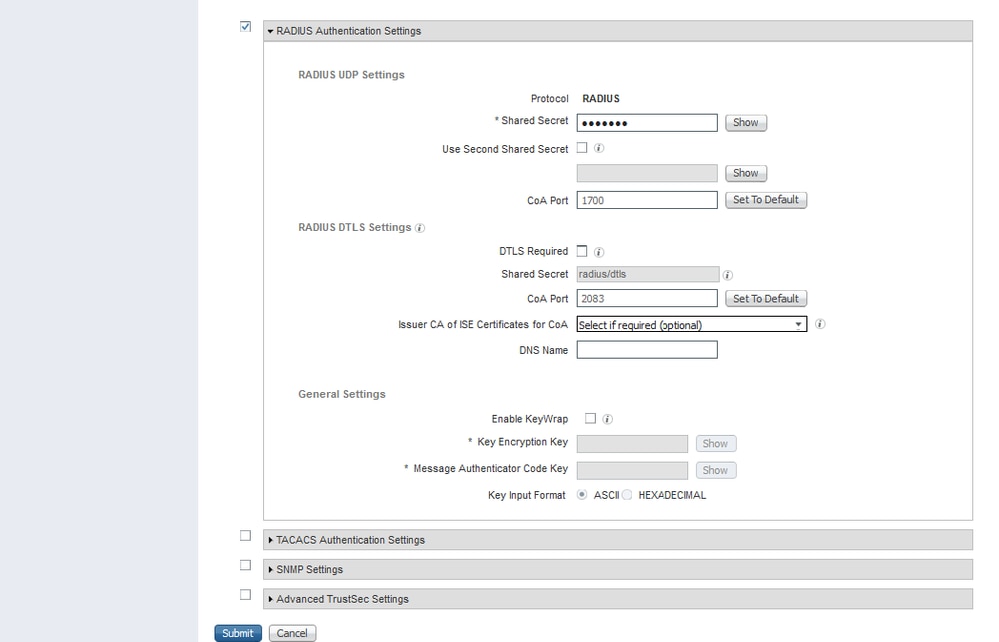 Submit Network Device Configuration
Step 3. You need to create Network Access Users that match with user name configured in SWA. Navigate to Administration > Identity Management > Identities > + Add.
 Add Local Users in ISE
Step 3.1. Assign a Name.
Step 3.2. (Optional) Enter the Email address of the user.
Step 3.3. Set Password.
Step 3.4. Click Save.
 Add a local User in ISE
Step 4. Create policy set that matches the SWA IP address. This is to prevent access to other devices with these user credentials.
Navigate to Policy > PolicySets and click + icon placed at the upper left corner.
 Add Policy Set in ISE
Step 4.1. A new line is placed at the top of your Policy Sets. Enter Name for new policy.
Step 4.2. Add a condition for RADIUS NAS-IP-Address attribute to match the SWA IP address.
Step 4.3. Click Use to keep the changes and exit the editor.
 Add Policy to Map SWA Network Device
Step 4.4. Click Save.
 Policy Save

Note: This example allowed the Default Network Access Protocols list. You can create a new list and narrow it down as needed.
Step 5. To view the new Policy Sets, click the ">" icon in the View column.
Step 5.1. Expand the Authorization Policy menu and click the + icon to add a new rule to allow the access to all authenticated users.
Step 5.2. Set a name.
Step 5.3. Set the conditions to match the Dictionary Network Access with Attribute AuthenticationStatus Equals AuthenticationPassed and click Use.
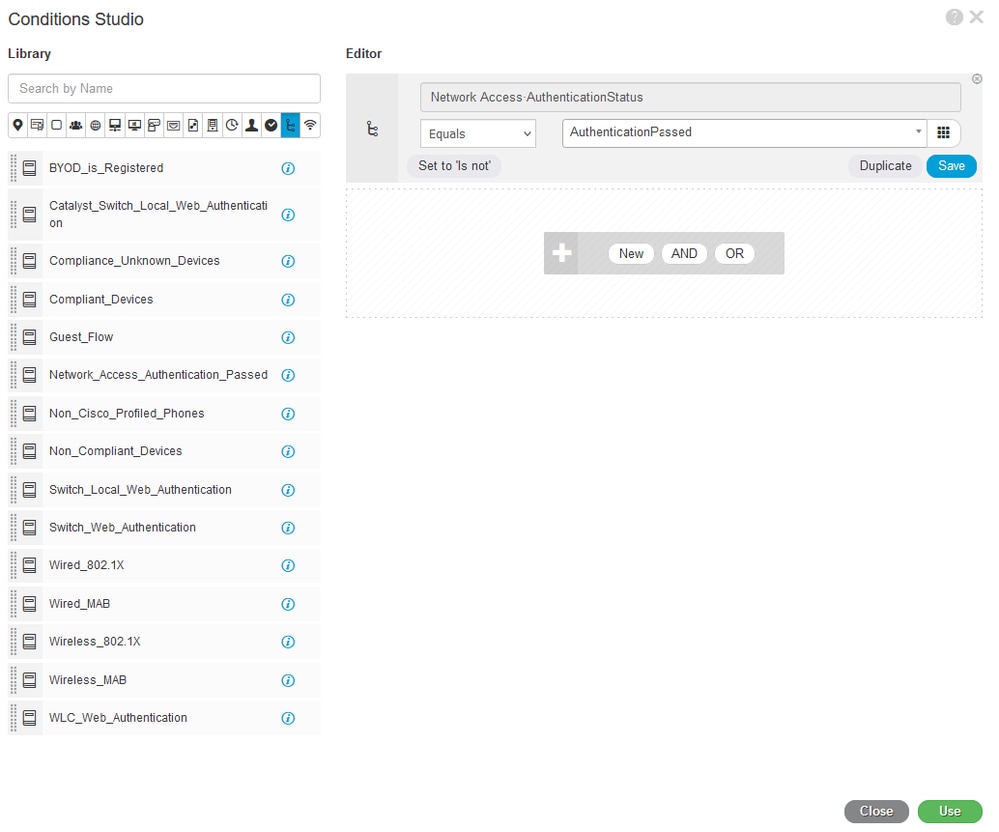 Select Authorization Condition
Step 6. Set the default PermitAccess as Authorization Profile and click Save.
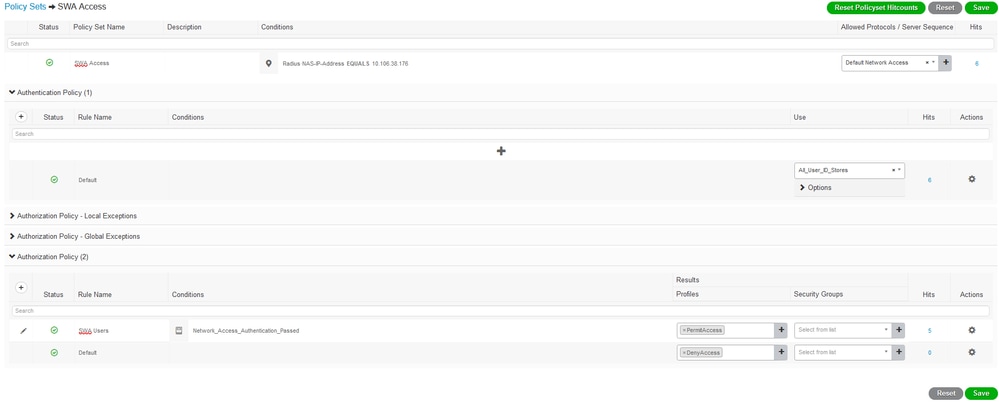 Select Authorization Profile
SWA Configuration
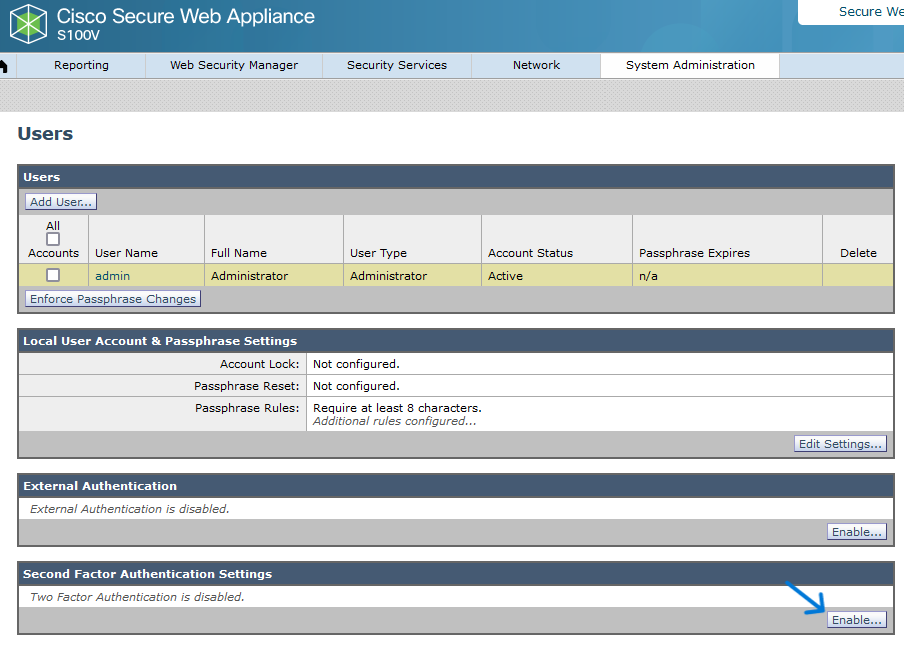
Step 1. From SWA GUI navigate to System Administration and click Users.
Step 2. Click Enable in Second Factor Authentication Settings.
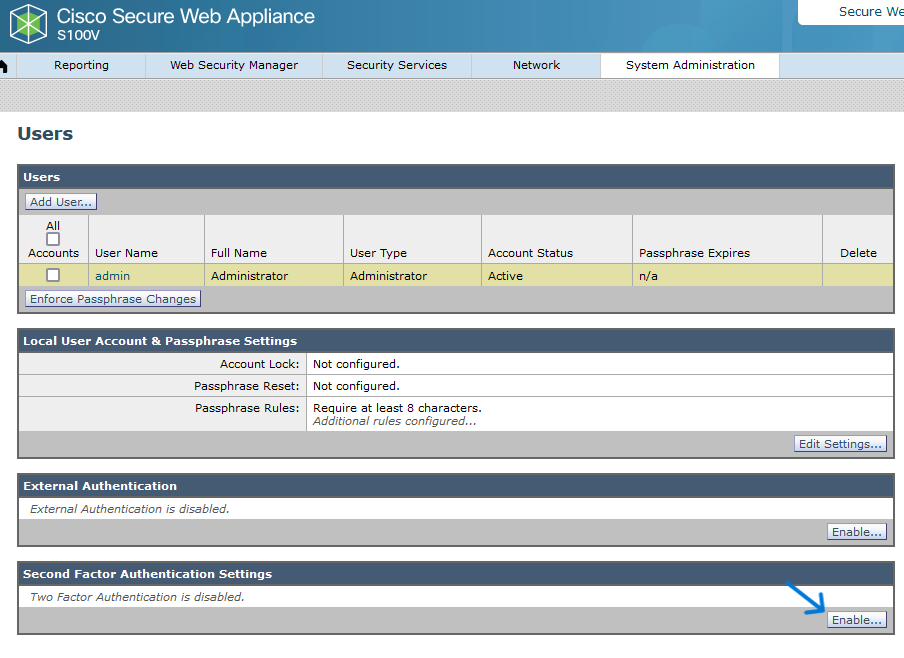 Enable Second Factor Authentication in SWA
Step 3. Enter IP address of the ISE in RADIUS Server Hostname field and enter Shared Secret that is configured in Step 2 of ISE Configuration.
Step 4. Select required Predefined Roles which you need Second Factor enforcement to be enabled.

Caution: If you enable second factor authentication in SWA, default 'admin' account also be enabled with Second Factor enforcement. You have to integrate ISE with LDAP or Active Directory (AD) to authenticate 'admin' credentials as ISE does not allow you to configure 'admin' as a Network Access User.
 Enable Second Factor Authentication in SWA

Caution: If you enable second factor authentication in SWA, default 'admin' account also be enabled with Second Factor enforcement. You have to integrate ISE with LDAP or Active Directory (AD) to authenticate 'admin' credentials as ISE does not allow you to configure 'admin' as a Network Access User.
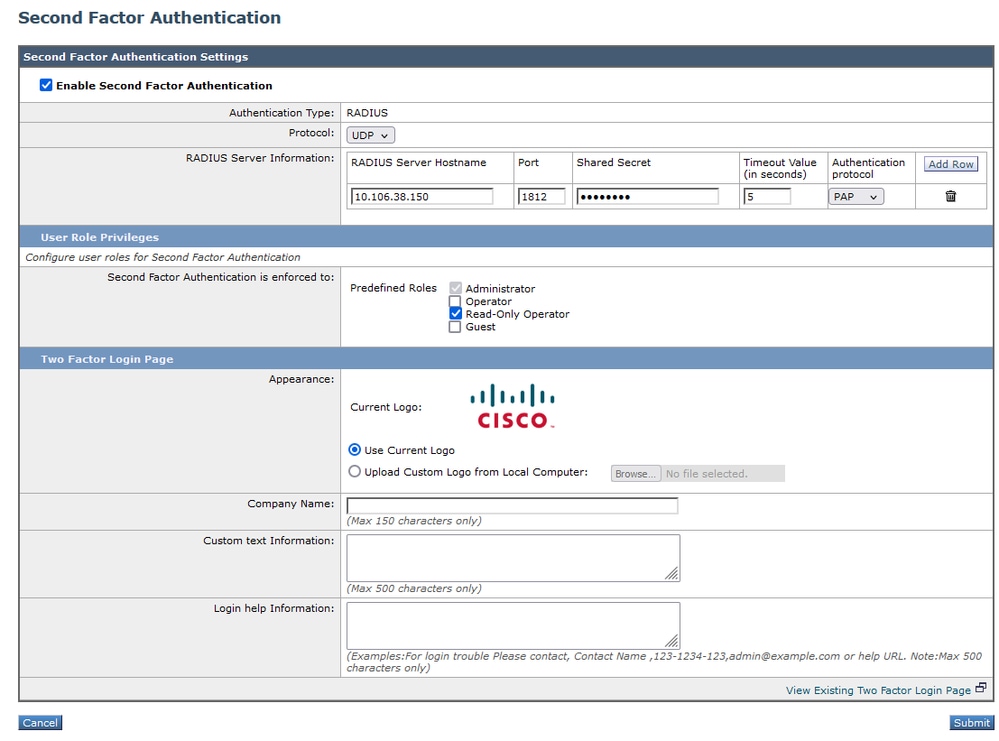 Configure Second Factor Authentication
Step 5: To configure Users in SWA, click Add User. Enter User Name and select User Type required for the desired role. Enter Passphrase and Retype Passphrase.
 User configuration in SWA
Step 6: Click Submit and Commit Changes.
Verify
Access SWA GUI with the configured user credentials. After successful authentication, you get redirected to secondary authentication page. Here, you need to enter the secondary authentication credentials configured in ISE.
 Verify Second Factor Login
References


 Feedback