Introduction
This document describes a deployment on Cisco Security Manager (CSM) using workflow and ticket base.
Prerequisites
Requirements
Cisco recommends that you have knowledge of these topics:
- Knowledge of Adaptive Security Appliance (ASA)
- Knowledge of Firewall configuration
Components Used
The information in this document is based on these software and hardware versions:
- Windows Server 2012
- CSM v4.22
- ASA v9.12.5
The information in this document was created from the devices in a specific lab environment. All of the devices used in this document started with a cleared (default) configuration. If your network is live, ensure that you understand the potential impact of any command.
Background Information
Specific requirements for this document include:
- Ensure you have enough privileges to make the necessary changes
- Ensure that you understand the changes you are going to make with each deployment
- Choose the appropriate guide depending on your current configuration
Configure
Non-Workflow Mode without Ticket Management
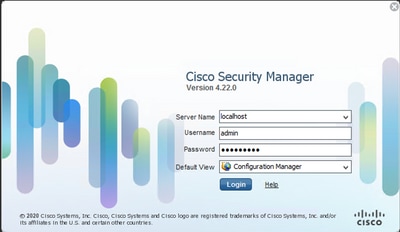
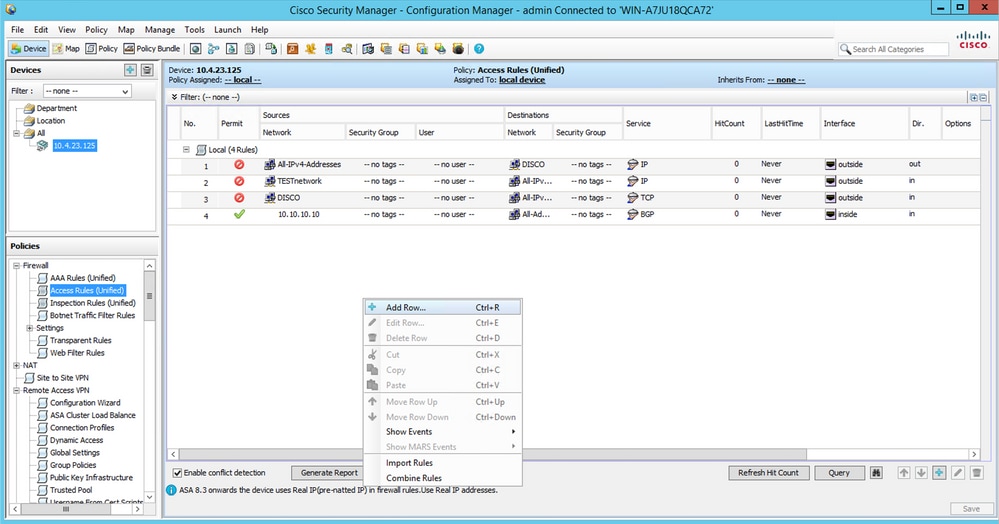
Step 1. Log in to Cisco Security Manager Client. From the dropdown, choose Configuration Manager.
Step 2. Make changes that you like to deploy.
Step 3. Navigate to Submit & Deploy Changes.

Step 4. Choose the devices that you want to deploy to and when you are ready, click Deploy.
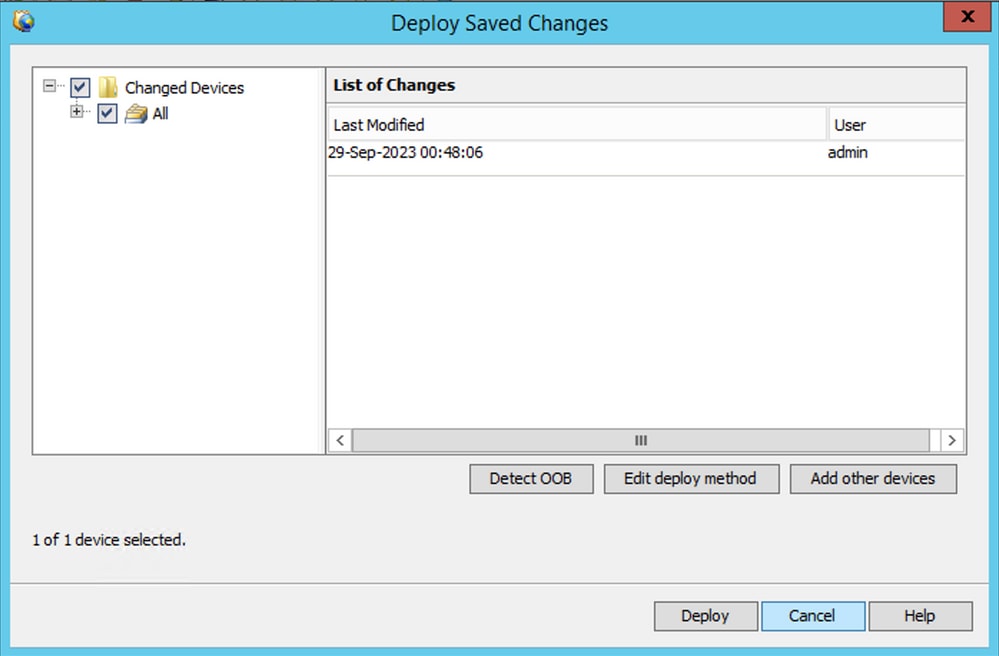

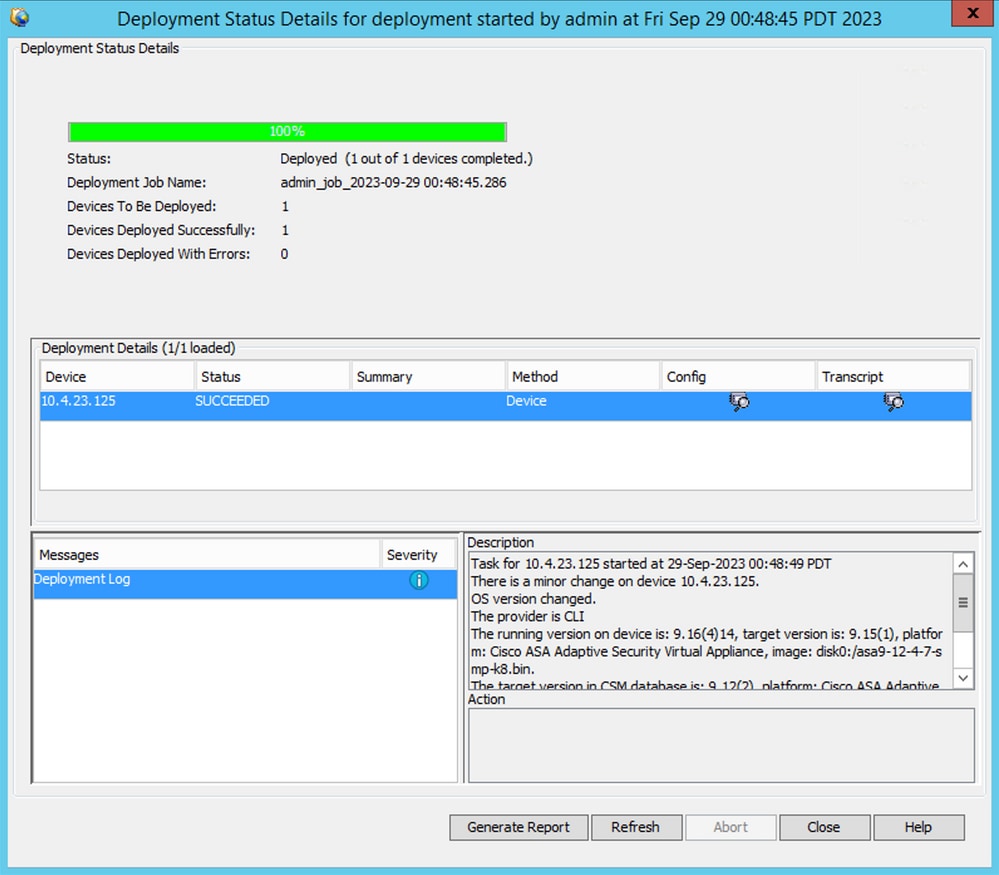
Note: While deployment is running, a pop-up window appears where you can monitor the progress.
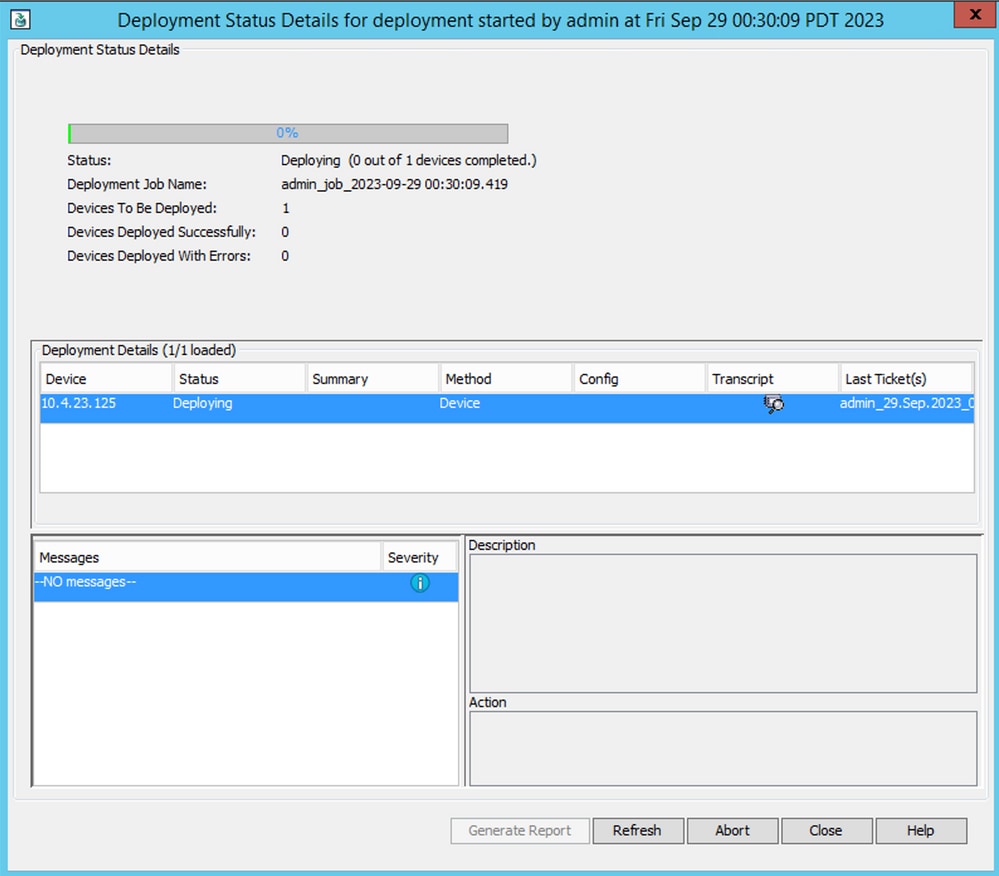
Step 5. (Optional) Once the deployment is accomplished, you can download the report or Transcript.
Non-Workflow Mode with Ticket Management
Enable Ticket Management
In order to use the ticket base, it must be enabled. If you already have a ticket base flow enabled, skip this step.
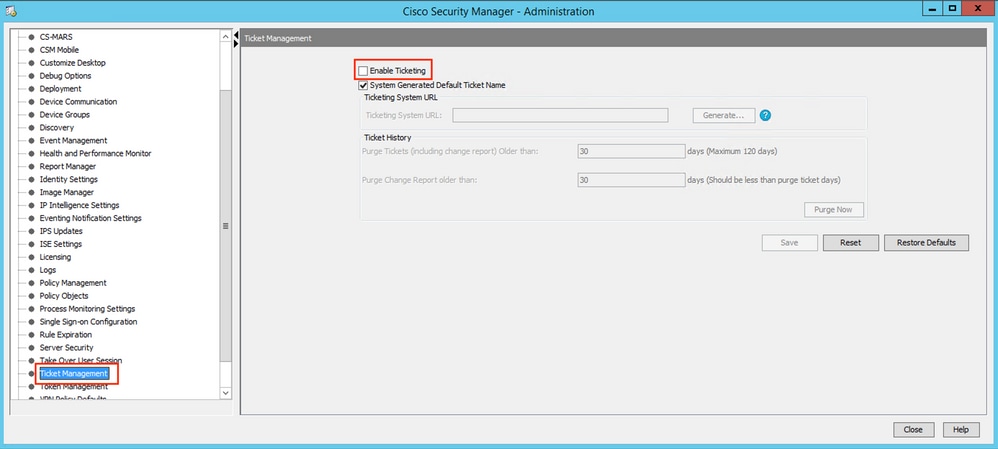
Step 1. Navigate to Tools > Security Manager Administration.

Step 2. Navigate to Ticket Management and check the option Enable Ticketing.
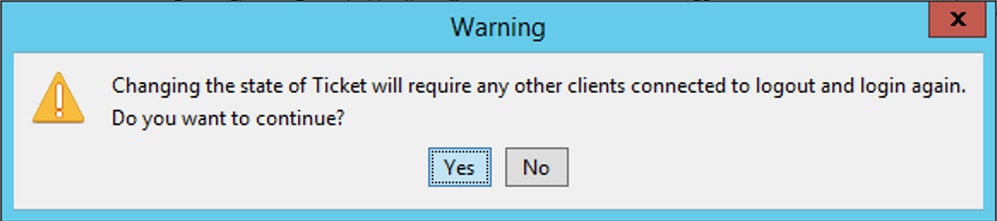
Step 3. Click yes in order to confirm that you understand the warning and want to proceed.
Deployment with Non-Workflow Mode with Ticket Management
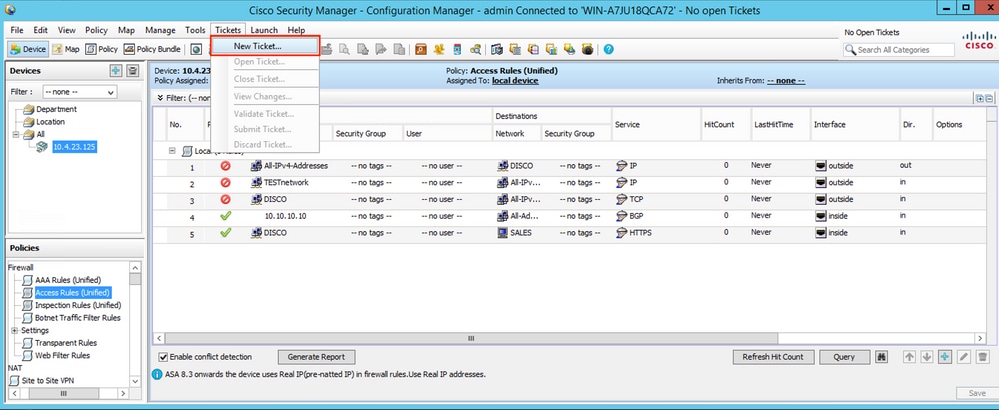
Step 1. Open a new ticket by navigating to Ticket > New ticket.
Step 2. Name the new ticket and add a description.
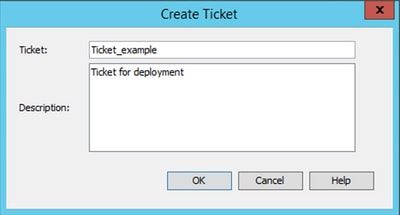

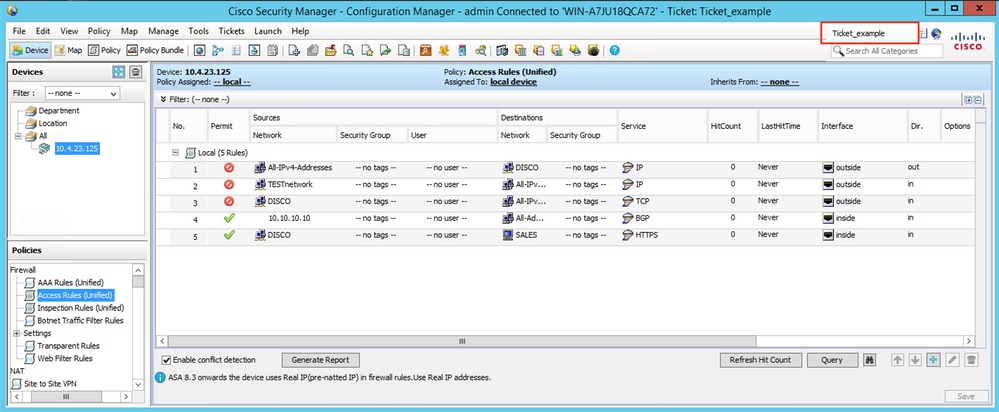
Tip: You can verify the new ticket is open and the current ticket in use, at the top right of the screen.
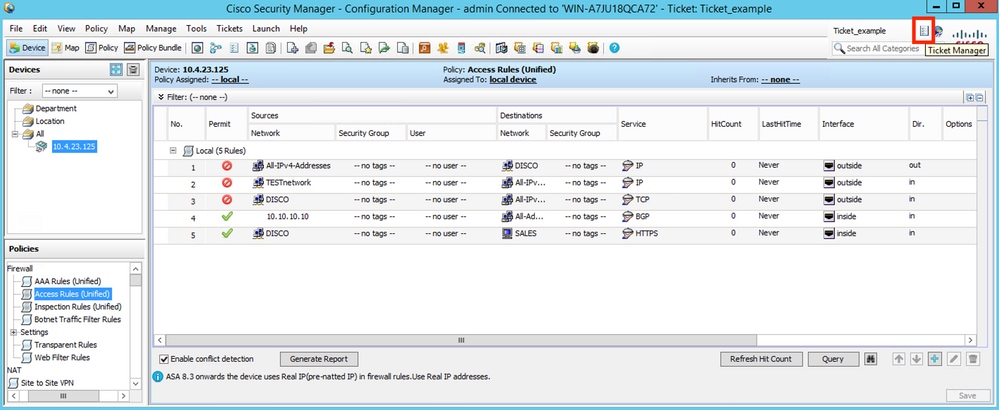
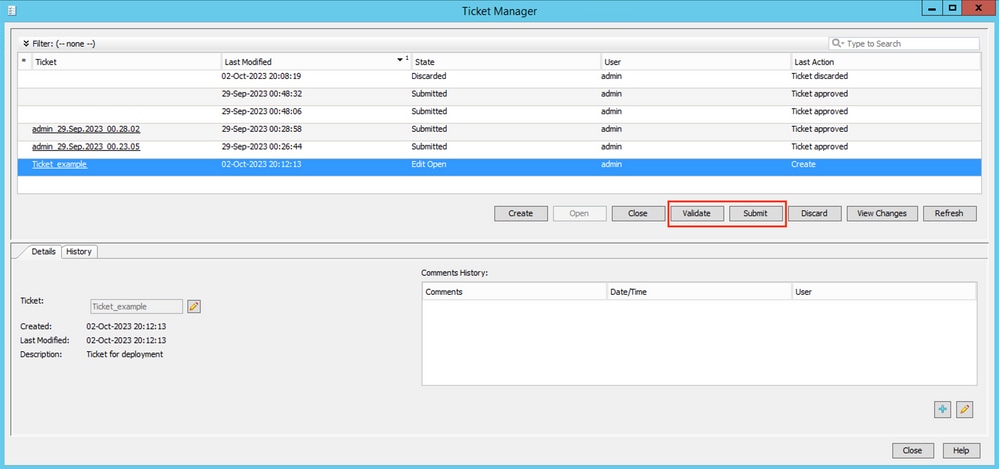
Tip: Alternatively you can use Ticket Manager in order to Create, Submit, and Discard tickets by clicking on the top right button.
Step 3. Make necessary changes to the configuration and save.

Step 4. (Optional) You can Discard or View Changes.
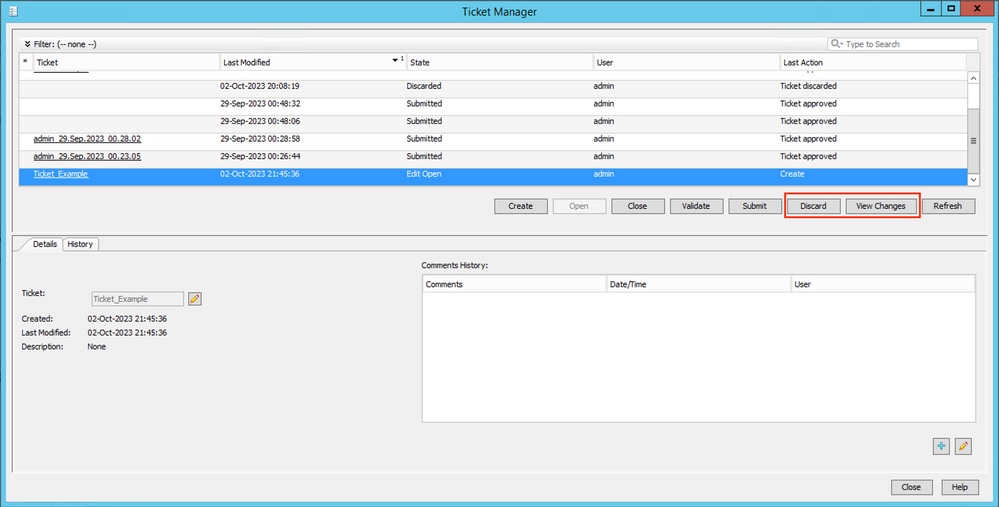

Caution: Discarding a Ticket undoes all configuration changes made on the ticket.
Step 5. Submit the ticket once configuration changes have been approved and validations have been done.
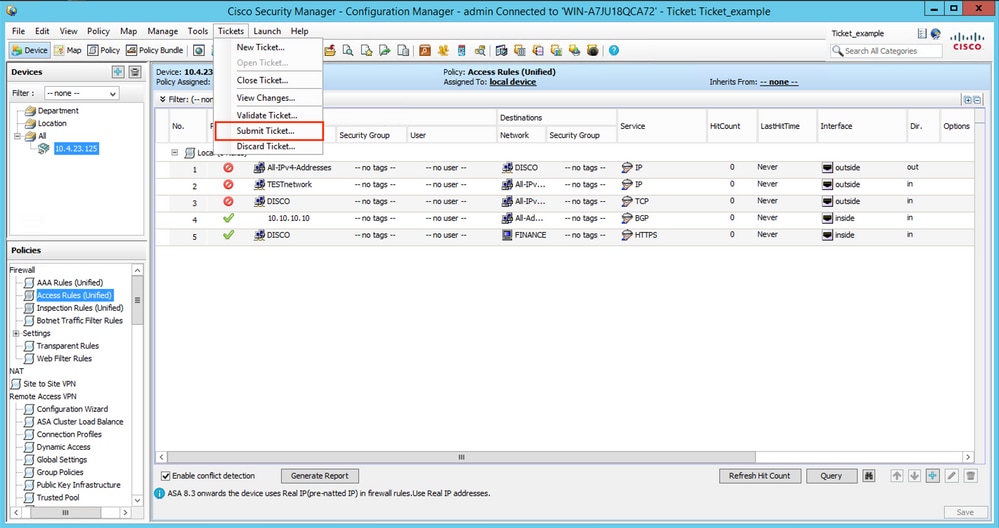
Tip: Validation and submission of tickets can also be done by the Ticket Manager.
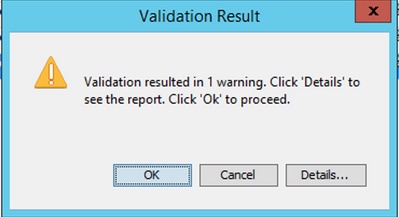
Step 6. Click OK when validations have been reviewed.
Step 7. Submit ticket.

Tip: You can leave a comment when submitting a ticket.
Step 8. Review the status of the ticket and ensure that it was successfully approved before proceeding with deployment.

Step 9. Navigate to Deployment Manager.
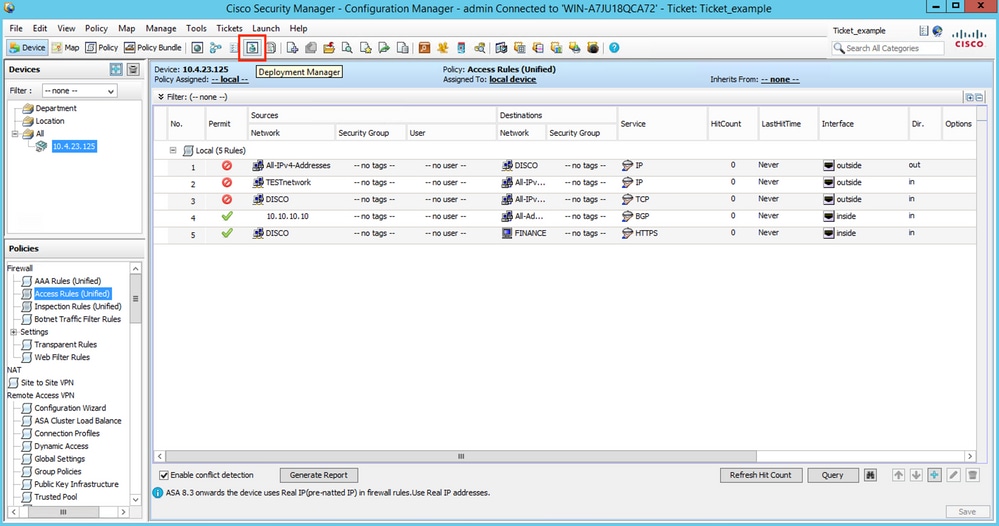
Step 10. Click Deploy when you are ready to push configuration changes.

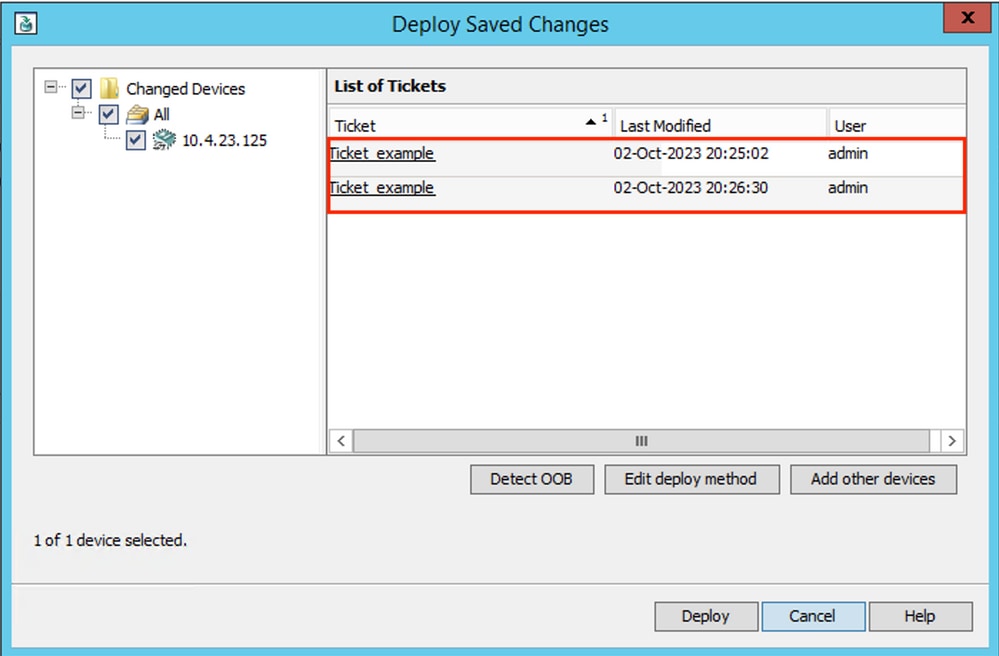
Step 11. The deployment window shows Tickets to deploy and to what devices it is targeting. Once the information has been reviewed, click Deploy.
Step 12. Monitor deployment and review the final status.

Troubleshoot
In case the deployment fails, it can be useful to review the report of the deployment. You can generate it by clicking Generate Report when the deployment has finished.
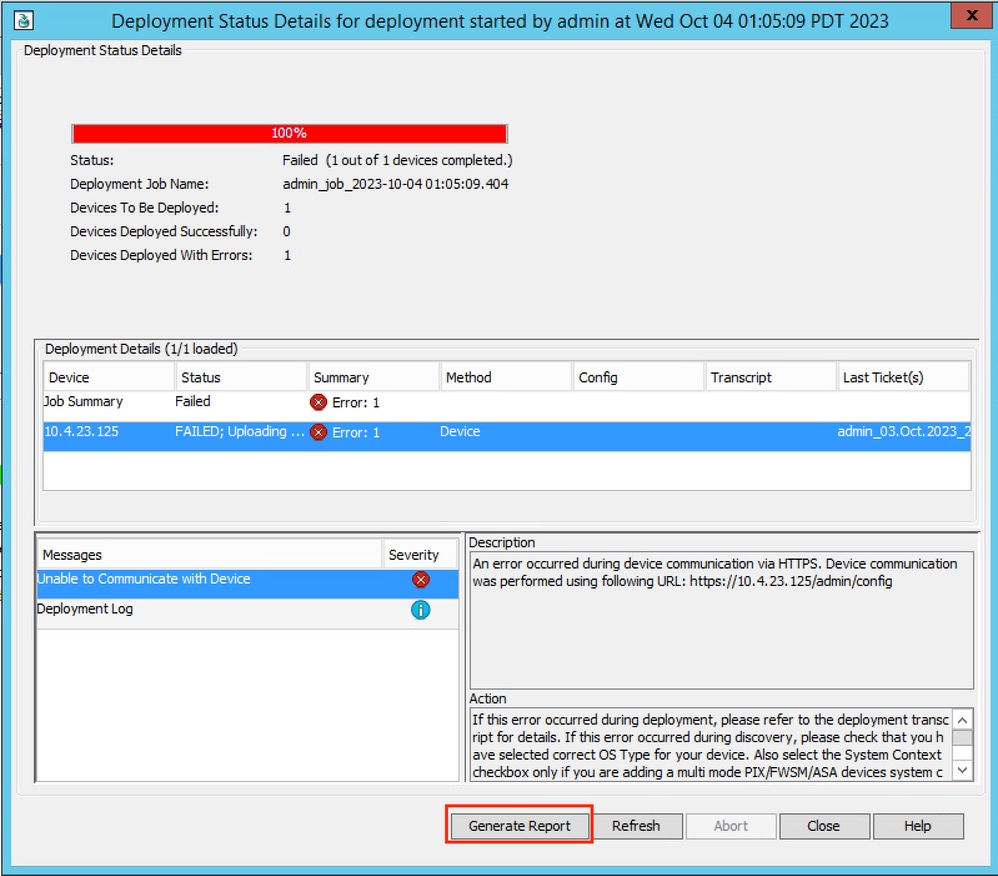
Alternatively, you can navigate to Deployment Manager, choose the deployment, and click Generate Report.

 Feedback