Troubleshoot of Threat Grid Appliance Integration with FMC
Available Languages
Download Options
Bias-Free Language
The documentation set for this product strives to use bias-free language. For the purposes of this documentation set, bias-free is defined as language that does not imply discrimination based on age, disability, gender, racial identity, ethnic identity, sexual orientation, socioeconomic status, and intersectionality. Exceptions may be present in the documentation due to language that is hardcoded in the user interfaces of the product software, language used based on RFP documentation, or language that is used by a referenced third-party product. Learn more about how Cisco is using Inclusive Language.
Contents
Introduction
This document describes in detail Thread Grid Appliance (TGA) integration with Firepower Management Center (FMC).
Prerequisites
Requirements
Cisco recommends that you have knowledge of these topics:
- Firepower Management FMC
- Threat Grid Appliance Basic Configuration
- Create Certificates of Authority (CA)
- Linux/Unix
Components Used
The information in this document is based on these software and hardware versions:
- FMC version 6.6.1
- Threat Grid 2.12.2
- CentOS 8
The information in this document was created from the devices in a specific lab environment. All of the devices used in this document started with a cleared (default) configuration. If your network is live, ensure that you understand the potential impact of any command.
Problem
In this used case scenario, you can see 2 issues and two error codes.
Scenario 1
The integration fails with errors:
Sandbox registration failed: Peer certificate cannot be authenticated with given CA certificates (code = 60) When it comes to this problem, the issue is related to the certificate that is not uploaded into FMC as a complete chain. Since the CA-signed certificate was used, the entire certificate chain combined into one single PEM file needs to be used. In another word you start with Root CA > Intermediate Cert (if applicable) > Clean Int. Please refer to this article from the official guide that describes the requirements and procedure.
If there is a multi-level signing chain of CAs, all required intermediate certificates, and the root certificate must be contained in a single file that is uploaded to the FMC.
All certificates must be PEM-encoded.
The file's newlines must be UNIX, not DOS.
If the Threat Grid appliance presents a self-signed certificate, upload the certificate you downloaded from that appliance.
If the Threat Grid appliance presents a CA-signed certificate, upload the file that contains the certificate signing chain.
Scenario 2
Invalid Certificate format error
Invalid Certificate format (must be PEM encoded) (code=0) Certificate format error, as shown in the image.
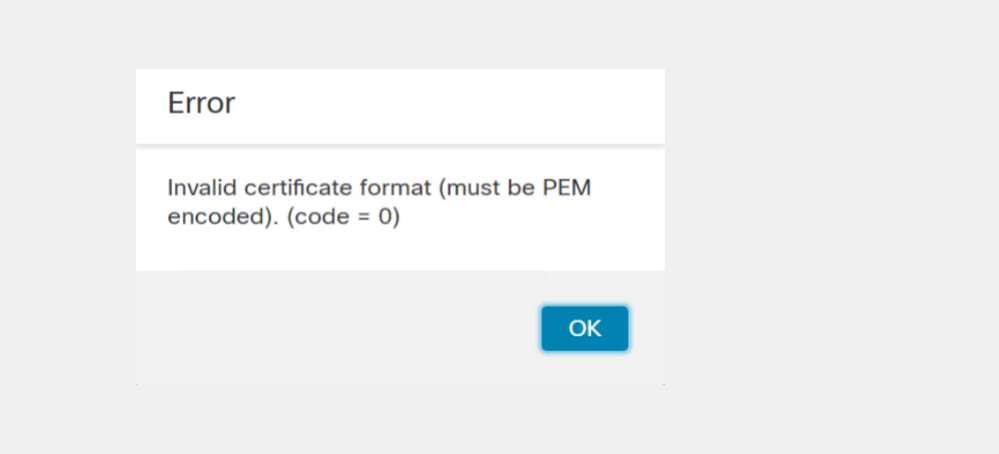
This error is due to the wrong formatting of the combined PEM certificate created on the Windows machine that uses OpenSSL. It is highly recommended to use a Linux machine to create this certificate.
Integration
Step 1. Configure the TGA, as shown in the images.
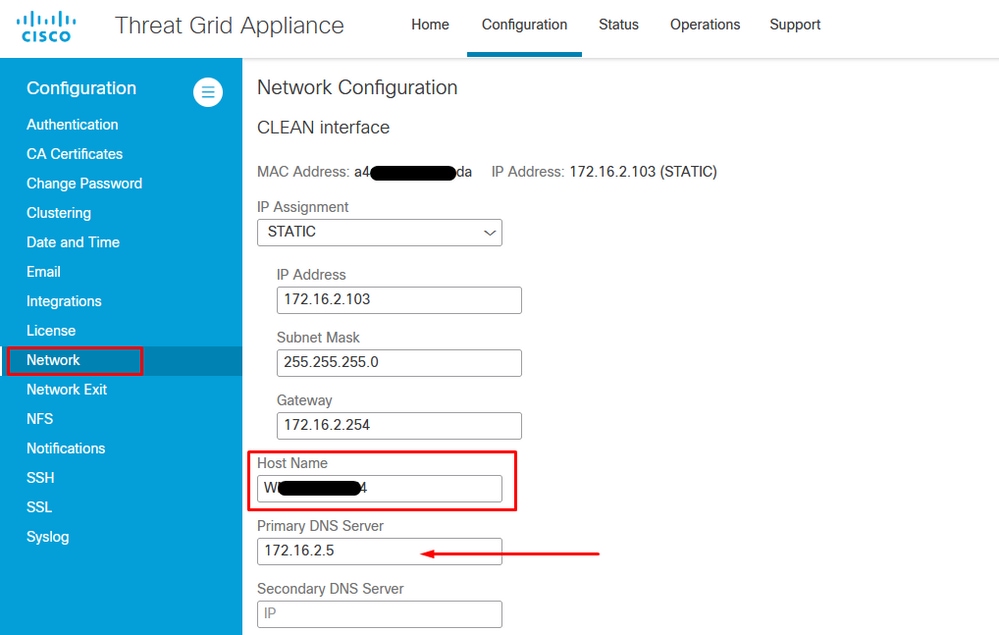
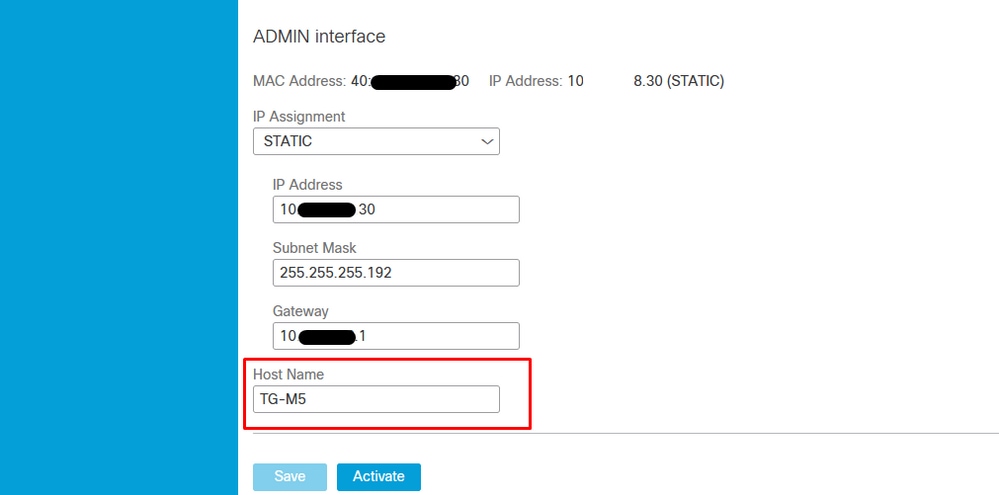
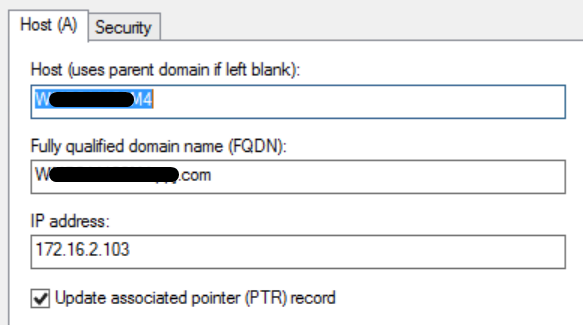

Internal CA-signed Certificates for Clean Admin interface
Step 1. Generate the private key which is used for both admin and clean interface.
openssl ecparam -name secp521r1 -genkey -out private-ec-key.pem Step 2. Generate CSR.
Clean interface
Step 1. Navigate to the CSR creation and use the private key generated.
openssl req -new -key private-ec-key.pem -out MYCSR.csr Note: The CN name must be entered for CSR and must match the hostname of the Clean interface defined under ‘Network’. A DNS entry must be present on the DNS server which resolves the Clean interface hostname.

Admin Interface
Step1. Navigate to the CSR creation and use the private key generated.
openssl req -new -key private-ec-key.pem -out MYCSR.csr Note: The CN name must be entered for CSR and must match the ‘hostname’ of the ‘admin interface’ defined under ‘Network’. A DNS entry must be present on the DNS server which resolves the clean interface hostname.
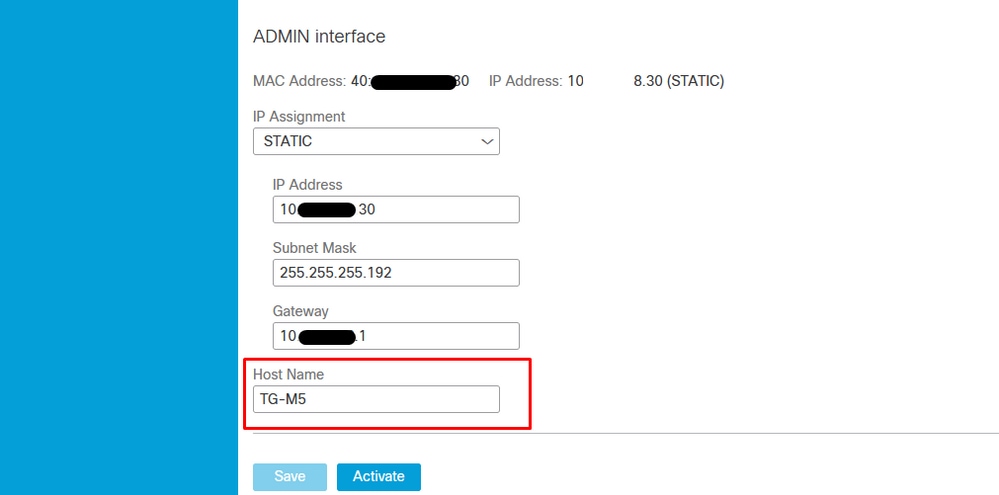
Step 2. CSR is to be signed by CA. Download the certificate in DER format with the CER extension.
Step 3. Convert CER to PEM.
openssl x509 -inform DER -outform PEM -in xxxx.cer -out yyyy.pem Clean interface CSR and CER to PEM

Admin interface CSR and CER to PEM
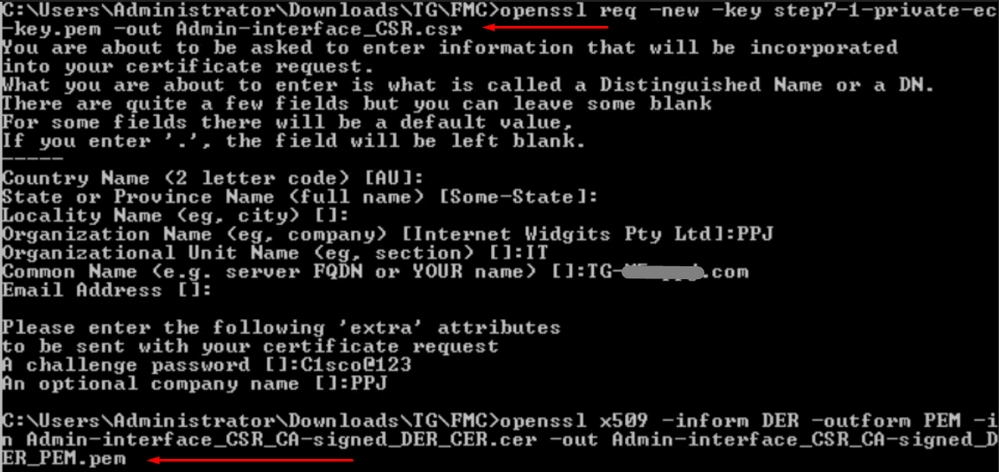
Proper format of the Certificate for FMC
If you already got provided with certificates and they are in CER/CRT format and readable when a text editor is used, you can just simply change the extension to PEM.
If the certificate is not readable you need to convert the DER format to PEM readable format.
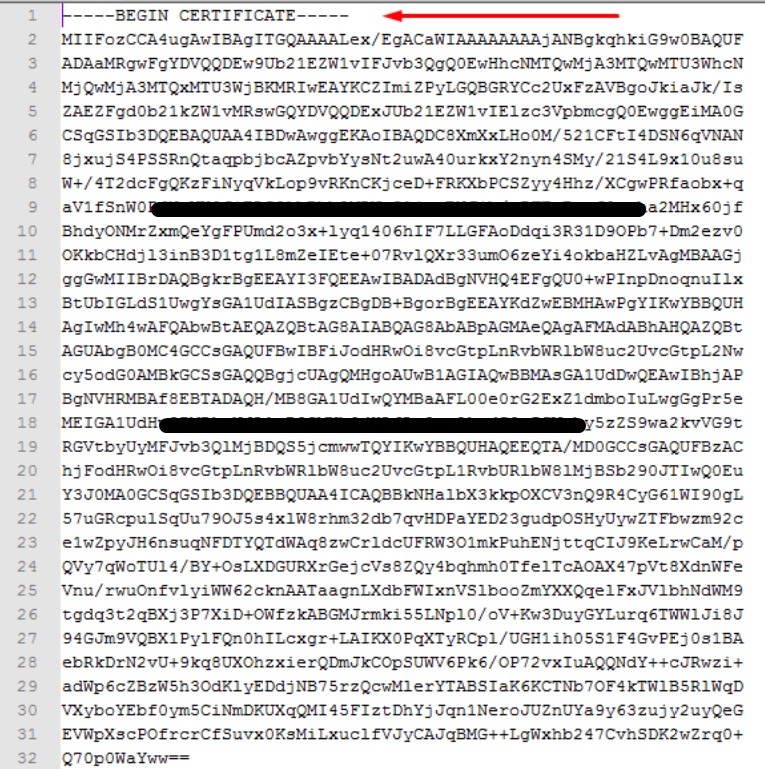
openssl x509 -inform DER -outform PEM -in xxxx.cer -out yyyy.pem PEM
Example of PEM readable format, as shown in the image.
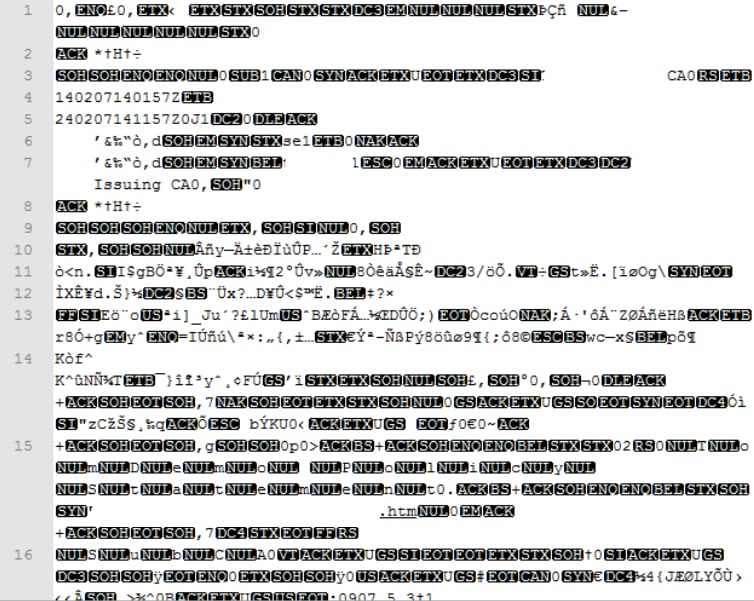
DER
Example of DER readable format, as shown in the image
Difference between certificate created in Windows vs Linux
A simple side-by-side comparison of both certificates next to each other you can use the Compare plugin in Notepad ++ reviled the encoded difference in line #68. On the left, you can see the certificate created in Windows, on the right you can find the certificate generated on the Linux machine. The one on the left has carriage return which makes that certificate PEM invalid for FMC. However, you cannot tell the difference in text editor except for that one line in Notepad ++.
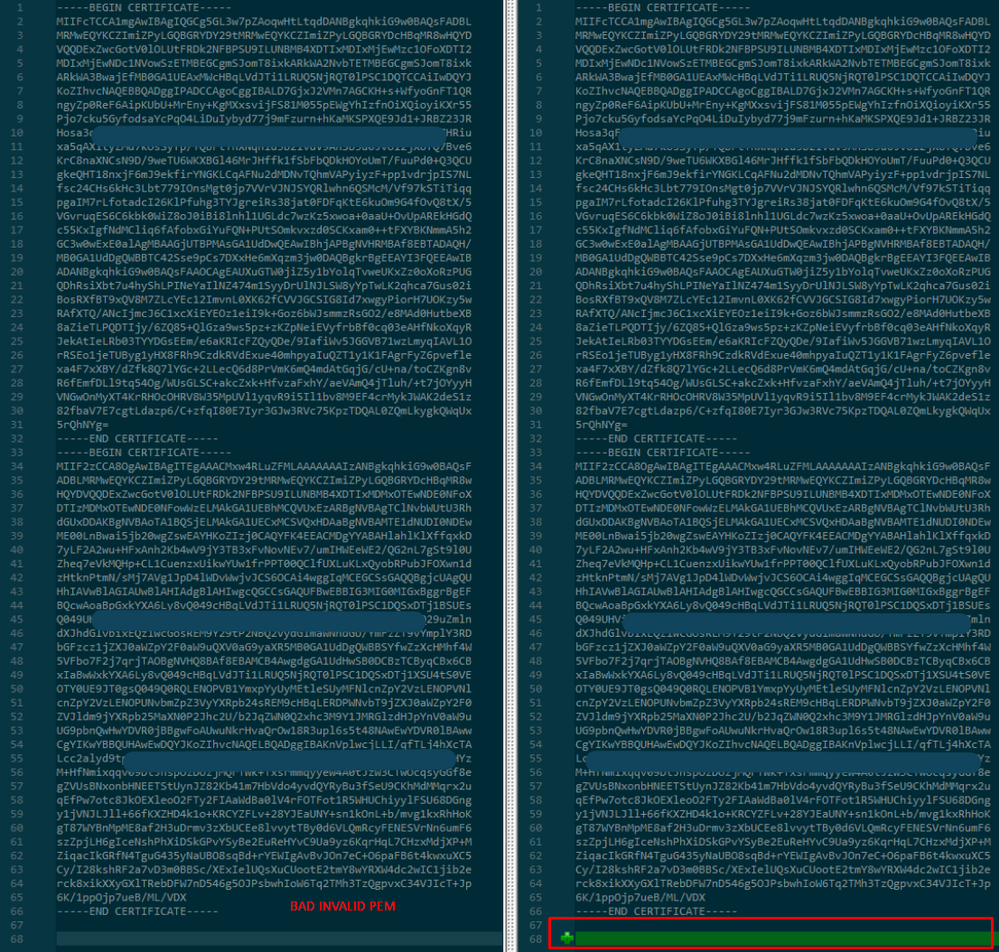
Copy the newly created/converted PEM certificate for RootCA and CLEAN interface to your Linux machine and remove the carriage return from the PEM file.
sed -i 's/\r//' <file.crt> Example, sed -i 's/\r//' OPADMIN.pem.
Verify if the carriage return is present.
od -c <file.crt> Certificates that still have carriage return presented, as shown in the image.

Certificate after you run that through a Linux machine.
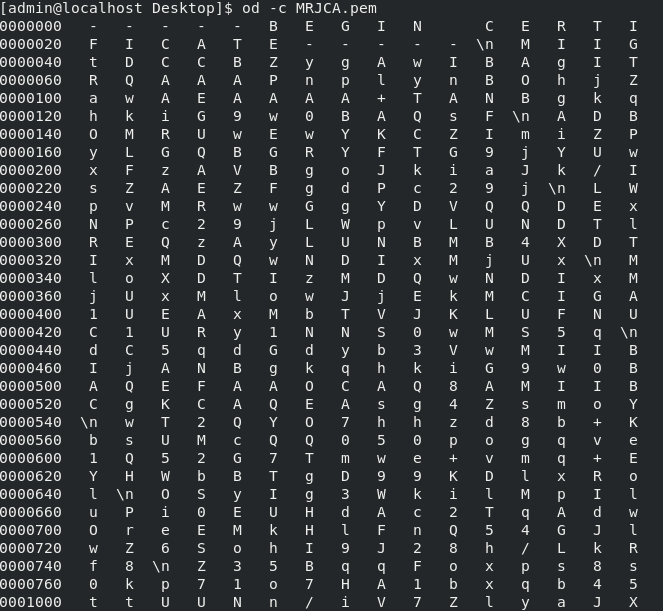
For FMC combine Root_CA and the no-carriage certificate on a Linux machine use the next command.
cat <root_ca_file.pem> <clean-int-no-carriage.pem> > <combined_root-ca_clean.pem> Example, cat Clean-interface_CSR_CA-signed_DER_CER_PEM_no-carriage.pem Root-CA.pem > combine.pem.
Or you can also open a new text editor in your Linux machine and combine both Clean certificates with carriage return removed into one file and save it with.PEM extension. You must have your CA certificate on top and the Clean Interface certificate on the bottom.
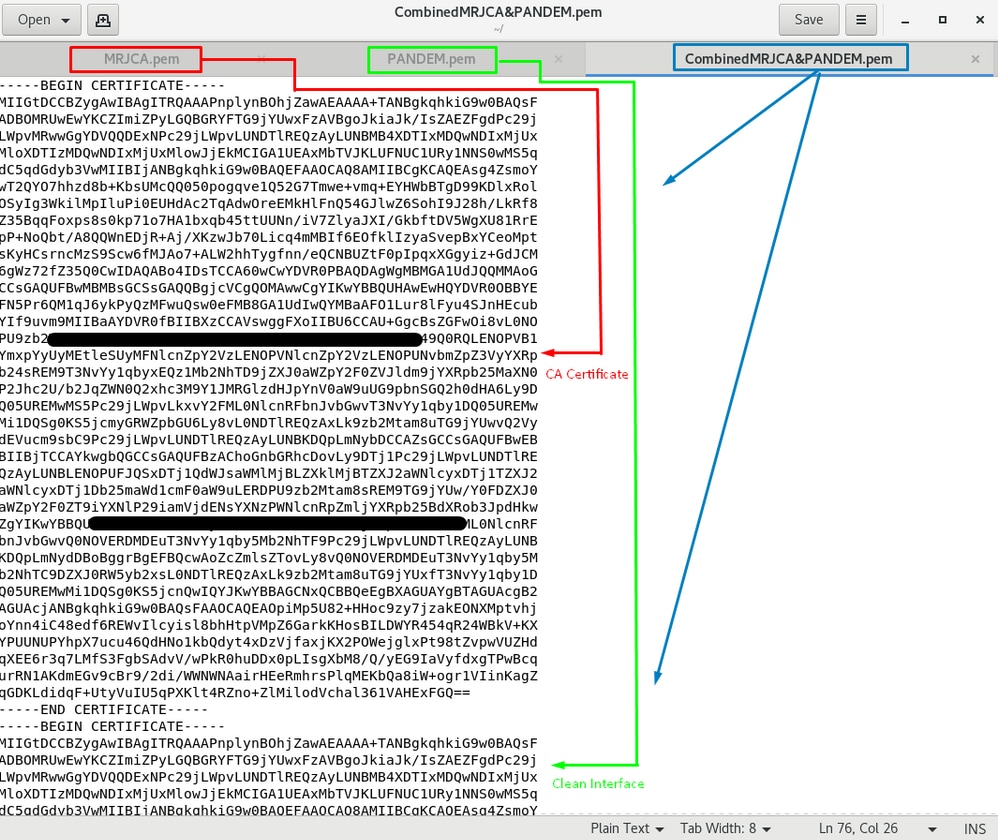
This must be your certificate that you later upload to your FMC to integrate with the TG appliance.
Certificate upload to TG appliance and FMC
Upload certificate for a clean interface
Navigate to Configuration > SSL > PANDEM - Actions Upload New Certificate > Add Certificate, as shown in the image.
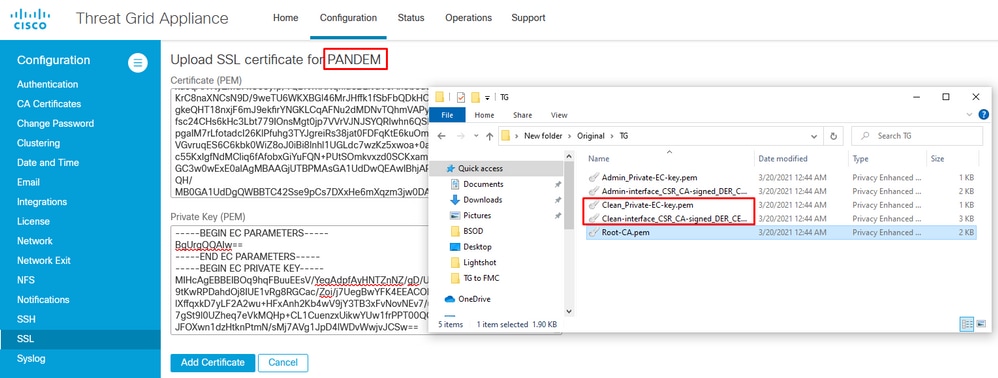
Upload certificate for an admin interface
Navigate to Configuration > SSL > OPADMIN - Actions Upload New Certificate > Add Certificate, as shown in the image.
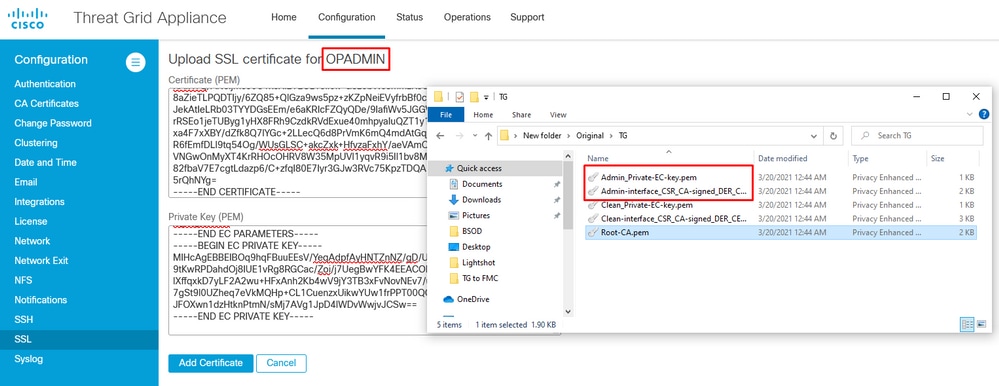
Upload certificate to FMC
In order to upload the certificate to the FMC, navigate to AMP > Dynamic Analysis Connections > Add New Connection, then fill in the required information.
Name: Any name to identify.
Host: Clean-interface FQDN as defined when the CSR for clean-interface is generated
Certificate: The combined certificate of ROOT_CA and clean interface_no-carriage.
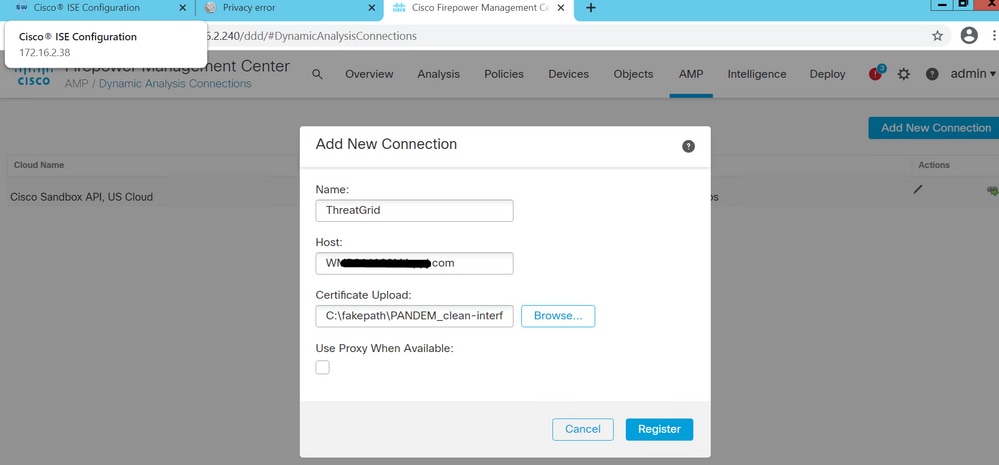
Once the New Connection is registered, a pop-up is displayed, click on the Yes button.

The page redirects to TG Clean interface and login prompt, as shown in the images.
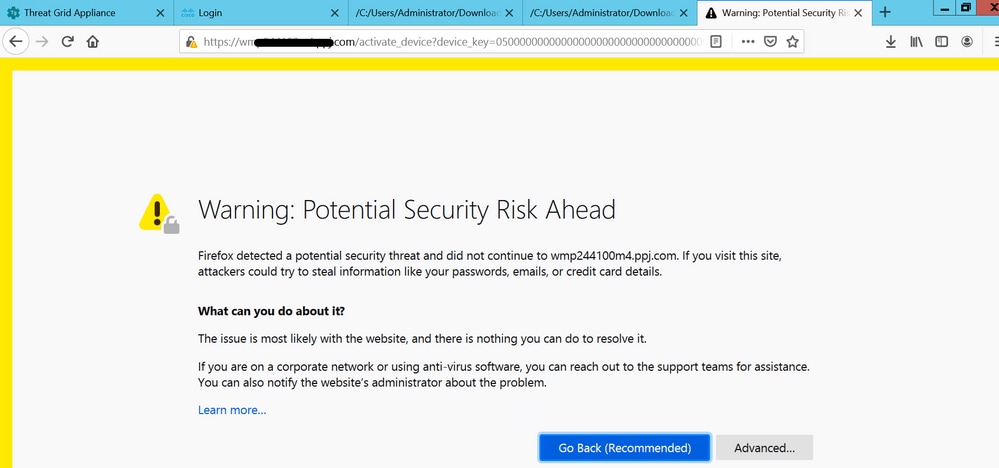
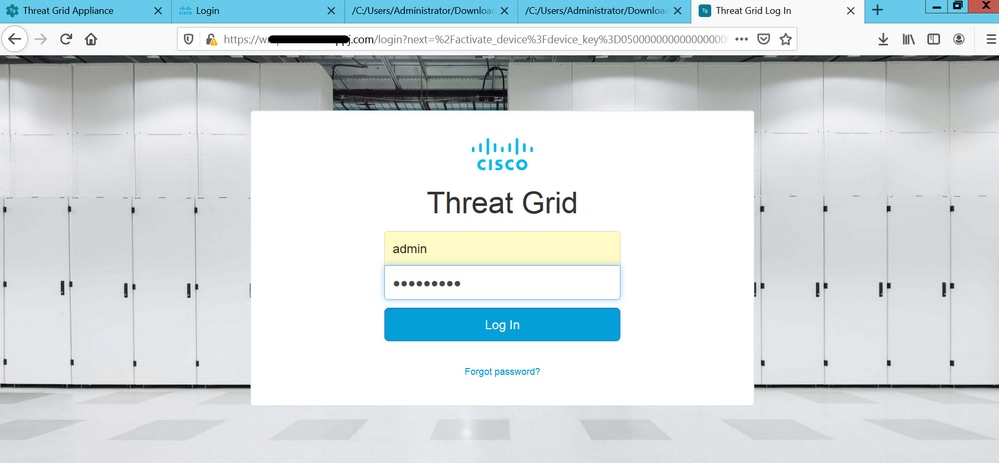
Accept the EULA.

Successful integration displays an active device, as shown in the image.
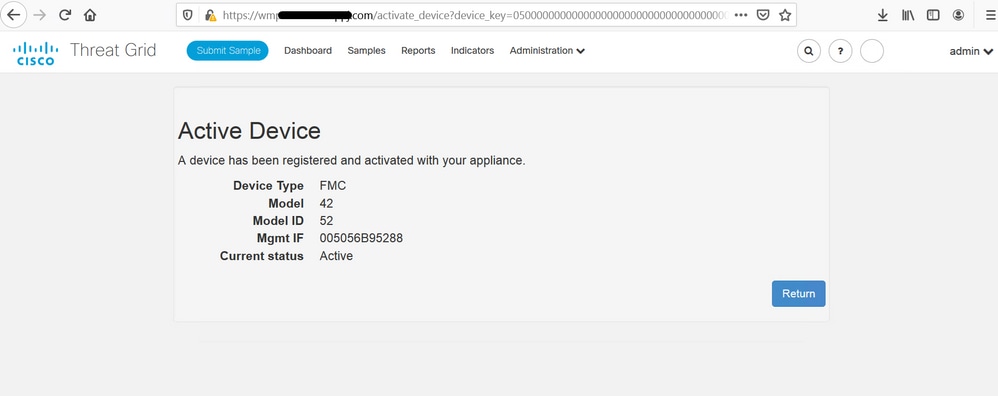
Click Return, back to FMC with successful TG integration, as shown in the image.

Related Information
Contributed by Cisco Engineers
- Roman ValentaCisco TAC Engineer
- Nitin ShettigarCisco Engineer
- Edited by Yeraldin SanchezCisco TAC Engineer
Contact Cisco
- Open a Support Case

- (Requires a Cisco Service Contract)
 Feedback