Introduction
This document describes how to integrate and troubleshoot Cisco XDR with Cisco Secure Firewall integration on Secure Firewall 7.2.
Prerequisites
Requirements
Cisco recommends knowledge of these topics:
- Firepower Management Center (FMC)
- Cisco Secure Firewall
- Optional Virtualization of images
- Secure Firewall and FMC must be licensed
Components Used
- Cisco Secure Firewall - 7.2
- Firepower Management Center (FMC) - 7.2
- Security Services exchange (SSE)
- Cisco XDR
- Smart License Portal
- Cisco Threat Response (CTR)
The information in this document was created from the devices in a specific lab environment. All of the devices used in this document started with a cleared (default) configuration. If your network is live, ensure that you understand the potential impact of any command.
Background
Release 7.2 includes changes on the way that Secure Firewall integrates with Cisco XDR and Cisco XDR Orchestration:
| Feature |
Description
|
|
Improved Cisco XDR integration, Cisco XDR orchestration.
|
We have streamlined the SecureX integration process. Now, as long as you already have a SecureX account, you just choose your cloud region on the new Integration > SecureX page, click Enable SecureX, and authenticate to SecureX. The option to send events to the cloud, as well as to enable Cisco Success Network and Cisco Support Diagnostics, are also moved to this new page.
When you enable SecureX integration on this new page, licensing and management for the systems's cloud connection switches from Cisco Smart Licensing to SecureX. If you already enabled SecureX the "old" way, you must disable and re-enable to get the benefits of this cloud connection management.
Note that this page also governs the cloud region for and event types sent to the Secure Network Analytics (Stealthwatch) cloud using Security Analytics and Logging (SaaS), even though the web interface does not indicate this. Previously, these options were on System > Integration > Cloud Services. Enabling SecureX does not affect communications with the Secure Network Analytics cloud; you can send events to both.
The management center also now supports SecureX orchestration—a powerful drag-and-drop interface you can use to automate workflows across security tools. After you enable SecureX, you can enable orchestration.
|
Consult 7.2 complete Release Notes to check all the features included within this release.
Configure
Prior to start the integration, ensure these URLs are allowed on your environment:
US Region
- api-sse.cisco.com
- eventing-ingest.sse.itd.cisco.com
EU Region
- api.eu.sse.itd.cisco.com
- eventing-ingest.eu.sse.itd.cisco.com
APJ Region
- api.apj.sse.itd.cisco.com
- eventing-ingest.apj.sse.itd.cisco.com
Step 1. To start the integration log into the FMC. Go to Integration>Cisco XDR, select the region where you want to connect (US, EU or APJC), select the type of events you want to forward to Cisco XDR, and then select Enable Cisco XDR:
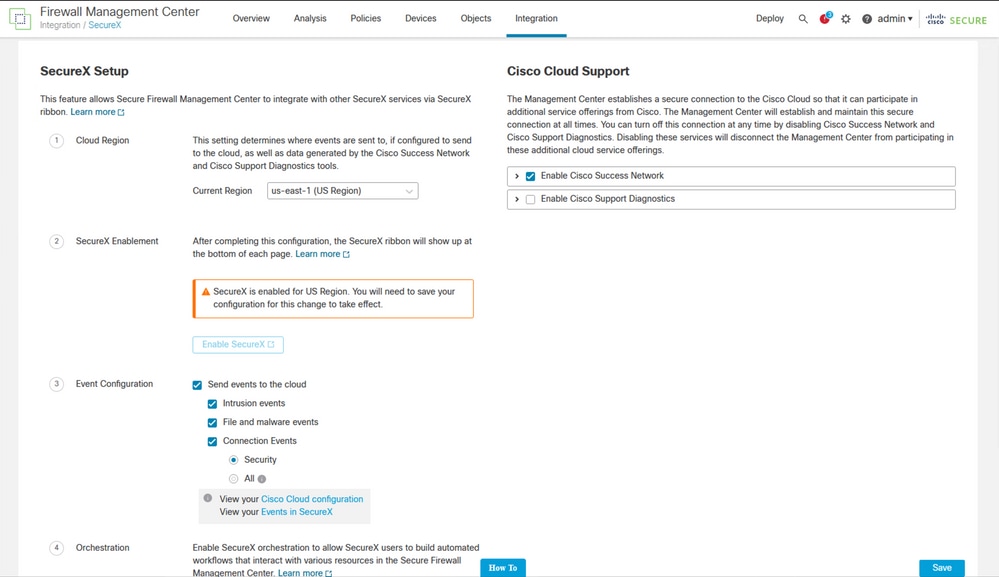
Notice that the changes are not applied, until you select Save .
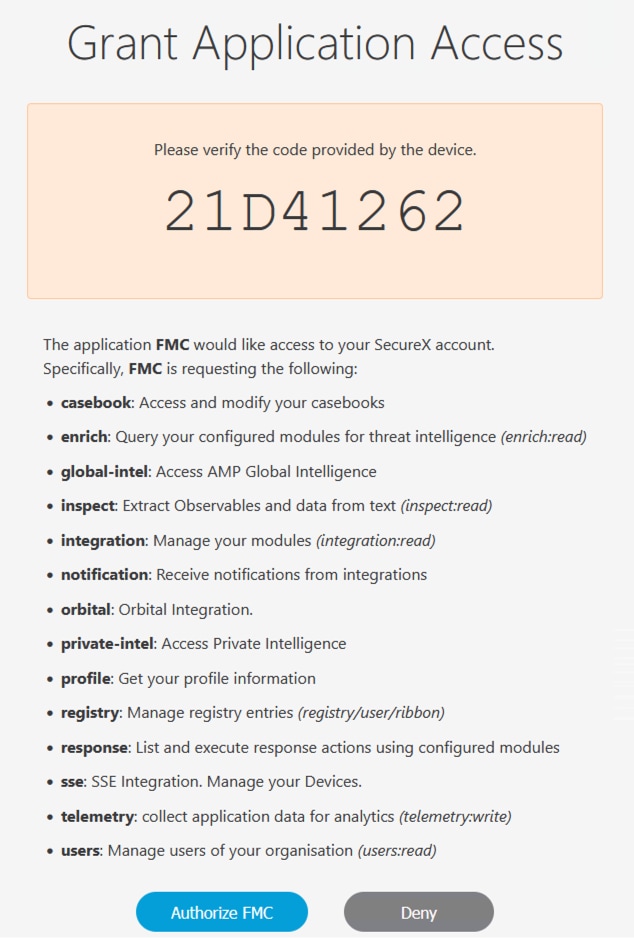
Step 2. Once Save was selected, you are redirected to authorized your FMC in your Cisco XDR account (you need to login to the Cisco XDR account prior to this step), select Authorize FMC:
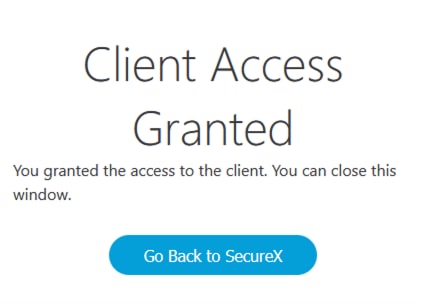
Step 3. Once the authorization is granted, you are redirected to Cisco XDR:
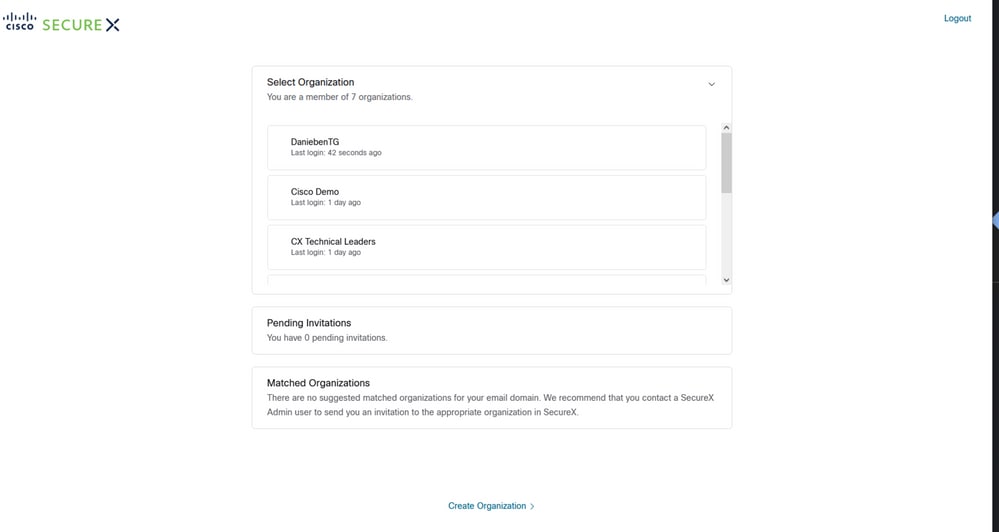
In case you have multiple Orgs, you are presented with the Cisco XDR landing page to select the Organization where you want to integrate your FMC and Secure Firewall devices:
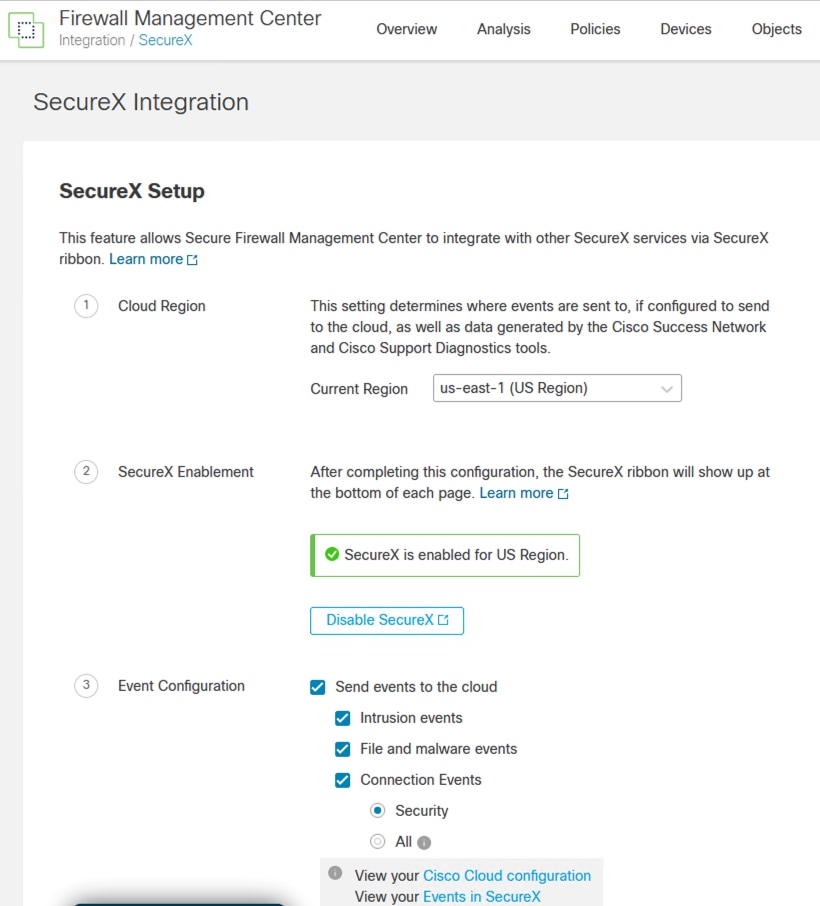
Step 4. After the Cisco XDR Organization was selected, you are redirected, once again to the FMC and you must get the message that shows the integration was successful:
Verify
Once the integration is done, you can expand the Ribbon from the bottom of the page:
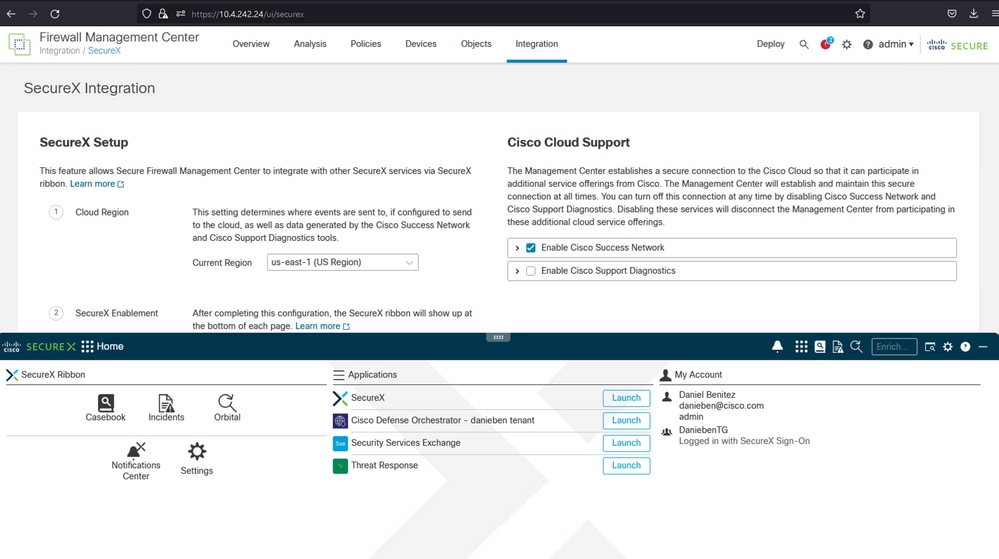
On the Ribbon, launch Security Services Exchange and under Devices you must see both the FMC and Secure Firewall you just integrated:


 Feedback