Introduction
This guide is inteded to show you how to configure 'Just a bunch of disks' (JBOD) on the Cisco 12G SAS Modular RAID Controller in a C-Series server.
Caveats:
* JBOD disks are not able to take advantage of any hardware caching on the RAID controller.
http://www.redbooks.ibm.com/redpapers/pdfs/redp5234.pdf (general documentation on RAID / JBOD)
* If caching is required on these disks, then you can put them into a RAID 0 array (striping) and present this to the OS. Recall that RAID0 has no parity, so please note that the more disks added to a RAID 0, the larger your failure domain, or the greater the chance of data loss across all disks due to a single disk failure. This is the nature of RAID 0. Good performance, intolerant of even a single disk failure. This is acceptable for some applications and use cases however.
Prerequisites
- C-Series Server
- Cisco 12G SAS Modular Raid Controller
- 1 or more HDD
- Access to CIMC / KVM
Components Used
- Cisco C240-M4 running 2.0(6d) CIMC
- Cisco 12G SAS Modular Raid Controller running 4.250.00-3632
Configure
As a safety precaution, if you have a pre-existing RAID configuration, please back up the data on that Virtual Disk (VD) prior to making these changes.
If you have existing Virtual Disk (VD), RAID 1 for instance, that you wish to preserve, its configuration should be preserved after enabling JBOD, though a reboot is required to enter the pre-boot RAID configuration menu (CTRL+R) to enable JBOD.
At the time of this writing, it appears that JBOD is disabled on the controller by default, and cannot be enabled on the 12G Controller via the CIMC, only the pre-boot RAID Configuration menu (CTRL+R).
If you wish for ALL disks to be JBOD, then delete any existing Virtual Disks (VD) on the RAID. This should release the Physical Disks (PD) into 'Unconfigured Good'. This can be done via CIMC or CTRL+R pre-boot RAID configuration menus. This should be expected to delete data on any Virtual Disk that you Delete so back up important data accordingly.
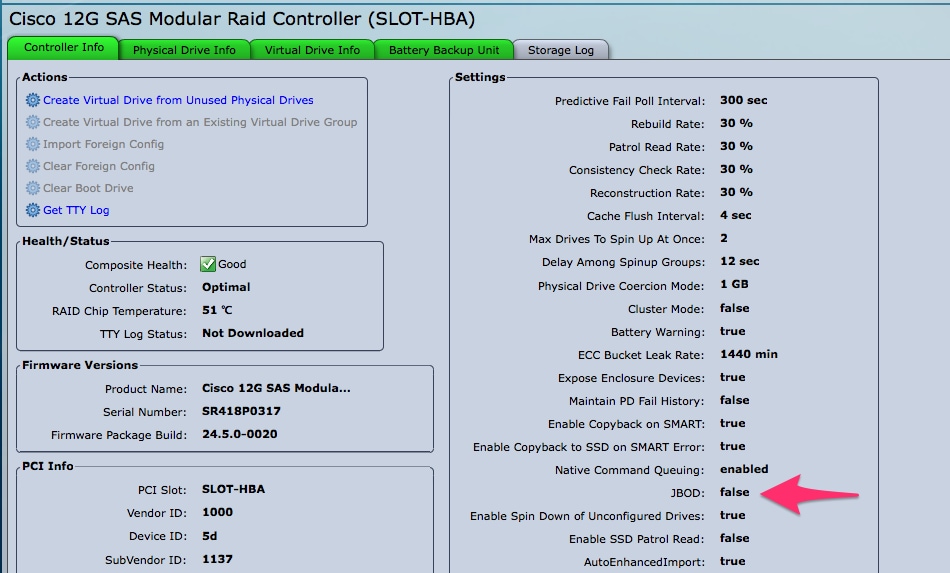
Confirm if JBOD is enabled or disabled already:
1) Log into CIMC.
2) Click Storage > Select 12G controller > Controller Info tab.

Enable JBOD
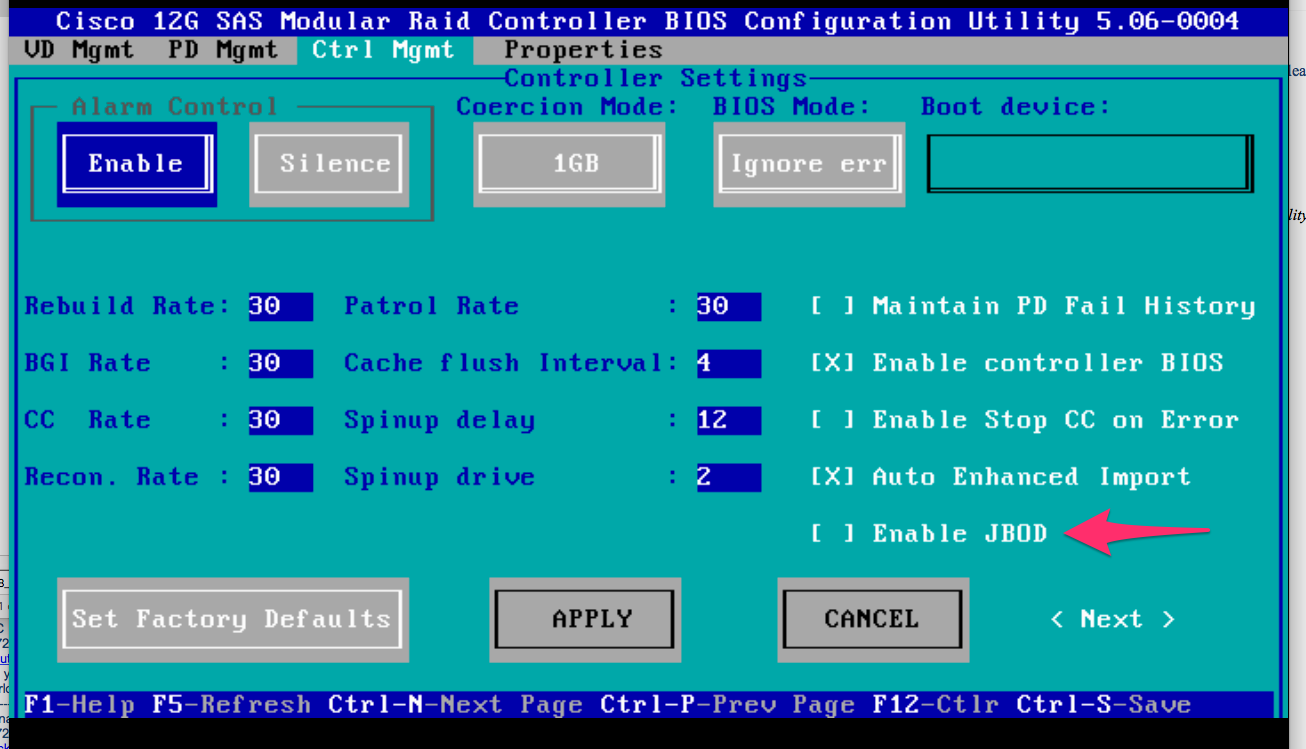
1) If disabled, reboot the host, and press CTRL+R to enter the RAID configuration screens.
2) Press CTRL+N twice, navigate to 'Enable JBOD' and press 'space'. Ensure that the [X] shows in the square brackets.
3) Press CTRL+S to save.

4) Press Escape to exit.
5) This will convert ALL available disks to JBOD. Again, in my testing, it did not convert PD allocated to VD (RAID 1) to JBOD, and my OS was still in tact on that RAID 1.
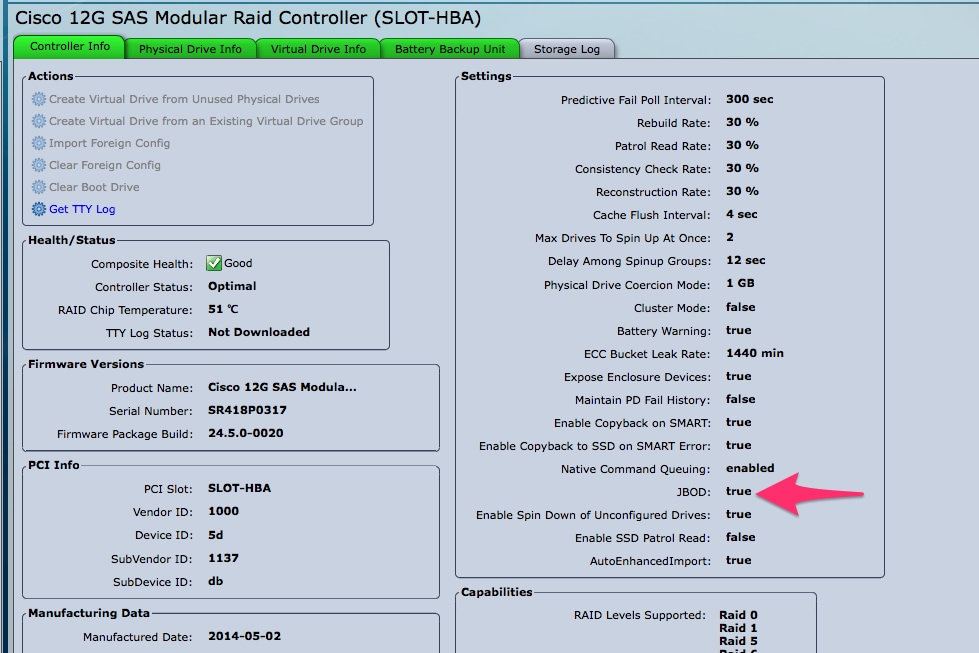
6) Confirm JBOD is enabled.

If you don't already have a Virtual Disk (VD), then you can configure some number of disks as 'Unconfigured Good' so you can add them to a new Virtual Disk (VD) or RAID Volume.

You can now toggle the disks between 'Unconfigured Good' (which can be added to RAID) or 'JBOD' from within the CIMC.
You will find that for any PD that is a member of a VD / RAID Group, you do not have the option convert it to JBOD. The PD must be removed from the VD / RAID Group prior to getting the option to convert it to a JBOD disk.
