Wireless Authentication using Cisco Business Dashboard
Available Languages
Objective
The objective of this article is to go over wireless authentication feature using the Cisco Business Dashboard (CBD) version 2.5.0.
Applicable Devices | Software Version
- Cisco Business Dashboard | 2.5.0 (Download latest)
- CBW140AC | Download latest
- CBW145AC | Download latest
- CBW240AC | Download latest
- CBW150AX | Download latest
Introduction
CBD provides tools that help you monitor and manage the devices in your Cisco Business network. It automatically discovers your network and allows you to configure and monitor all supported devices such as switches, routers, and wireless access points.
CBD 2.5.0 adds Authentication service functionality to CBD. The new service is supported on both CBW140/240 series and CBW 150AX devices.
It sets up a FreeRADIUS instance on the CBD manager to use for RADIUS authentication, giving your organization a simple way to deploy a server without clients having to know or understand RADIUS.
If you are ready to get started, let us dive in.
Table of Contents
Configure Authentication Profile
First, you must configure the authentication profile you will use for your organization. In many cases you can simply use the default profile.
Step 1
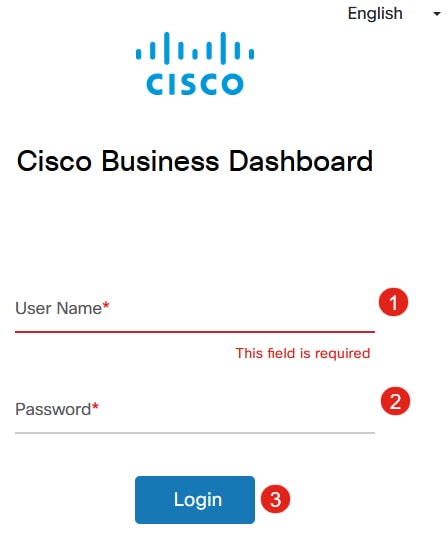
Login to CBD.
Step 2
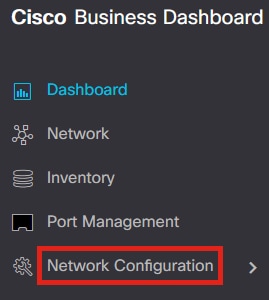
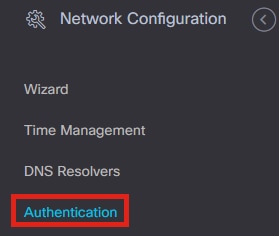
Navigate to Network Configuration > Authentication.
Step 3
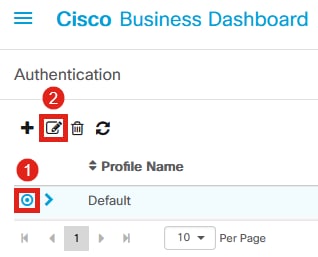
You can either edit the existing Default profile or add another profile. In this example, the Default profile is selected. Click Edit.
Step 4
In CBD 2.5.0, there is a new option to select Use Cisco Business Dashboard Authentication Service. This is checked by default. Make the desired changes and click Update.
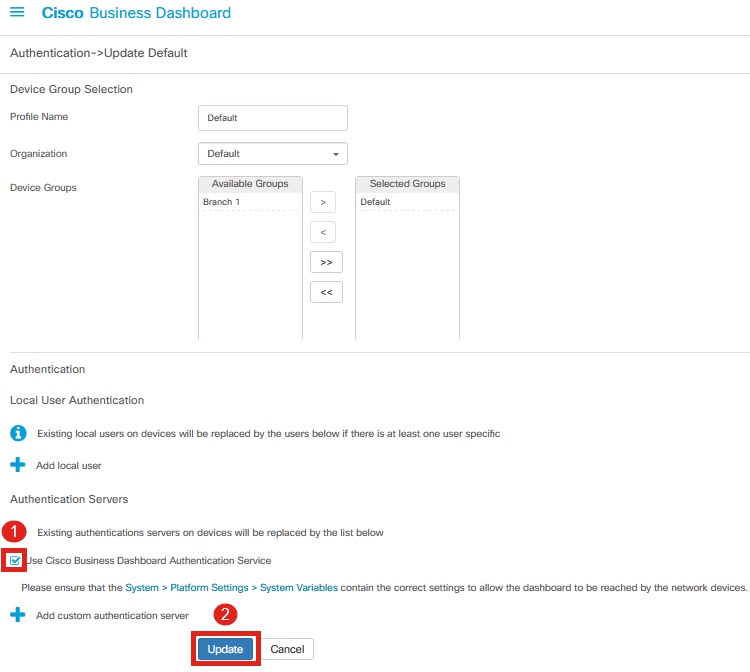
Make sure to see if System > Platform Settings > System Variables have the correct settings to allow the Dashboard to be reached by the network devices.
Step 5
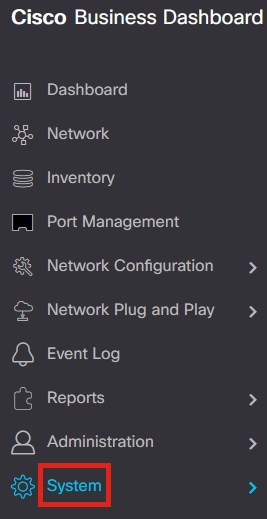
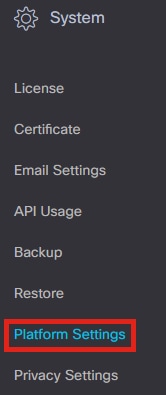
Navigate to System > Platform Settings in the menu.
Step 6
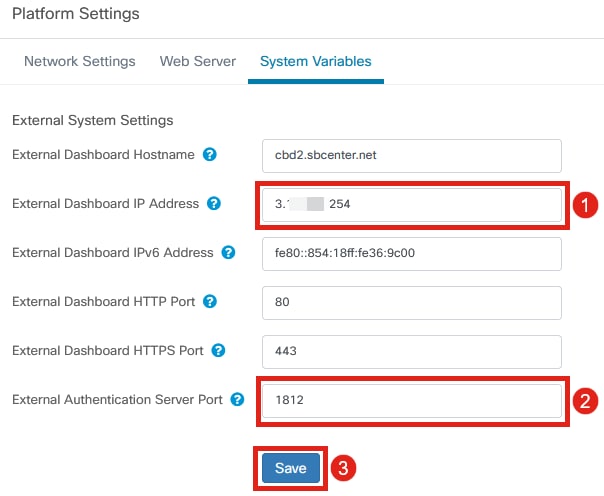
Select the System Variables tab.

Step 7
Check the settings to ensure that the External Dashboard IP Address is the public IP address of the CBD and the External Authentication Server Port is 1812. This is the default port. Click Save.
Step 8
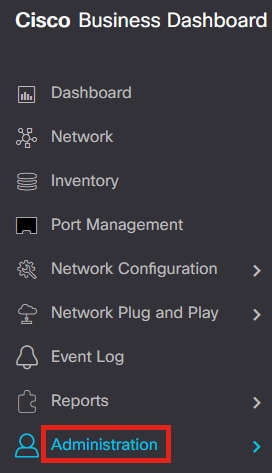
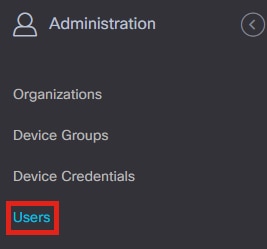
To create users that are going to be authenticating to the system, go to Administration > Users.
Step 9
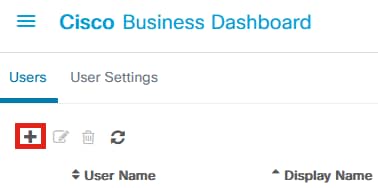
To add users, click on the plus icon.
Step 10
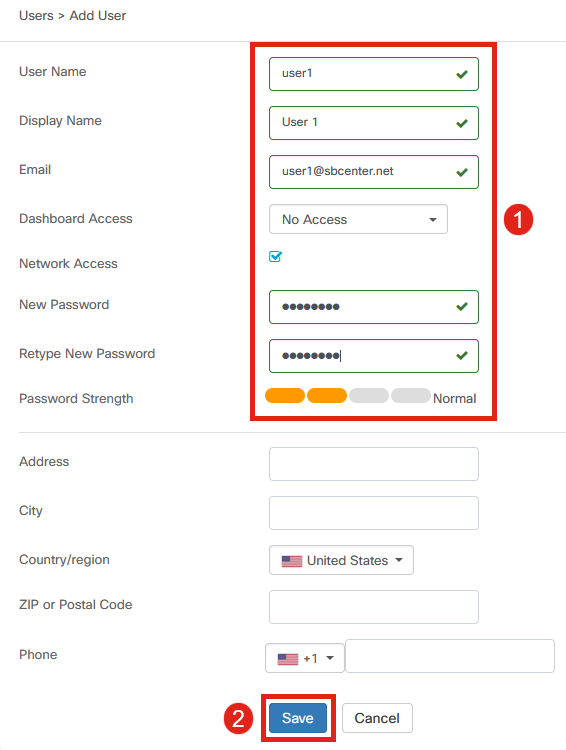
Configure the following:
- User Name
- Display Name
- Dashboard Access – select from the dropdown menu. In this example, No Access is selected.
- New Password
- Retype New Password
The other fields are optional. Click Save.
Step 11
Click on the Organizations tab.
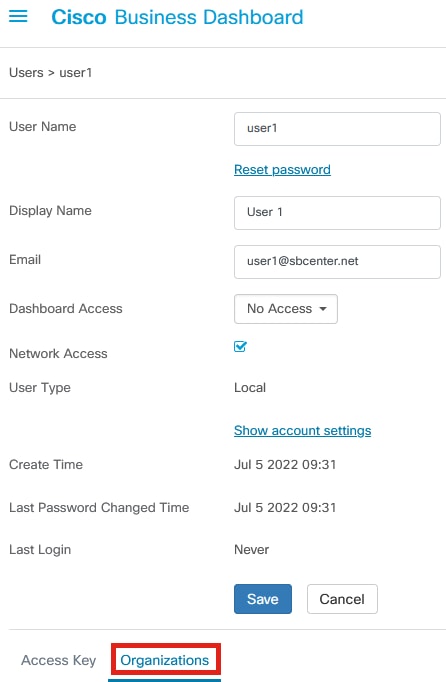
Step 12
Here, you need to associate the user you just created with your CBD organization. Click the plus icon and choose the option from the dropdown menu. In this example, Default is selected.
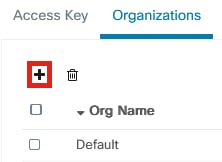
This user will now be able to login to the Default organization configured for wireless authentication.
Configure Wireless Networks
Step 1
Navigate to Network Configuration > Wireless LANs menu.
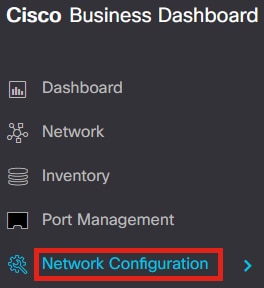
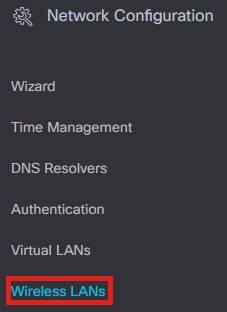
Step 2
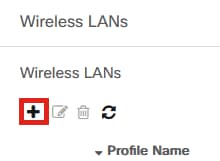
To create a new profile, click on the plus icon under Wireless LANs.
Step 3
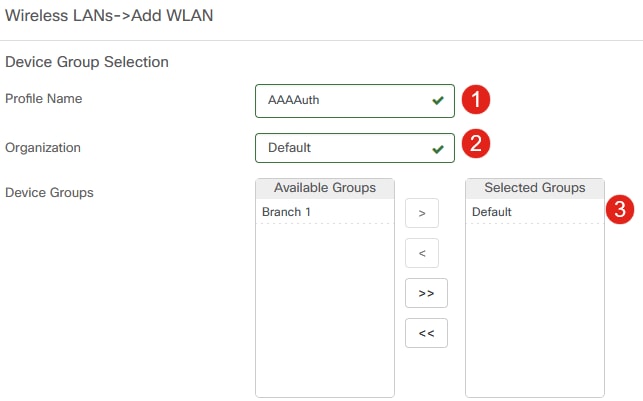
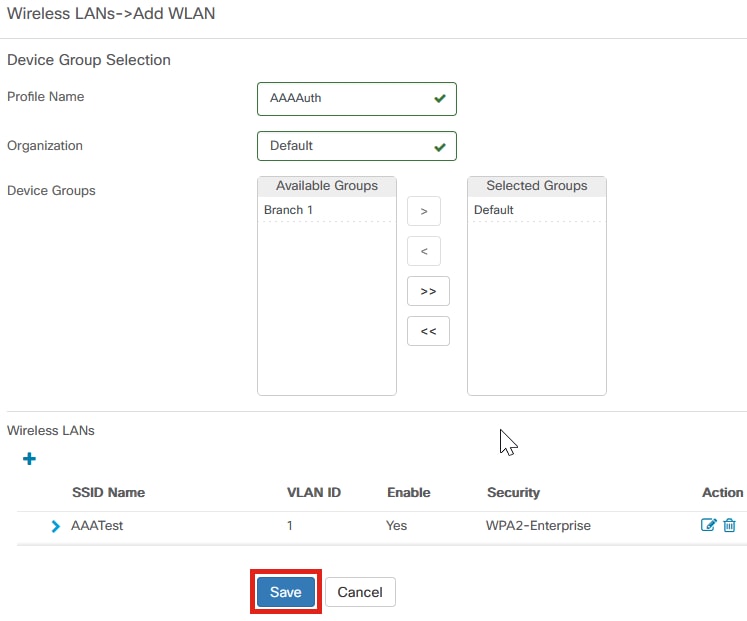
Enter the Profile Name, Organization and configure Device Groups to apply the settings to the wireless devices in the group.
Step 4
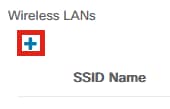
To create an SSID, click the plus icon.
Step 5
Enter the SSID Name, VLAN ID and select Security from the dropdown menu. In this example, WPA2-Enterprise is selected. Click Save.
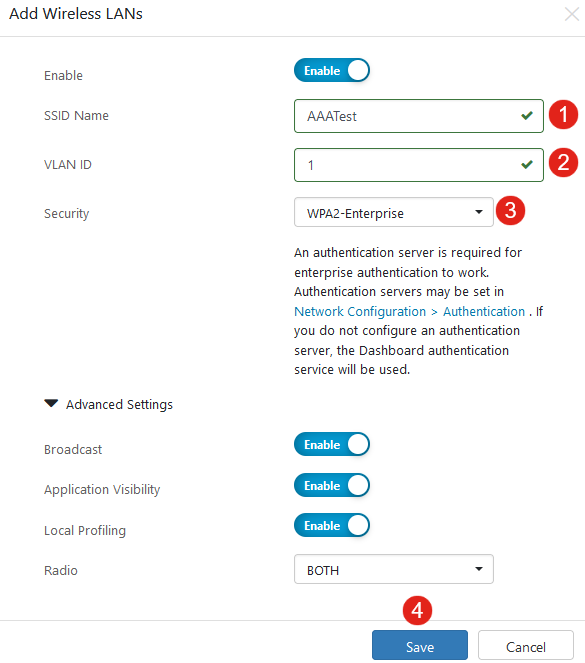
Cisco Business Dashboard Authentication Server will be used if you do not have an authentication server configured.
Step 6
Click Save again to apply the wireless network and Radius settings to all the clients.
Verification
To check if the settings have been applied,
Step 1
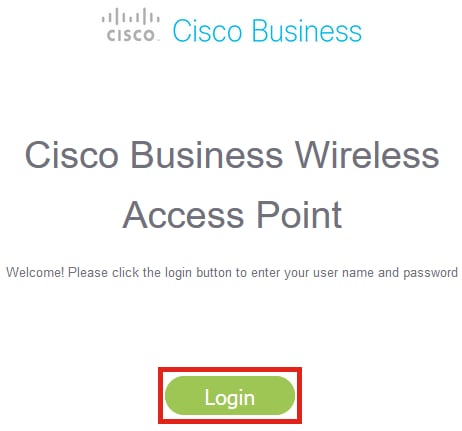
Login to your CBW AP.
Step 2
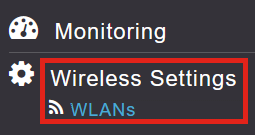
Go to Wireless Settings > WLANs.
Step 3
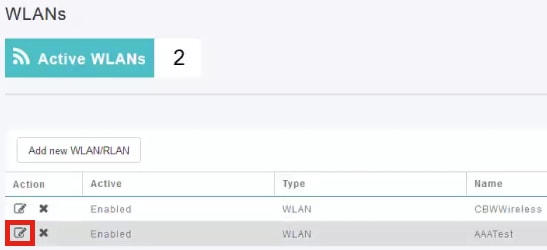
The SSID that you created will be listed. In this example, it is AAATest.

Step 4
Select the SSID and click edit to view the settings.
Step 5
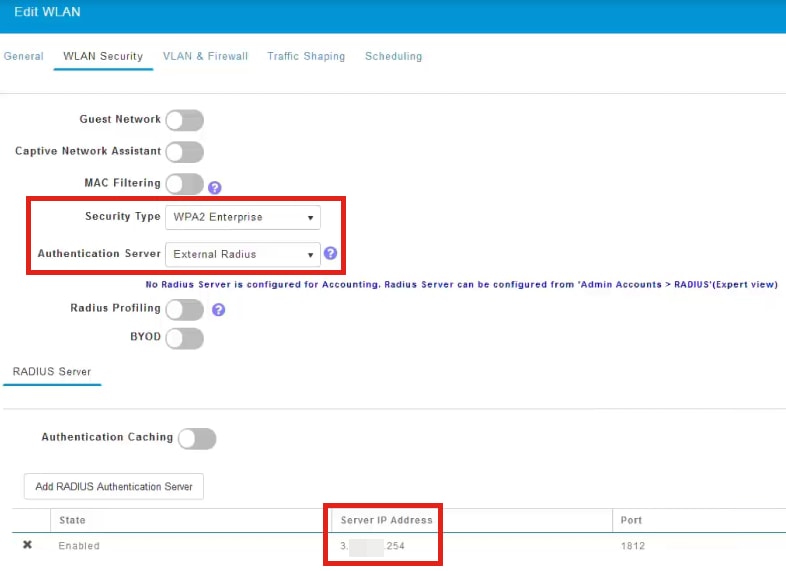
Navigate to WLAN Security tab.

You will see that the Security Type will be listed as WPA2 Enterprise and Authentication Server will be the External Radius. The Server IP Address will be the one you configured earlier.
Step 6
Switch to Expert view by clicking the bi-directional arrow at the top of the user interface.

Step 7
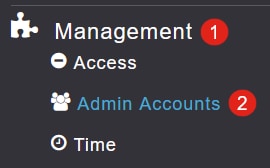
Navigate to Management > Admin Accounts.
Step 8
Click on the RADIUS tab.

You will see that the Radius authentication server has been configured for Network User.

Testing
To test the settings:
Step 1
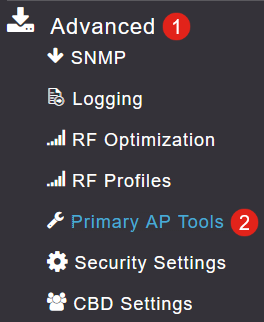
Navigate to Advanced > Primary AP Tools.
Step 2
Click on Troubleshooting Tools tab.

Step 3
Under the Radius Response section, enter the Username and Password and click Start to see if it authenticates against the Radius server.
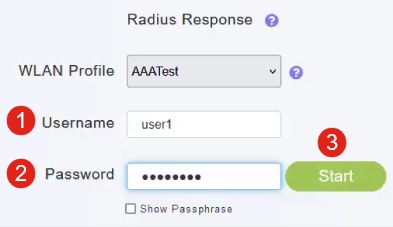
You will see an Authentication success notification after the test is completed.

Make sure you have IP connectivity between the CBD Manager and client system for this to work properly.
Conclusion
That’s it! You do not have to worry anymore about configuring Radius on your own. CBD will do all the work and you can sit back, relax, and enjoy the benefits of wireless authentication in your network.
Revision History
| Revision | Publish Date | Comments |
|---|---|---|
1.0 |
29-Aug-2022 |
Initial Release |
Contact Cisco
- Open a Support Case

- (Requires a Cisco Service Contract)
 Feedback