Using the Cisco FindIT Kaseya Plugin
Available Languages
Objective
This article aims to provide information about the uses of the different pages on the Cisco FindIT Kaseya Plugin.
Applicable Devices | Software Version
-
Cisco FindIT Network Manager – 1.1
-
Cisco FindIT Network Probe – 1.1
Introduction
The Cisco FindIT Kaseya Plugin is a module that installs on the Kaseya Virtual System Administrator (VSA). It tightly integrates the Cisco FindIT Network Manager with the Kaseya VSA, allowing for centralized management of the network. The plugin allows access to the powerful management features of FindIT including action management, dashboards, device discovery, network topology, remote device management, actionable alerts and event history.
The Cisco FindIT Kaseya Plugin complies with all third-party integration requirements for Kaseya on-premise VSA versions 9.3 and 9.4.
Using the Cisco FindIT Kaseya Plugin
Accessing the Plugin
Step 1. Launch a web browser and enter the IP address of your Kaseya VSA server on the address bar and then hit Enter.

In this example, the IP address used is 10.10.0.1
Step 2. Enter your Kaseya account login credentials in the Username and Password fields provided, and then click SIGN IN.
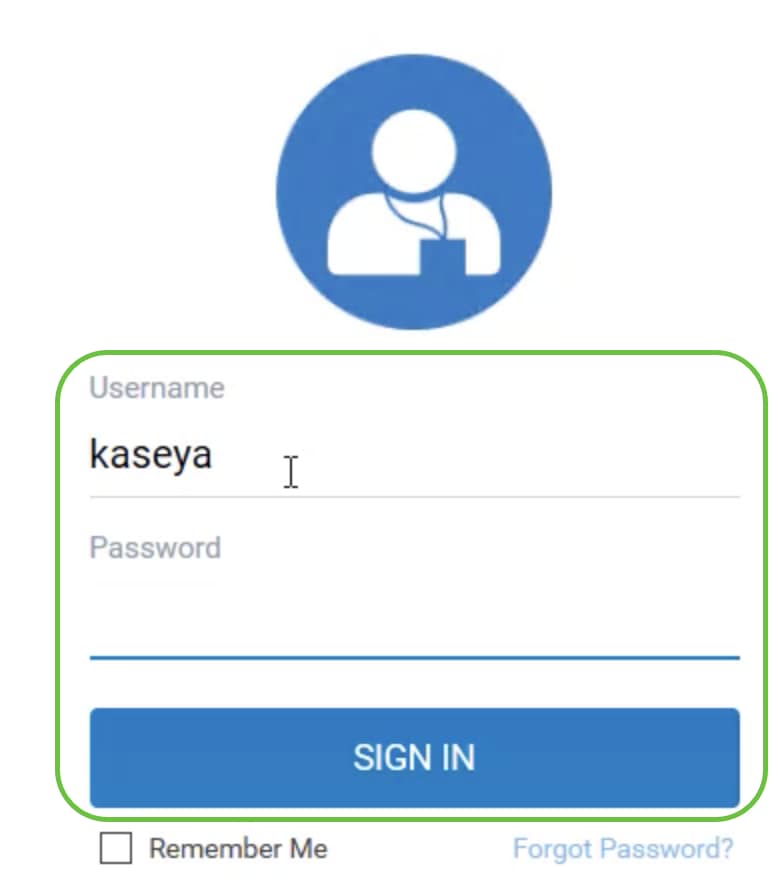
In this example, kaseya is used as the Username.
Using the Cisco FindIT Kaseya Plugin
Upon logging in to the Kaseya web-based utility, you will see the tiles in the Navigation Panel that lead to the different configuration pages of Kaseya.
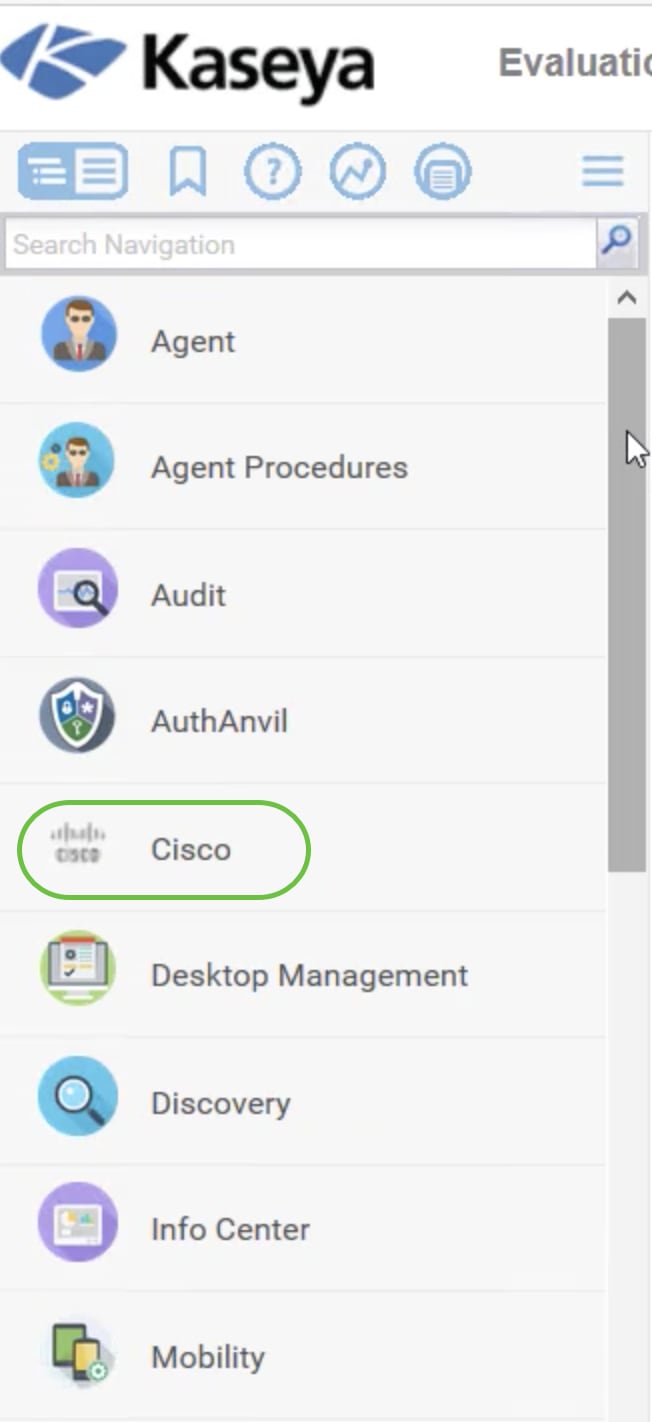
Upon clicking on the Cisco tile, the tree view appears that leads to the configuration pages of the plugin.
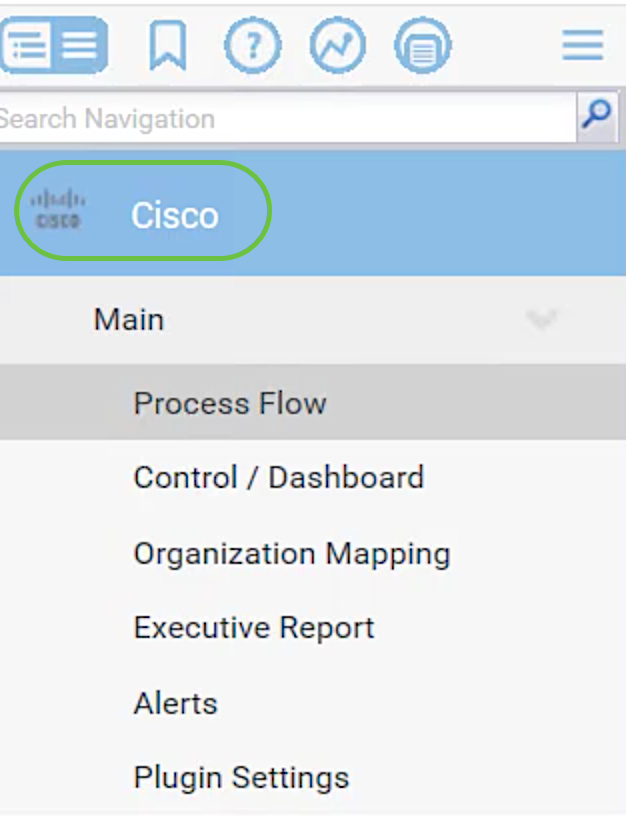
Process Flow
This contains the following two tabs:
1. Cisco FindIT - This tab has the basic guide to the steps to be performed to configure the plugin where each item links to the main page of the functionality. The steps are divided into three categories:
-
Required Steps - PLUGIN SETTINGS and ORGANIZATION MAPPING are the linked steps required and must be performed in the initial configuration of the plugin or in case of reinstallation. When clicked, these steps will take you to the Plugin Settings page and Organization Mapping page, respectively. The PLUGIN SETTINGS must be done first for the configuration of FindIT credentials before going to ORGANIZATION MAPPING.
-
Action Item - SELECT DEVICES AND ACTIONS is the linked step that is not required but is very beneficial in using the plugin. When clicked, this step will take you to the Control / Dashboard page.
-
Optional Steps - SET ALERT LEVELS and RUN EXECUTIVE REPORT FOR CUSTOMERS are the linked steps that are recommended but are not required in the configuration of the plugin. When clicked, these steps will take you to the Alerts page and Executive Report page.
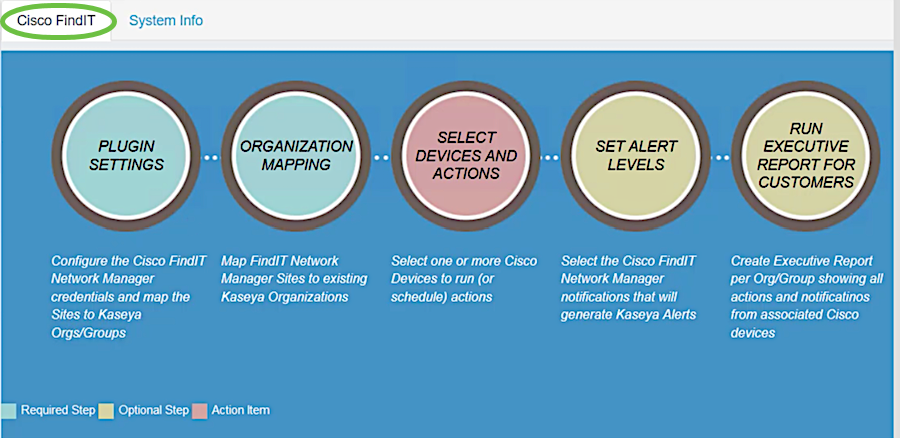
2. System Info - This tab displays the FindIT Plugin Version.

Control / Dashboard
This page is similar to the view of DISCOVERY – INVENTORY on the FindIT 1.1 Probe. You can select one or multiple sites of FindIT Network Probe and display all or filtered list of devices in the network along with their information such as the Status, Hostname, Device Type, IP Address, Model, MAC Address, Serial Number, Current Firmware, Firmware Available, Network, and Actions. These actions, which can be scheduled, include updating the firmware, saving and backing up configurations, deleting a device and rebooting. To learn more, check out the article, Manage a Device via the Control Dashboard Page on the Cisco FindIT Kaseya Plugin.
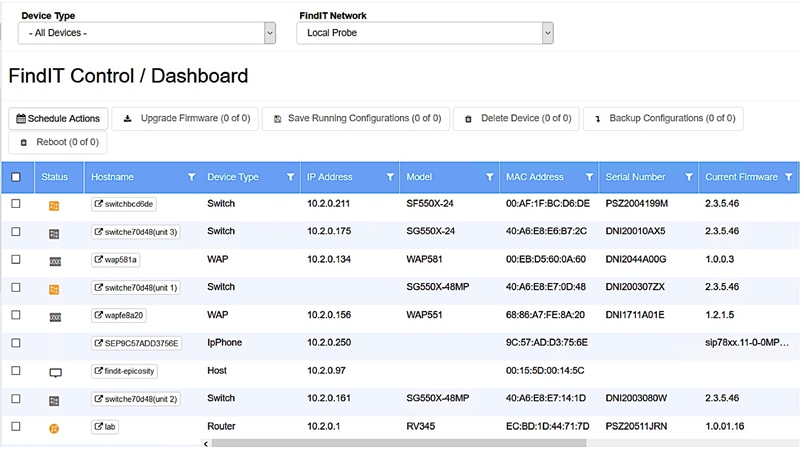
Clicking on a hostname will open the login page for the device in a new tab. Make sure to allow pop-ups in your browser.
Organization Mapping
This is the page where you map FindIT Network Manager sites to existing Kaseya Organization/Groups. If there is no mapped FindIT sites, the Control / Dashboard page will not be able to populate the list of devices. To know more, view the article on Organization Mapping on the Cisco FindIT Kaseya Plugin.

Executive Report
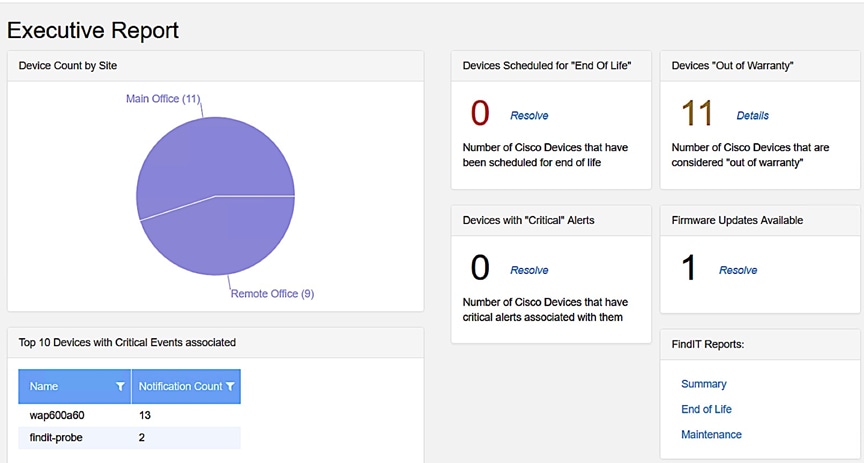
This page allows you to create reports per Organization or Group showing all actions and notifications from associated Cisco devices. This opens in a new tab and shows the specific report of current lifecycle status of network devices in FindIT 1.1 Manager. To learn more, view article on Run Executive Reports on the Cisco FindIT Kaseya Plugin.
Alerts
This page allows you to create rules that use FindIT events as a trigger to generate standard Kaseya alerts such as raising an Alarm, creating a Ticket, running a Script, or sending an Email (ATSE). To learn more, check out the following article on Create Rule to Set Alert Levels on the Cisco FindIT Kaseya Plugin.
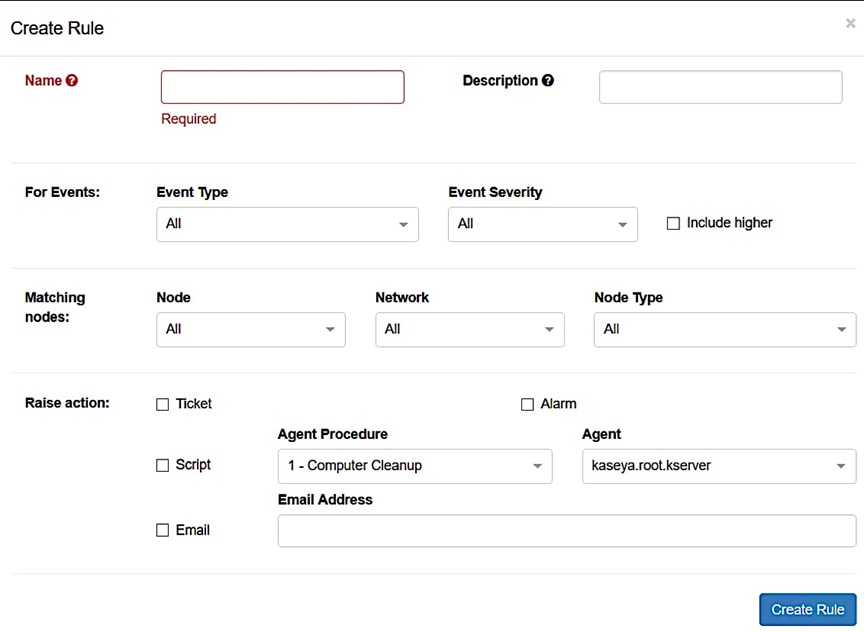
The Raise action section is outside of the scope boundary as items correlate to functions outside of the plugin, thus, in Kaseya VSA itself.
Plugin Settings
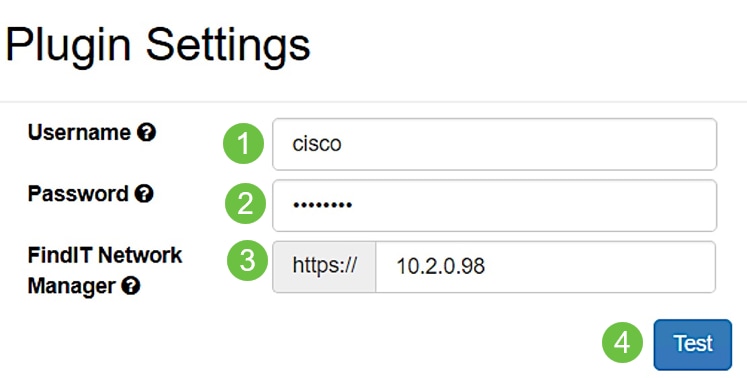
This page allows you to configure the plugin to establish a connection between the Kaseya and FindIT Network Manager. You need to specify the Username, Password, and IP address or hostname of the FindIT Network Manager and test these credentials by clicking the Test button afterwards.
You now have explored the different uses of the pages on the Cisco FindIT Kaseya Plugin.
Contact Cisco
- Open a Support Case

- (Requires a Cisco Service Contract)
 Feedback