Install and Configure FindIT Network Manager and FindIT Network Probe on Microsoft Hyper-V Manager
Available Languages
Objective
The Cisco FindIT Network Management provides tools that help you easily monitor, manage, and configure your Cisco 100 to 500 Series network devices such as switches, routers, and wireless access points (WAPs) using your web browser. It also notifies you about device and Cisco Support notifications such as the availability of new firmware, device status, network settings updates, and any connected Cisco-devices that are no longer under warranty or covered by a support contract.
FindIT Network Management is a distributed application which is comprised of two separate components or interfaces: one or more Probes referred to as FindIT Network Probe and a single Manager called FindIT Network Manager.
An instance of FindIT Network Probe installed at each site in the network performs network discovery, and communicates directly with each Cisco device. In a single site network, you may choose to run a standalone instance of FindIT Network Probe. However, if your network is composed of multiple sites, you may install FindIT Network Manager at a convenient location and associate each Probe with the Manager. From the Manager interface, you can get a high-level view of the status of all the sites in your network, and connect to the Probe installed at a particular site when you wish to view a detailed information for that site.
This article provides instructions on how to install and configure FindIT Network Manager and FindIT Network Probe on Microsoft Hyper-V Manager.
Install FindIT Network Manager on Microsoft Hyper-V Manager
Install Virtual Switch on Microsoft Hyper-V Manager
Follow these steps to deploy the Virtual Hard Disk (VHD) Virtual Machine (VM) image to Microsoft Hyper-V Manager.
Step 1. Launch the Hyper-V Manager on your Windows Server or computer.

Note: In this example, Windows 10 is used.
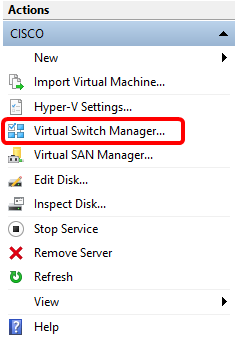
Step 2. Choose Virtual Switch Manager.
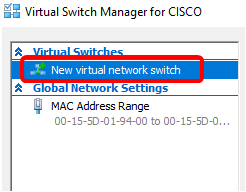
Step 3. Under the Virtual Switches area, click New virtual network switch to add a virtual switch.
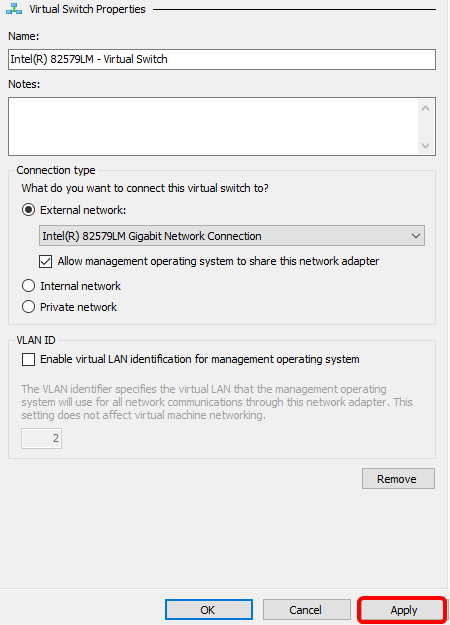
Step 4. On the left side of the window, enter the name of the virtual switch in the Name field.
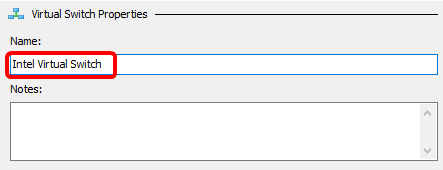
Note: In this example, Intel Virtual Switch is used.
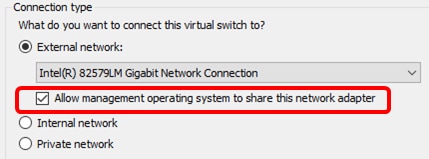
Step 5. Click External network then choose an adapter from the drop-down list.
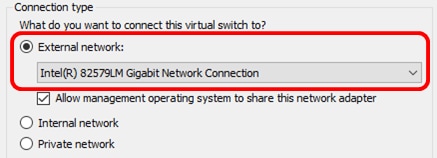
Note: In this example, Intel(R) 82579LM Gigabit Network Connection is chosen.
Step 6. Make sure the Allow management operating system to share this network adapter check box is checked. This means that the management operating system will have access to the chosen physical network adapter.
Step 7. Click Apply then click OK.
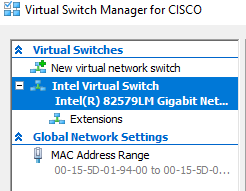
The new virtual switch should be displayed under the Virtual Switches area.
Install FindIT Network Manager using Microsoft Hyper-V Manager
Follow these steps to deploy the Virtual Hard Disk (VHD) Virtual Machine (VM) image to Microsoft Hyper-V Manager.
Step 1. Download the FindIT Network Manager VHD VM image from the Cisco Small Business Site, then extract on your preferred location.
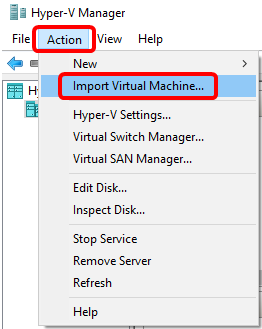
Step 2. On your Hyper-V Manager, click Action > Import Virtual Machine.
Step 3. Click Browse and locate the downloaded VHD file in Step 1.

Step 4. Browse through the FindITNetworkManager folder then click Select Folder.
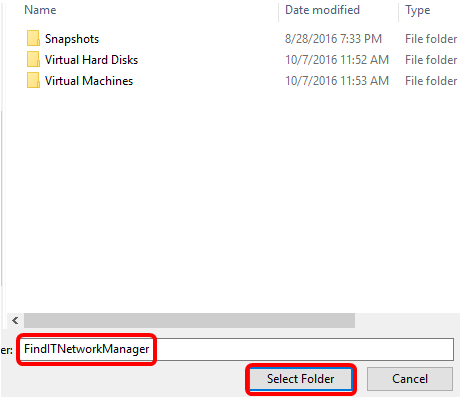
Step 5. Click Next.
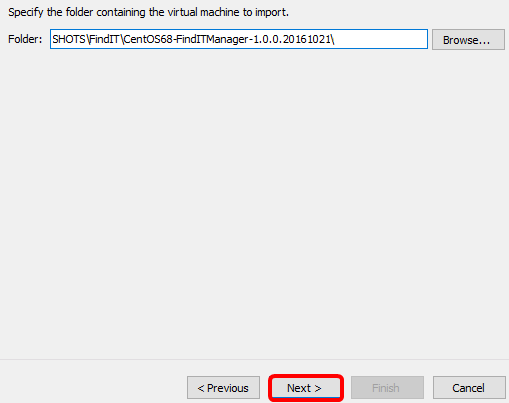
Step 6. Click Next again.
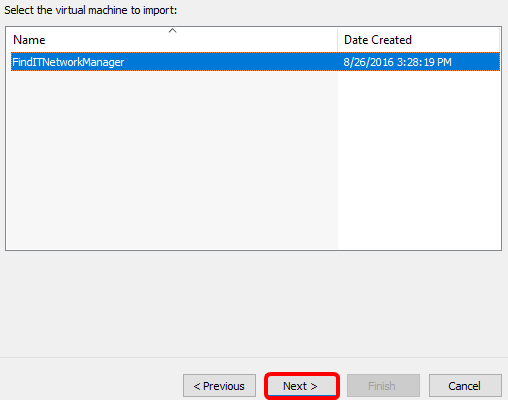
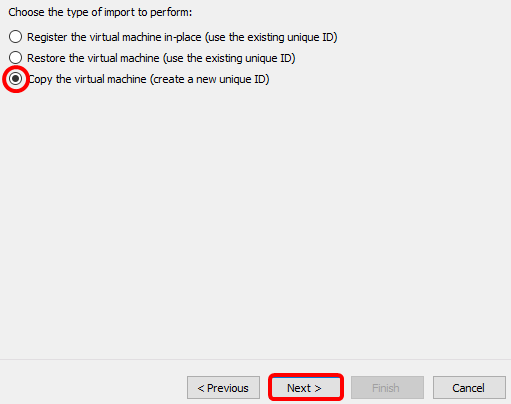
Step 7. Click Copy the virtual machine (create a new unique ID) then click Next.
Step 8. Click Next to store the VM in the specified location.
Note: Alternatively, you can check the Store the virtual machine in a different location check box to change the specified location.
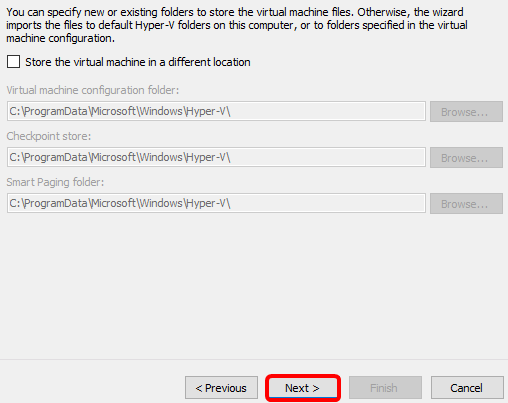
Step 9. Click Next again.
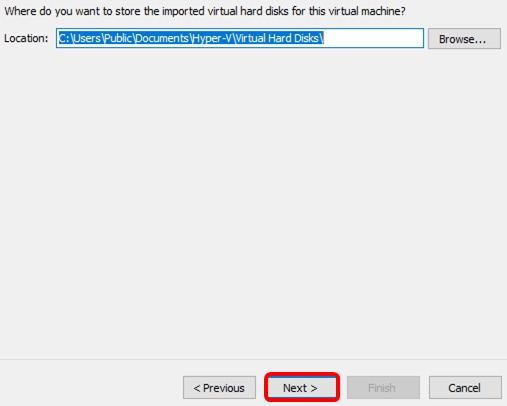
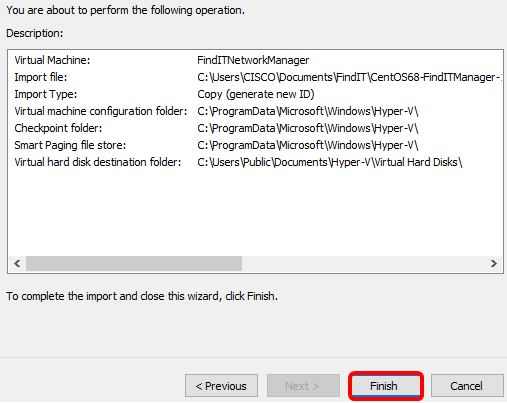
Step 10. Review the Description then click Finish.
Note: The FindIT Network Manager will be displayed in the list of virtual machines once it has been successfully deployed.
Step 11. Right-click on the VM, then click Connect to open the VM console.
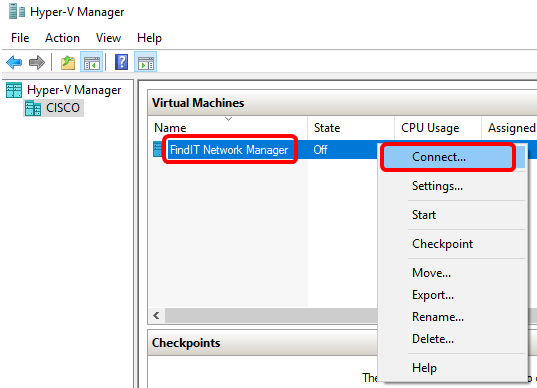
Step 12. Click on the new VM, then click Action > Start to power the VM on.
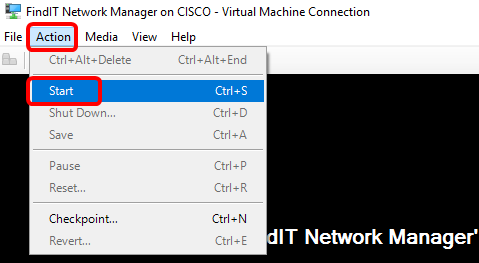
You should now have deployed the FindIT Network Manager VM on the Microsoft Hyper-V Manager.
Configure the Deployed FindIT Network Manager
Once deployment of the FindIT Network Manager is completed using your preferred virtual machine, follow the steps below to configure the VM.
Step 1. Log in to the console using the default username and password: cisco/cisco.

Step 2. Once you are prompted to change the password for the cisco account, enter the current password.

Step 3. Enter and retype the new password for the cisco account.

The DHCP IP Address and Administration GUI address will be displayed.

Note: In this example, the IP Address of FindIT Network Manager is 192.168.1.101 and the Administration GUI address is https://192.168.1.101.
Step 4. Enter the sudo config_vm command to start the initial setup wizard.

Step 5. Enter the password for sudo. The default password is cisco. If you changed it, enter the new password.

Step 6. Enter y for Yes or n for No in the setup wizard to configure the Hostname, Network, NTP server, and Time Zone.

Step 7. (Optional) If DHCP is specified when configuring network, enter the ifconfig command to check the assigned IP address and remember it. A static IP can also be configured.

You should now have completed the FindIT Network Manager installation on your VM.
To learn how to access and configure the initial settings of the FindIT Network Manager, click here for instructions.
Install FindIT Network Probe on Microsoft Hyper-V Manager
Install FindIT Network Probe
Follow these steps to deploy the VHD VM image to Microsoft Hyper-V Manager.
Step 1. Download the FindIT Network Probe VHD VM image from the Cisco Small Business Site.
Step 2. Start the Hyper-V Manager on your Windows Server or computer.

Note: In this example, Windows 10 is used.
Step 3. On your Hyper-V Manager, click Action > Import Virtual Machine.
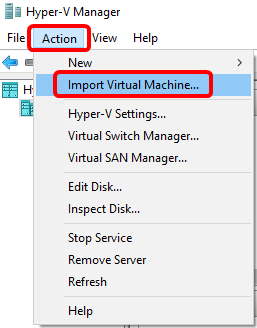
Step 4. Click Browse and locate the downloaded VHD file in Step 1.

Step 5. Browse through the FindITNetworkProb folder then click Select Folder.
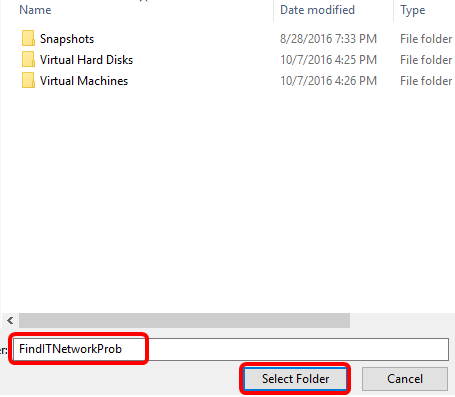
Step 6. Click Next.
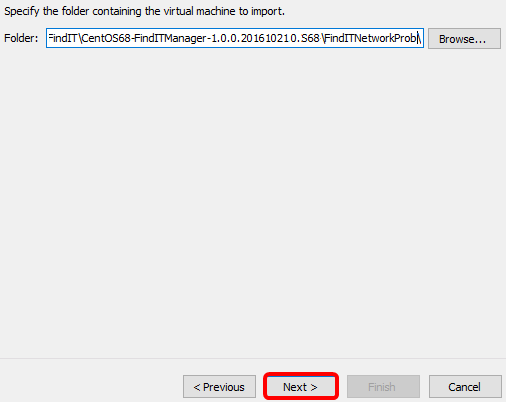
Step 7. Click Next again.
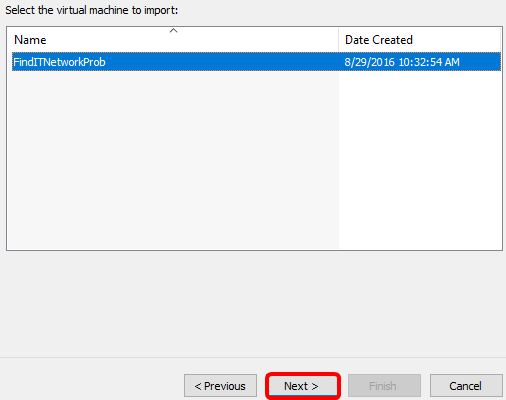
Step 8. Click Copy the virtual machine (create a new unique ID) then click Next.
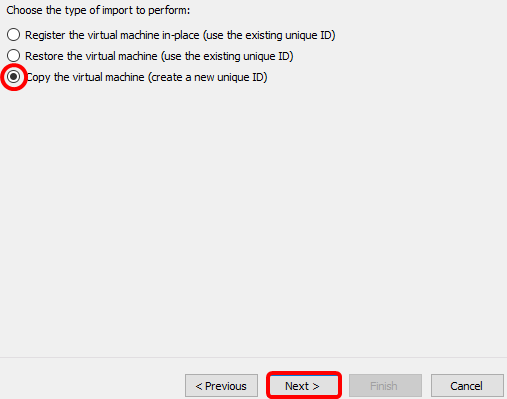
Step 9. Click Next to store the VM in the specified location.
Note: Alternatively, you can check the Store the virtual machine in a different location check box to change the specified location.
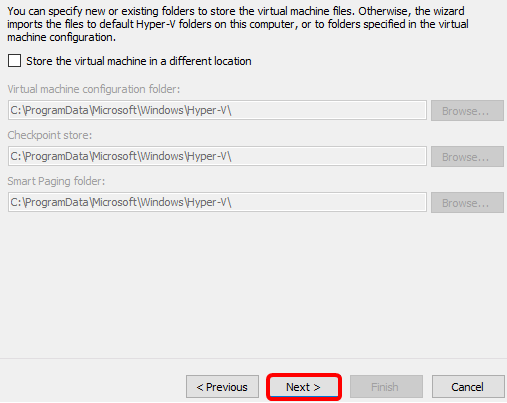
Step 10. Click Next again.
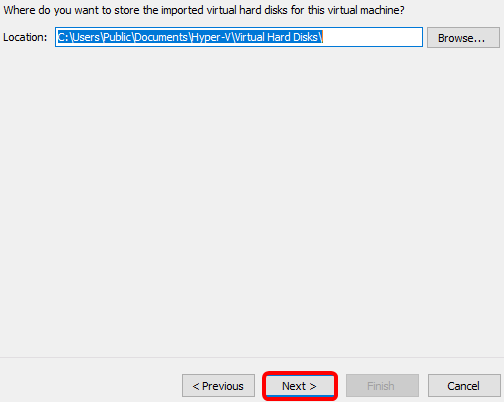
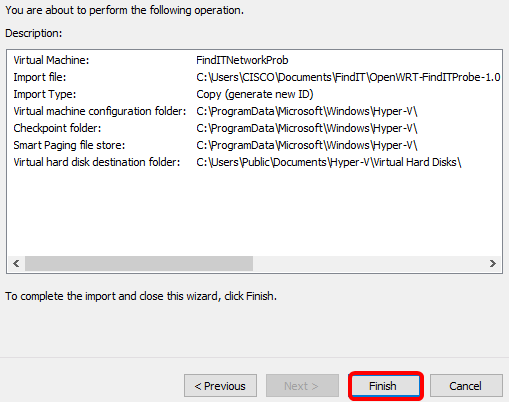
Step 11. Review the Description then click Finish.
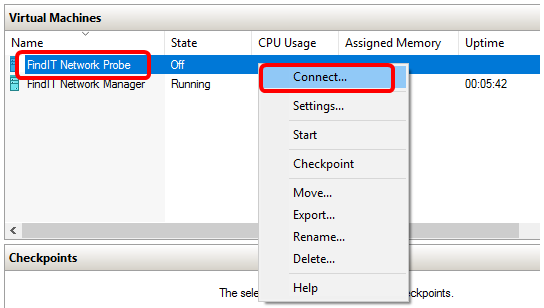
Step 12. Right-click on the VM, then click Connect to open the VM console.
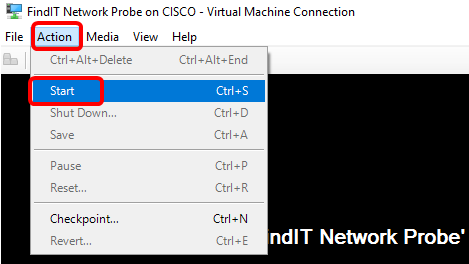
Step 13. Click on the new VM, then click Action > Start to power the VM on.
Configure the Deployed FindIT Network Probe
Once deployment is finished, follow the steps below to configure the VM.
Step 1. Log in to the console using the default username and password: cisco/cisco.

You will be prompted to change the password for the cisco account. The DHCP IP Address and Administration GUI address will be displayed.
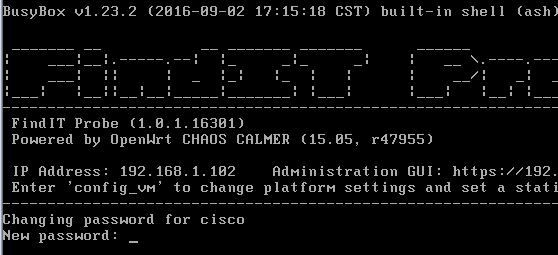
Note: In this example, the IP Address of FindIT Network Probe is 192.168.1.102.
Step 2. Enter and retype the new password for the cisco account.

Step 3. (Optional) Enter the ifconfig command to find the IP address of FindIT Network Probe.

You should now have configured FindIT Network Probe on your machine.
To learn how to access and configure the initial settings of the FindIT Network Probe, click here for instructions. To learn how to associate the FindIT Network Probe to the FindIT Network Manager, click here for instructions.
Contact Cisco
- Open a Support Case

- (Requires a Cisco Service Contract)
 Feedback