Install and Uninstall the Cisco FindIT Kaseya Plugin
Available Languages
Objective
The Cisco FindIT Kaseya Plugin is a module that installs on the Kaseya Virtual System Administrator (VSA). It tightly integrates the Cisco FindIT Network Manager with the Kaseya VSA, allowing for centralized management of the network. The plugin allows access to the powerful management features of FindIT including action management, dashboards, device discovery, network topology, remote device management, actionable alerts and event history.
The Cisco FindIT Kaseya Plugin complies with all third-party integration requirements for Kaseya on-premise VSA versions 9.3 and 9.4.
This article aims to provide instructions on how to install and uninstall the Cisco FindIT Kaseya Plugin to and from the Kaseya VSA Server.
Applicable Devices
- FindIT Network Manager
- FindIT Network Probe
Software Version
- 1.1
Install and Uninstall the Cisco FindIT Kaseya Plugin
Install the Cisco FindIT Kaseya Plugin to the Kaseya VSA Server
Step 1. Download the Cisco FindIT Kaseya Plugin from the Cisco FindIT Plugin for Kaseya website.
Step 2. Locate the installer on your Kaseya VSA server then double-click it.
Note: In this example, the installer is located in the desktop.

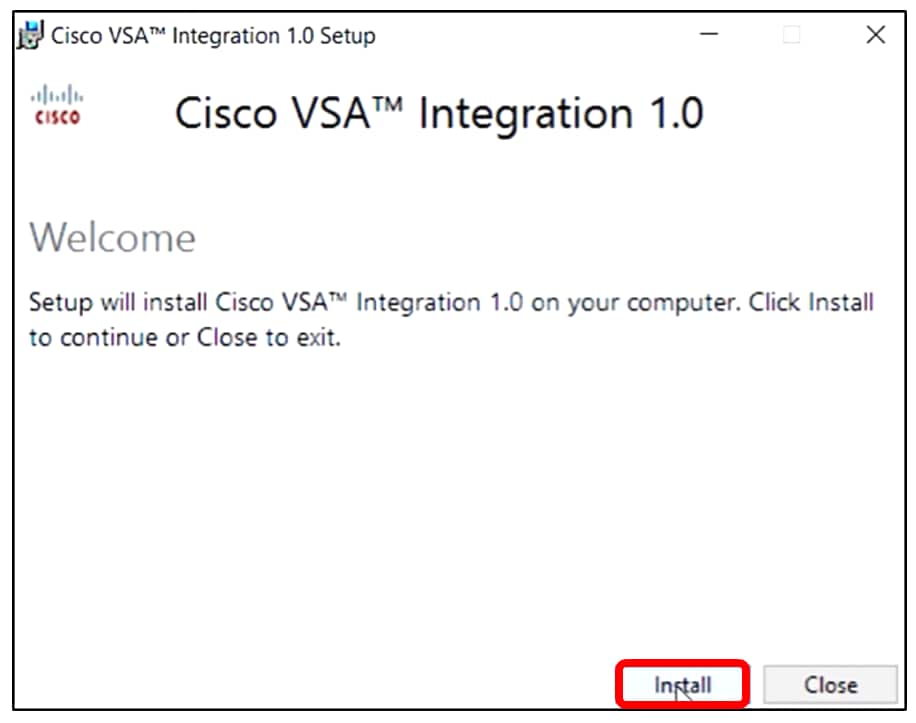
Step 3. In the Welcome screen of the Cisco VSA™ Integration 1.0 Setup window, click the Install button.
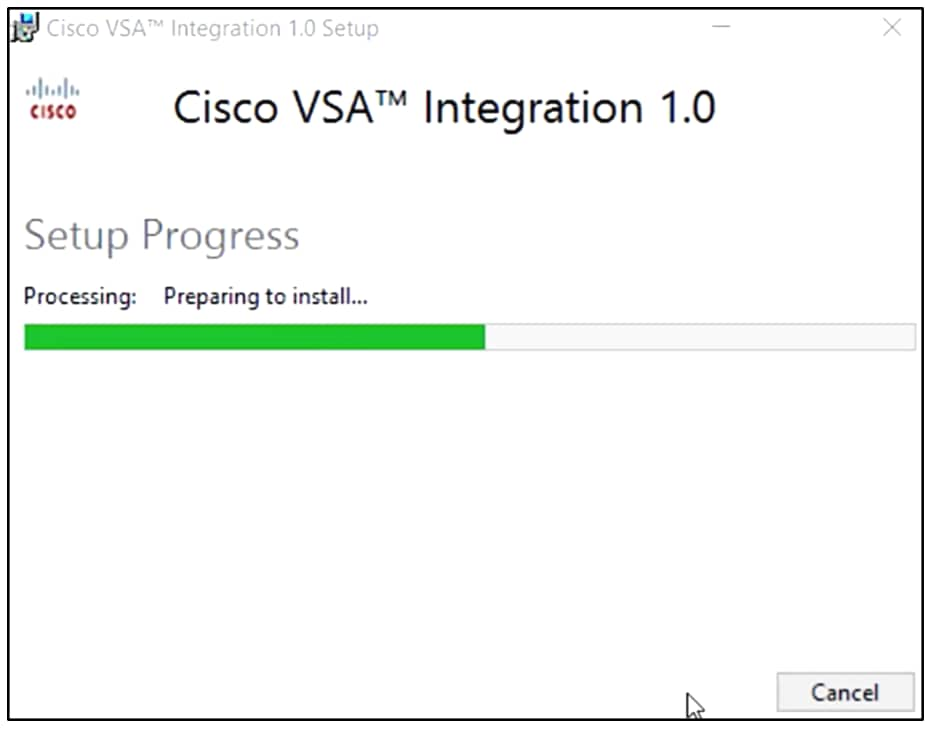
Step 4. Wait until the setup is finished as indicated by the progress bar.
Reapply the Database Schema
Step 5. Reapply the database schema by doing any of the following options:
- Click on the link in the Setup Successful screen.
- Go through the Programs list under Kaseya in the Kaseya VSA Server.
- Log on to the Kaseya web-based utility by entering your Kaseya account credentials.
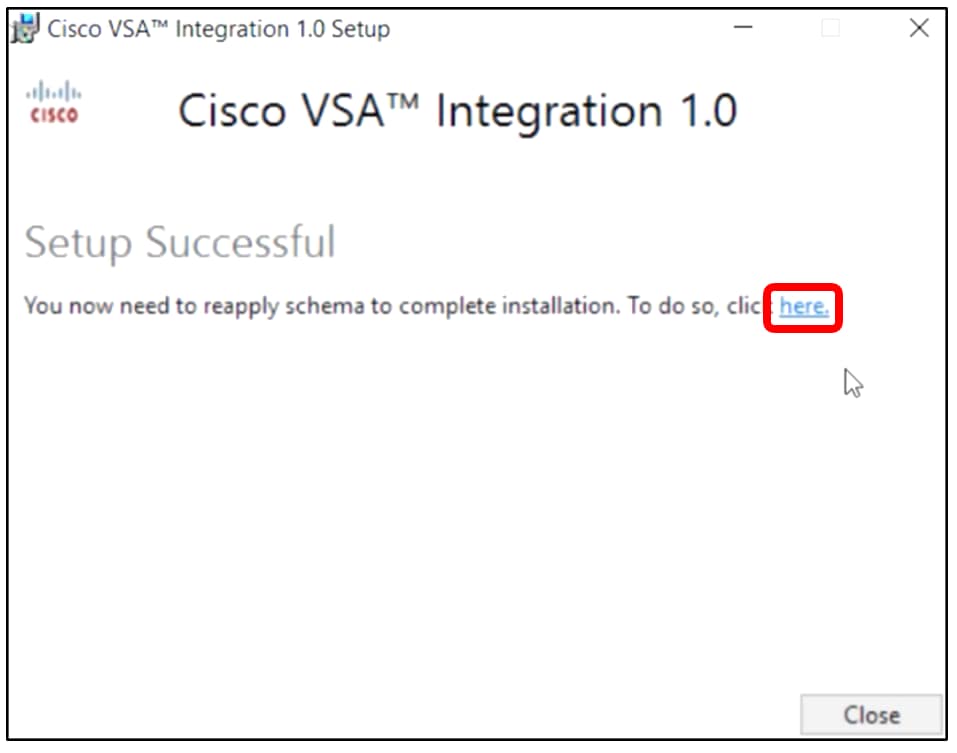
Note: In this example, the database schema will be reapplied by clicking on the Setup Successful screen link. A browser tab will be automatically opened.
Step 6. Wait until the database configuration is completed as indicated by the progress bar.

Step 7. Once completed, it will take you to the Kaseya login page. Enter your credentials then click SIGN IN.
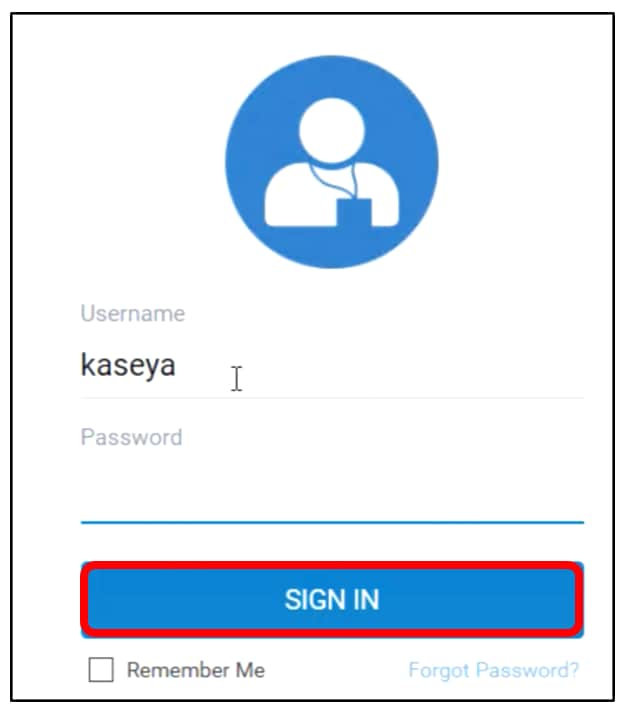
Note: The Cisco tile will now be added to the Navigation Panel on the Kaseya web-based utility.
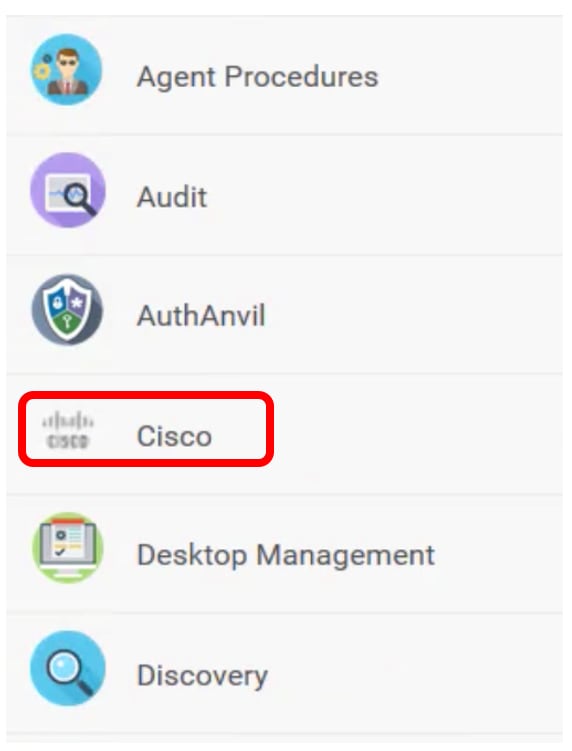
Establish a Connection Between the Plugin and the FindIT Manager
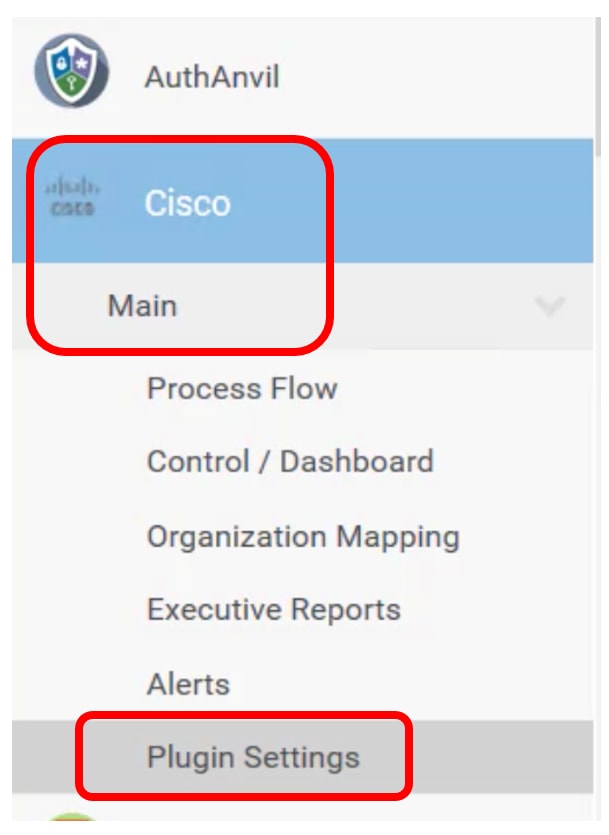
Step 8. Choose Cisco > Main > Plugin Settings in the Navigation Panel.
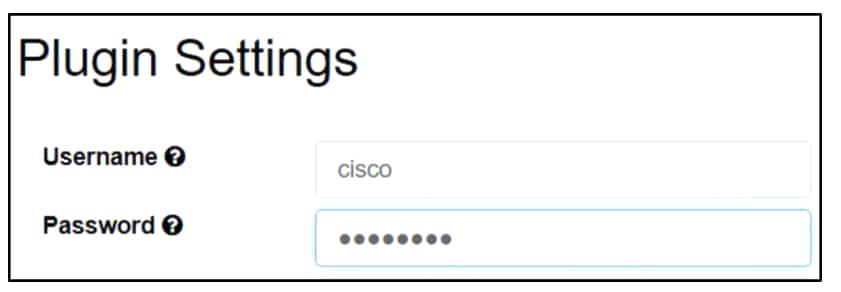
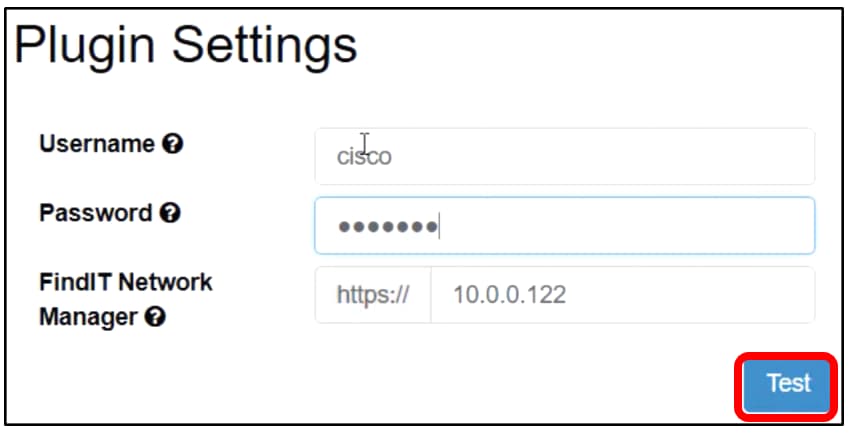
Step 9. In the Plugin Settings window, enter the Username and Password in their respective fields.
Step 10. Enter the IP address of your FindIT Network Manager in the field provided.
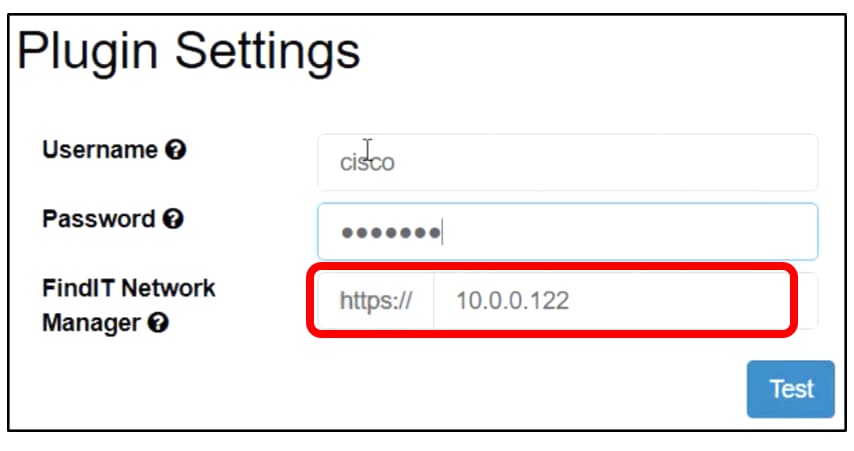
Note: In this example, 10.0.0.122 is used.
Step 11. Click the Test button to test the login credentials you entered and its connection to the FindIT Network Manager.
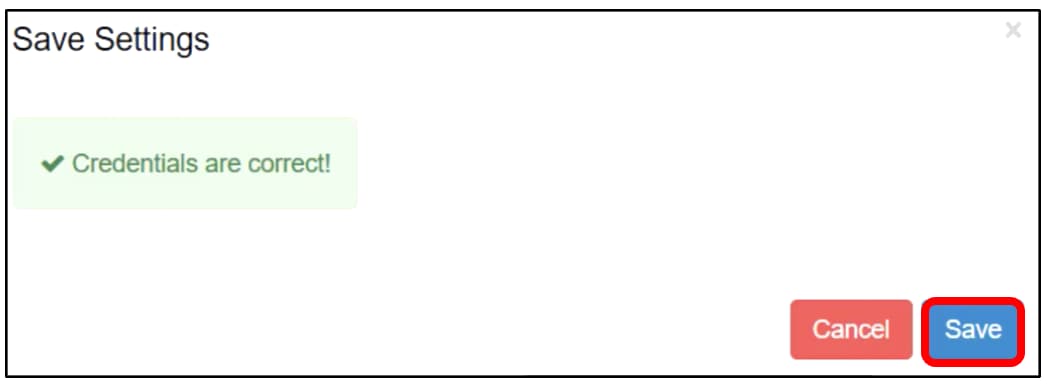
Step 12. Click on the Save button once the Credentialsare correct! message appears.
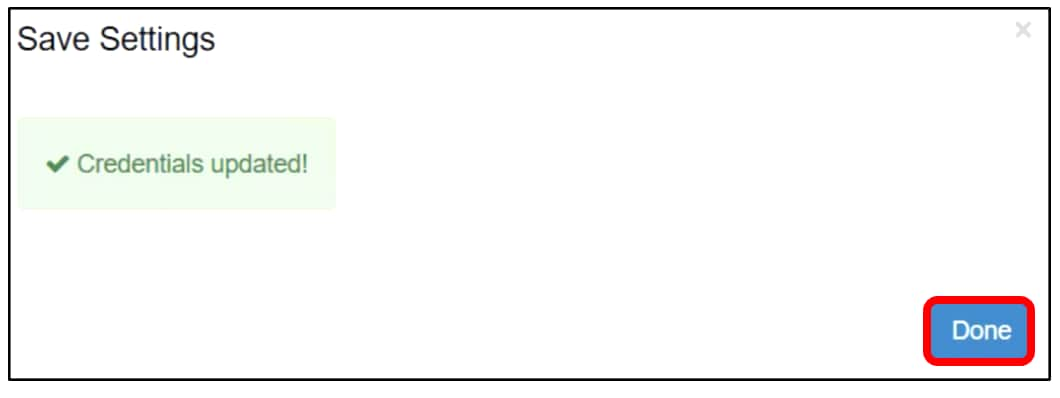
Step 13. Click Done when the Credentials updated! message appears.
You now have successfully installed the Cisco FindIT Kaseya Plugin.
Uninstall the Cisco FindIT Kaseya Plugin from the Kaseya VSA Server
Step 1. Run the installer on your Kaseya VSA server.
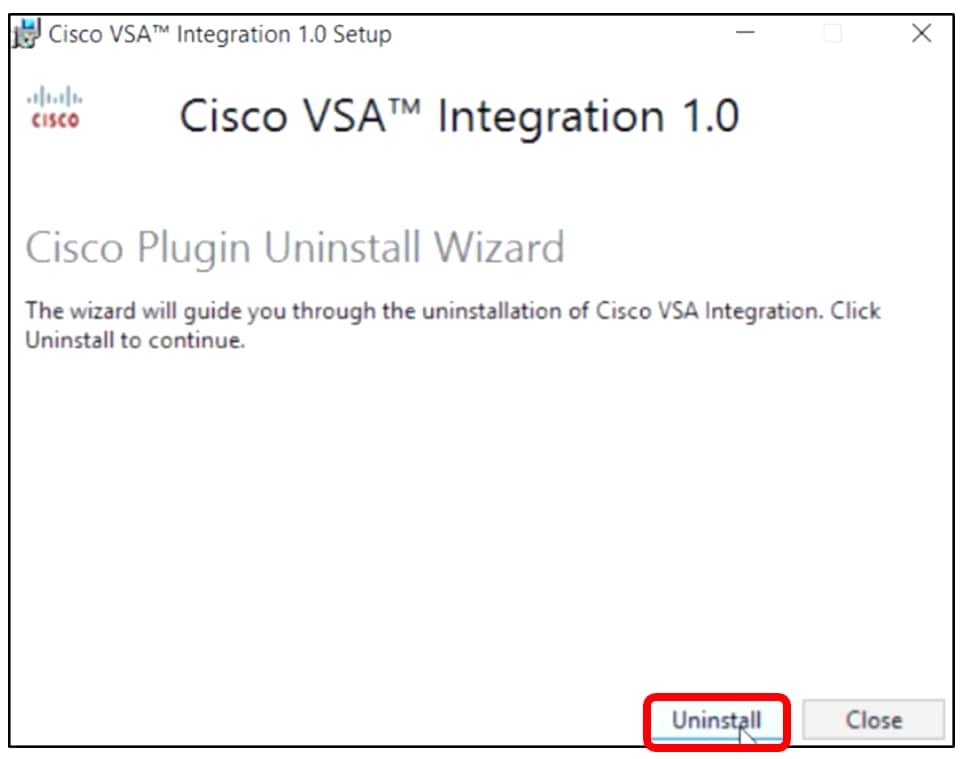
Note: The installer will then detect that the Cisco Plugin is installed on the server and will display the Cisco Plugin Uninstall Wizard screen.

Step 2. Click Uninstall.
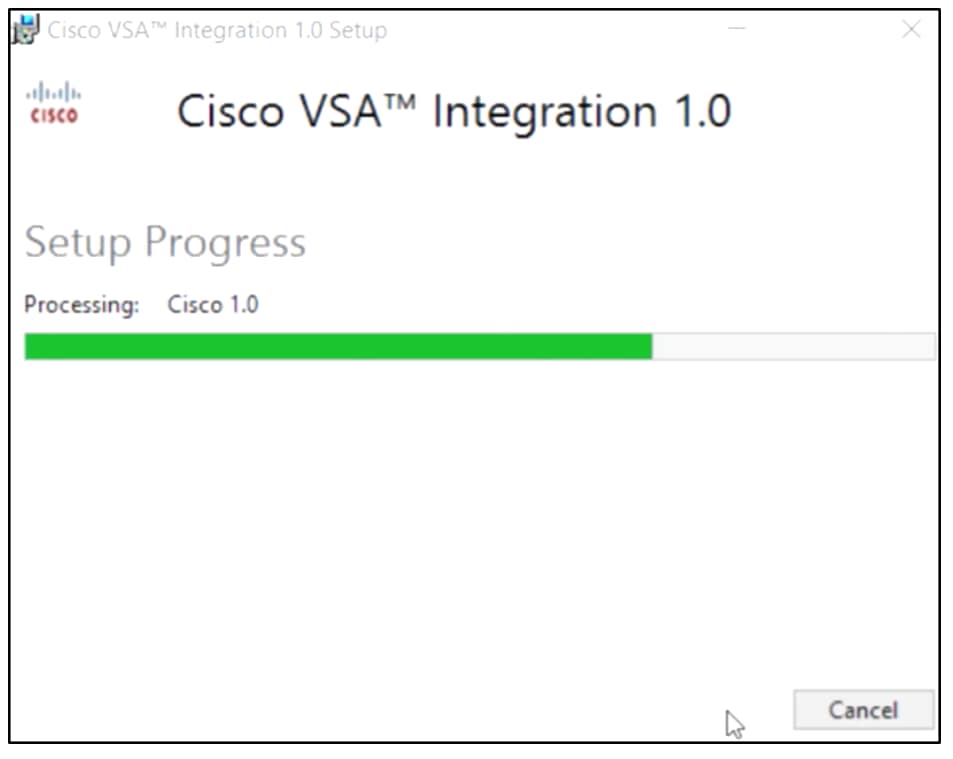
Step 3. Wait until the uninstall process is finished as indicated by the progress bar.
Reapply the Database Schema
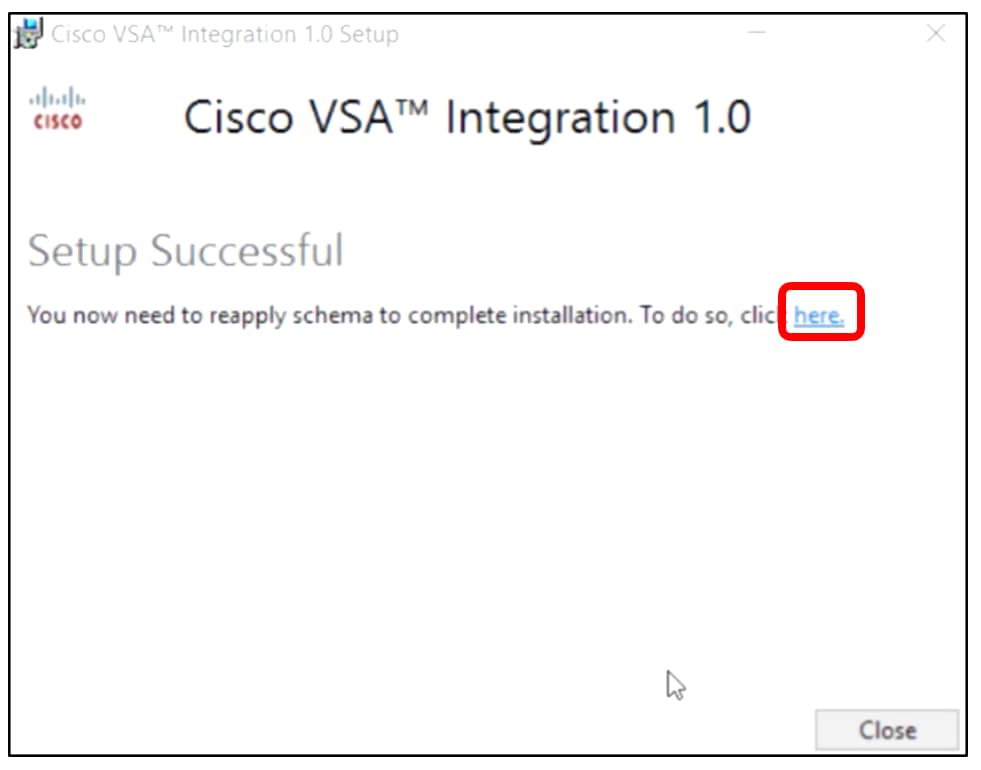
Step 4. Click on the link in the Setup Successful screen.
Step 5. Wait until the database configuration is completed as indicated by the progress bar.

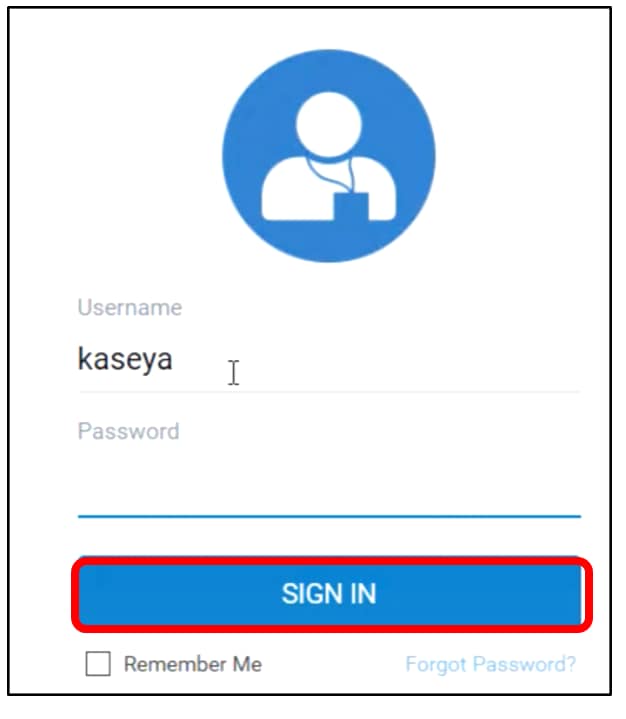
Step 6. Once completed, it will take you to the Kaseya login page. Enter your credentials then click SIGN IN.
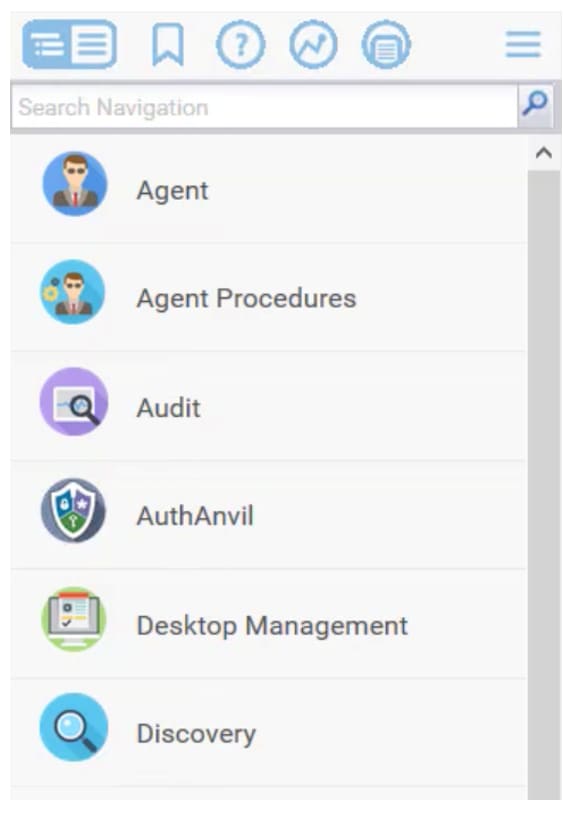
Step 7. (Optional) To verify if the Cisco Plugin has been successfully uninstalled, check if Cisco is no longer displayed in the Navigation Panel.
You now have successfully uninstalled the Cisco FindIT Kaseya Plugin from the VSA server.
Contact Cisco
- Open a Support Case

- (Requires a Cisco Service Contract)
 Feedback