Convert an Enterprise Phone to Use Webex Calling
Available Languages
Objective
In this article, steps will be shown to convert an Enterprise Phone to use Webex, as well as getting registered to use Cisco’s Cloud Based Voice over IP (VoIP) system, Webex Calling, once that side has been set up. This article highlights the manual migration method recommended for a PoC/lab or a small number of phones that need to be migrated.
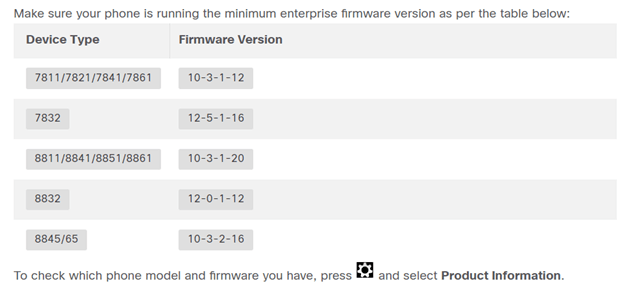
Applicable Devices | Firmware Version
- Cisco Enterprise Phone 7811, 7821, 7841, and 7861 | 10.3.1.12
- Cisco Enterprise Phone 7832 | 12.5.1.16
- Cisco Enterprise Phone 8811, 8841, 8851, and 8861 | 10.3.1.20
- Cisco Enterprise Phone 8832 | 10.0.1.12
- Cisco Enterprise Phone 8845 and 8865 | 10.3.2.16
Introduction
Webex Calling, sometimes abbreviated as WxC, integrates the normal Cloud PBX functionality that you would expect, such as phone functionality, on hold music, call transfers, conference calling, etc.
The Webex infrastructure provides meetings, conference room systems, instant messaging, duo authentication, and more. Webex calling functionality is vast and varied, but this article focus is specific to the process of getting phones provisioned to Webex calling so you can register to a configured Webex Calling Infrastructure.
If you need assistance with the configuration of Webex Calling, like setting up phone numbers, users, hunt groups, or anything other than provisioning the phone, contact the WebEx Calling support team for assistance.
There are two websites utilized for this process:
- Webex Control Hub: admin.webex.com
- Cloud Upgrader: upgrade.cisco.com
- Create account
- Enter information
- Register phone
- Management location moving forward
- Prerequisites for network administrator/person responsible for the migration
- Migration Assistant that explains what to enter into the phone itself
Prerequisites
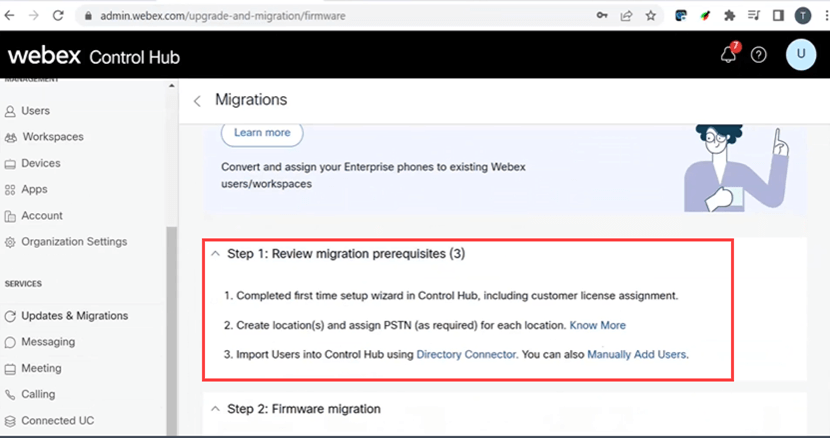
Before you can migrate and register a phone, your network administrator needs to set up the organization for Webex calling, including creating users and workspaces.
The management interface is located at https://admin.webex.com, and can be accessed once the account has been created. The prerequisite list can be found under Updates & Migrations > Migrate Enterprise phones to MPP (MPP) firmware.
Please check the following link for minimum enterprise phone firmware before starting the firmware migration procedure: https://upgrade.cisco.com/e2m_converter_wxc.
The Step 1 tab shows these prerequisites.
Configuration Steps
Connect the phone to your Network
Step 1
Connect the LAN port of the phone to your network, typically a LAN port on a router or switch. If your phone uses Power over Ethernet, use a PoE port on your switch.

Step 2
Optionally, connect the access port of the phone to your computer with Ethernet cables.

Step 3
If your phone needs power besides with PoE, connect the phone to an outlet.
Create Your Webex Control Hub Account
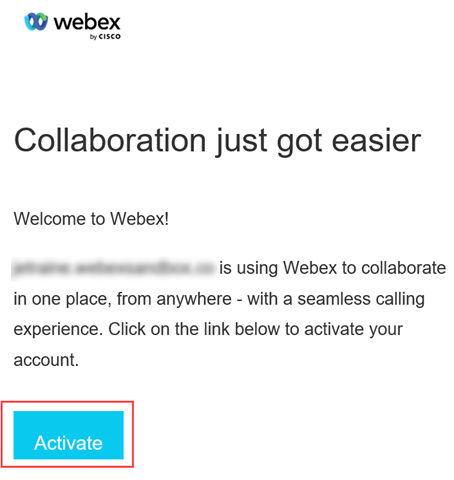
You will be emailed an invitation to set up your Webex Control Hub account. You will be given a username for login. Enter a password. Take note of the complete username and password.
Migrate Your Phone and Get Connected
Step 1
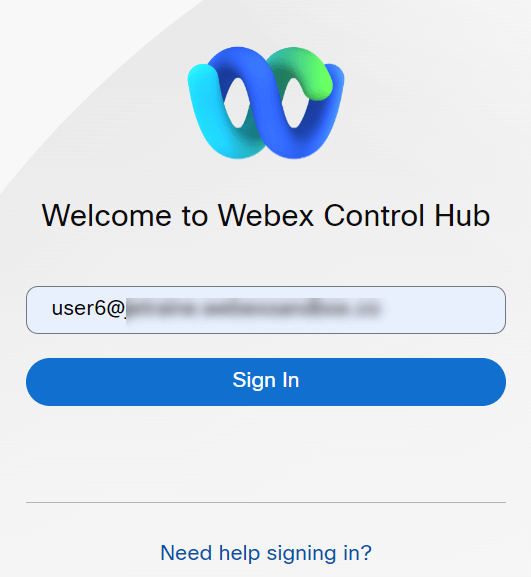
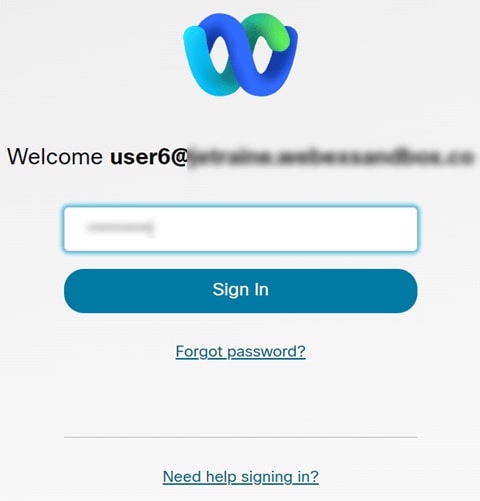
Navigate to https://admin.Webex.com/login. Enter the administrator’s username and click Sign In.
Step 2
Enter the password and click Sign In.
Step 3
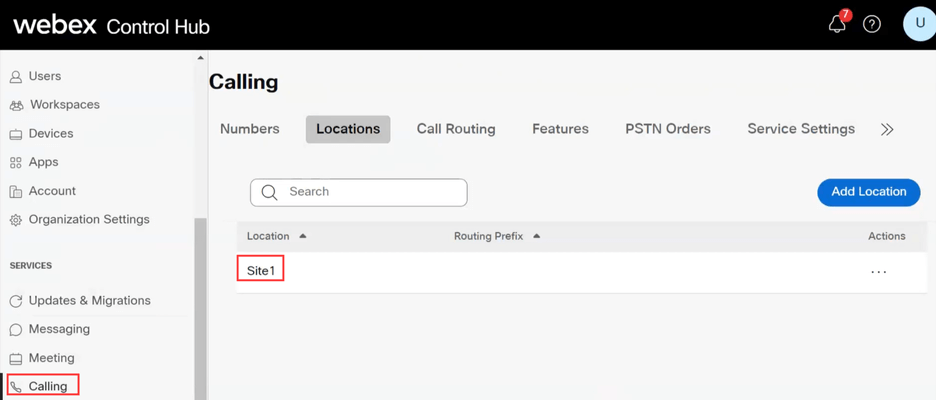
Navigate to Calling. Take note of the Location. You will need to enter this name exactly in a later step.
Step 4
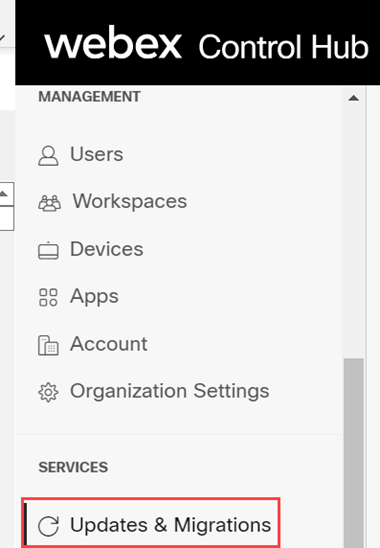
Scroll down and click on Updates & Migrations.
Step 5
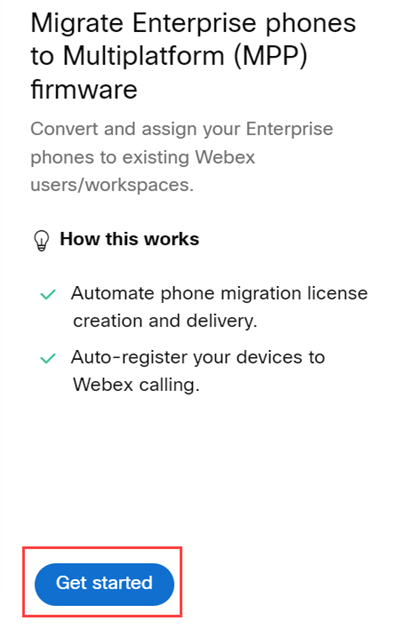
Select Migrate Enterprise phones to Multiplatform (MPP) firmware.
Step 6
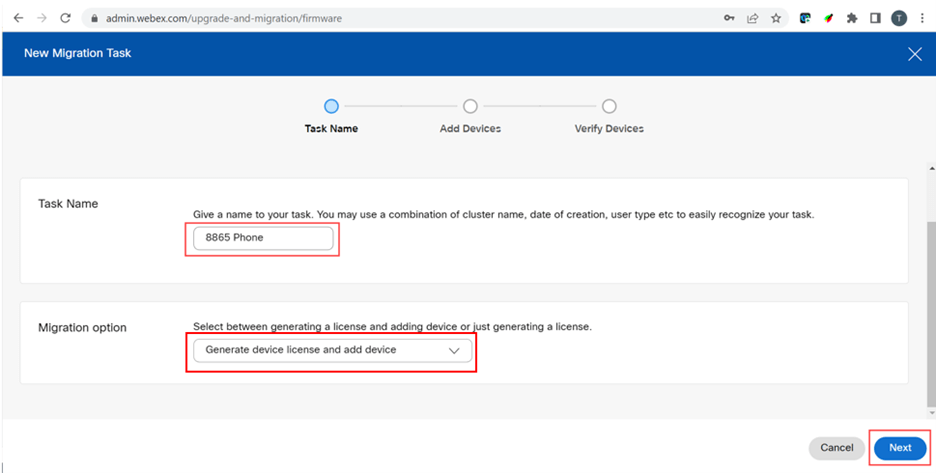
Select Start New Task.

Step 7
Enter a Task Name and Migration option. Click Next.
Step 8
Select Download CSV template.
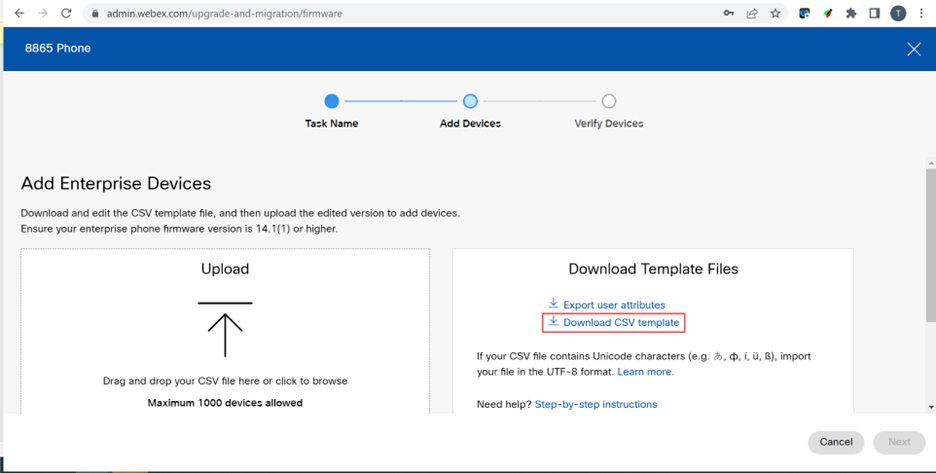
Step 9
Open this template from your Downloads folder.

Step 10
The template shows some examples.
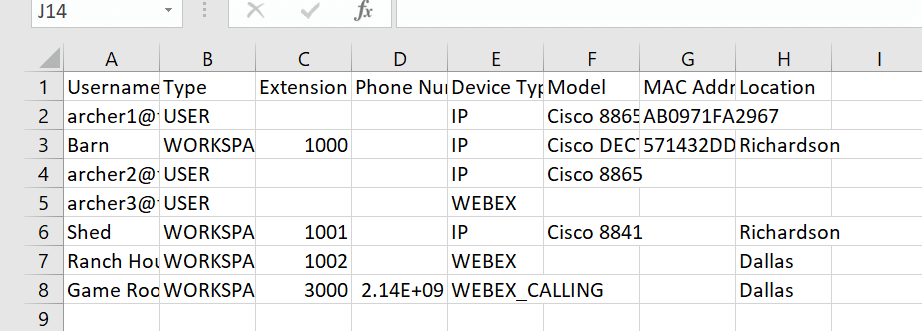
Enter your user information.
- You will need to enter the entire username/email that you use to log into Webex Call Hub.
- If the phone will be assigned to a specific user, as in this example, you do not need to enter the extension or phone number. If the phone will be located in a workspace, you will need to enter the extension.
- The MAC address should not have colons.
- The Location needs to match the official name exactly and is case sensitive.
- Delete the other entries.
- Save with a file name you will remember as a CSV file

Step 11
On the Upgrade and Migration page, click Upload.
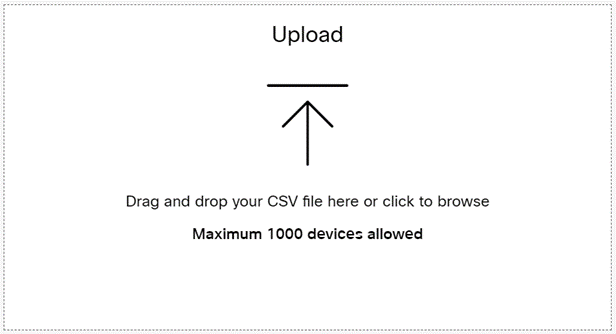
Step 12
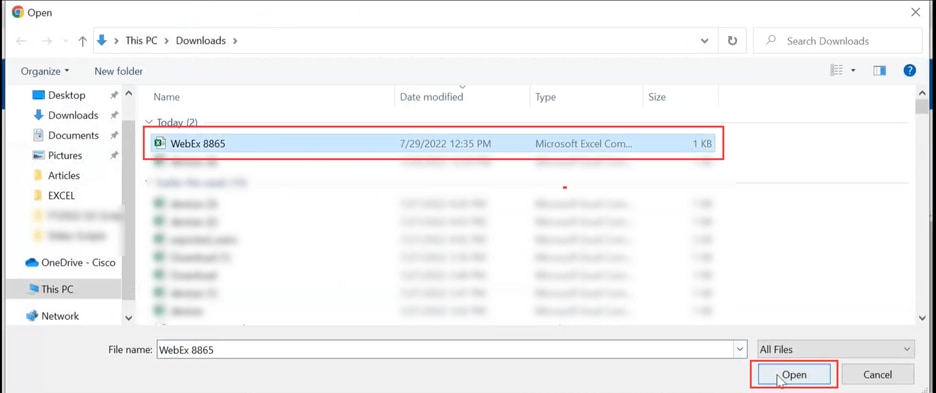
In your Downloads folder, select the file you just saved that only includes the headings and your details. Click Open.
Step 13
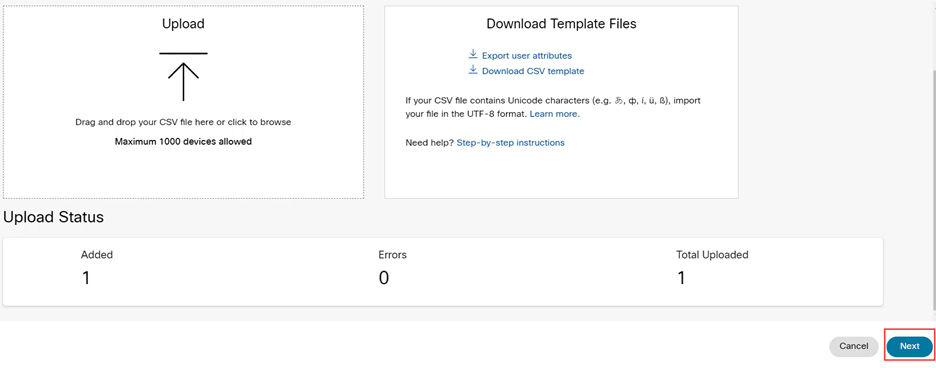
Scroll down and see that one device has been added. Select Next.
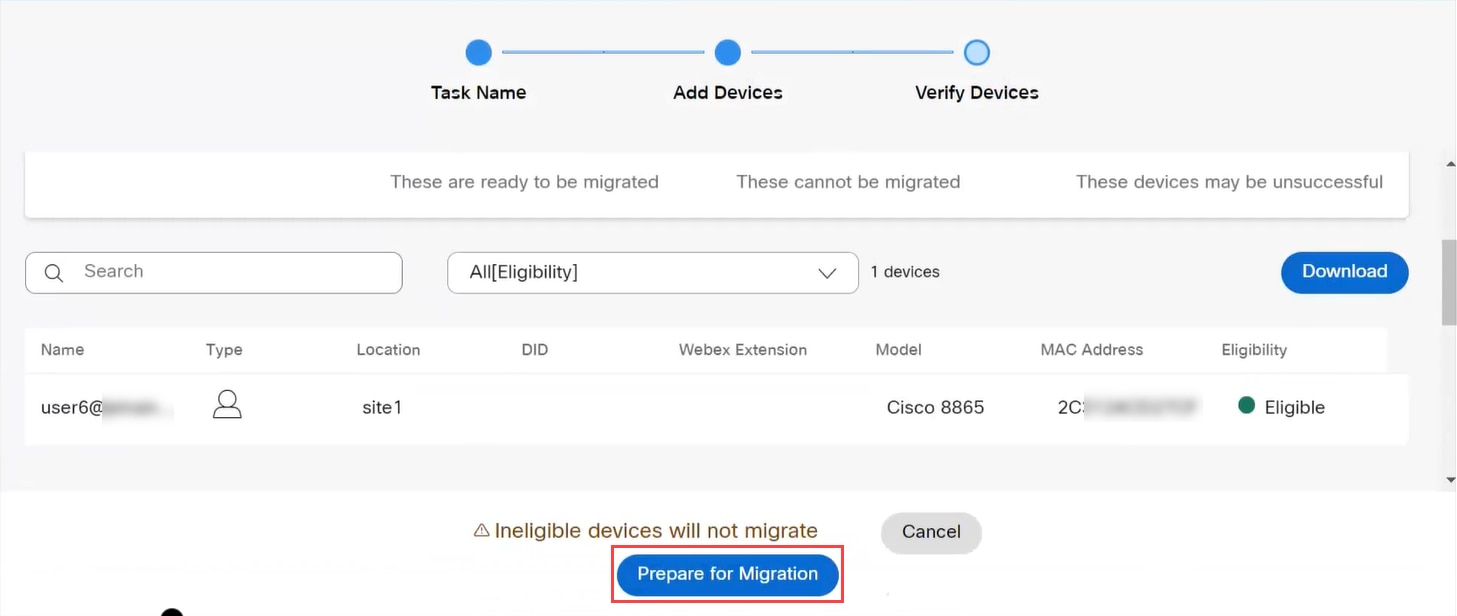
After a few moments, you will see that the device is eligible for migration. This is important because it gives you the green light to continue.

Step 14
Scroll down and click Prepare for Migration.
Step 15
You will see the status In Progress.

Step 16
When the migration is ready, a notification states that the phone is Ready for migration.
It is important to wait until you see this notification before proceeding.

Step 17
Navigate to upgrade.cisco.com. Log in. Under Enterprise > MPP (For Webex Calling only), select Run Migration.

Step 18
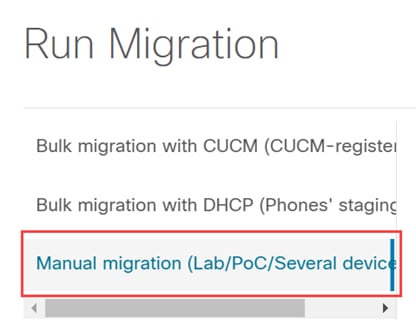
Select Manual migration (Lab/PoC/Several devices).
Step 19
Scroll down and follow these steps on your phone, starting with pressing the Settings button.

Step 20
Select Admin Settings > Network/Ethernet Setup > IPv4 Setup.
Step 21
Scroll down to the Alternate TFTP tab. By default, this is set to No. Edit to set Alternate TFTP to On/Yes and configure TFTP Server 1 to 3.14.211.49. It is important to note that this static IP address could change, so reference the address specified on upgrade.cisco.com as it will have the latest information.
To enter these numbers, you will either have a dot button connected to the star key, or you will need to click the large circular button on the phone for the octets to show for the address. This depends on your model of phone. Select Validate.
Step 22
Select Apply.
Step 23
Select Erase if prompted that a Trust List is installed on the phone.
Step 24
Wait for the phone to download the configuration and upgrade/restart several times.
Once the migration process in completed, the phone should be registered to the extension/phone number that was assigned/uploaded to the user/MAC address in the CSV file.
Conclusion
Now that you have these steps complete, you are registered and migrated. You should now be able to make calls on your phone, both inside and outside of the office.