Configure SIP Settings on the Cisco IP Phone 8800 Series Multiplatform Phone
Available Languages
Objective
Session Initiation Protocol (SIP) is a signaling protocol that is used for managing communication sessions like voice and video calls over the Internet Protocol (IP). The protocol can be used to create, modify, and terminate unicast or multicast sessions. One or more media streams may be present in the sessions. Like other Voice over Internet Protocol (VoIP) protocols, SIP addresses the functions of signaling and session management within a packet telephony network. Signaling allows transportation of call information across network boundaries. Session management provides the ability to control the attributes of an end-to-end call.
The applications of the SIP include video conferencing, streaming multimedia distribution, file transfer, and so on. SIP is an application layer protocol independent of the Transport layer.
The objective of this document is to explain the configuration of SIP settings for extensions on Cisco IP Phone 8800 Series Multiplatform Phone models.
Applicable Devices | Firmware Version
- IP Phone 8800 Series | 11.0.1 (Download latest)
The 8800 series phones referenced in this article are not Enterprise phones that use a specific call controller. If you would like to compare the two different types of phones, check out Compare & Contrast: Cisco IP MPP Phones & Cisco Unified IP Phones.
Phones with Multiplatform Firmware
MPP phones require either service from an Internet Telephony Service Provider (ITSP) or an IP Private Branch Exchange (PBX) call control server. WebEx Calling, Ring Central, and Verizon are examples of an ITSP. Some examples of IP PBX services that work with Cisco MPP phones include, Asterisk, Centile, and Metaswitch platforms.
These ITSP and IP PBX call controllers are a separate system in which the phone and the call controller communicate with each other to provide services such as call park and voicemail. Since the MPP phones do not use a specific call controller, access and procedures vary.
Each call controller can follow different procedures, so we can't tell you exactly how yours will work. For information and help with your specific voicemail commands, refer to the help sites from the provider you chose. If you have an administrator, you can contact them for details and possible training.
Asterisk Help Site
Asterisk Wiki Help Page for SIP Settings.
Other Possible Configuration for SIP Settings
Step 1. Log in to the web-based utility and click Admin > advanced. You will be taken to the Advanced Admin page.

Step 2. Click Voice > Extension (1, 2, 3 , 4, 5) and scroll down to the SIP Settings.
Note: In this example, Ext1 is used.

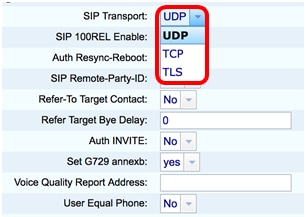
Step 3. Choose a transport layer protocol from the SIP Transport drop-down menu. The choices are:
- TCP — Transmission Control Protocol (TCP) is a connection-oriented protocol that provides reliable, ordered, and error-checked stream of packets which allows a clear connection in the network.
- UDP — User Data Protocol (UDP) is a connectionless messaging protocol for delivery of data packets.
- TLS — Transport Layer Security (TLS) is a secured method of transporting your voice data over the network. It is a standard protocol for securing and authenticating communication.
Note: In this example, UDP is chosen.
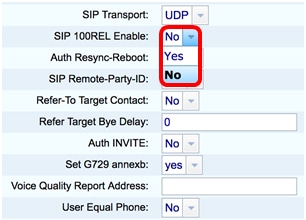
Step 4. In the SIP 100REL Enable drop-down menu, choose Yes to enable the support of 100REL SIP extension for reliable transmission of provisional response and use of Provisional Response Acknowledgment (PRACK) requests. Both 100REL and PRACK extensions on SIP message format are used for reliable provisioning. Choose No to disable. This is the default setting.
Note: SIP defines two types of responses: provisional and final. Final responses (2xx-6xx) convey the result of the request processing and are sent reliably. In this example, No is chosen.
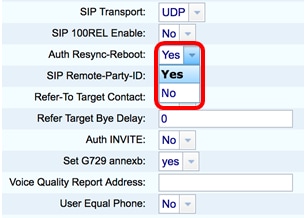
Step 5. In the Auth Resync-Reboot drop-down menu, choose Yes to allow the SIP server to authenticate the server when it receives the NOTIFY resync reboot message. The default is No.
Note: In this example, Yes is chosen.
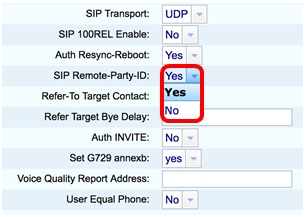
Step 6. (Optional) From the SIP Remote-Party-ID drop-down menu, choose Yes or No to allow the use of Remote-Party-ID header instead of a From Header. The SIP Remote-Party-ID header identifies the calling party and it includes user party, screen, and privacy headers that indicate how a call is presented or screened. The default is Yes.
Note: In this example, Yes is chosen.
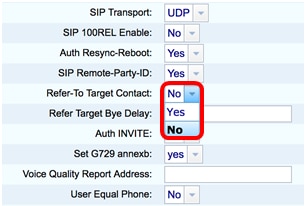
Step 7. (Optional) From the Refer-To Target Contact drop-down list, choose Yes to allow contact to the Refer-To Target or No to disallow it.
Note: In this example, No is chosen.
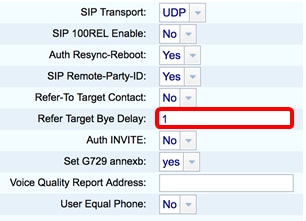
Step 8. In the Refer Target Bye Delay field, enter a value in seconds. This is the time in which the Refer Target will reattempt to send a BYE message. The default is 0.
Note: In this example, 1 is used.
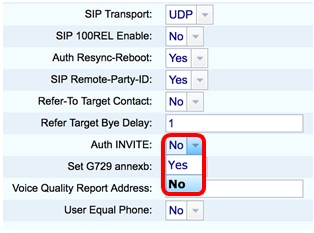
Step 9. (Optional) From the Auth INVITE drop-down menu, choose Yes or No to make authorization essential for initial incoming INVITE requests from the SIP Proxy.
Note: In this example, No is chosen.
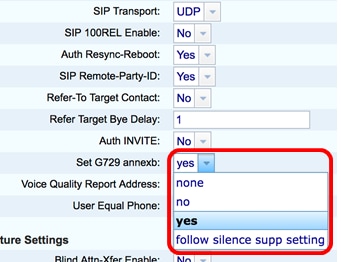
Step 10. (Optional) From the Set G729 annexb drop-down menu, choose an option. The G729 annexb is used to monitor the voice activity in the signal. The default is none. The options are:
- none — Choose this to disable G729 annexb.
- no — Choose this to disable G729 annexb.
- yes — Choose this to enable G729 annexb on the phone.
- follow silence supp setting — Choose this to follow Silence Suppressing setting on the VoIP server.
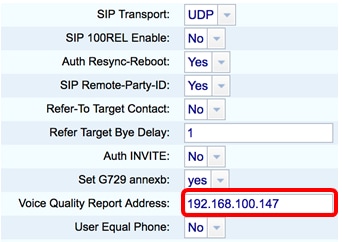
Step 11. In the Voice Quality Report Address field, enter an IPv4 address of the Voice Quality Report server to send voice reports.
Note: In this example, 192.168.100.147 is used.
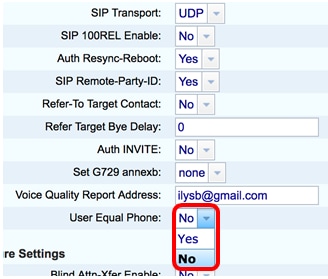
Step 12. (Optional) From the User Equal Phone drop-down menu, choose Yes or No to enable or disable headers FROM, TO, and request lines of SIP Messages from containing a “user=phone” attachment.
Note: In this example, No is chosen.
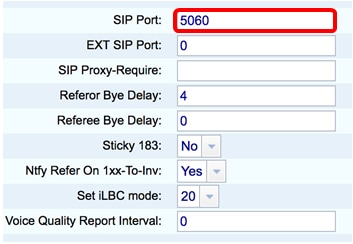
Step 13. In the SIP Port field, enter the port number of the SIP message. The default value is 5060 for all transport layer protocols.
Note: In this example, 5060 is used.
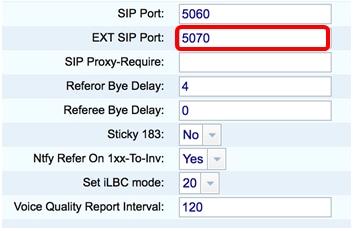
Step 14. In the EXT SIP Port field, enter the external SIP port number.
Note: In this example, 5070 is used.
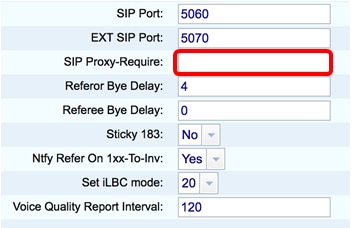
Step 15. (Optional) Enter the appropriate header in the SIP Proxy-Require field. The SIP Proxy-Require is used to indicate proxy-sensitive features that must be supported by the proxy. The SIP proxy can support a specific extension or parameter when this header is given by the user agent. If the proxy does not support this field even after configuration, then a message is sent which says unsupported.
Note: In this example, it is left blank.
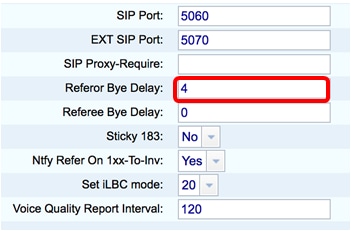
Step 16. Enter the appropriate period of time in seconds in the Referor Bye Delay field. The phone sends a BYE message to end old call logs once the call transfers have been completed. There are many delay settings related to this function. They are Referor, Refer Target, Referee and Refer-To Target.
Note: The default value for Referor Bye Delay is 4.
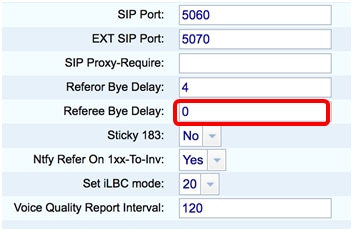
Step 17. In the Referee Bye Delay field, enter the appropriate period of time in seconds. The default is 0.
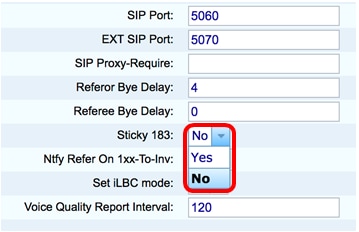
Step 18. (Optional) From the Sticky 183 drop-down menu, choose Yes to enable the phone to ignore further 180 SIP responses after receiving the first 183 SIP response for an outbound INVITE. Choose No to accept. This is the default setting.
Note: In this example, No is chosen.
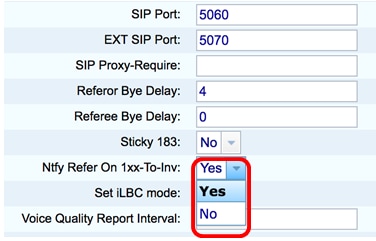
Step 19. Choose Yes from the Ntfy Refer On 1xx-To-Inv drop-down list. This will make the Transferee to send a NOTIFY message with Event: Refer to the transferor on the transfer call log for any 1xx response which is received from the transfer target. If No is chosen, the phone will only send a NOTIFY for final responses (200 and higher).
Note: In this example, Yes is chosen.
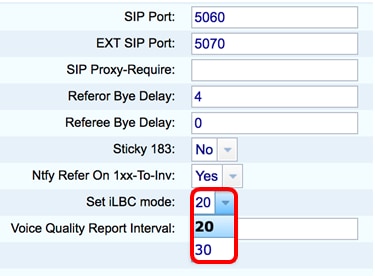
Step 20. The Internet Low Bitrate Codec (iLBC) is a standard, high-complexity speech codec that is suitable for robust voice communication over IP. iLBC has built-in error correction functionality that helps the codec perform in networks with a high-packet loss. From the iLBC mode drop-down menu, choose either 20 or 30 to set the data frame lengths in milliseconds.
Note: In this example, 20 is chosen.
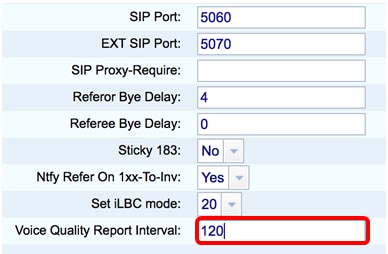
Step 21. Enter a value in seconds in the Voice Quality Report Interval field to periodically report the status of the monitoring resources to the external entity. The triggering takes place based on the preconfigured interval value. You can use the statistics collected by this method of reporting to collect information on resource usage.
Note: In this example, 120 is used.
Step 22. Click the Submit All Changes to save the settings.

You should now have configured the SIP settings on your IP phone.
